8
3

Delete article

Deleted articles cannot be recovered.

Draft of this article would be also deleted.

Are you sure you want to delete this article?

More than 3 years have passed since last update.

Informatica Intelligent Cloud Services(IICS)におけるSnowflakeの利用方法

Last updated at Posted at 2020-12-06

この記事は Snowflake Advent Calendar 2020 の6日目の記事です。

概要

Informatica Intelligent Cloud Services(IICS)にて、Snowflakeコネクターの設定手順を紹介します。
IICSは、マルチクラウドで実行可能なETLツールであり、IPaaS(Integration Platform as a Service)として提供されております。

Informatica Intelligent Cloud Services(IICS)を紹介したうえで、簡単なパイプラインを作成する手順を提示します。

なぜをInformatica Intelligent Cloud Services(IICS)利用すべきなのか

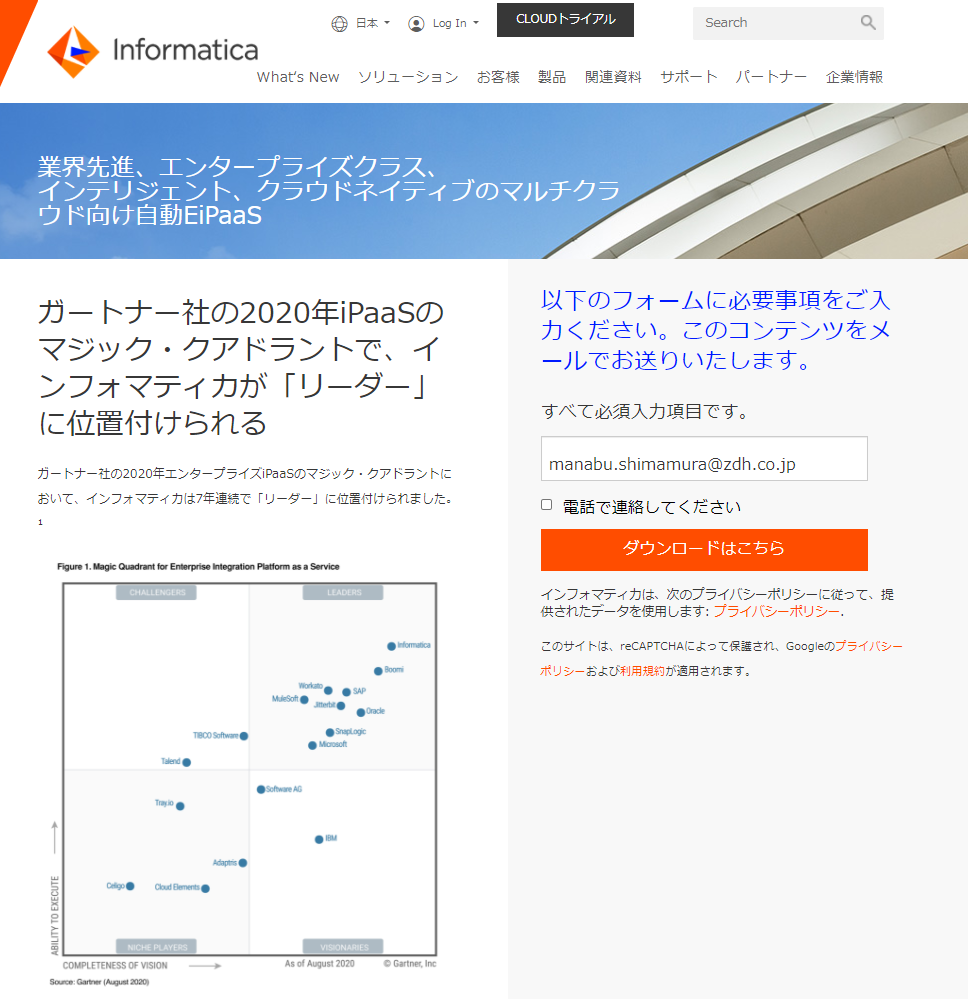
1. グローバルで評価されているツールであること

image.png

2. IICSだけでなくデータマネジメント全般をソリューションとして提供していること
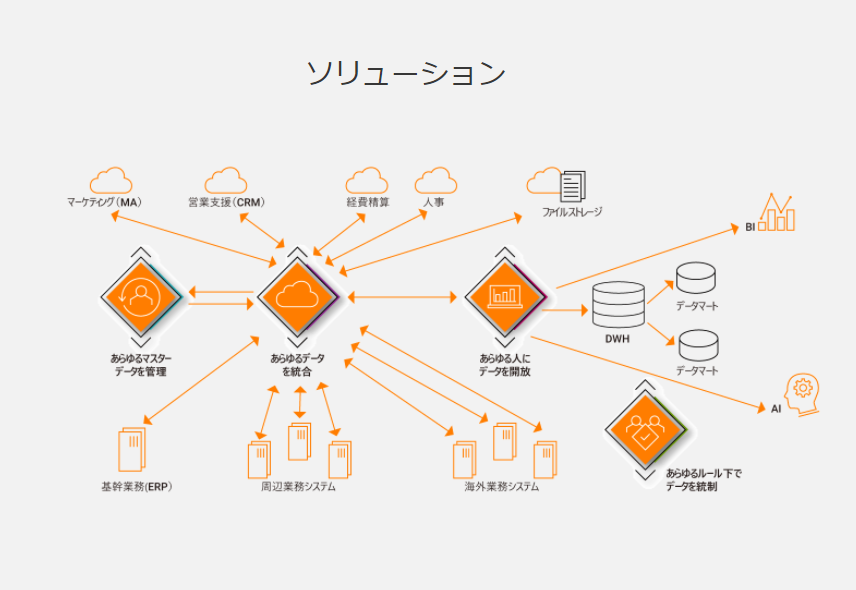
image.png
引用元:What‘s New | Informatica Japan

3. マルチクラウドで実行が可能であること
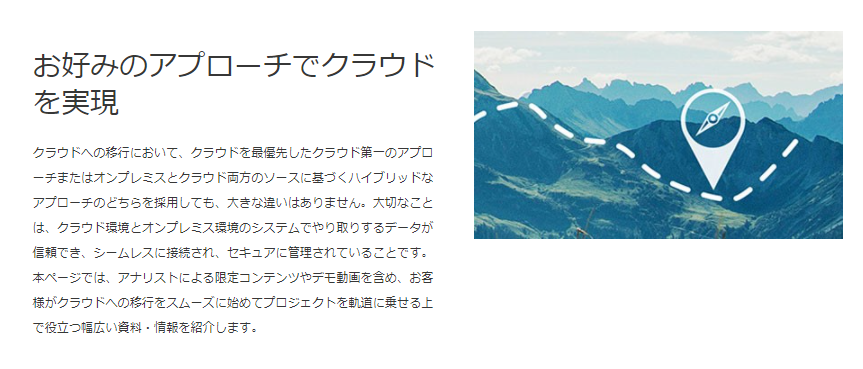
image.png
引用元:クラウド/ハイブリッド:お好みの方法でクラウドに移行 | Informatica Japan

簡単なデータ同期の実施

事前準備

下記のアカウントを作成してください。

  • Snowflake
  • Informatica Cloud Data Integration

Informatica Cloud Data Integrationの環境構築の手順については、クラスメソッド様が紹介しております。
Informatica Cloud Data Integrationの環境をAWS上で構築してみた | Developers.IO (classmethod.jp)

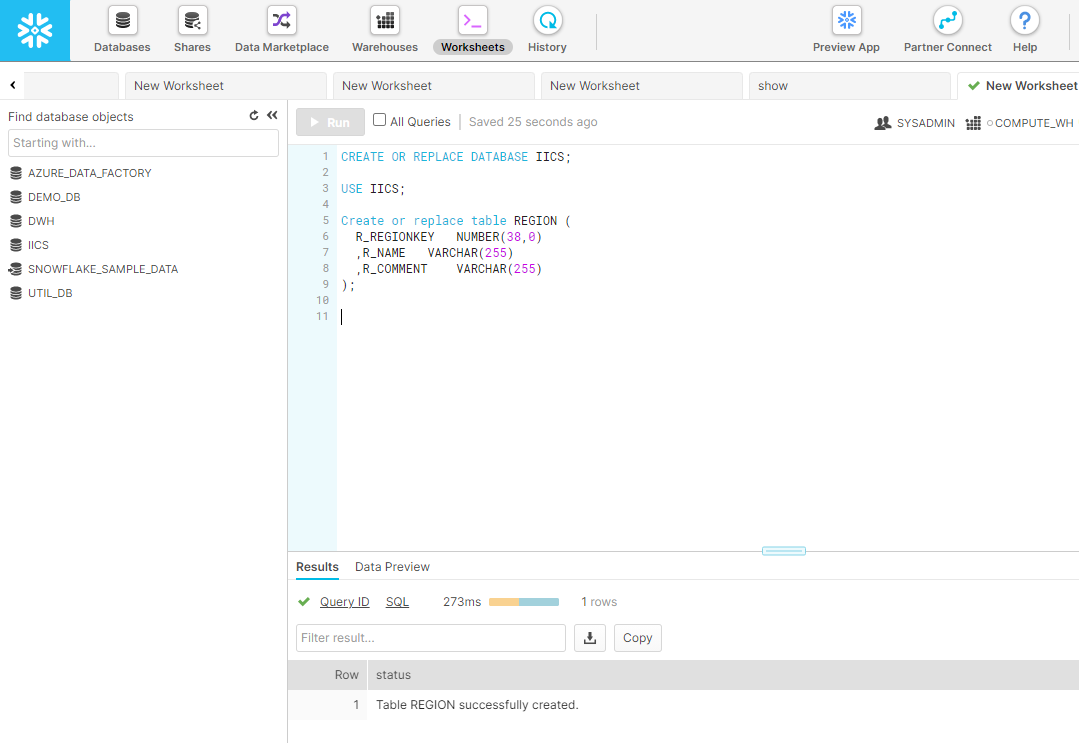
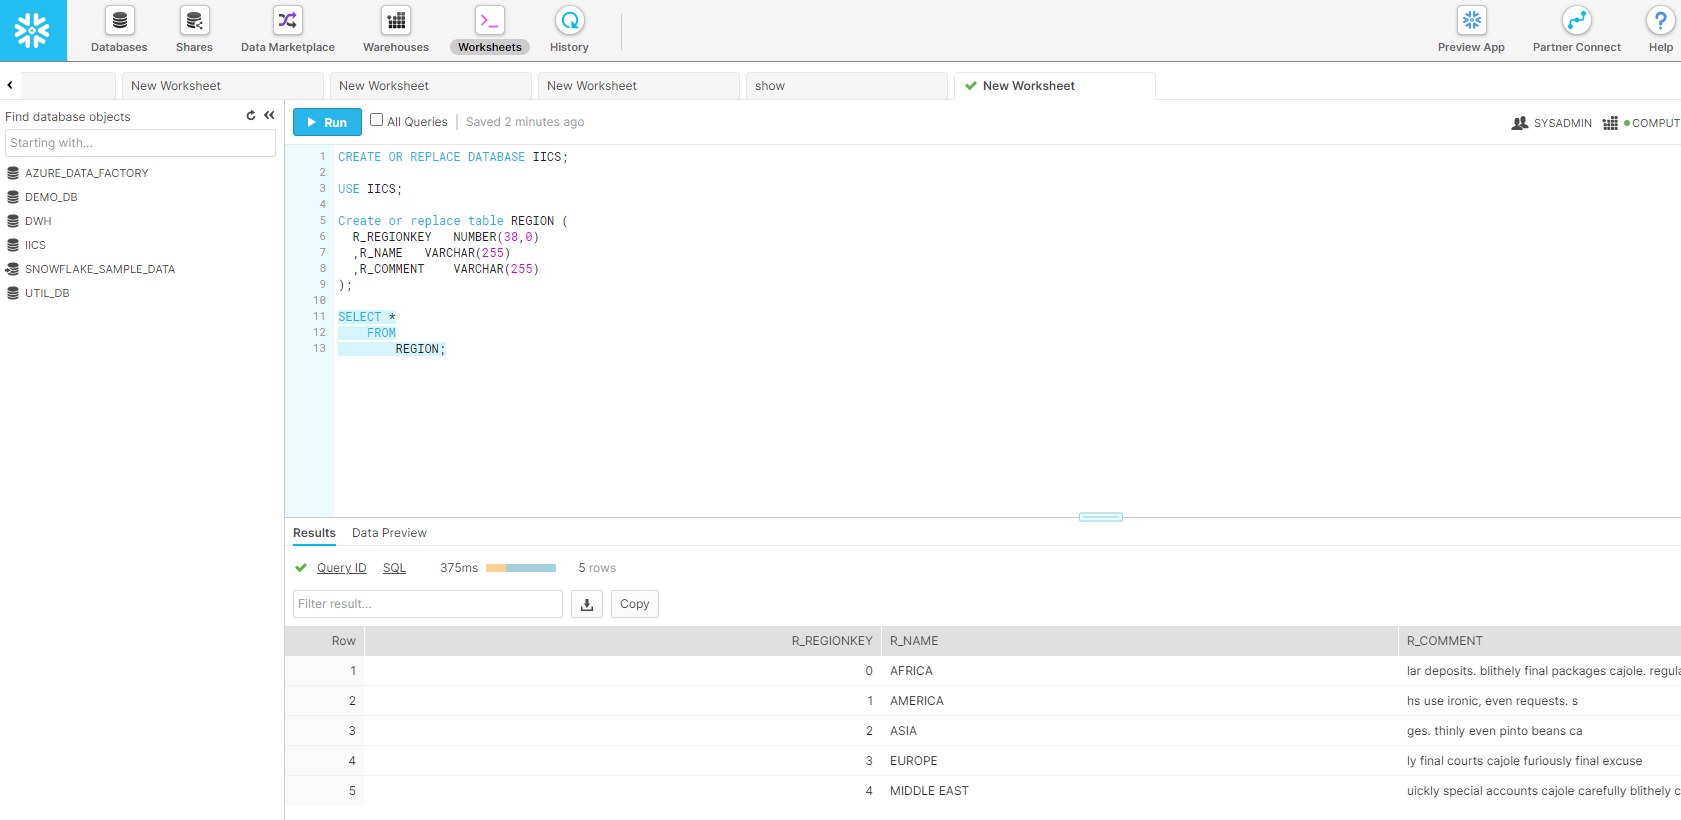
1. Snowflakeにて、データベースとテーブルを作成

CREATE OR REPLACE DATABASE IICS;

USE IICS;

Create or replace table REGION (
  R_REGIONKEY	NUMBER(38,0)
  ,R_NAME	VARCHAR(255)
  ,R_COMMENT	VARCHAR(255)
);

image.png

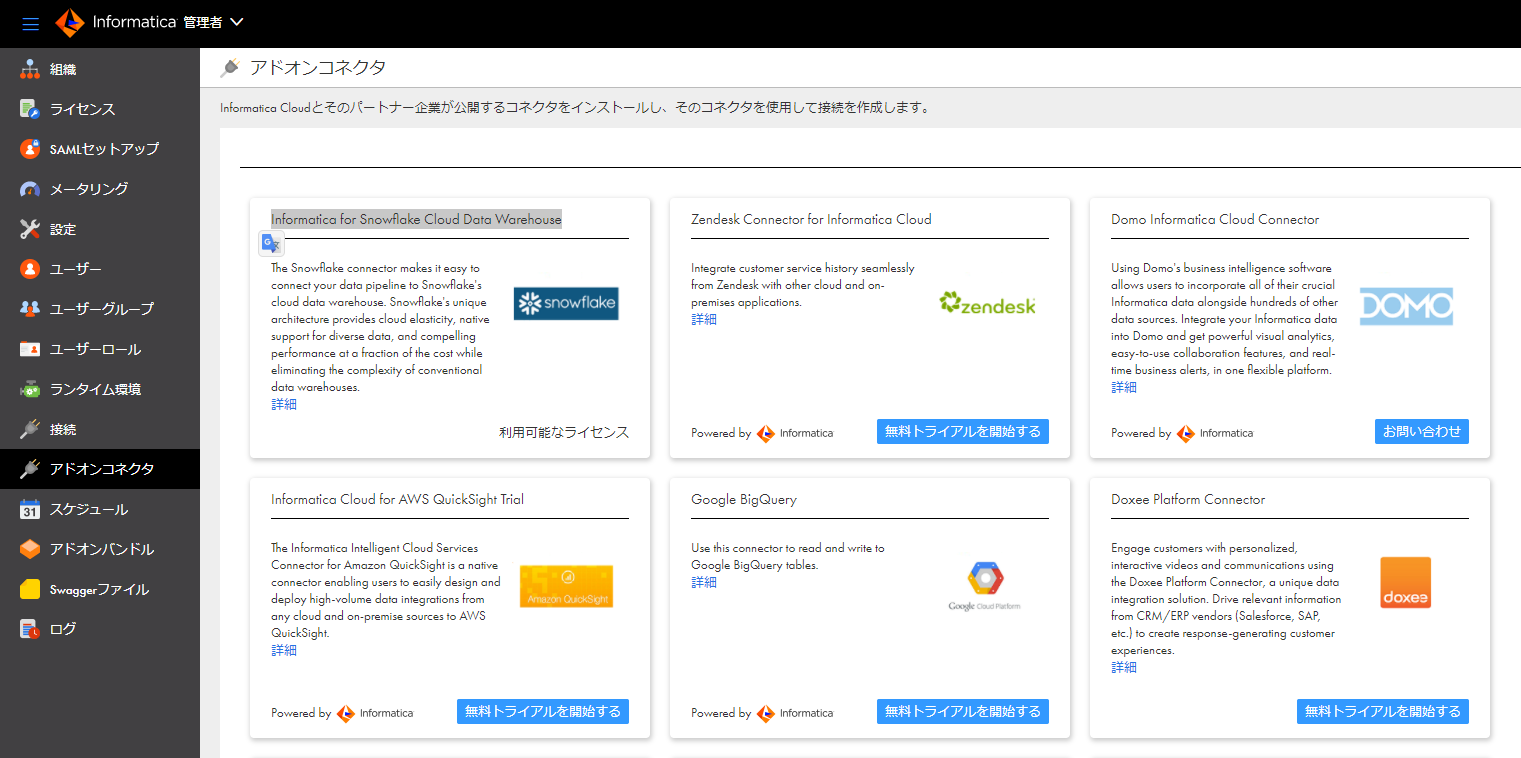
2. IICS管理者にて、"アドオン" -> "Informatica for Snowflake Cloud Data Warehouse" -> "無料トライアルを開始する"を選択する。"利用可能なライセンス"となることを確認。

image.png

3. (オプション)Secure Agent環境を構築します。たまたま、私の環境にて、SnowflakeコネクタがInformatica Cloud Hosted Agentで動作しなかったので、構築しました。先述のクラスメソッド様の記事にて、AWSでの構築手順も紹介されておりますが、Azureで実施しました。
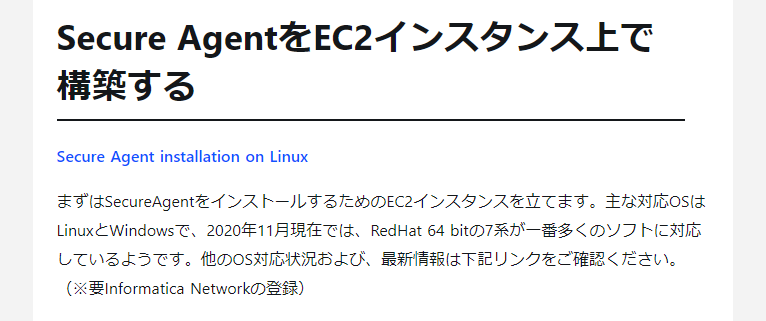
image.png
Informatica Cloud Data Integrationの環境をAWS上で構築してみた | Developers.IO (classmethod.jp)
4. "接続" -> "新しい接続"を選択します。

image.png

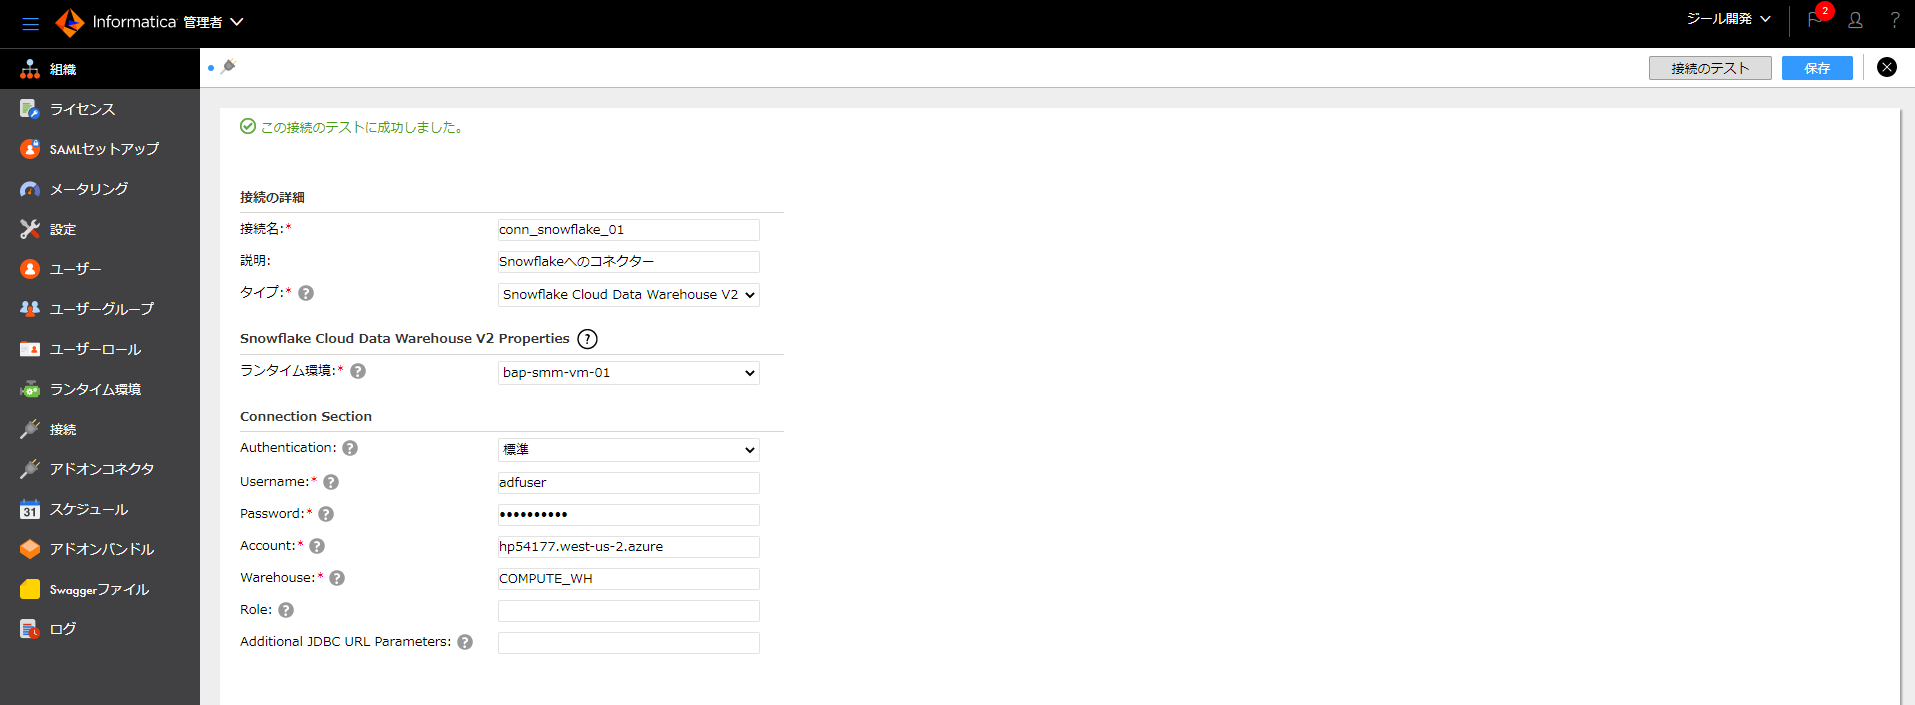
5. 必要な項目を入力後、"接続のテスト"を選択。接続確認完了後、"保存"を選択。

項目 入力項目 サンプル
接続名 接続の名称 conn_snowflake_01
説明: 接続の説明 Snowflakeへのコネクター
タイプ Informatica for Snowflake Cloud Data Warehouse V2 Informatica for Snowflake Cloud Data Warehouse V2
ランタイム環境 実行環境。3の手順で作成した環境。 bap-smm-vm-01
Authentication 認証方法 標準
Username ユーザー名 adfuser
Password パスワード saaaa123344
Account Snowflakeアカウント名。URLの"snowflakecomputing.com"の前の部分 hp54177.west-us-2.azure
Warehouse 仮想ウェアハウス名 COMPUTE_WH
image.png

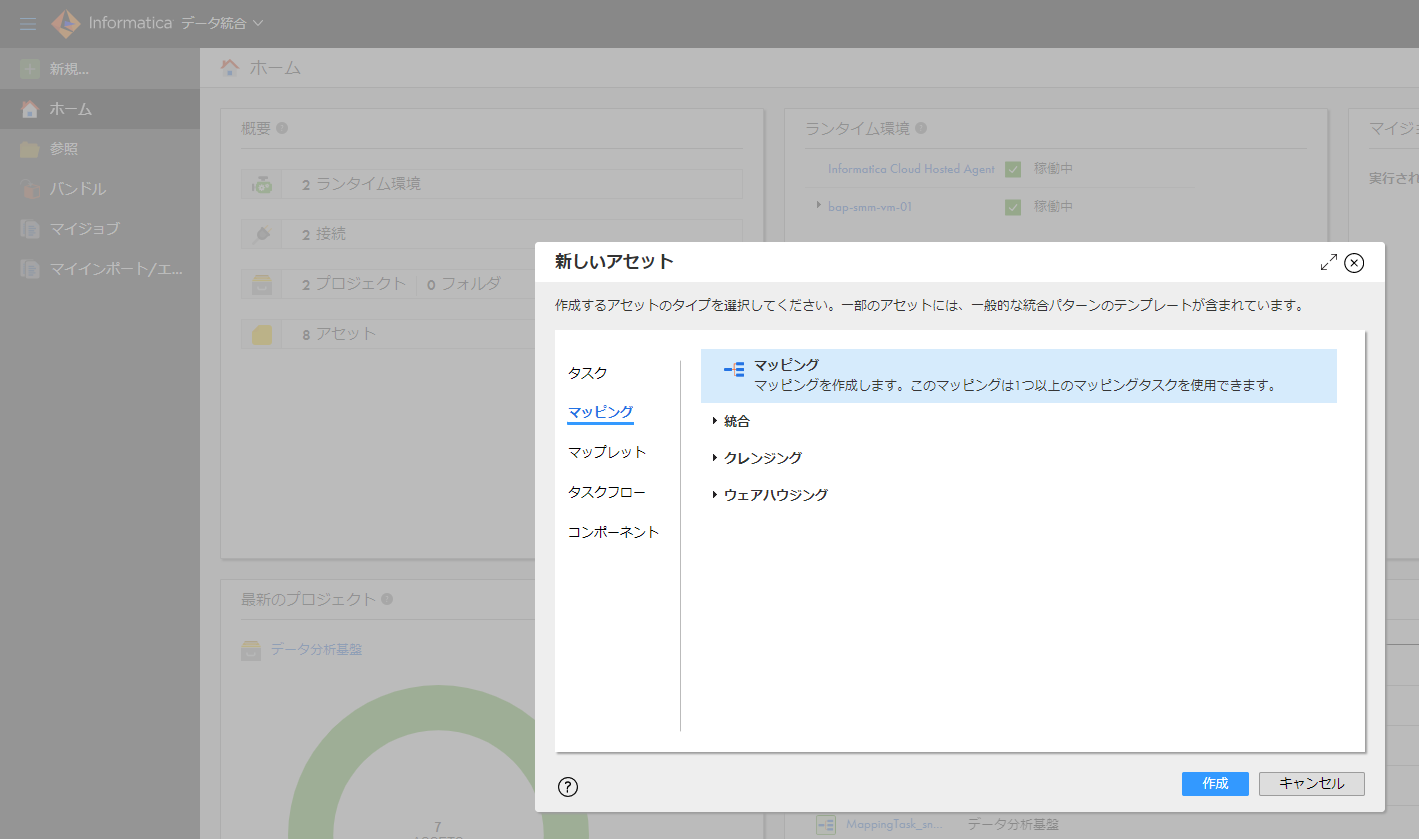
6. IICSデータ統合に移動後、"新規..." -> "マッピング" -> "マッピング"を選択。

image.png

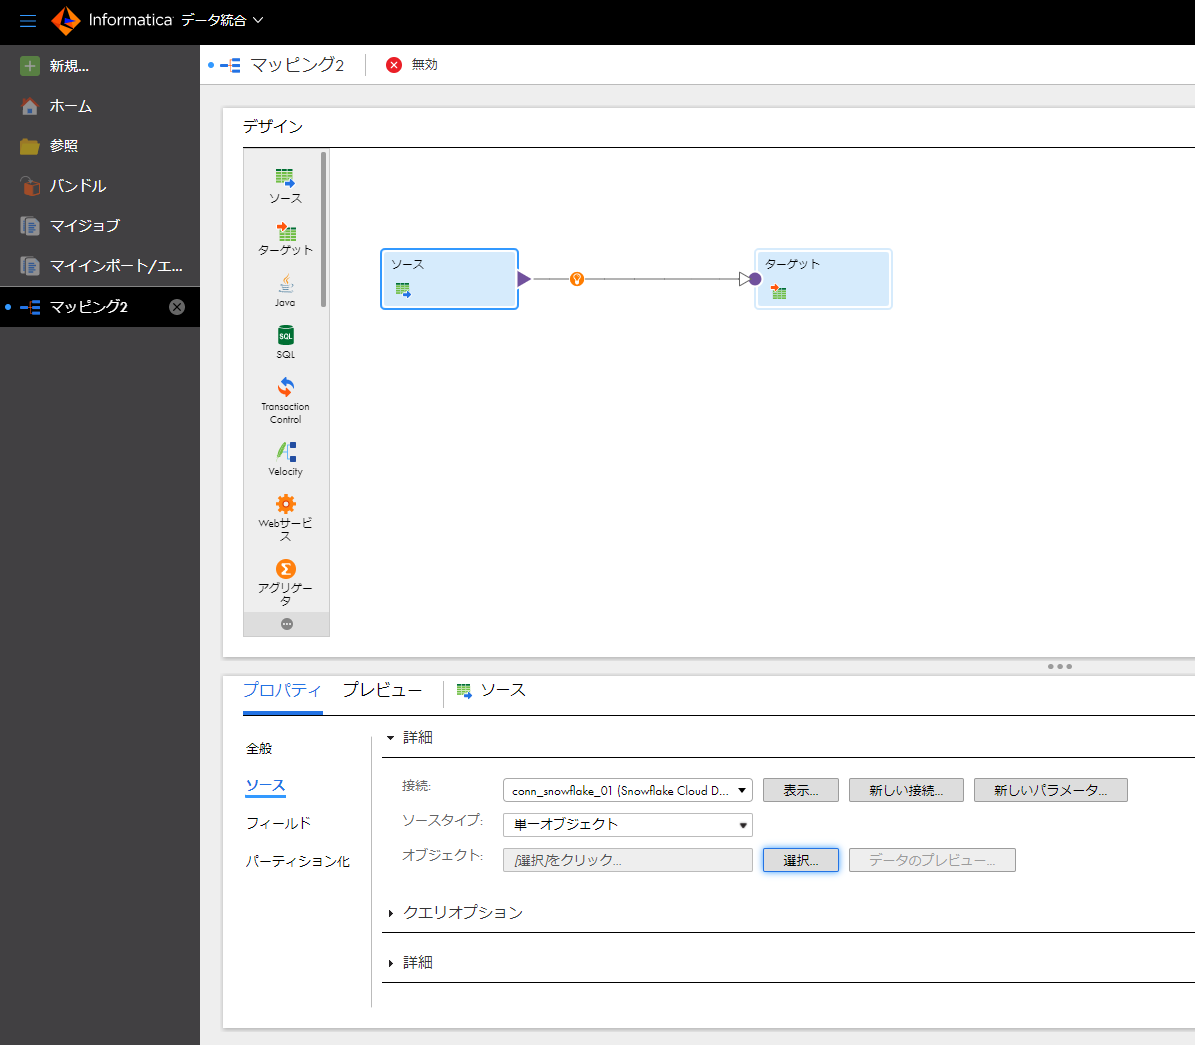
7. ソースを選択後、"プロパティ" -> "ソース" -> "接続"にて作成済みの接続を選択。

image.png

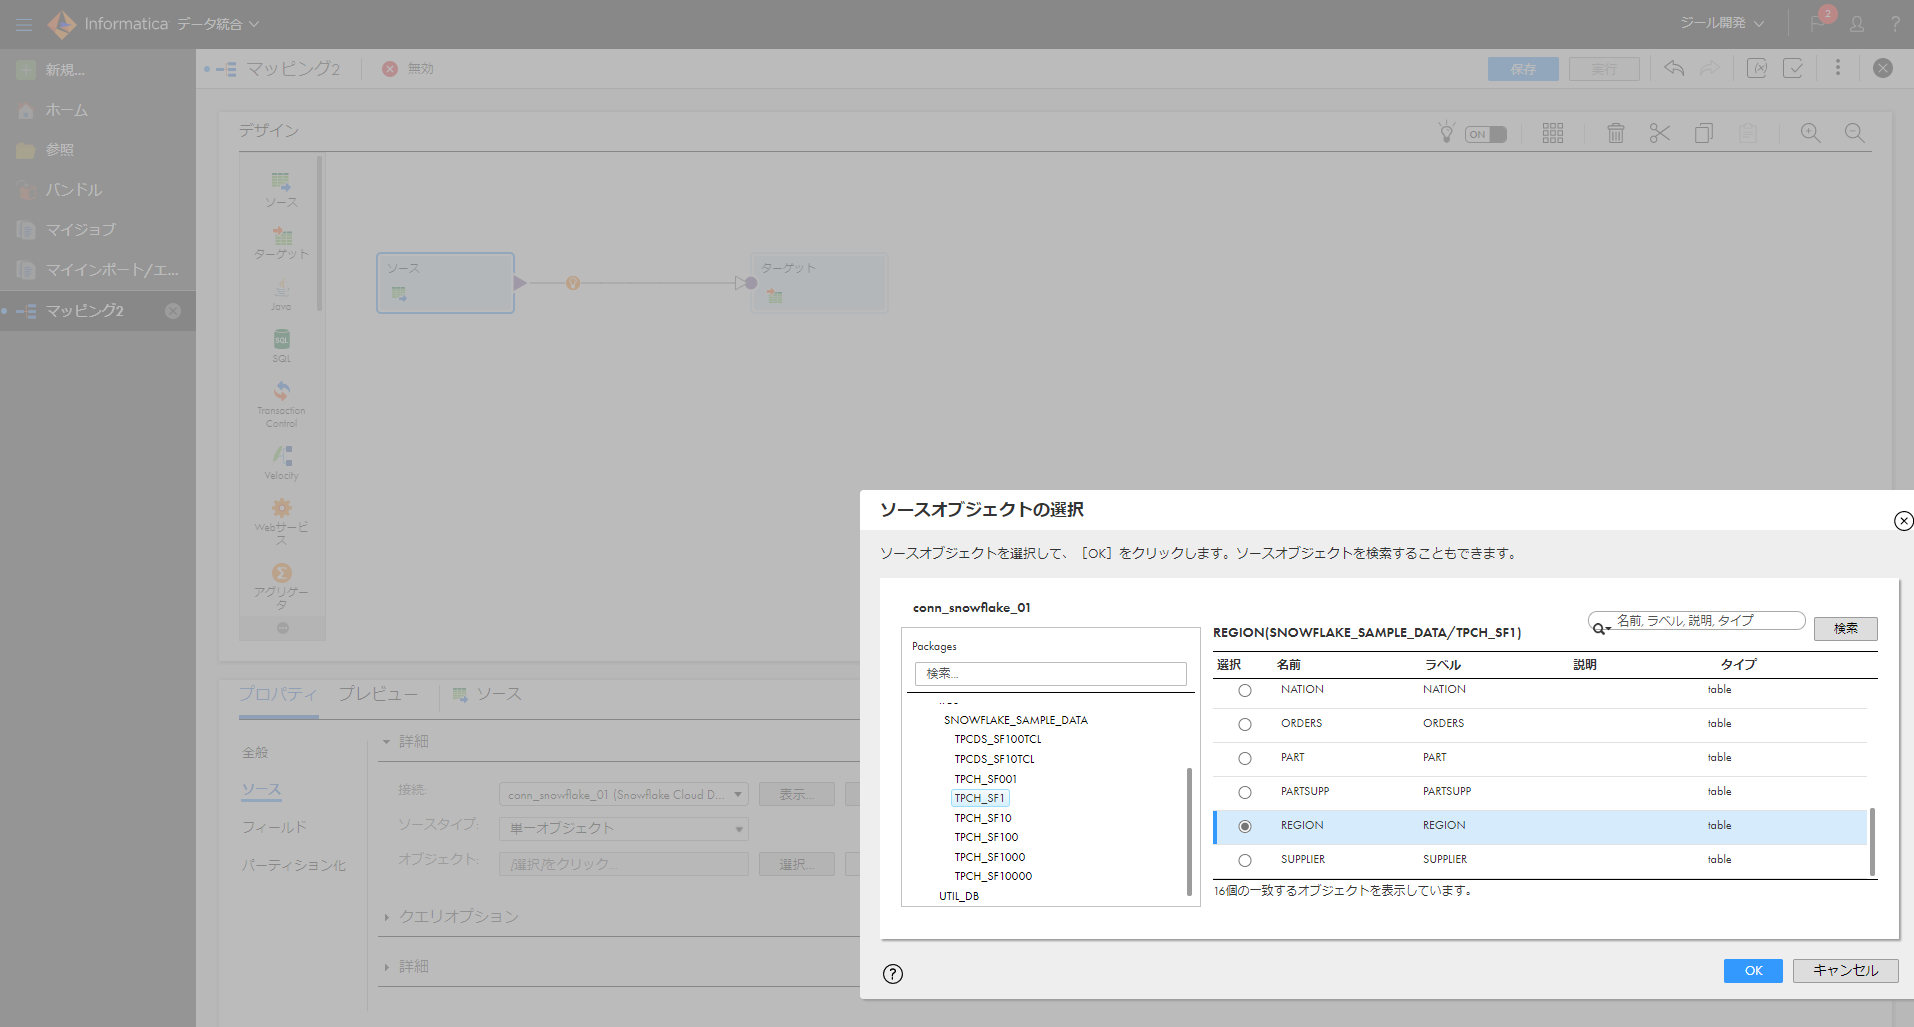
8. ”オブジェクト" -> "選択"を選択後、Snowflakeサンプルデータベースの"REGION"を選択し、"OK"を選択

image.png

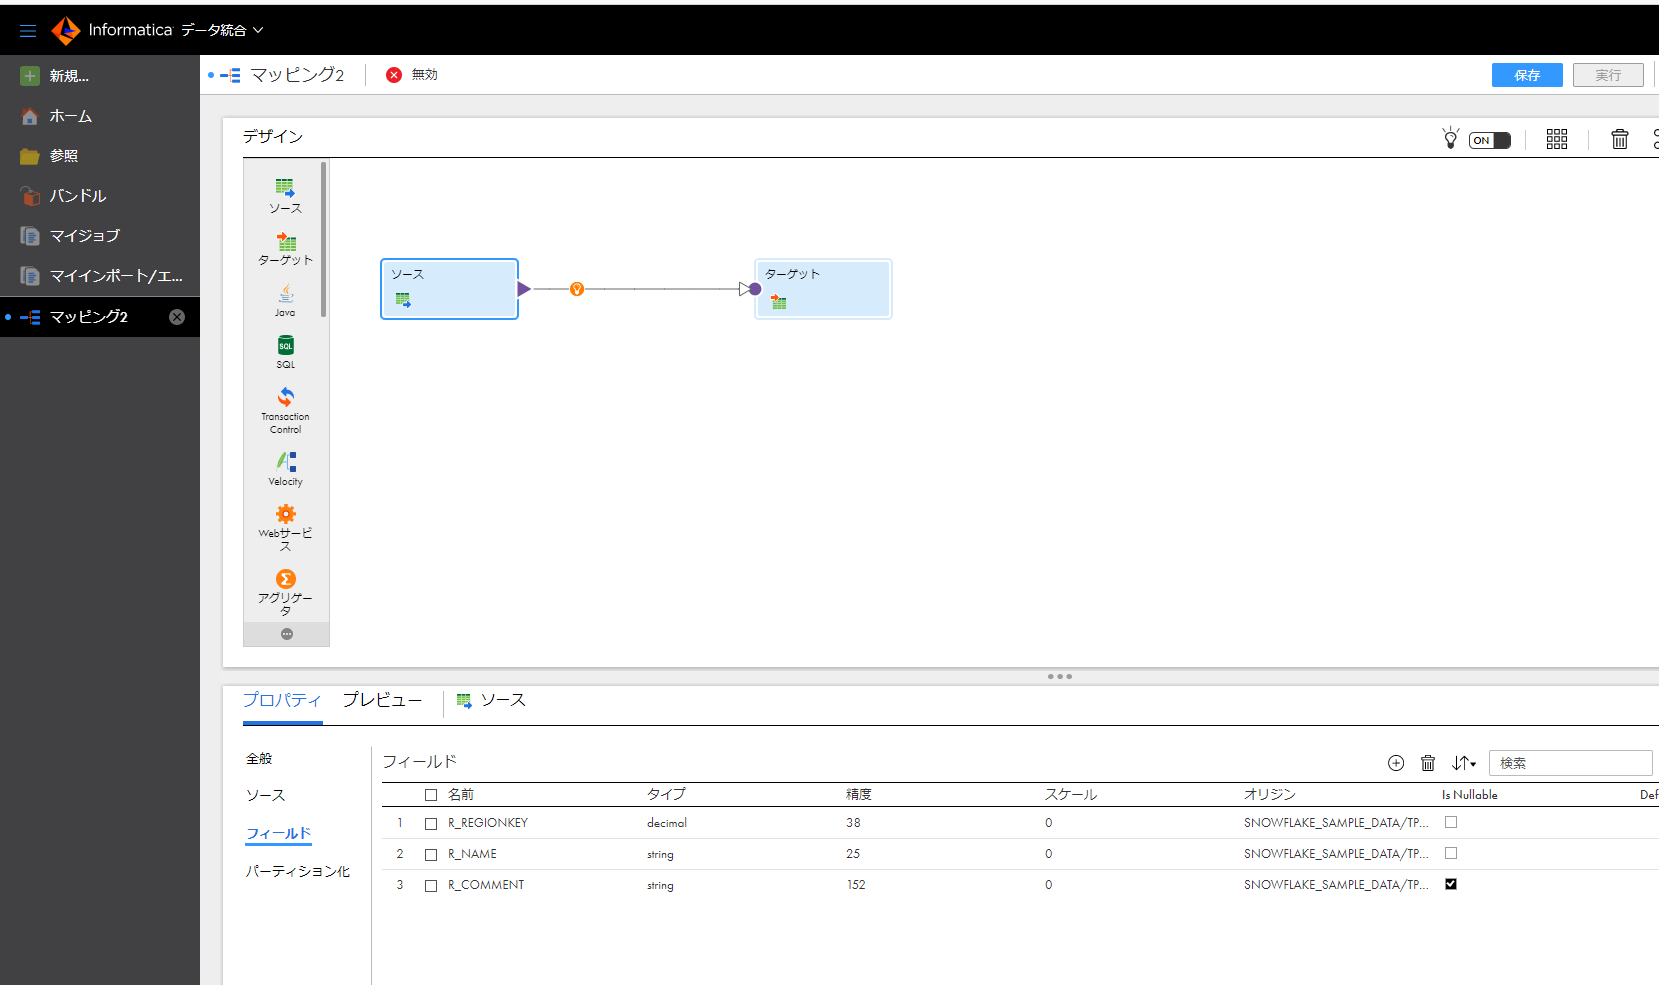
9. "フィールド"タブをクリックして、スキーマがただしいことを確認します。

image.png

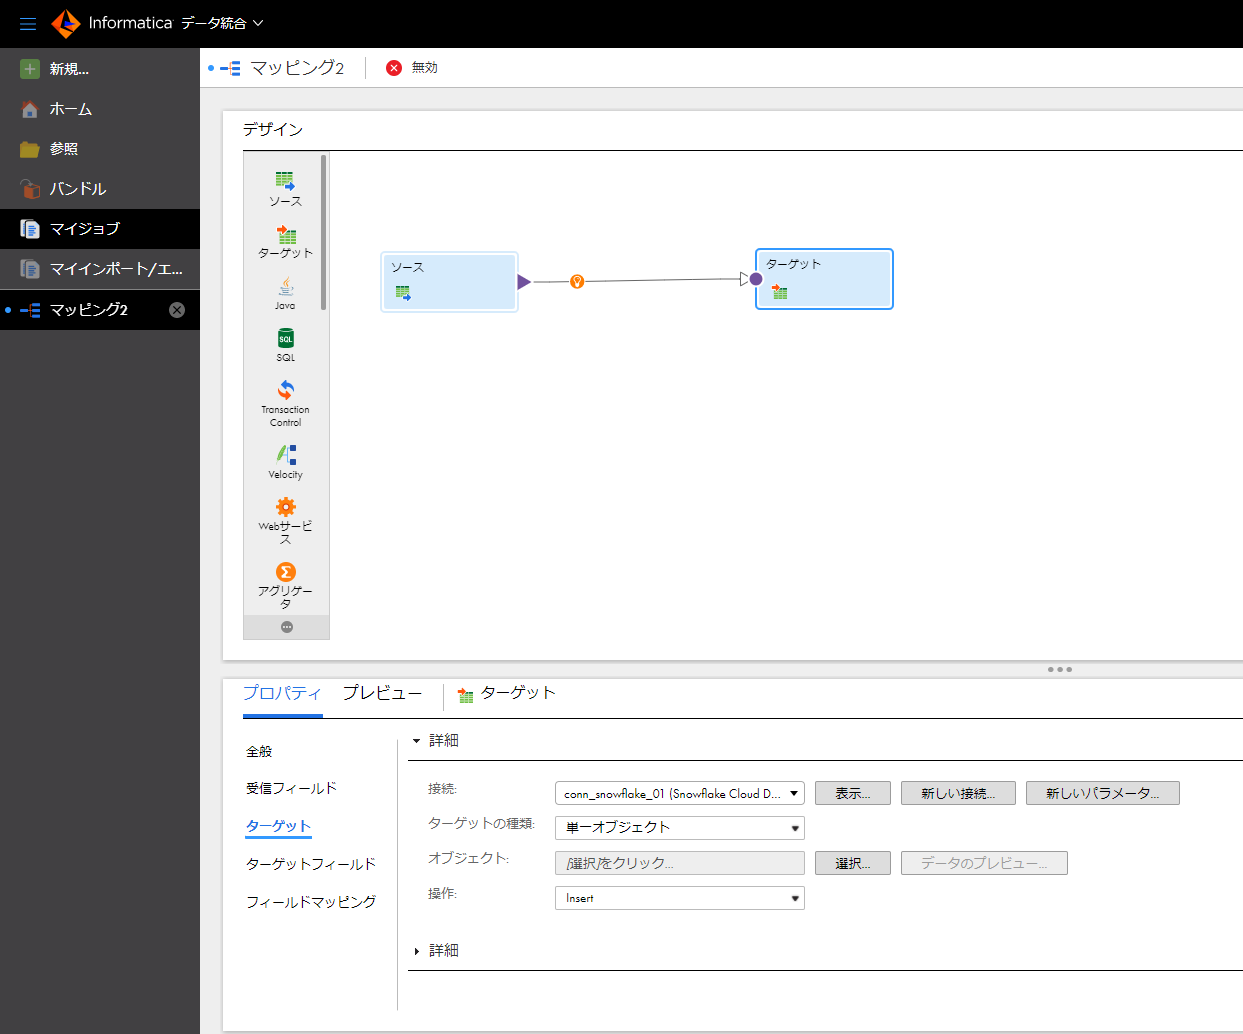
10. "ターゲット"を選択し、"プロパティ" -> "ターゲット" -> "接続"にて作成済みの接続を選択。

image.png

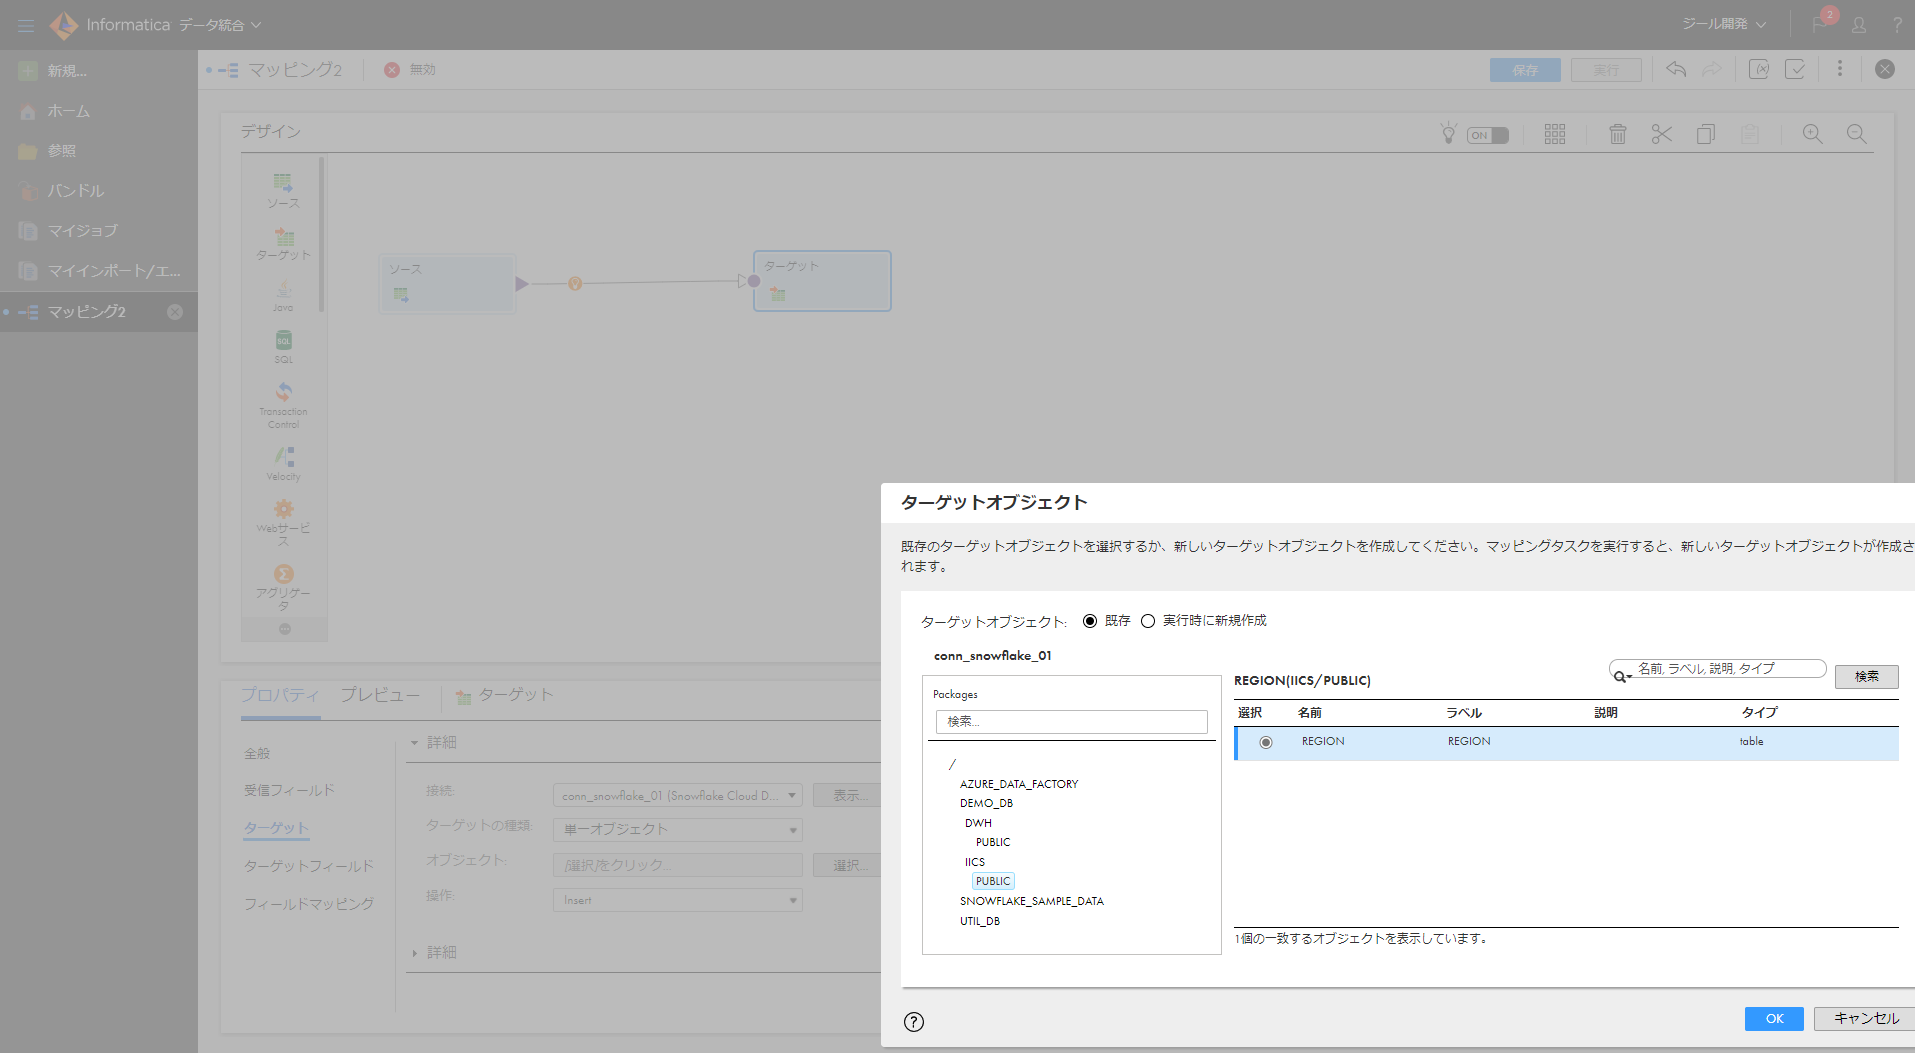
11. ”オブジェクト" -> "選択"を選択後、1の手順にて作成した"REGION"を選択し、"OK"を選択

image.png

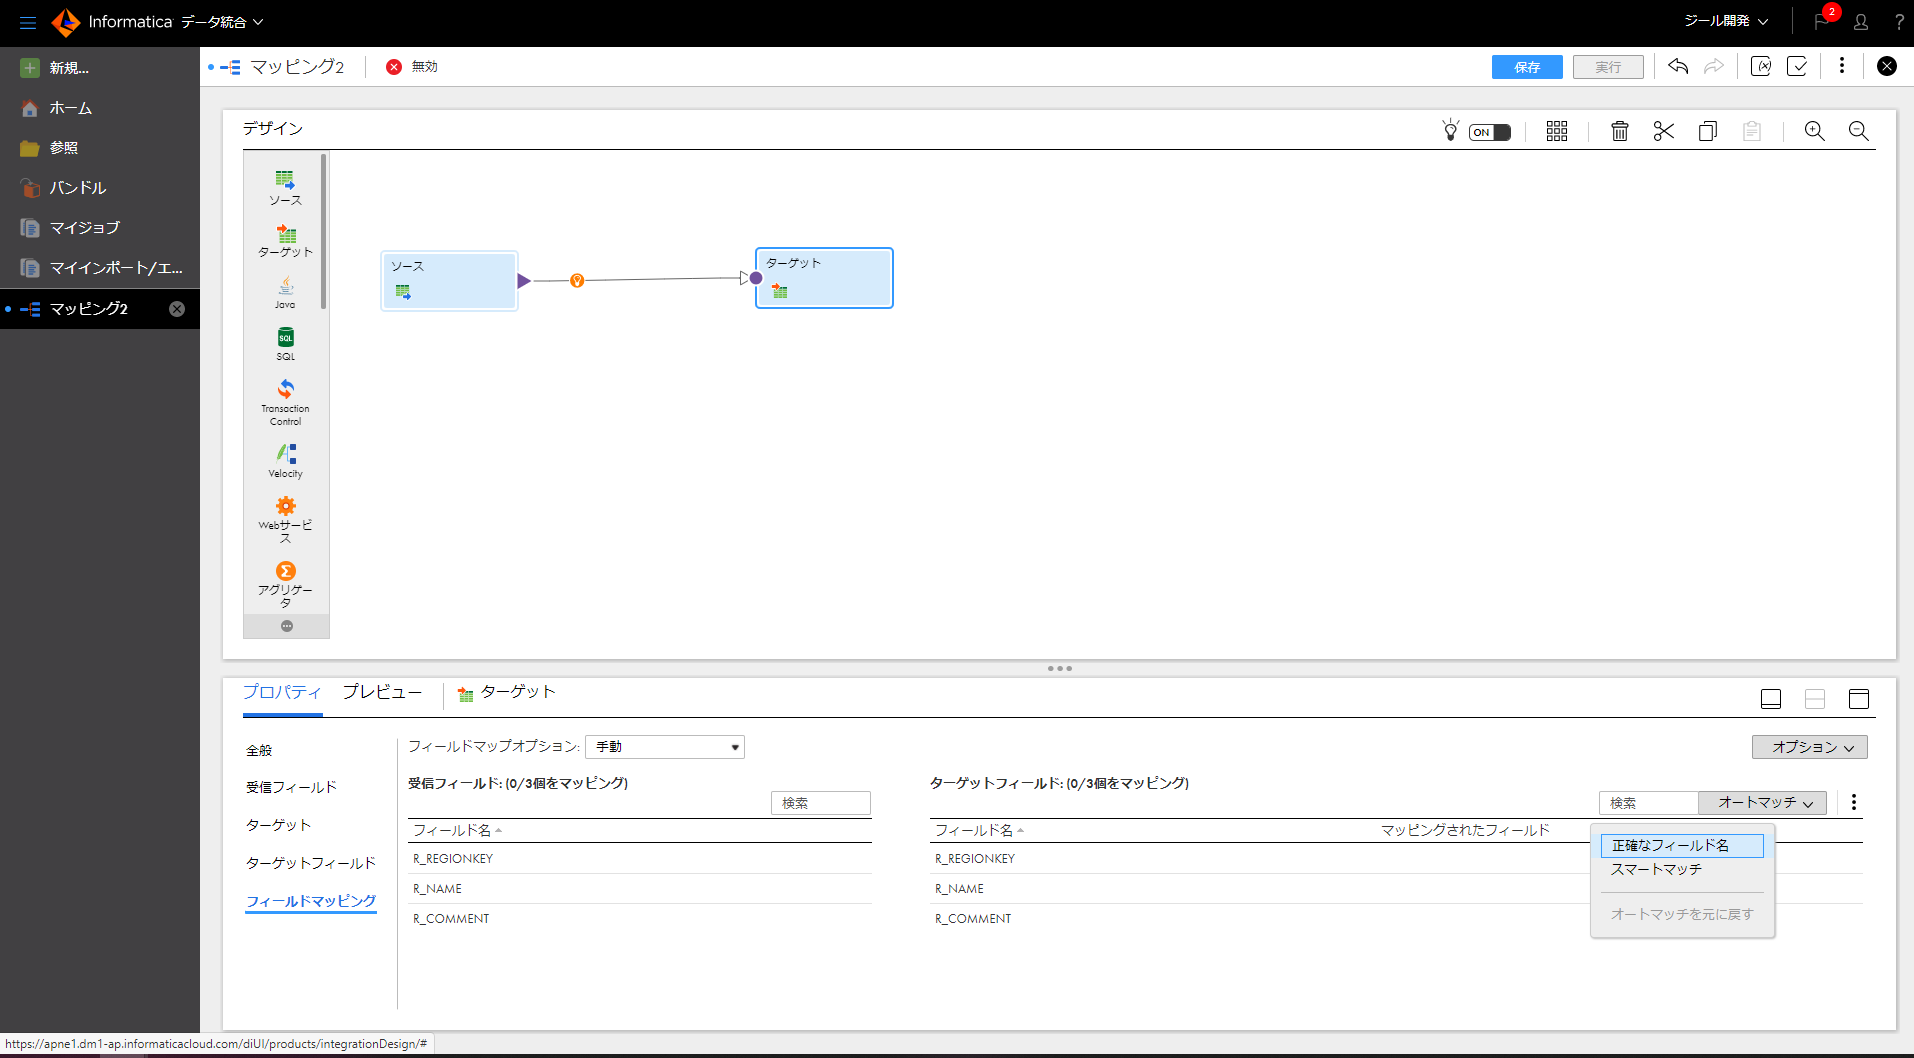
12. "フィールドマッピング"タブにて、"オートマッチ" -> "正確なフィールド名"を選択。

image.png

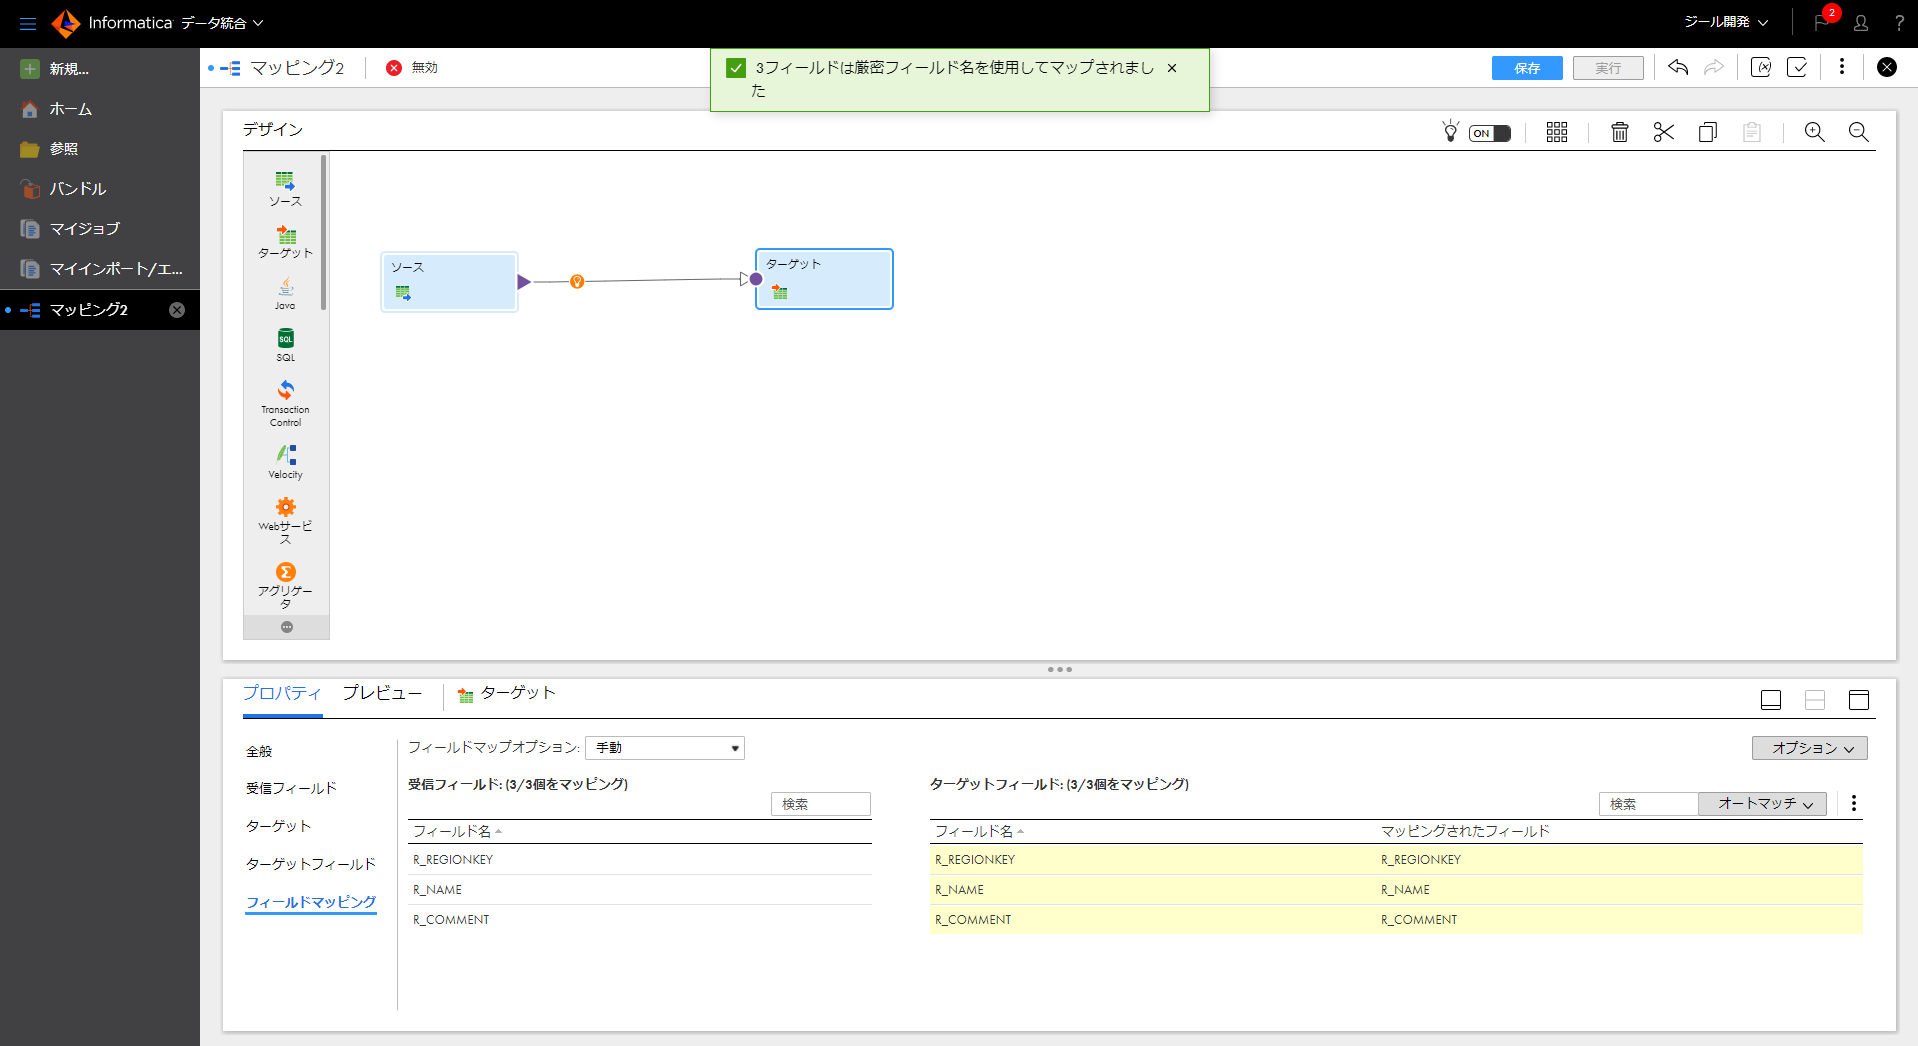
13. "マッピングされてフィールド"にて、"マッピングされてフィールド"に項目が入力されたことを確認。

image.png

14. 右上の"保存"ボタンを選択後、"実行"を選択。

image.png

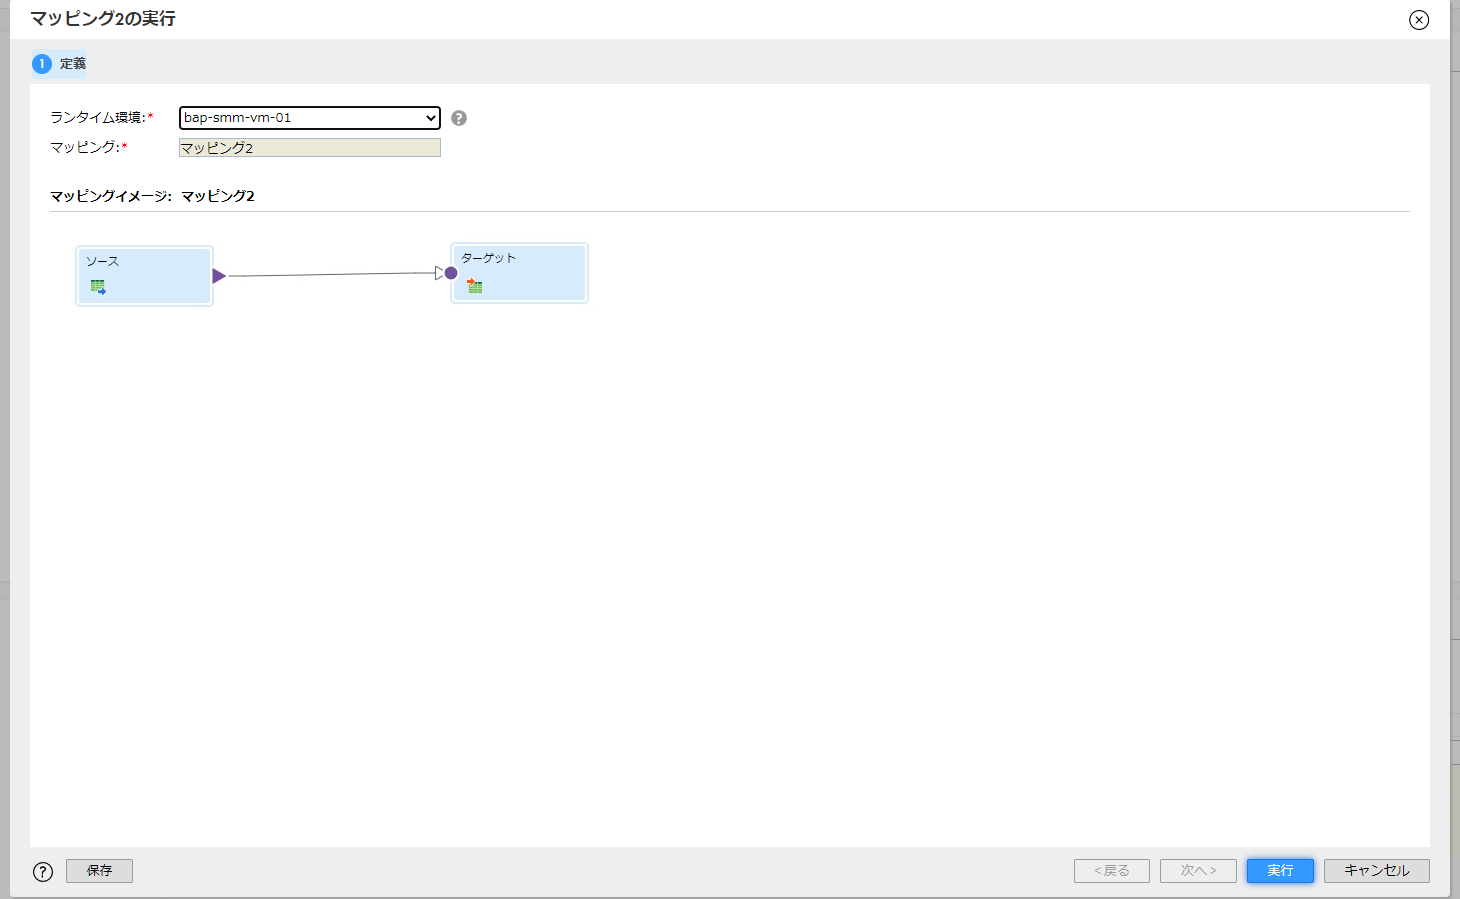
15. "ランタイム環境"を作成済みの環境に設定し、"実行"を選択。

image.png

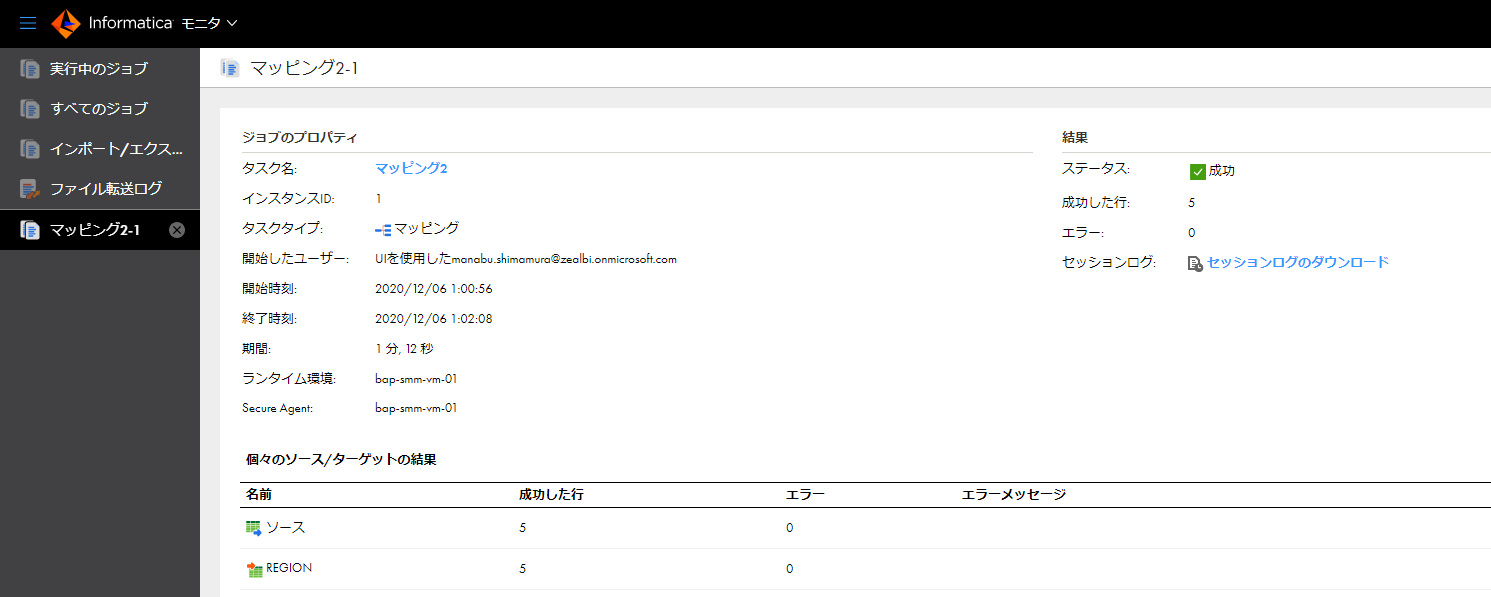
16. IICSモニタ画面にて、実行完了を確認。

image.png

17. Snowflakeにて、データが挿入されていることを確認。

image.png

8
3
0

Register as a new user and use Qiita more conveniently

  1. You get articles that match your needs
  2. You can efficiently read back useful information
  3. You can use dark theme
What you can do with signing up
8
3

Delete article

Deleted articles cannot be recovered.

Draft of this article would be also deleted.

Are you sure you want to delete this article?