この記事は、iOSアプリ開発から公開までの流れ の第2章です。
本稿では、Xcode で iOS アプリをビルドして実行する手順を記載します。
1. ウィンドウのタイトルバーに ▶︎ ボタンがあります
このボタンをクリックすると、ビルドと実行が行われます。その前に、

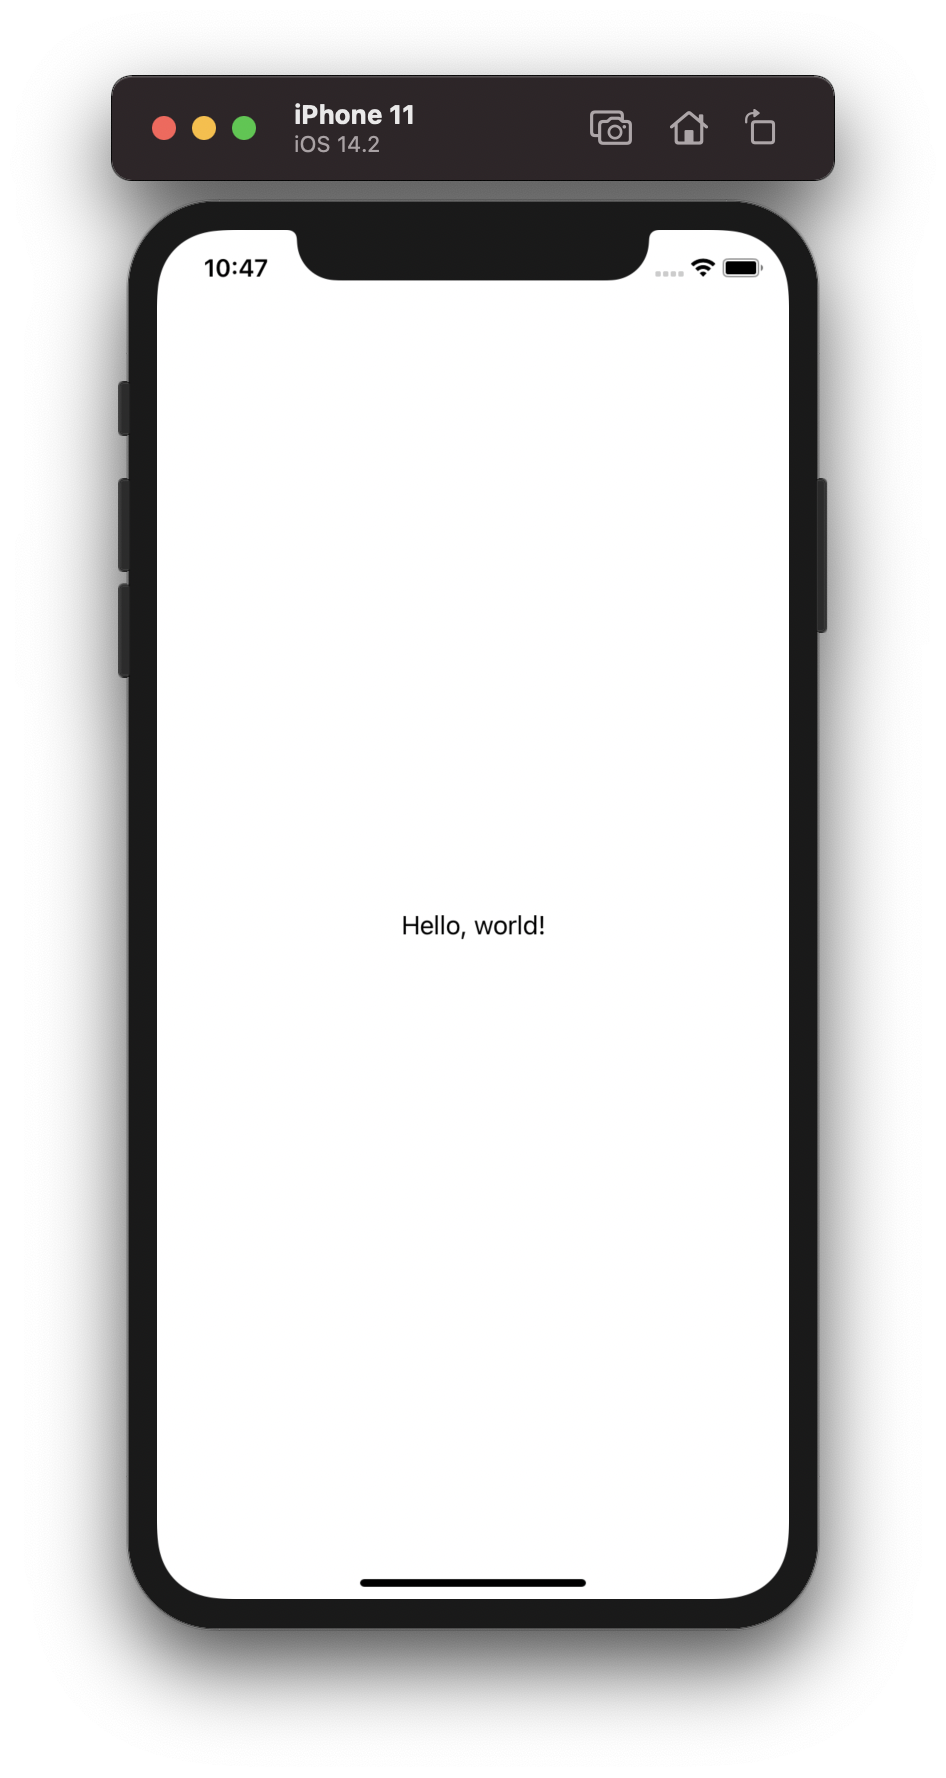
2. シミュレータの機種を選択します

3. ▶︎ をクリックしてシミュレータでアプリを起動します
コンパイルエラーが発生しなければ、シミュレータが起動します。
はい、Hello, world! 終わり。
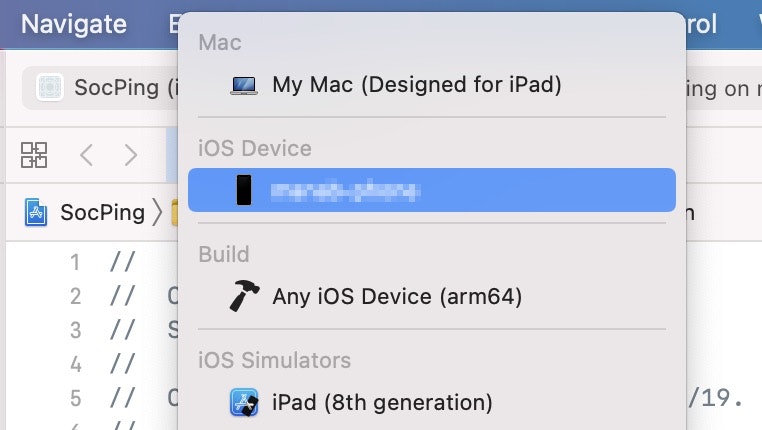
4. 次に実機で動作実行するため、iOS Deivce を選択します
USB で iPhone を Mac に接続すると、ここに iPhone の名前が表示されます。
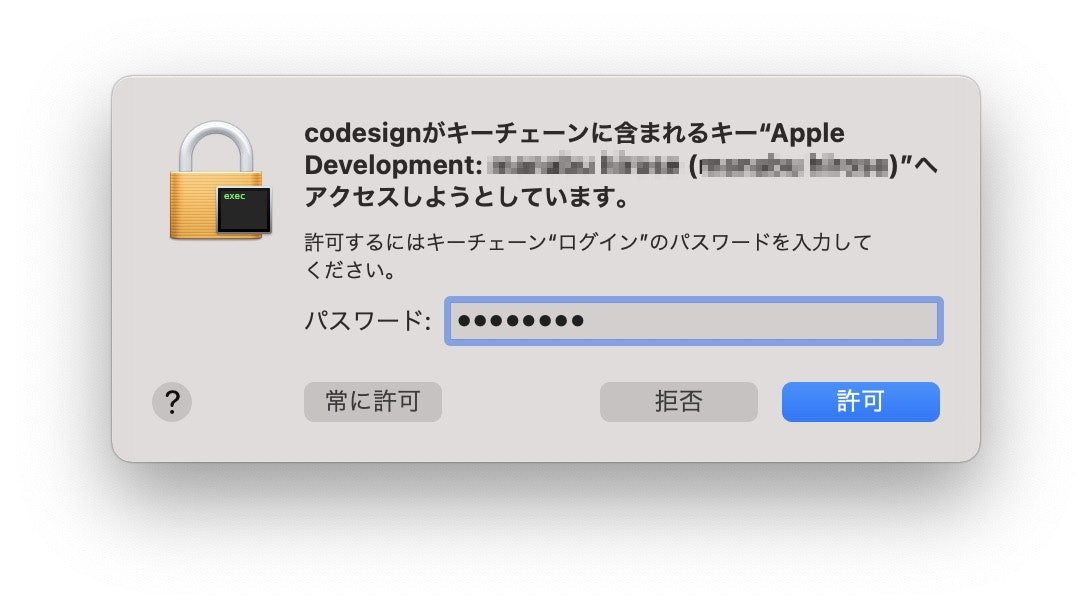
5. パスワードを入力します
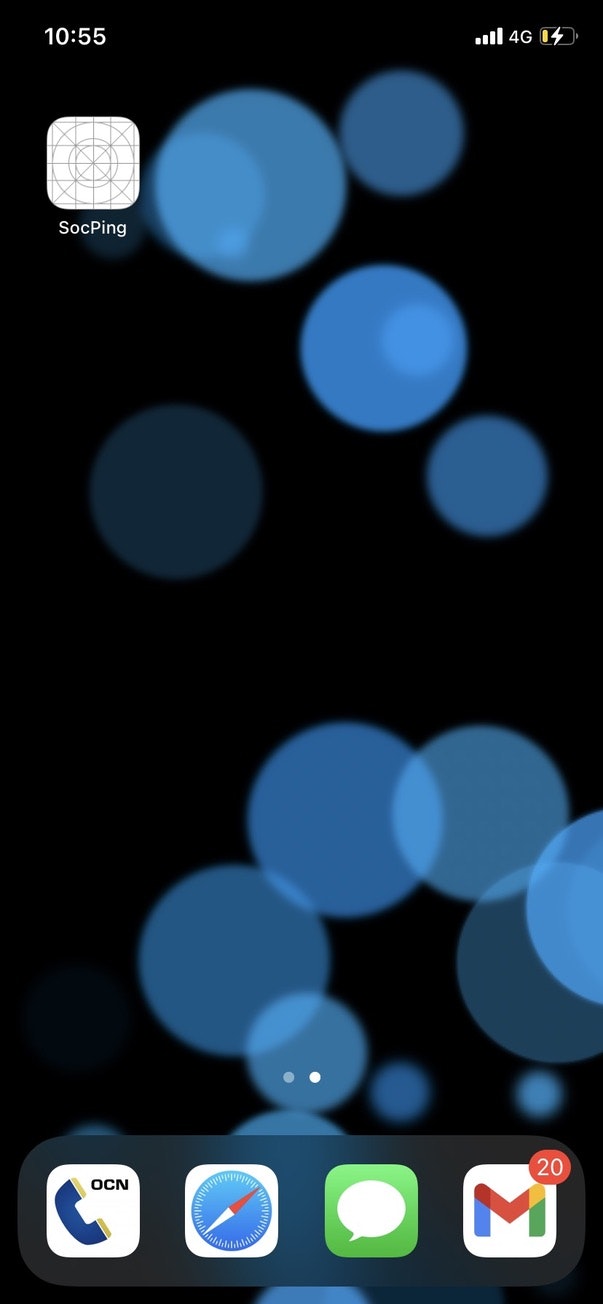
6. アプリがインストールされました
7. このメッセージが表示された場合は、
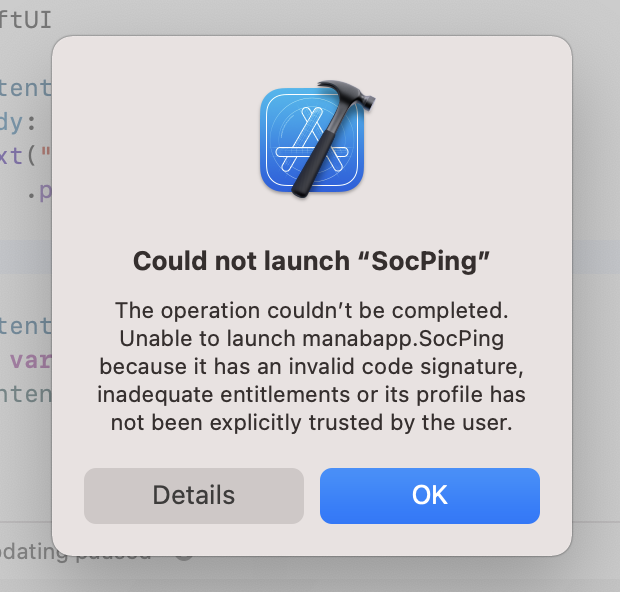
8. iPhone 側で [設定] > [一般] > [プロファイルとデバイス管理]
"Apple Development: xxxxx" をタップ。
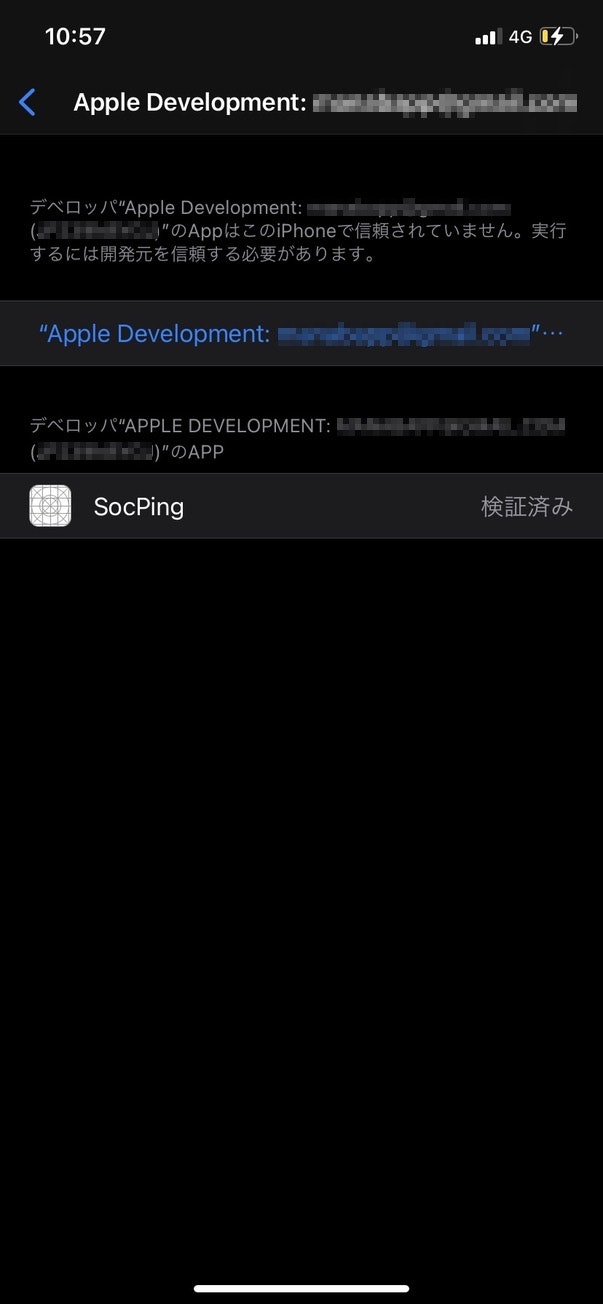
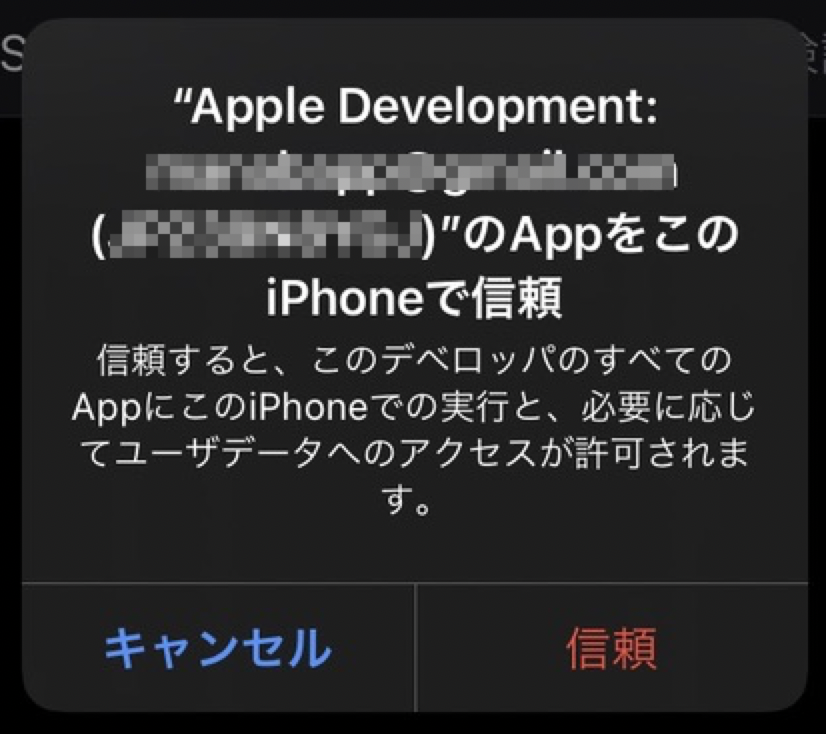
9. 信頼をクリック
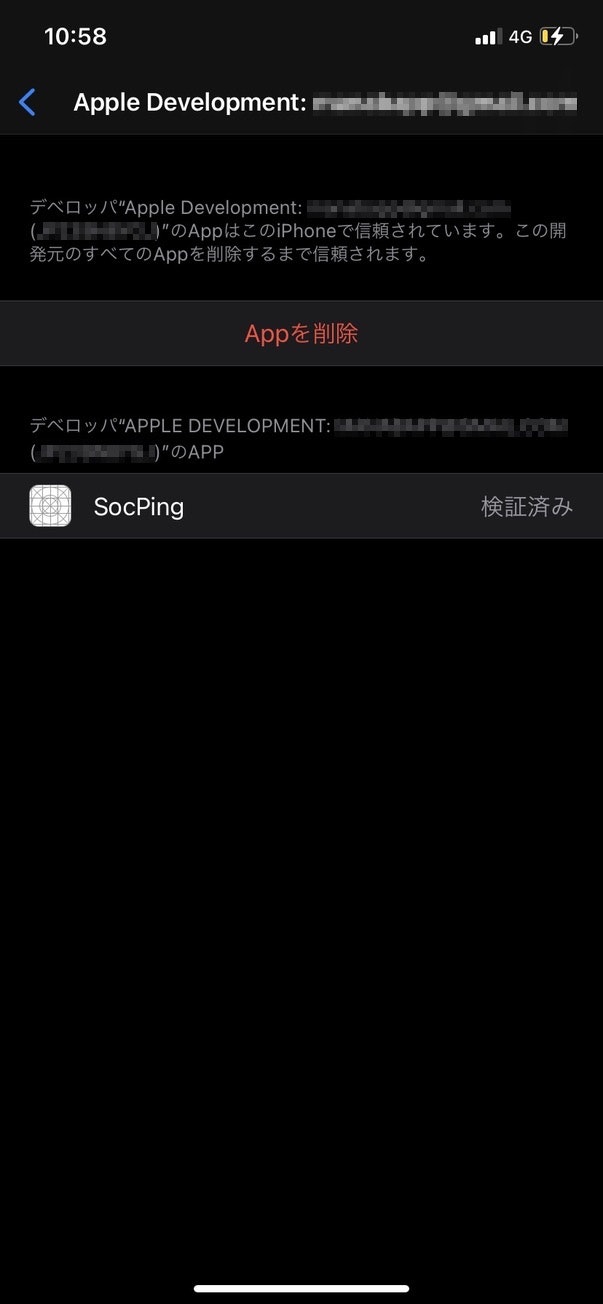
10. アプリが信頼されました
削除する場合は、App を削除 をタップすればよいです。
11. iPhone 上でもアプリが起動したことを確認できました

終わり。