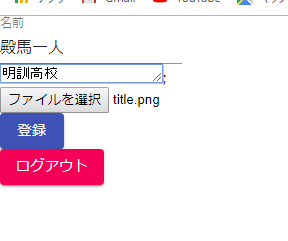
③の続きです。
休日の間に連続投稿しておきます。
今回はFirebaseのStorageへ画像をアップロードします。
↓参考資料にした公式ガイド
https://firebase.google.com/docs/storage/web/upload-files?hl=ja
まずはfirebaseのStorageサービスを開始しましょう。

↑にアップロードしていきます。

↑初期値のセキュリティルールでは認証ができたユーザーのみアップロードできるようになっているので、ケースによってセキュリティルールを変更しましょう。
fileを受け取るinputを作ってgetImageメソッドでsetStateを行います。
<input type = "file"
onChange={(event)=>{this.getImage(event)}}>
</input>
 //stateでimage:''を設けています
  getImage(event){
    let image = event.target.files[0];
    this.setState({
      image: image,
    });
  }
入力フォームの入力値を送るボタンで、addDataメソッドを発動して、
画像とまとめて送信します。
出力ファイル名が分かりやすいように、
{this.state.name}+pngとしています。
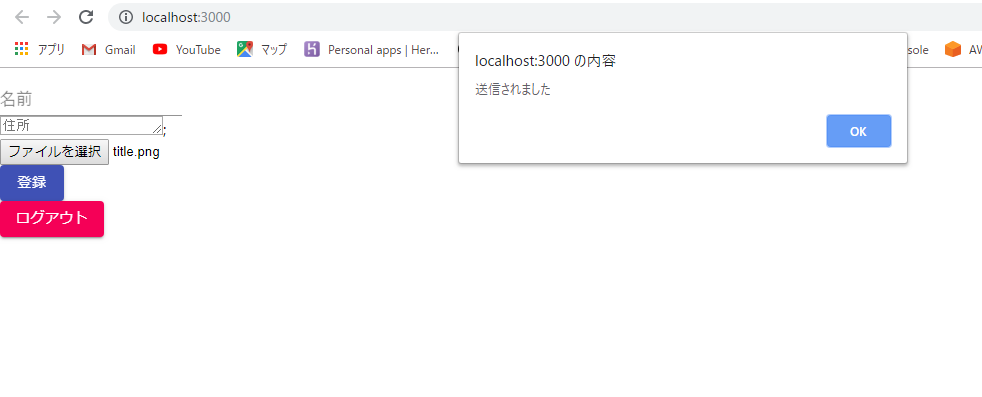
また送信成功したらalertが表示されるようにしています。
  //入力値をデータベースへ送る
  addData(){
    firestore.collection('users').add({
    name: this.state.name,
    address: this.state.address,
    created_at: new Date(),
    }).then(() => {
    this.setState({
      name: '',
      address: '',
    });
  })

   //ここからがstorageへのアップロード
   let storageRef = firebase.storage().ref().child(this.state.name+`.png`);
   storageRef.put(this.state.image)
   .then(function(snapshot) {
    alert("送信されました");
   });
  }
↓全体がこちらです。
import React from 'react';
import './App.css';
import firebase from "firebase/app";
import "firebase/auth";
import "firebase/firestore";
import { firestore } from './plugins/firebase';
import Button from '@material-ui/core/Button';
import TextField from '@material-ui/core/TextField';
import TextareaAutosize from '@material-ui/core/TextareaAutosize';
import StyledFirebaseAuth from 'react-firebaseui/StyledFirebaseAuth';


class App extends React.Component{
  constructor(props){
    super(props);
    this.state = {
      name: '',
      address: '',
      image: '',
      isLogin: false,
    }
    this.getName = this.getName.bind(this);
    this.getAddress = this.getAddress.bind(this);
    this.getImage = this.getImage.bind(this);
    this.addData = this.addData.bind(this);
    this.logOut = this.logOut.bind(this);
    }

  componentDidMount() {
    firebase.auth().onAuthStateChanged(user => {
      this.setState({
        isLogin: true,
      });
    });
  }

  getName(event) {
    this.setState({
      name: event.target.value,
    });
  };

  getAddress(event) {
    this.setState({
      address: event.target.value,
    });
  };

  getImage(event){
    let image = event.target.files[0];
    this.setState({
      image: image,
    });
  }


  addData(){
    firestore.collection('users').add({
    name: this.state.name,
    address: this.state.address,
    created_at: new Date(),
    }).then(() => {
    this.setState({
      name: '',
      address: '',
    });
  })
   let storageRef = firebase.storage().ref().child(this.state.name+`.png`);
   storageRef.put(this.state.image)
   .then(function(snapshot) {
    alert("送信されました");
   });
  }


  logOut(){
    this.setState({
      isLogin: false,
    });
  }


  render(){
    const uiConfig = {
      signInFlow: 'popup',
      signInSuccessUrl: '/',
      signInOptions: [
        firebase.auth.GoogleAuthProvider.PROVIDER_ID,
        firebase.auth.EmailAuthProvider.PROVIDER_ID,
      ]
    };

    let successfulUser;

    if(this.state.isLogin){
      successfulUser=(
        <div>
        <form>
        <TextField  label="名前"
         value= {this.state.name}
         onChange={(event)=>{this.getName(event)}}/>
         <br/>

         <TextareaAutosize
         aria-label="住所"
         rowsMax={4}
         placeholder="住所"
         value= {this.state.address}
         onChange={(event)=>{this.getAddress(event)}}
         />;
         <br/>

         <input type = "file"
         onChange={(event)=>{this.getImage(event)}}>
         </input>
         <br/>

        <Button variant="contained" color="primary" onClick={this.addData}>登録</Button>
        </form>
        <Button variant="contained" color="secondary" onClick={this.logOut}>ログアウト</Button>
        </div>

      );
     }else{
      successfulUser=(
         <div>
         <p>Please sign-in:</p>
         <StyledFirebaseAuth uiConfig={uiConfig} firebaseAuth={firebase.auth()}/>
         </div>
       );
      }

     return(
       <div>
          {successfulUser}
       </div>
      );
    }
}
export default App;
↓のような表示になっているので、ファイルを送ってみます。
そしてストレージへはnameの名前でファイルが保存されています。

今回は以上となります。


