はじめに
IBM Cloud FunctionからWatson MLで作ったWebサービスを呼ぶということをやってみました。
今まで知らなかったのですが、Cloud Functionに対してサービスをバインドすることが可能で、こうしておくとCloud Function上のコードに認証情報を含める必要がなく便利です。(SCORING_URLはまだ手で設定していますが。。。)
その手順について記載します。
前提
Githubに説明のあるWebサービスをCALL先とします。
(このWebサービスの作成手順はまだネットにアップしていなかったので、近々アップします)
SCORING URLの確認
Watson Studioのモデル管理画面から、接続対象のWebサービスのSCORING URLを確認してエディタなどに保存します。
SCORING URLは、Warson Studioプロジェクト管理画面から
「Deployments」タブ->詳細画面->「Implementaion」タブで確認可能です。
サービスの作成
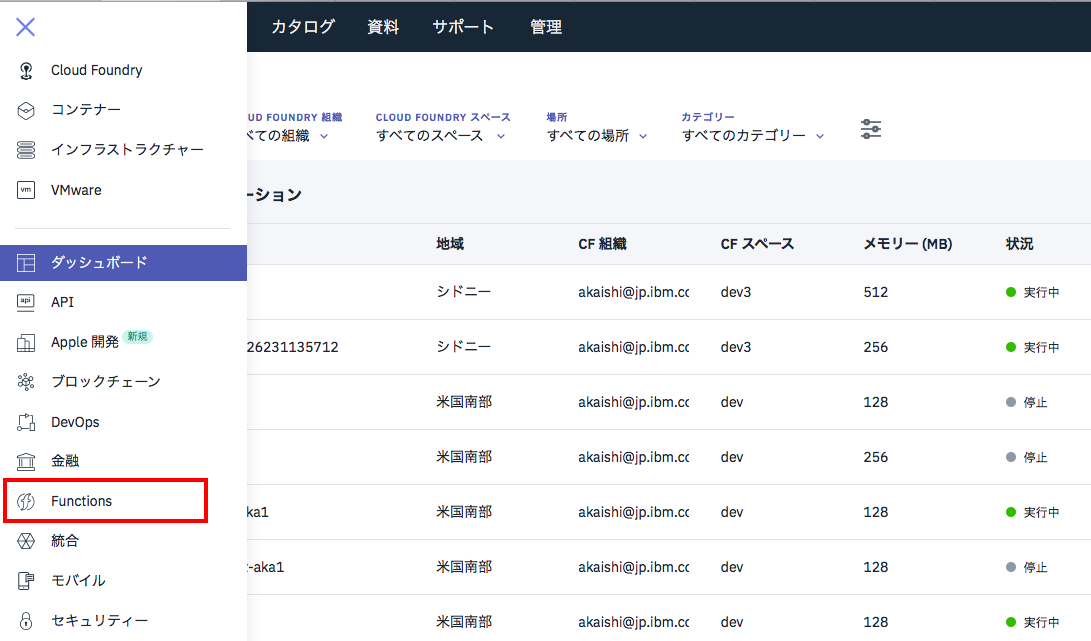
IBM Cloudのダッシュボードから「Functions」を選択します。
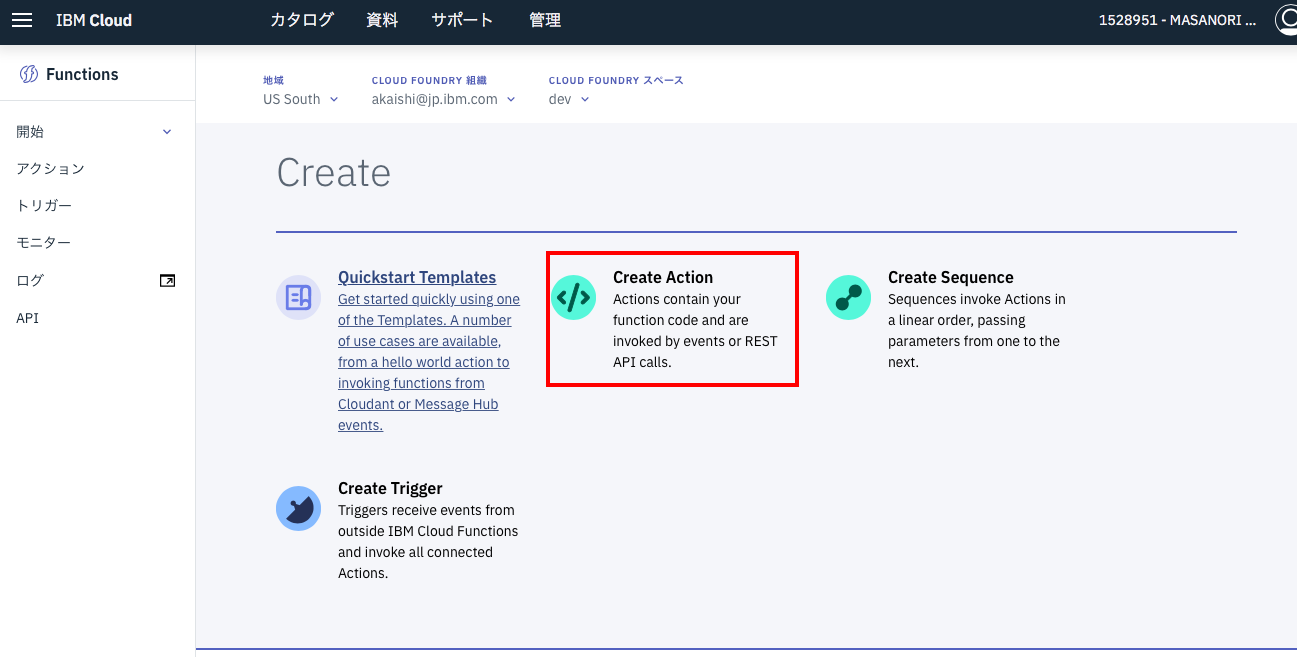
下の画面が表示されたら「作成の開始」をクリックします。
次の画面では「Create Action」をクリック。
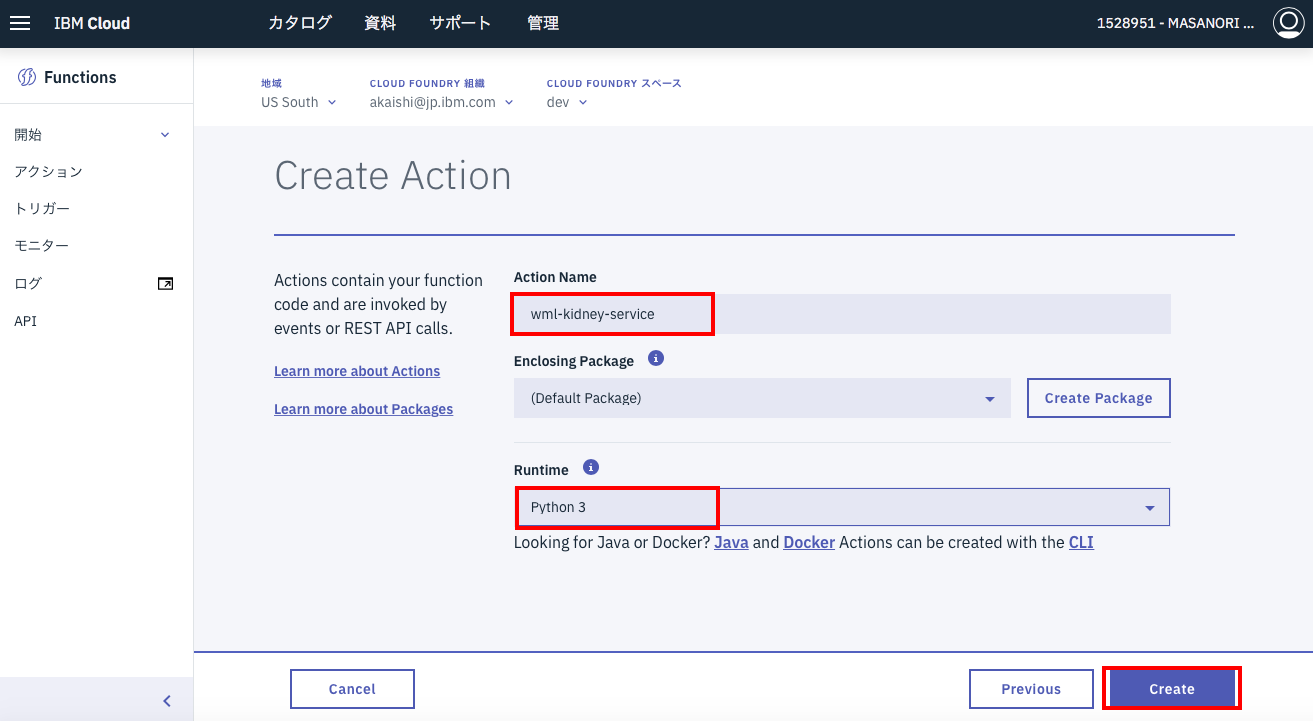
下の画面が出たら、
Action Name: wml-kidney-service
Runtime: Python 3
を入力して「Create」をクリック。
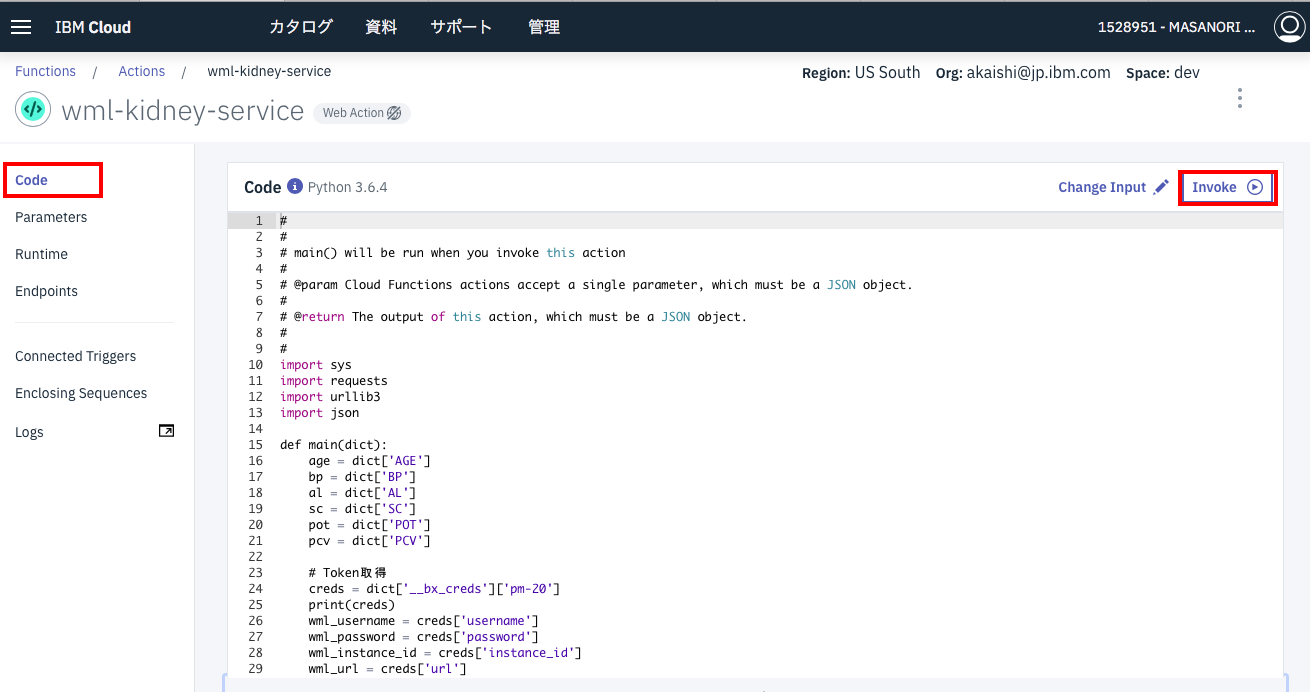
コード編集画面が出たら、コードの中身を下記のものに置き換えて下さい。
(scoring_urlの定義は、上のステップで取得したものにします。)
置き換えが終わったら、「Save」をクリックします。
#
#
# main() will be run when you invoke this action
#
# @param Cloud Functions actions accept a single parameter, which must be a JSON object.
#
# @return The output of this action, which must be a JSON object.
#
#
import sys
import requests
import urllib3
import json

def main(dict):
    age = dict['AGE']
    bp = dict['BP']
    al = dict['AL']
    sc = dict['SC']
    pot = dict['POT']
    pcv = dict['PCV']

    # Token取得
    creds = dict['__bx_creds']['pm-20']
    print(creds)
    wml_username = creds['username']
    wml_password = creds['password']
    wml_instance_id = creds['instance_id']
    wml_url = creds['url']
    auth = '{username}:{password}'.format(username = wml_username, password = wml_password)
    header_basic_auth = urllib3.util.make_headers(basic_auth=auth)
    url = '{}/v3/identity/token'.format(wml_url)
    mltoken =  json.loads( requests.get(url, headers=header_basic_auth).text )['token']
    #print('mltoken = ', mltoken)

    # Scoring API呼出し
    scoring_url = 'xxxx'
    header_token = {'Content-Type': 'application/json', 'Authorization': 'Bearer ' + mltoken}
    value1 = [None, age, bp, al, sc, pot, pcv]
    payload_scoring = {"fields": ["CLASS", "AGE", "BP", "AL", "SC", "POT", "PCV"], "values": [value1]}
    #print(payload_scoring)
    scoring_response = requests.post(scoring_url, json=payload_scoring, headers=header_token)
    print(scoring_response)

    # 結果解析
    res = json.loads( scoring_response.text )
    print(res)
    fields = res['fields']
    ret_list = res['values']
    ret = ret_list[0]
    cls = ''
    prob = 0
    for index, field in enumerate(fields):
        if field == '$L-CLASS':
            cls = ret[index]
        if field == '$LC-CLASS':
            prob = round(ret[index], 4)
    ret = {cls: prob}
    return(ret)
Cloud Functionプラグインの導入
Cloud Functionプラグインの導入がまだの場合(bx wskコマンドが使えない)は、下記リンクからプラグインの導入を行います。
Cloud Functionプラグイン
MLサービスとのバインド
まず、次のコマンドで作成したFunctionサービスの名称を確認します。
$ bx login
$ bx wsk action list
次のコマンドで、Watson MLサービスとバインドします。
$ bx wsk service bind pm-20 wml-kidney-service
複数のWatson MLサービスがある場合は、以下のようにインスタンス名もオプションで追加します。
$ bx wsk service bind pm-20 wml-kidney-service --instance <instance_name>
正常にバインドされているかどうかは、次のコマンドでわかります。
bx wsk action get wml-kidney-service
バインドされている場合、usernameやpasswordなどの情報も、__bx_credsの配下に設定されています。
テスト用パラメータの設定
Cloud Functionの管理画面から「アクション」->「wml-kidney-service」を選択し、先ほど作ったCloud Functionの詳細画面を表示します。
メニューから「Parameters」を選択し、「Add」をクリックして、以下のパラメータとデフォルト値を順に設定していきます。
| 変数 | 値 |
|---|---|
| AGE | 21 |
| BP | 90 |
| AL | 4 |
| SC | 1.7 |
| POT | 3.5 |
| PCV | 23 |
下の図のように全部設定が終わったら、「Save」をクリックして下さい。
テスト
これですべての設定が完了しました。
メニューから再び「Code」を選択し、画面右の「Invoke」をクリックします。
うまくいくと、下の図のような結果が帰ってきます。
うまくいかない場合は、エラーメッセージを元にデバッグを行って下さい。
(注意)bindコマンドはソースコードを修正する度に発行しなおす必要があります。


