Apache Cordovaのチュートリアルがあったのでやりました
試したのはこのチュートリアルです。
なんでCordovaやってんの?
Cordovaについて軽く触れときます。CordovaはPhoneGapというマルチデバイス対応のアプリ作成のフレームワークが元でニトビという会社が作っていたものをアドビが買収してApacheにオープンソースのプロジェクトとして寄贈したものです。2009年からあるので結構色々積み上がってますね。いろいろシングルページアプリケーション用のフレームワークが流行ってるんですが、よくわからないのでお仕着せのものを利用することにしました。
以下、作業です。チュートリアルのまんまですのでほとんど意味ないかも。でもnodebrew使ったところだけ違うかな。ブラウザだけでやりました。
環境の準備
Module 1: Creating a Cordova Project
とりあえずnode.jsのインストールをnodebrewでやった。
curl -L git.io/nodebrew | perl - setup
セットアップすると最新のv4.0.0がはいっていた。
nodebrew list
v4.0.0

which npm
/Users/myname/.nodebrew/current/bin/npm
なんとなくよくわかんないけどお作法似てると思うから、useってしといた
nodebrew use v4.0.0
cordovaはコマンドラインで環境を整えるようなので、コマンドラインのインストール
npm install -g cordova
which cordova
/Users/yourname/.nodebrew/current/bin/cordova
アプリ作成の初期作成
Module 2: Building a Cordova Project
自分のパッケージ名と作業用のプロジェクトのディレクトリ作る。yournameは自分の名前に。
cordova create workshop com.yourname.workshop Workshop
ディレクトリに移動
cd workshop
ここで、チュートリアルではプラットフォームの選択(iOSとかAndroidとか)をするのだが、とりあえずどんなものかブラウザで見たいので追加しなかった。
なんのプラグインなのかわからないけど、この後のチュートリアルで使うっぽいのでプラグインをインストール。
必要なプラグインのインストール
cordova plugin add org.apache.cordova.device
cordova plugin add org.apache.cordova.console
一応プラグインをインストールしたあと、ブラウザで動かすときは、こんな風にするらしいのを何処かで見たので、実施しておいた。
動かすプラットフォームの設定
cordova platform add browser
そしたら、ブラウザ用にプラグインをインストールしてくれた。手順的には、platform addのほうが先のはずなんだけど、後でやっても追従してくれる感じなのかな?
cordova platform add browser
Adding browser project...
Running command: /Users/yourname/.cordova/lib/npm_cache/cordova-browser/4.0.0/package/bin/create /Users/yourname/Dropbox/Develop/workshop/platforms/browser com.yourname.workshop Workshop
Creating Browser project. Path: platforms/browser
Discovered plugin "cordova-plugin-whitelist" in config.xml. Installing to the project
Fetching plugin "cordova-plugin-whitelist@1" via npm
Installing "cordova-plugin-whitelist" for browser

This plugin is only applicable for versions of cordova-android greater than 4.0. If you have a previous platform version, you do *not* need this plugin since the whitelist will be built in.

Installing "cordova-plugin-console" for browser
Installing "cordova-plugin-device" for browser
とりあえずこの時点でブラウザで開いてみたらこんな感じに。
これはどうやら動いていない事になってるみたいっていうかちゃんとbuildする作業が必要です。
設定したアプリをbuildする
ということで次の手順でブラウザ用のbuildをする。
cordova build browser
Running command: /Users/ishimaru/Dropbox/Develop/workshop/platforms/browser/cordova/build
Cleaning Browser project
Browser packaged app built in platforms/browser/build/package.zip
buildするとplatformsディレクトリ内にbrowserとかiosとかあるんだけど、その中のbuildディレクトリにzipファイルができるみたい。
ブラウザでの動作をEmulation(意味なさそうだけどw)
cordova emulate browser
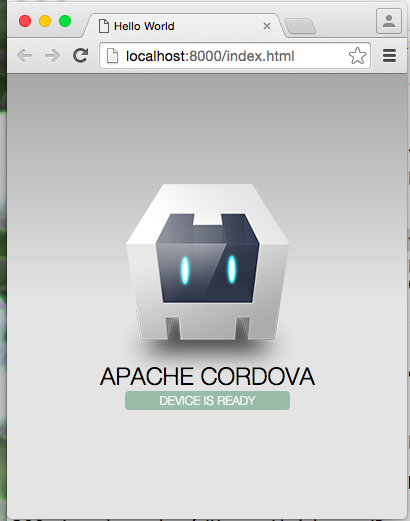
そしたら、動いてるよってメッセージでました。いいですね。
何を持って「DEVICE IS READY」になってるか理解していないけど次に行く。
チュートリアル用のファイルを設定してちょっと動かす
Module 3: Setting Up the Workshop Files
一旦消す。(´・ω・`)
pwd /Users/yourname/Dropbox/Develop/workshop
rm -rf www
クローンしてきて、startar-wwwをwwwにコピーするらしいのでした。
git clone https://github.com/ccoenraets/cordova-tutorial
cd cordova-tutorial
cp -pR starter-www ../www
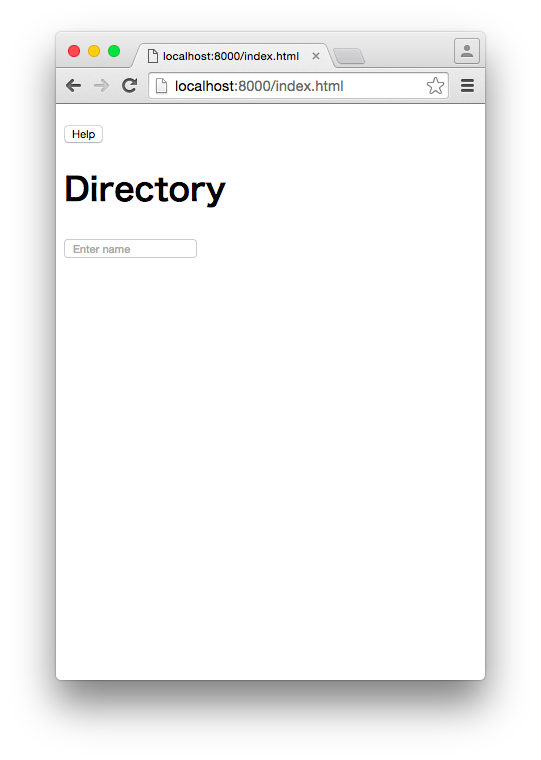
ビルドしなおしてブラウザで見るとChromeが立ち上がって動いた。
cordova build browser
cordova emulate browser
(わざわざビルドしたけど、普通にブラウザでファイル開いたら同じように動きました。)
jsonをサーバーサイドから取ってくる動きを試すには、
Module 4: Choosing a Data Storage Strategy
jsonをサーバーサイドから取ってくる動きを試すには、
<script src="js/services/memory/EmployeeService.js"></script>
これを
<script src="js/services/json/EmployeeService.js"></script>
に変えたらいいみたい。中身の実装置き換えてみてねと。
サーバーサイドは、git cloneしたところの、ここ/Users/ishimaru/Dropbox/Develop/workshop/cordova-tutorial/server
に入っているので、そこでとりあえずnode moduleをインストールしてサーバーを動かせとのこと。
cd cordova-tutorial/server
npm install
した。
package.jsonの中身を見てinstallしてくれて、node_modulesってディレクトリにインストールされるのでこれを使ってサーバーを動かす。
node server
よく見えないけど動いた。
ダイアログをnativeにするらしい
Module 5: Using Native Notification
ダイアログのプラグインをインストール
cordova plugin add org.apache.cordova.dialogs
cordova用のgenerateされるjsを読み込むようにindex.htmlにかく
<script src="cordova.js"></script>
</body>
</html>
ブラウザのwindow.alertをoverrideするロジックを書く。
document.addEventListener('deviceready', function () {
  if (navigator.notification) { // Override default HTML alert with native dialog
      window.alert = function (message) {
          navigator.notification.alert(
              message,    // message
              null,       // callback
              "Workshop", // title
              'OK'        // buttonName
          );
      };
  }
}, false);
でまた、ビルドして見てみる。
cordova build browser
cordova emulate browser
ちょっとHelpボタン押してもalert動かないね。まいっか。
つぎをする。
クリックが300msec遅れるのをすぐ対応するようにするらしい。
Module 6: Avoiding the 300ms Click Delay
fastclick.jsを読むようにした。
<script src="lib/fastclick.js"></script>
<script src="cordova.js"></script>
</body>
</html>
FastClick.attachを足した。
document.addEventListener('deviceready', function () {
  if (navigator.notification) { // Override default HTML alert with native dialog
      window.alert = function (message) {
          navigator.notification.alert(
              message,    // message
              null,       // callback
              "Workshop", // title
              'OK'        // buttonName
          );
      };
  }
}, false);
FastClick.attach(document.body);
実際よくわからないけどalertが動いたのでokとする。
シングルページアプリケーションにする。
Module 7: Setting Up a Single-Page Application
scriptタグ以外のbodyタグの中のdomを全部消すらしい。なんかほかのフレームワーク(Monacaとか)でも一回消してからやるのが普通っぽいです。
こうなったよ。
<!DOCTYPE html>
<html>
<head>
    <meta charset="utf-8">
    <meta name="viewport" content="width=device-width, initial-scale=1.0, user-scalable=no, minimum-scale=1.0, maximum-scale=1.0">
</head>
<body>

<script src="cordova.js"></script>
<script src="lib/fastclick.js"></script>
<script src="lib/jquery.js"></script>
<script src="js/services/memory/EmployeeService.js"></script>
<script src="js/app.js"></script>

</body>
</html>
index.htmlに最初に書いてあったdomを生成するfunctionをjsの中につくる。local functiosのブロックのところに書いた。
    function renderHomeView() {
        var html =
            "<h1>Directory</h1>" +
            "<input class='search-key' type='search' placeholder='Enter name'/>" +
            "<ul class='employee-list'></ul>";
        $('body').html(html);
        $('.search-key').on('keyup', findByName);
    }
そのあと、このfunctionをservice.initializeってやってるところで呼び出すようにした。
    service.initialize().done(function () {
        renderHomeView();
    });
そして、「Event Registration」のブロックにある重複した処理をけす。
renderHomeView の処理の中身を見るとわかるように、bodyの中からhelpボタンを無くしちゃうのと、search-keyでキーボードから手を話したら検索開始するっていうイベント処理が、renderHomeViewの中で実装されることになるので、以下の2つのブロックを消す。
$('.search-key').on('keyup', findByName);
$('.help-btn').on('click', function() {
    alert("Employee Directory v3.4");
});
これで修正は終わりなので、動作確認する。
わかりにくいからapp.jsの結果の全部のソースを書くとこうなってる。
// We use an "Immediate Function" to initialize the application to avoid leaving anything behind in the global scope
(function () {

    /* ---------------------------------- Local Variables ---------------------------------- */
    var service = new EmployeeService();
    service.initialize().done(function () {
        renderHomeView();
    });

    /* --------------------------------- Event Registration -------------------------------- */
    document.addEventListener('deviceready', function () {
        if (navigator.notification) { // Override default HTML alert with native dialog
            window.alert = function (message) {
                navigator.notification.alert(
                    message,    // message
                    null,       // callback
                    "Workshop", // title
                    'OK'        // buttonName
                );
            };
        }
    }, false);
    FastClick.attach(document.body);

    /* ---------------------------------- Local Functions ---------------------------------- */
    function findByName() {
        service.findByName($('.search-key').val()).done(function (employees) {
            var l = employees.length;
            var e;
            $('.employee-list').empty();
            for (var i = 0; i < l; i++) {
                e = employees[i];
                $('.employee-list').append('<li><a href="#employees/' + e.id + '">' + e.firstName + ' ' + e.lastName + '</a></li>');
            }
        });
    }

    function renderHomeView() {
        console.log("renderHomeView start");
        var html =
            "<h1>Directory</h1>" +
            "<input class='search-key' type='search' placeholder='Enter name'/>" +
            "<ul class='employee-list'></ul>";
        $('body').html(html);
        $('.search-key').on('keyup', findByName);
        console.log("renderHomeView end");
    }

}());
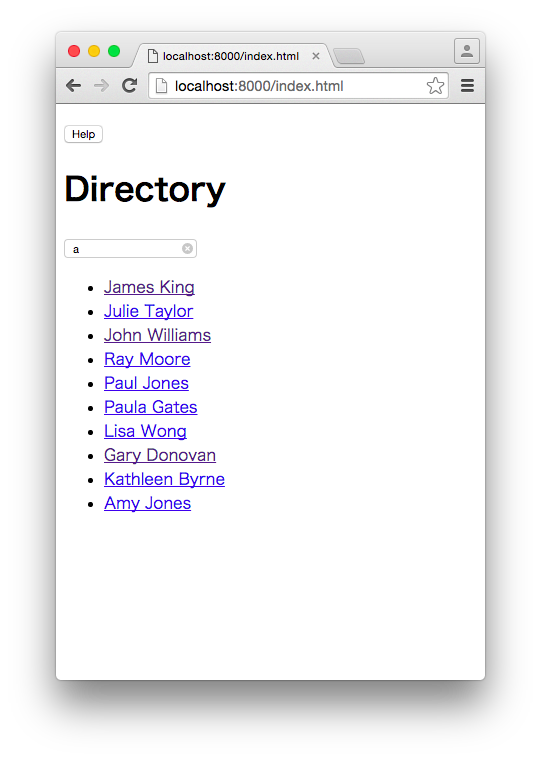
では動作確認すると、動いてたのでok。
動作確認のためのビルドとアプリの立ち上げは、何度も書いたけど以下の感じで。
cordova build ios
cordova emulate ios
僕はブラウザなので何もしなかった。
これで一応シングルページアプリケーションになったみたいだけど感動の無さww。
htmlを文字列の中に入れて書くのもなんなので、templateエンジンを導入するらしい
Module 8: Using Handlebars Templates
事前準備でライブラリのCSSとjsを読むようにする
bodyにテンプレートエンジンの本体ソースを読むようにする。テンプレートエンジンは、これらしい。handlebars
<script src="lib/handlebars.js"></script>
あと、モバイル用のRatchetっていうスタイルシートをあてるって。
Ratchet
index.htmlのheadに以下のように書いた。
<link href="assets/ratchet/css/ratchet.css" rel="stylesheet">
<link href="assets/css/styles.css" rel="stylesheet">
それから、テンプレートエンジンにhtmlを移していくみたい。
ふつうに bodyタグの中に入れるらしいんだけど、不思議な形。scriptタグの中にhtmlがそのまま書いてある風味。
検索バーの部品のテンプレートを書く。
first child of the body tagに書けと。
<body>の直後に書けばいいみたいですね。
<script id="home-tpl" type="text/template">
    <header class="bar bar-nav">
        <h1 class="title">Directory</h1>
    </header>
    <div class="bar bar-standard bar-header-secondary">
        <input class='search-key' type="search"/>
    </div>
    <div class="content"></div>
</script>
検索結果の従業員のリストのテンプレート。
これを上のに続いてかけと。
<script id="employee-list-tpl" type="text/template">
    <ul class="table-view">
        {{#each this}}
        <li class="table-view-cell media">
            <a href="#employees/{{ id }}">
                <img class="media-object pull-left" src="assets/pics/{{pic}}">
                <div class="media-body">
                    {{firstName}} {{lastName}}
                    <p>{{title}}</p>
                </div>
            </a>
        </li>
        {{/each}}
    </ul>
</script>
テンプレートは、Handlebars.compileってやってjavascriptの中の変数にロードしておくみたいですね。なので、app.jsに変数を2つ追加する。「Local Variables」のブロックに入れておけばいいっぽい。
var homeTpl = Handlebars.compile($("#home-tpl").html());
var employeeListTpl = Handlebars.compile($("#employee-list-tpl").html());
renderHomeViewの中でhtmlを文字列連結して作ってたやつを消して、テンプレートの変数を読むようにする。homeTpl()ってのがそれ。
function renderHomeView() {
    $('body').html(homeTpl());
    $('.search-key').on('keyup', findByName);
}
findByNameってfunctionが最初からあるんだけどそれの中にあるhtmlベタ書きの部分もtemplateを利用するようにする。
function findByName() {
    service.findByName($('.search-key').val()).done(function (employees) {
        $('.content').html(employeeListTpl(employees));
    });
}
動いた。
綺麗に動いた。でもスクショ略します。
つづいては、iOS7でエラーがでるステータスバーの問題をfixする
プラグインをインストール(ステータスバー用のプラグインか…)
cordova plugins add org.apache.cordova.statusbar
devicereadyに、対応処理を追加しておく。
document.addEventListener('deviceready', function () {から}の間に書くと、devicereadyの初期化処理に追加処理を入れられます。
StatusBar.overlaysWebView( false );
StatusBar.backgroundColorByHexString('#ffffff');
StatusBar.styleDefault();
browserでやってるから、前のと差分が分からないけど、動いたのでok。
Viewをクラスに分ける
Module 9: Creating View Classes
ゴニョゴニョと各Viewの実装をファイルを分けてクラスを作ってますね。ダルイので結果だけ貼ります。
やったことは、snip...
結果のファイルはこれ。
<!DOCTYPE html>
<html>
<head>
    <meta charset="utf-8">
    <meta name="viewport" content="width=device-width, initial-scale=1.0, user-scalable=no, minimum-scale=1.0, maximum-scale=1.0">
    <link href="assets/ratchet/css/ratchet.css" rel="stylesheet">
    <link href="assets/css/styles.css" rel="stylesheet">
</head>
<body>
<script id="home-tpl" type="text/template">
    <header class="bar bar-nav">
        <h1 class="title">Directory</h1>
    </header>
    <div class="bar bar-standard bar-header-secondary">
        <input class='search-key' type="search"/>
    </div>
    <div class="content"></div>
</script>

<script id="employee-list-tpl" type="text/template">
    <ul class="table-view">
        {{#each this}}
        <li class="table-view-cell media">
            <a href="#employees/{{ id }}">
                <img class="media-object pull-left" src="assets/pics/{{pic}}">
                <div class="media-body">
                    {{firstName}} {{lastName}}
                    <p>{{title}}</p>
                </div>
            </a>
        </li>
        {{/each}}
    </ul>
</script>

<script src="cordova.js"></script>
<script src="lib/fastclick.js"></script>
<script src="lib/handlebars.js"></script>
<script src="lib/jquery.js"></script>
<script src="js/services/memory/EmployeeService.js"></script>

<script src="js/EmployeeListView.js"></script>
<script src="js/HomeView.js"></script>
<script src="js/app.js"></script>

</body>
</html>
// We use an "Immediate Function" to initialize the application to avoid leaving anything behind in the global scope
(function () {

    /* ---------------------------------- Local Variables ---------------------------------- */
    var service = new EmployeeService();

    HomeView.prototype.template = Handlebars.compile($("#home-tpl").html());
    EmployeeListView.prototype.template = Handlebars.compile($("#employee-list-tpl").html());

    service.initialize().done(function () {
        $('body').html(new HomeView(service).render().$el);
    });

    /* --------------------------------- Event Registration -------------------------------- */
    document.addEventListener('deviceready', function () {
        if (navigator.notification) { // Override default HTML alert with native dialog
            window.alert = function (message) {
                navigator.notification.alert(
                    message,    // message
                    null,       // callback
                    "Workshop", // title
                    'OK'        // buttonName
                );
            };
        }

        StatusBar.overlaysWebView( false );
        StatusBar.backgroundColorByHexString('#ffffff');
        StatusBar.styleDefault();

    }, false);
    FastClick.attach(document.body);

}());
var HomeView = function (service) {

    var employeeListView;

    this.render = function() {
        this.$el.html(this.template());
        $('.content', this.$el).html(employeeListView.$el);
        return this;
    };

    this.findByName = function() {
        service.findByName($('.search-key').val()).done(function(employees) {
            employeeListView.setEmployees(employees);
        });
    };

    this.initialize = function () {
        // Define a div wrapper for the view (used to attach events)
        this.$el = $('<div/>');
        this.$el.on('keyup', '.search-key', this.findByName);
        employeeListView = new EmployeeListView();
        this.render();
    };

    this.initialize();

}
var EmployeeListView = function () {

    var employees;

    this.initialize = function() {
        this.$el = $('<div/>');
        this.render();
    };

    this.setEmployees = function(list) {
        employees = list;
        this.render();
    }

    this.render = function() {
        this.$el.html(this.template(employees));
        return this;
    };

    this.initialize();

}
動いた。
次はViewの制御でURLに対応して、別のテンプレートを表示する動きを実装するみたい。
Module 10: Implementing View Routing
ここは難しくないからスキップしちゃおうかな。コピペで動きました。
次はハードウェアアプセラレーションってことで、ページがスライドするアニメーション
Module 11: Using Hardware Acceleration
ここも難しくないからスキップしちゃおうかな。コピペで動きました。
次は、位置情報のAPI
Module 12: Using the Location API
さらに、また難しくないのでスキップw。コピペで動きました。
MacのブラウザではChromeでは動かずSafariだと「一日だけ位置情報の利用を許可?」ってのがでたあとちゃんと動きました。
次は、連絡先API
Module 13: Using the Contacts API
さらに、また難しくないのでスキップw。コピペですが動きませんでした。連絡先APIはブラウザからは連携しないみたいです。
最後は、CameraAPI
Module 14: Using the Camera API
さらに、また難しくないのでスキップw。コピペですが動きませんでした。カメラAPIもMacのブラウザからは連携しないみたいです。
ということで最後まで試しました。
作り方的にはなるほどって感じ。
シングルページアプリケーションってこんな感じで実装するのかってのがつかめました。ただのjavascriptだったwwでもjsでのテンプレートエンジンとか教えていただいて感謝。
日本語ではこちらを参考にさせて頂きました。
Cordova(コルドバ)チュートリアル1 Cordovaプロジェクトの作成|Symfowareについての考察blog
チュートリアルのあれ。
cordova-tutorial


