はじめに
アプリと言えば通知機能、というわけでFirebase Cloud Messaging(FCM)を利用してiOSアプリの通知機能を作成していきたいと思います。iOSはAPN、AndroidはGCMと個別の技術で開発する方法もありますが、FCMを利用すればなんと共通のコードで通知機能を実現できます。
実装のゴール
ゼロからReactNativeのプロジェクトをはじめて、通知センターに通知が表示されて、通知のタップ情報をアプリで受け取れるところまでをゴールとして進めていきます。
プロジェクトの作成
まずはinitコマンドでプロジェクトを作成します。
react-native init FCMNotification
react-native-fcmパッケージの追加
react-native-fcmパッケージを利用して実装するので追加します。linkもしときましょう。
yarn add react-native-fcm
react-native link react-native-fcm
Xcodeプロジェクトの設定変更
Cocoapodsのセットアップ
※ cocoapodsがない場合はgem install cocoapodsしておきましょう。
iOSのディレクトリに移動して、CocoapodsをXcodeプロジェクトで利用できる状態にします。
cd ios && pod init
続けて、以下のようにPodfileを書き換えます。
# Uncomment the next line to define a global platform for your project
# platform :ios, '9.0'

target 'FCMNotification' do
  # Uncomment the next line if you're using Swift or would like to use dynamic frameworks
  # NOTE: コメントを外す
  use_frameworks!

  # Pods for FCMNotification
  # NOTE: Firebase/Messagingを追加
  pod 'Firebase/Messaging'

  target 'FCMNotificationTests' do
    inherit! :search_paths
    # Pods for testing
  end
end
Xcodeプロジェクト内のコードの書き換え
続いて以下のコマンドでXcodeを開き、プロジェクト内のファイルを書き換えます。
open FCMNotification.xcworkspace
※ pod initによってプロジェクト名.xcworkspaceというプロジェクトファイルが生成されます。間違えて.xcodeprojのプロジェクトファイルを開かないように注意。
AppDelegate.hを以下のように書き換えます。
# import <UIKit/UIKit.h>

@import UserNotifications;

@interface AppDelegate : UIResponder <UIApplicationDelegate, UNUserNotificationCenterDelegate>

@property (nonatomic, strong) UIWindow *window;

@end
続けてAppDelegate.mを以下のように書き換えます。
# import "AppDelegate.h"

# import "RCTBundleURLProvider.h"
# import "RCTRootView.h"

# import "RNFIRMessaging.h"

@implementation AppDelegate

- (BOOL)application:(UIApplication *)application didFinishLaunchingWithOptions:(NSDictionary *)launchOptions
{
  NSURL *jsCodeLocation;

  jsCodeLocation = [[RCTBundleURLProvider sharedSettings] jsBundleURLForBundleRoot:@"index.ios" fallbackResource:nil];

  RCTRootView *rootView = [[RCTRootView alloc] initWithBundleURL:jsCodeLocation
                                                      moduleName:@"FCMNotification"
                                               initialProperties:nil
                                                   launchOptions:launchOptions];
  rootView.backgroundColor = [[UIColor alloc] initWithRed:1.0f green:1.0f blue:1.0f alpha:1];

  self.window = [[UIWindow alloc] initWithFrame:[UIScreen mainScreen].bounds];
  UIViewController *rootViewController = [UIViewController new];
  rootViewController.view = rootView;
  self.window.rootViewController = rootViewController;
  [self.window makeKeyAndVisible];

  [FIRApp configure];
  [[UNUserNotificationCenter currentNotificationCenter] setDelegate:self];

  return YES;
}

- (void)userNotificationCenter:(UNUserNotificationCenter *)center willPresentNotification:(UNNotification *)notification withCompletionHandler:(void (^)(UNNotificationPresentationOptions))completionHandler
{
  [[NSNotificationCenter defaultCenter] postNotificationName:FCMNotificationReceived object:self userInfo:notification.request.content.userInfo];
  if([[notification.request.content.userInfo valueForKey:@"show_in_foreground"] isEqual:@YES]){
    completionHandler(UNNotificationPresentationOptionAlert | UNNotificationPresentationOptionBadge | UNNotificationPresentationOptionSound);
  }else{
    completionHandler(UNNotificationPresentationOptionNone);
  }

}

- (void)userNotificationCenter:(UNUserNotificationCenter *)center didReceiveNotificationResponse:(UNNotificationResponse *)response withCompletionHandler:(void (^)())completionHandler
{
  NSDictionary* userInfo = [[NSMutableDictionary alloc] initWithDictionary: response.notification.request.content.userInfo];
  [userInfo setValue:@YES forKey:@"opened_from_tray"];
  [[NSNotificationCenter defaultCenter] postNotificationName:FCMNotificationReceived object:self userInfo:userInfo];
}

//You can skip this method if you don't want to use local notification
-(void)application:(UIApplication *)application didReceiveLocalNotification:(UILocalNotification *)notification {
  [[NSNotificationCenter defaultCenter] postNotificationName:FCMNotificationReceived object:self userInfo:notification.userInfo];
}

- (void)application:(UIApplication *)application didReceiveRemoteNotification:(nonnull NSDictionary *)userInfo fetchCompletionHandler:(nonnull void (^)(UIBackgroundFetchResult))completionHandler{
  [[NSNotificationCenter defaultCenter] postNotificationName:FCMNotificationReceived object:self userInfo:userInfo];
  completionHandler(UIBackgroundFetchResultNoData);
}

@end
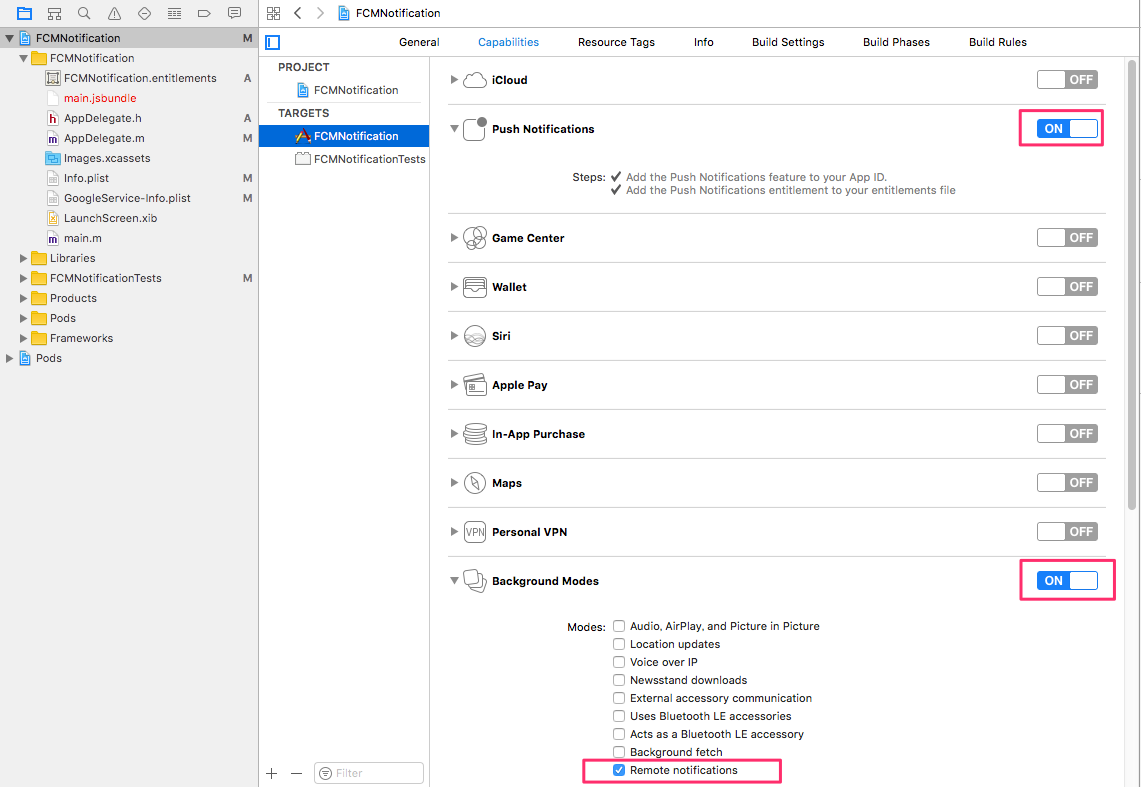
アプリの通知機能を有効にする
プロジェクトの設定から通知関連の機能を有効にしておきます。これを忘れると通知が届かないので注意!
Firebaseプロジェクトのセットアップ
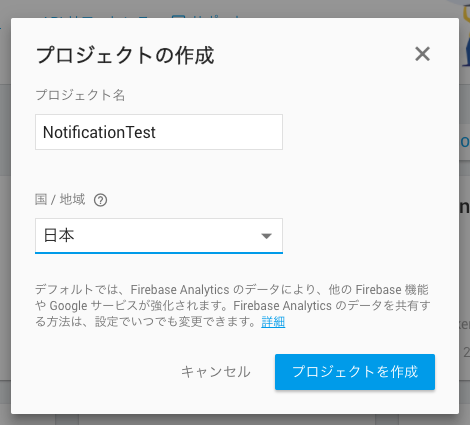
続いて、Firebaseプロジェクトを作成して、Firebaseから通知を配信できるようにします。
Firebaseプロジェクトを新規に作成する
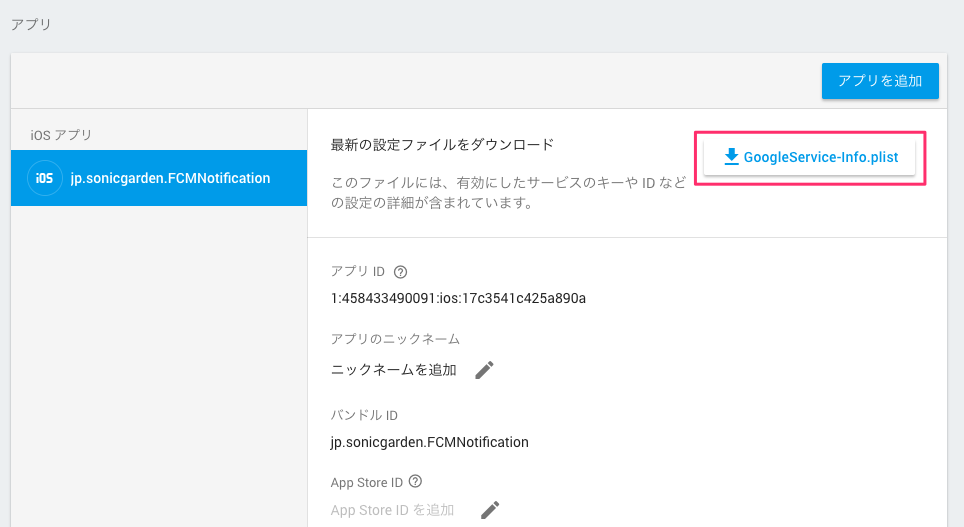
FirebaseプロジェクトにiOSアプリを追加し、GoogleService-Info.plistをダウンロードします。
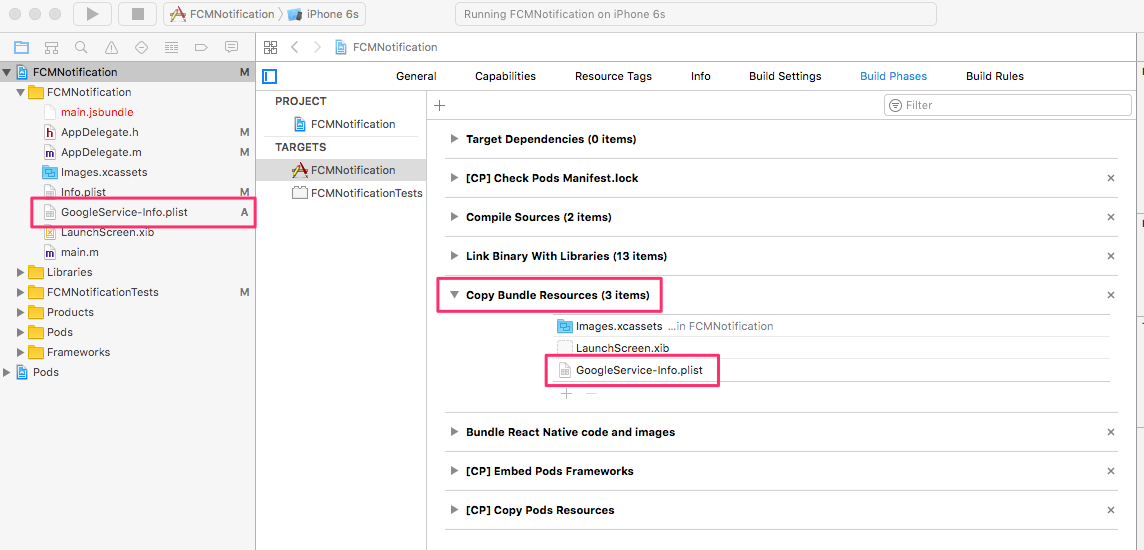
ダウンロードしたGoogleService-Info.plistをXcodeプロジェクトに追加し、Copy Bundle Resourcesに追加します。
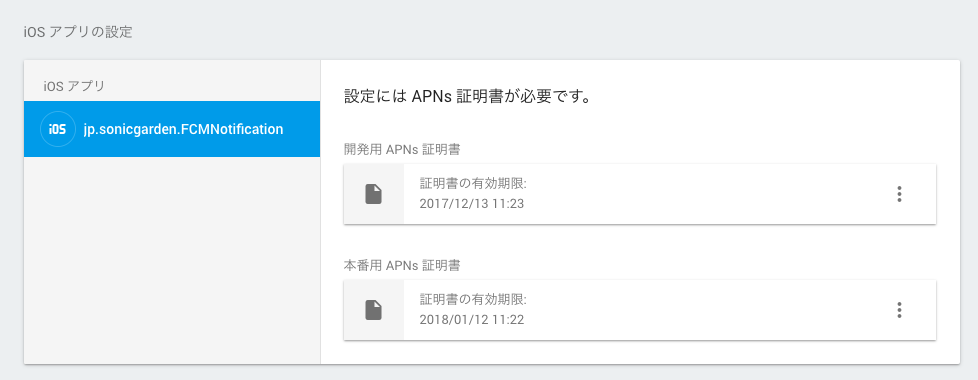
更に、FirebaseからAPNに連携するために、APNs証明書を設定しておきます。
※ APNs証明書を作成する際はfastlaneのpemを利用すると便利です(参考:fastlane の pem を使って一瞬で iOS 用の Push 通知 (Apple Push Notification Service) の証明書を作る)
ReactNative側のコードを書く
通知系の処理はNotificationというコンポーネントに切り分けています。
import React from 'react';
import { AppRegistry } from 'react-native';
import Root from './src/Root';

const FCMNotification = () => <Root />;
AppRegistry.registerComponent('FCMNotification', () => FCMNotification);
import React, { Component } from 'react';
import {
  View,
  Text,
  StyleSheet,
} from 'react-native';
import Notification from './Notification'

export default class Root extends Component {
  render() {
    return (
      <View style={styles.container}>
        <Notification />
        <Text>Notification Test</Text>
      </View>
    );
  }
}

const styles = StyleSheet.create({
  container: {
    flex: 1,
    justifyContent: 'center',
    alignItems: 'center'
  },
});
import React, { Component } from 'react';
import { View } from 'react-native';
import FCM from 'react-native-fcm';

export default class Notification extends Component {
  componentDidMount() {
    FCM.requestPermissions(); // for iOS
    FCM.getFCMToken().then(token => console.log(`[TOKEN] ${token}`));
    // 通知タップ時の処理を書く
    this.notificationUnsubscribe = FCM.on('notification', notif => console.log(notif));
    // トークンがリフレッシュされたときの処理を書く
    this.refreshUnsubscribe = FCM.on('refreshToken', token => console.log(`[TOKEN] ${token}`));
  }

  componentWillUnmount() {
    this.notificationUnsubscribe();
    this.refreshUnsubscribe();
  }

  render() {
    return (<View />);
  }
}
FCMからのイベントはFCM.onで受け取って処理します。今回は受け取った情報をそのままログとして表示するようにしています。
通知のテスト
アプリが起動するか確認
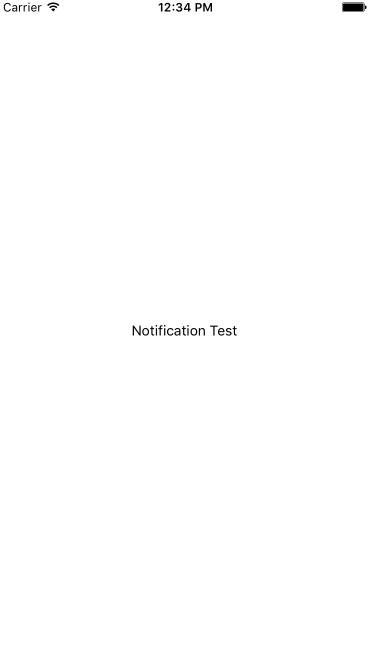
ここまでセットアップを終えると、こんなアプリが立ち上がるようになります(スクリーンショットはシミュレータで立ち上げたものです)。
Firebaseコンソールから通知のテスト
さて、ここから早速通知機能が動いているかどうかテストしていきたいと思います!
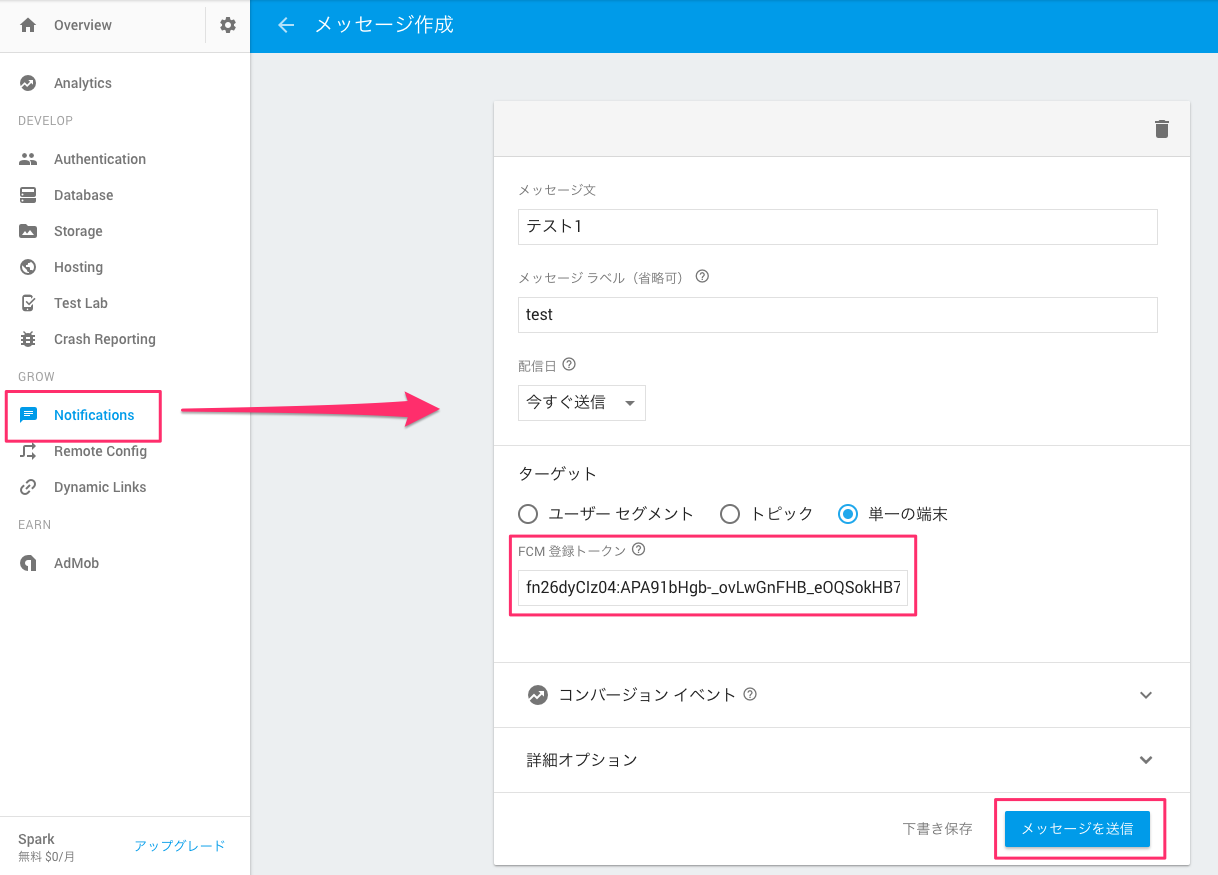
Firebaseコンソールから手動で通知を送信することができるので、まずは通知先アプリのトークンを取得します。
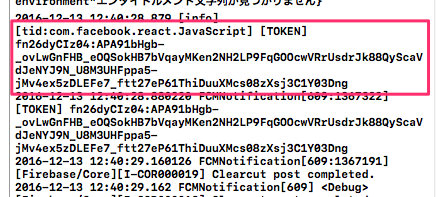
トークンを取得するためには実機でアプリを立ち上げる必要があるので、実機でアプリを立ち上げます。すると、以下のようにトークンの取得ログが表示されます。
こちらのトークンをコピって、Firebaseコンソールから通知を送信します。
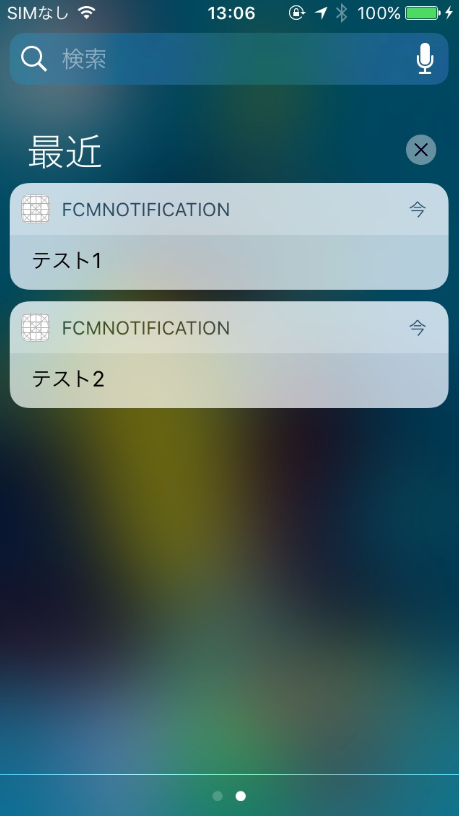
すると実機に通知が届きます。
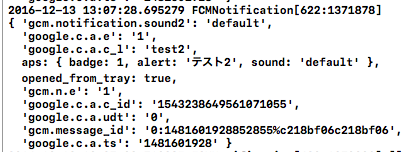
「テスト2」の通知をタップすると、Xcodeのログに以下のような情報が表示されます。
{'gcm.notification.sound2': 'default',
  'google.c.a.e': '1',
  'google.c.a.c_l': 'test2',
  aps: { badge: 1, alert: 'テスト2', sound: 'default' },
  opened_from_tray: true,
  'gcm.n.e': '1',
  'google.c.a.c_id': '1543238649561071055',
  'google.c.a.udt': '0',
  'gcm.message_id': '0:1481601928852855%c218bf06c218bf06',
  'google.c.a.ts': '1481601928' }
FCM.on('notification')イベントの引数として上記の情報が渡されるので、この情報を元にアプリ内の特定の場所に遷移したり、といった処理を書いていきます。
これで通知を動かすことができました!お疲れ様でした!
続けて次の記事でAndroid編も書こうと思います。
