Firebaseがとてつもなく便利、という話を聞いて、Xamarinから触ってみることにしました。iOSネイティブでもAndroidネイティブでもJSでもなくXamarin、という流れに、かなり回り道な感がありますが、Xamarinへの愛があればなんてことないよね。
Firebaseの設定
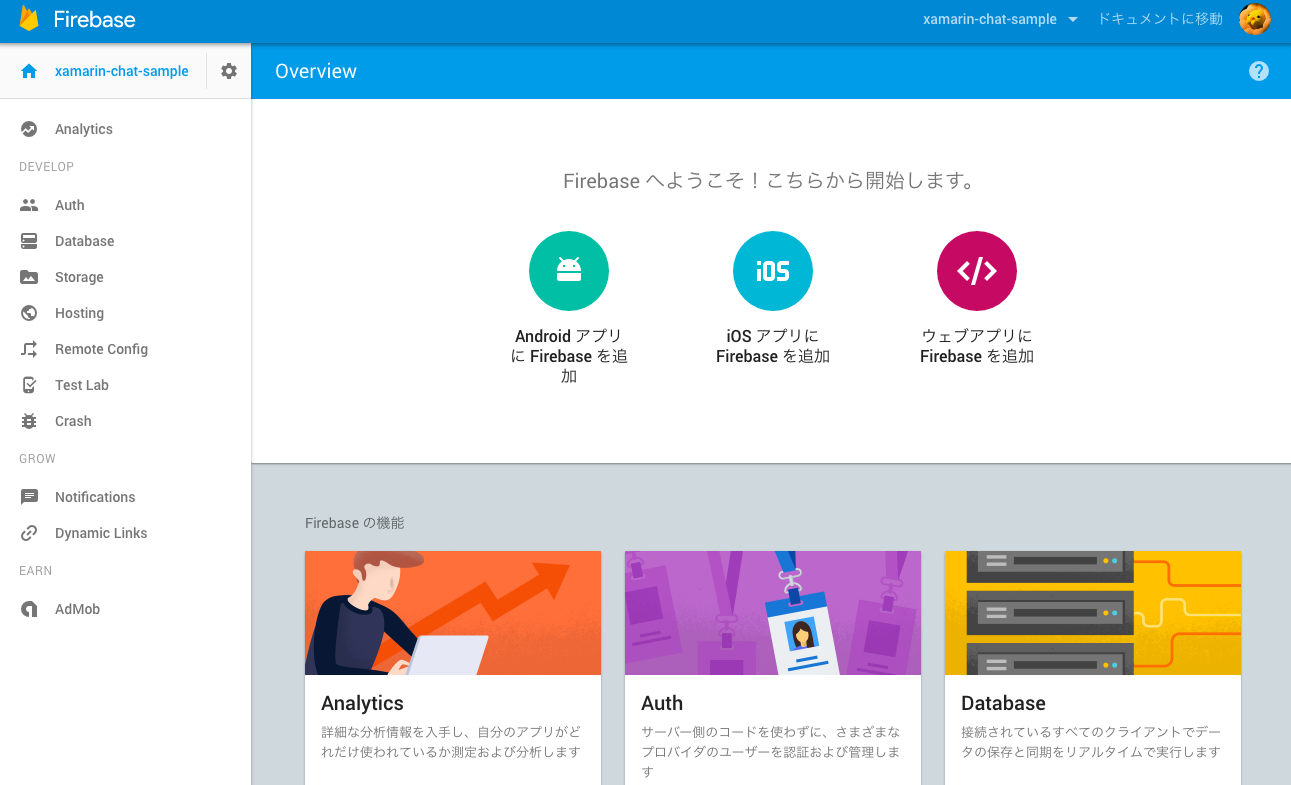
そういう訳で、まずはFirebaseの設定から。Firebaseのアカウントを作って、最初のプロジェクトを作ると、こんなページが表示されます。この例ではプロジェクトの名前を「xamarin-chat-sample」としました。
データベースへのアクセスキーの取得
まずはデータベースにアクセスするためのキーを取得します。あとでデータベースへのアクセス時に利用するので、控えておいてください。
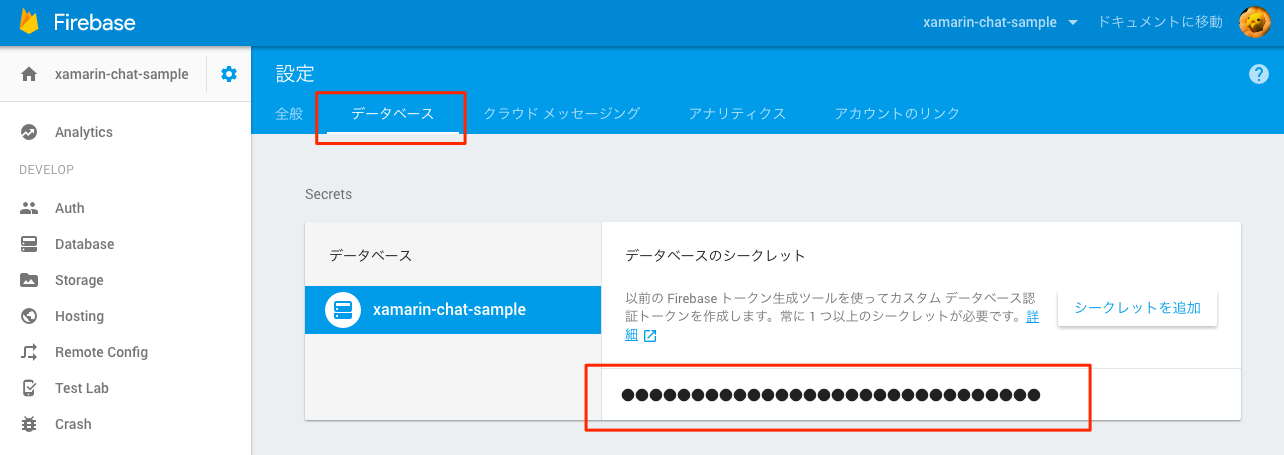
左上の設定アイコンから「プロジェクトの設定」を選択し、
「データベース」タブを選択し、●印で隠れているトークンの場所にカーソルをあわせると表示される「表示する」リンクをクリックし、アクセスキーを取得します。
データベースへのアクセス権限を公開状態にする
検証を簡単にするため、データベースへのアクセス権限を公開状態にします。
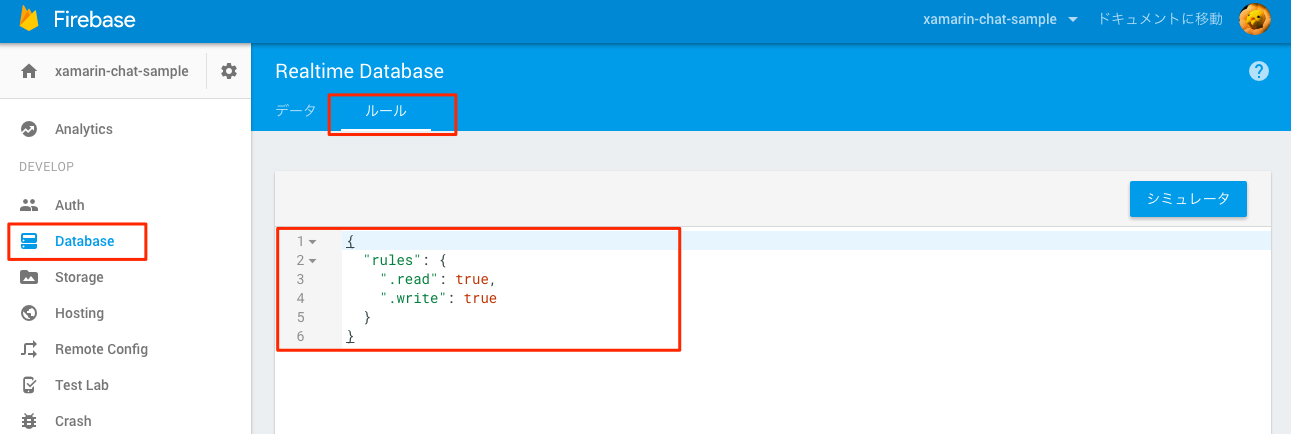
上図のように、「Database」メニューから「ルール」タブを選択し、内容を以下のように変更します。
{
  "rules": {
    ".read": true,
    ".write": true
  }
}
これでFirebase側の設定は完了です。
Xamarin側のコード
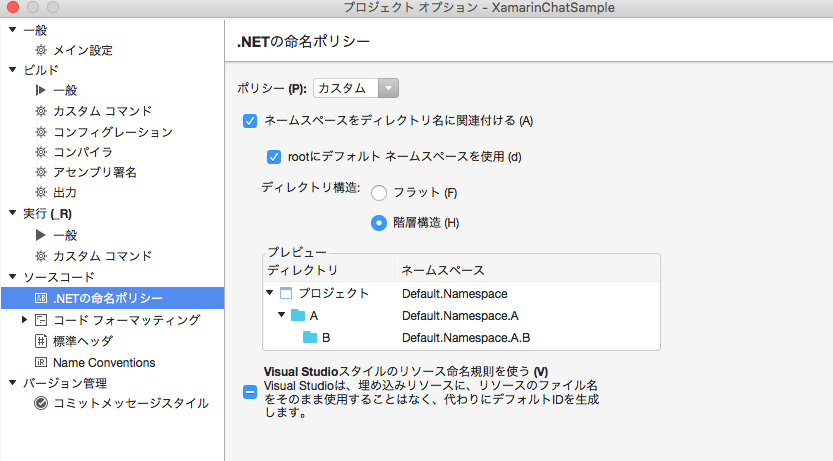
今回はXamarin.Formsのソリューションとして、XamarinChatSampleという名前でソリューションを作成しました。ウィザードでの設定はデフォルト通りです。一部、プロジェクトオプションを以下のように変更しています。最初に参考にしたコードがこの設定で書かれていたので、踏襲しているだけです。
参考にした本:Mastering Xamarin.Forms
FireSharpパッケージを追加する
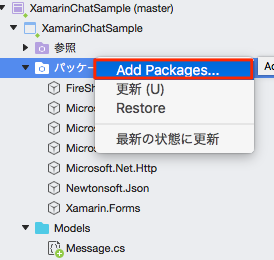
プロジェクトツリー上の「パッケージ」を右クリックして、「Add Packages...」を選択します。そこで「FireSharp」パッケージを検索し、プロジェクトに追加します。
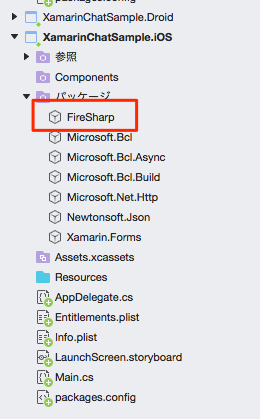
Xamarin.Forms側とあわせて、ビルドするOS側にも追加しておきましょう。
Newtonsoft.Jsonなどの依存パッケージは、FireSharpパッケージを追加するとあわせて自動的に追加されます。
参考:FireSharp
Viewを書こう
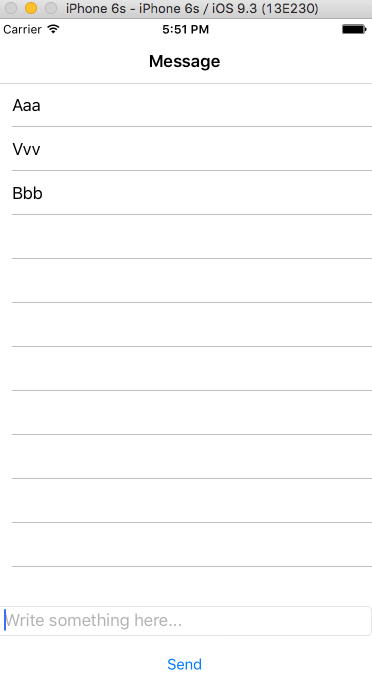
投稿したメッセージが表示されれば良いや、という訳でこんな画面を作ってみます。
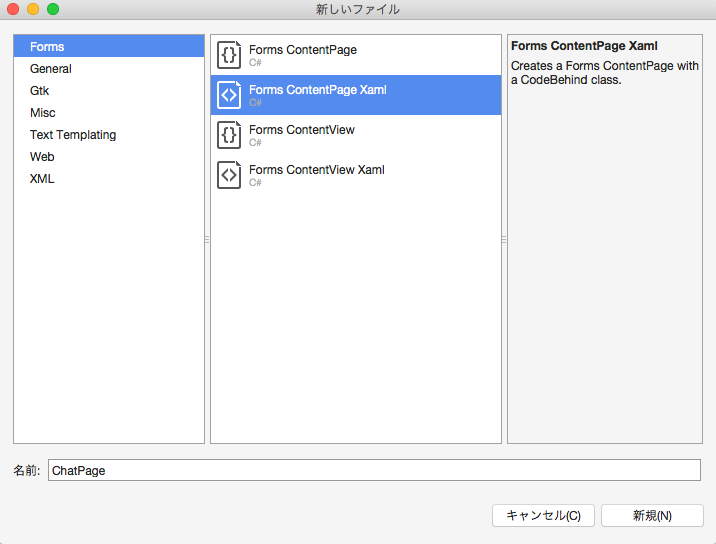
Xamarin.Formsプロジェクトに「Views」というディレクトリを追加し、その中にForms ContentPage Xamlを追加します。ここでは「ChatPage」という名前にしておきましょう。
ChatPage.xamlの中身はこんなコードになります。
<?xml version="1.0" encoding="UTF-8"?>
<ContentPage xmlns="http://xamarin.com/schemas/2014/forms" xmlns:x="http://schemas.microsoft.com/winfx/2009/xaml" x:Class="XamarinChatSample.Views.ChatPage">
	<ContentPage.Content>
		<StackLayout>
			<ListView x:Name="messagesView" VerticalOptions="FillAndExpand"></ListView>
			<StackLayout Orientation="Vertical" VerticalOptions="End">
				<Entry x:Name="content" Placeholder="Write something here..." Keyboard="Chat" />
				<Button Text="Send" WidthRequest="80" Clicked="OnSendTapped" />
			</StackLayout>
		</StackLayout>
	</ContentPage.Content>
</ContentPage>
ここで忘れないうちに、アプリを開いたときにChatPageが開かれるよう、App.xaml.csを編集しておきます。
using Xamarin.Forms;
using XamarinChatSample.Views;

namespace XamarinChatSample
{
	public partial class App : Application
	{
		public App()
		{
			InitializeComponent();

           // ここを変更↓
			MainPage = new NavigationPage(new ChatPage());
		}

		protected override void OnStart()
		{
			// Handle when your app starts
		}

		protected override void OnSleep()
		{
			// Handle when your app sleeps
		}

		protected override void OnResume()
		{
			// Handle when your app resumes
		}
	}
}
この時点でChatPage.xaml.csに空のOnSendTappedメソッドを実装してから、ビルドしてiOSシミュレータで起動すると、まっさらなリストビューが表示されると思います。
Firebaseと連携させよう
そういうわけでやっとFirebaseとの連携です。ChatPage.xaml.csの内容はこんな感じにしてみました。
using System;
using System.Collections.Generic;
using System.Collections.ObjectModel;
using FireSharp;
using FireSharp.Config;
using FireSharp.Interfaces;
using FireSharp.Response;
using Xamarin.Forms;
using XamarinChatSample.Models;

namespace XamarinChatSample.Views
{
	public partial class ChatPage : ContentPage
	{
		private IFirebaseClient firebaseClient = new FirebaseClient(new FirebaseConfig {
			AuthSecret = "(先ほど取得したデータベースへのアクセスキーをここに入力します)",
			BasePath = "https://xamarin-chat-sample.firebaseio.com"
		});

		private ObservableCollection<string> messages = new ObservableCollection<string>();

		public ChatPage()
		{
			InitializeComponent();
			Title = "Message";
			messagesView.ItemsSource = messages;
			ListenChatStream();
		}

		void OnSendTapped(object sender, EventArgs args)
		{
			AddMessage();
		}

		async void AddMessage()
		{
			var message = new Message { body = content.Text };
			await firebaseClient.PushAsync("messages/push", message);
			content.Text = "";
		}

		async void ListenChatStream()
		{
			await firebaseClient.OnAsync("messages", (sender, args, context) =>
			{
				messages.Add(args.Data);
			});
		}
	}
}
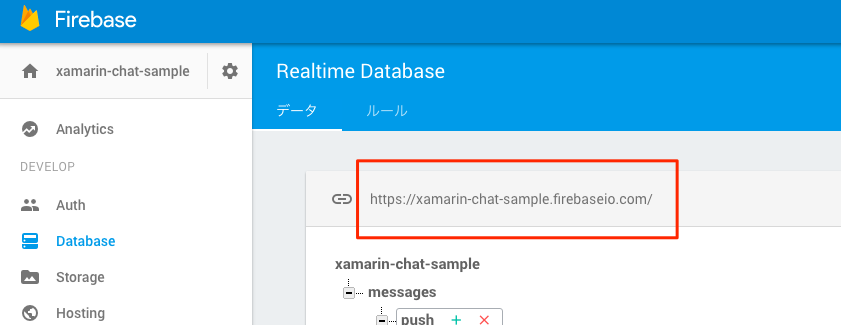
AuthSecretには先ほど取得したデータベースへのアクセスキーを入力します。BasePathはFirebaseコンソール上の以下の画面から確認することができます。
Firebaseにpushしているモデルは、以下のように定義しています。
using System;

namespace XamarinChatSample.Models
{
	public class Message
	{
		public string body { get; set; }
	}
}
上記までの実装で、テキストフィールドに何か入力してSendボタンをタップすると、Firebaseにデータが送信されて、そのデータがOnAsyncメソッドでListenされ、アプリ画面上に表示されるところまでの流れができました。ほぼリアルタイムに同期されるので、チャットぽい動作になります。
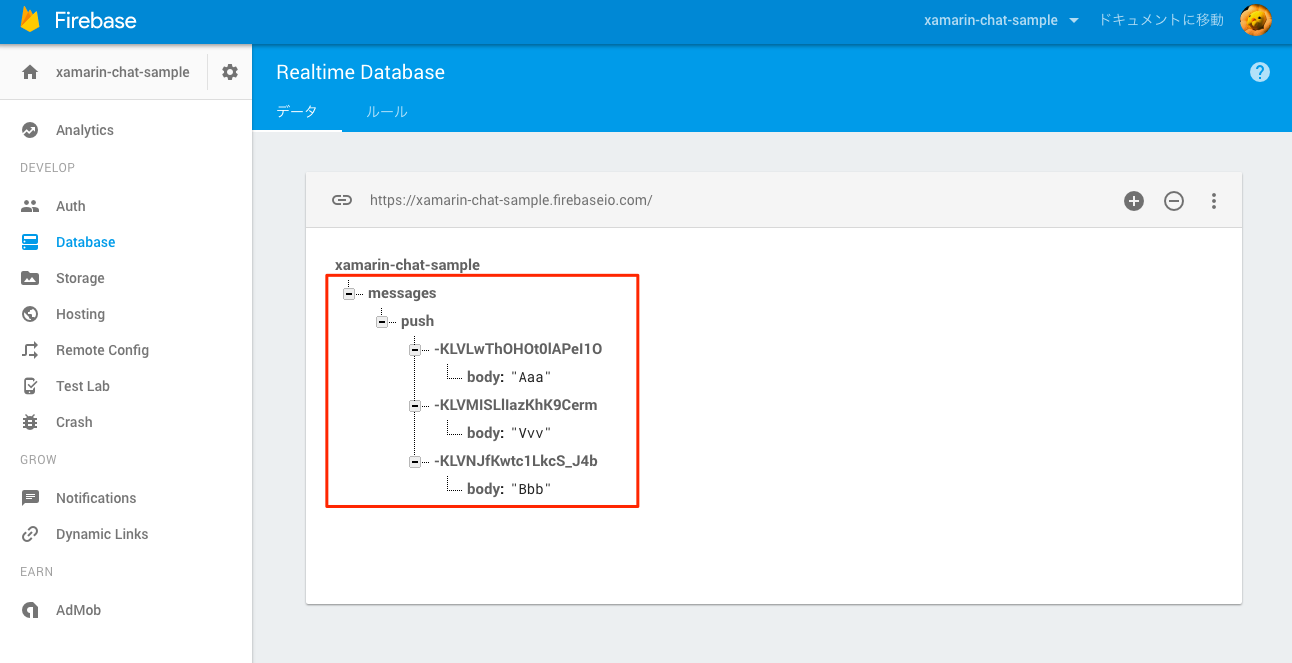
適当に何か入力してFirebaseコンソールでデータベースの内容を確認すると、以下のようにデータがちゃんと連携されているのがわかります。
あとがき
個人的にサクッとFirebaseとの連携を試してみようと思ったのですが、Firebaseコンソールの見方がよく分からなくてちょっとハマってしまったので、こんな記事を書いてみました。サクッと触ってみたい人の助けになれば幸いです。
Firebaseにはその他にも認証機能や通知機能といったものがあるので、こちらもXamarinで作例が作れれば良いなーと思っています。
