概要
CustomPaintを使用する事で複雑なUIがカスタマイズできると知り、勉強しました。
CustomPaintについて
CustomPaintを使用するためには、通常、以下の3つの要素が必要になります。
- Paint
- Path
- Canvas
Paintで色やスタイル等を指定し、Pathで描画する形状や軌跡を定義し、最終的にCanvasを使用して描画操作を行います。
CustomPaintの使い方
paint と shouldRepaint の2つのメソッドを実装します。
class MyCustomPainter extends CustomPainter {
  @override
  void paint(Canvas canvas, Size size) {
    // 描画ロジックをここに実装
  }

  @override
  bool shouldRepaint(CustomPainter oldDelegate) {
    // 描画が再度行われるべきかどうかを指定
    return false;
  }
}
CustomPaint widgetは、CustomPainterを指定し、painterプロパティにCustomPainterのインスタンスを渡します。
CustomPaint(
  painter: MyCustomPainter(),
)
クリスマスツリーを作ってみた

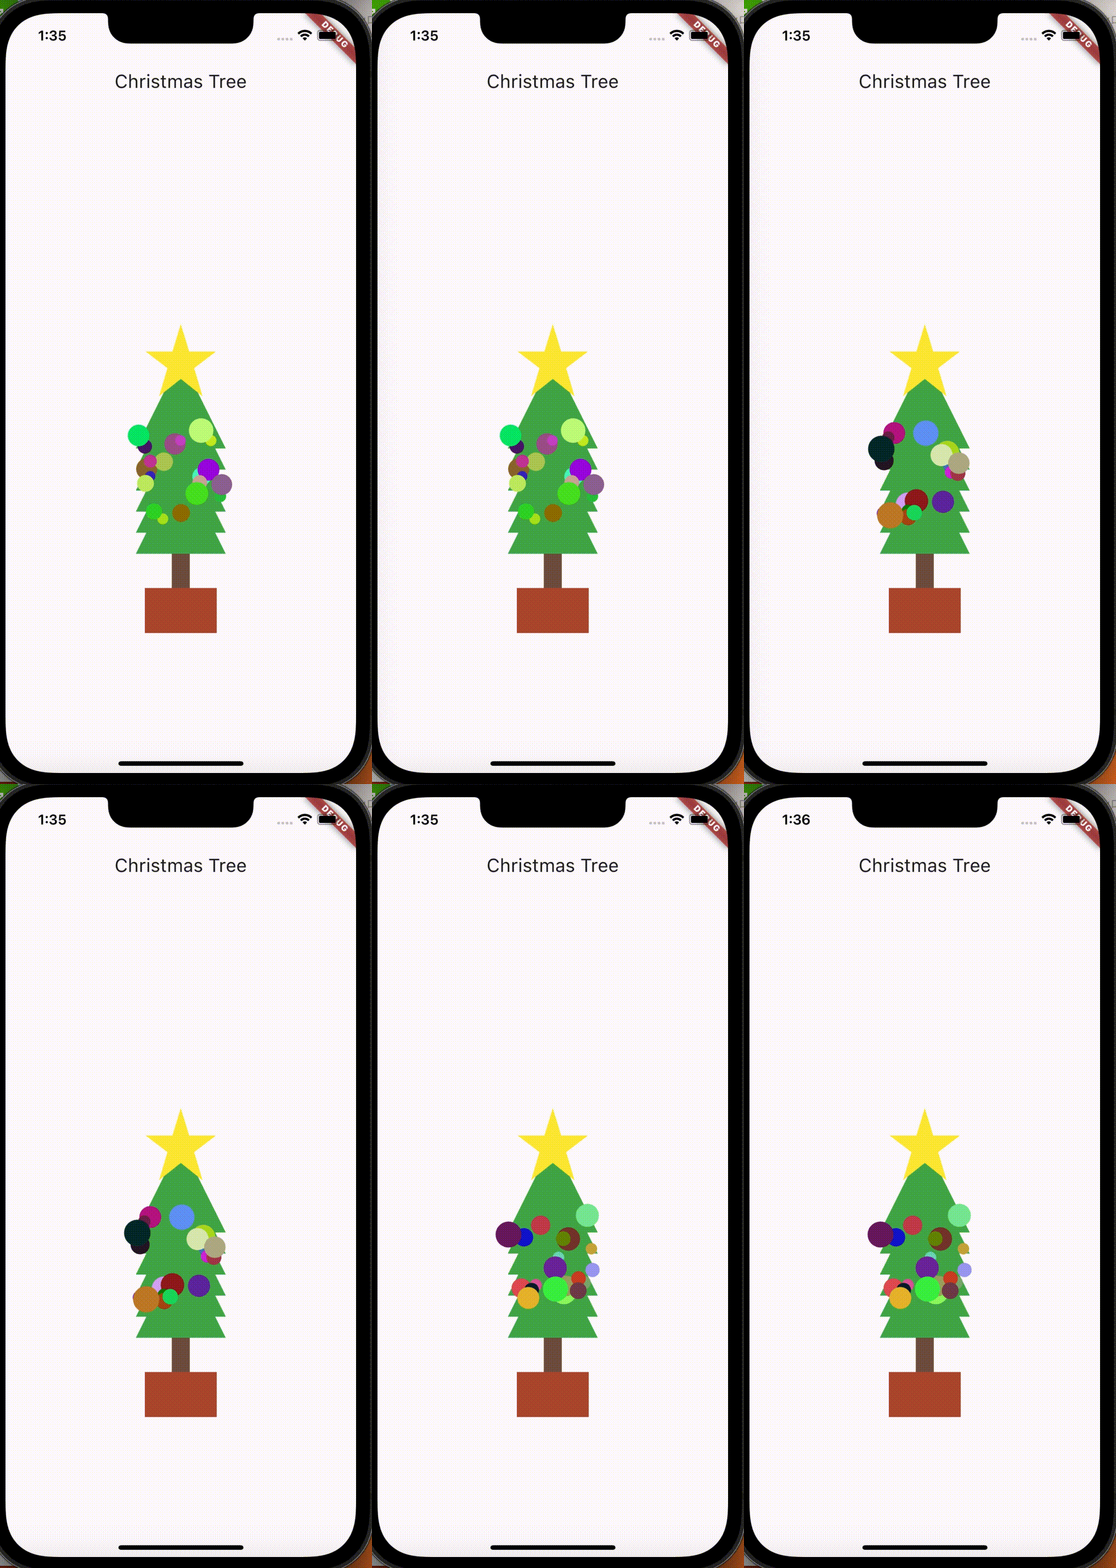
実際にクリスマスツリーを作成してみました。
飾りの色と位置はランダムにしているためhot reloadするたびに変化します。
サンプルコード
クリスマスツリーのサンプルコード
import 'dart:math';

import 'package:flutter/material.dart';

void main() {
  runApp(const MyApp());
}

class ChristmasTreePainter extends CustomPainter {
  @override
  void paint(Canvas canvas, Size size) {
    // ツリーの幹を描画
    Paint woodPaint = Paint()
      ..color = Colors.brown
      ..style = PaintingStyle.fill;

    canvas.drawRect(
        Rect.fromCenter(
          center: Offset(size.width / 2, size.height - 50),
          width: 20,
          height: 100,
        ),
        woodPaint);

    // 植木鉢を描画
    Paint potPaint = Paint()
      ..color = const Color(0xFFB55233)
      ..style = PaintingStyle.fill;

    canvas.drawRect(
        Rect.fromCenter(
            center: Offset(size.width / 2, size.height - 10),
            width: 80,
            height: 50),
        potPaint);

    // ツリーの設定
    Paint treePaint = Paint()
      ..color = Colors.green
      ..style = PaintingStyle.fill;

    Offset position = Offset(size.width / 2, size.height / 5);

    // 三角を上から下まで均等
    double interval = size.width * 0.06;
    double startY = size.height * 0.4;

    for (double y = startY; y < size.height - 100; y += interval) {
      double triangleSize = 50;

      Path trianglePath = Path()
        ..moveTo(position.dx, y - triangleSize)
        ..lineTo(position.dx - triangleSize, y + triangleSize)
        ..lineTo(position.dx + triangleSize, y + triangleSize)
        ..close();

      canvas.drawPath(trianglePath, treePaint);
    }

    // 星を描画
    Paint paint = Paint()
      ..color = Colors.yellow
      ..style = PaintingStyle.fill;

    // Pathオブジェクトを作成
    Path starPath = Path()

      // 始点となる座標を指定
      ..moveTo(size.width * 0.5, 0)

      // 各頂点を結ぶようにパスを指定
      ..lineTo(size.width * 0.62, size.height * 0.38)
      ..lineTo(size.width, size.height * 0.38)
      ..lineTo(size.width * 0.69, size.height * 0.61)
      ..lineTo(size.width * 0.81, size.height)
      ..lineTo(size.width * 0.5, size.height * 0.76)
      ..lineTo(size.width * 0.19, size.height)
      ..lineTo(size.width * 0.31, size.height * 0.61)
      ..lineTo(0, size.height * 0.38)
      ..lineTo(size.width * 0.38, size.height * 0.38)

      // 始点に戻る
      ..close();

    // 星の描画スケール
    double starScale = 0.2;

    Offset starPosition = Offset(size.width / 2.5, size.height * 0.18);

    // CanvasにPathを描画
    canvas.save(); // キャンバスの状態を保存
    canvas.translate(starPosition.dx, starPosition.dy); // 描画位置を調整
    canvas.scale(starScale, starScale); // スケールを適用
    canvas.drawPath(starPath, paint); // スケール適用後のパスを描画
    canvas.restore(); // キャンバスの状態を元に戻す

    // 飾りを描画
    Paint decorationPaint = Paint()..style = PaintingStyle.fill;

    // 飾りの数
    int numberOfDecorations = 20;

    // ツリーの位置とサイズ
    Offset treePosition = Offset(size.width / 2, size.height * 0.6);
    double triangleSize = 50;

    // ツリーの描画領域(三角形)に対してランダムな位置に飾りを配置
    for (int i = 0; i < numberOfDecorations; i++) {
      // ツリーの描画領域内にランダムな位置に飾りを配置
      double x = treePosition.dx -
          triangleSize +
          Random().nextDouble() * (triangleSize * 2);
      double y = treePosition.dy -
          triangleSize +
          Random().nextDouble() * (triangleSize * 2);

      // 飾りのサイズをランダムに設定
      double decorationSize = Random().nextDouble() * 10 + 5;

      // 各飾りの色をランダムに設定
      decorationPaint.color = Color.fromRGBO(
        Random().nextInt(256),
        Random().nextInt(256),
        Random().nextInt(256),
        1.0,
      );

      // 円形
      canvas.drawCircle(Offset(x, y), decorationSize, decorationPaint);
    }
  }

  @override
  bool shouldRepaint(CustomPainter oldDelegate) {
    return false;
  }
}

class ChristmasTree extends StatelessWidget {
  const ChristmasTree({super.key});

  @override
  Widget build(BuildContext context) {
    return CustomPaint(
      painter: ChristmasTreePainter(),
      size: const Size(500, 400),
    );
  }
}

class MyApp extends StatelessWidget {
  const MyApp({super.key});

  @override
  Widget build(BuildContext context) {
    return MaterialApp(
      home: Scaffold(
        appBar: AppBar(title: const Text('Christmas Tree')),
        body: const Center(child: ChristmasTree()),
      ),
    );
  }
}
Paint
| 属性 | 型 | 説明 |
|---|---|---|
| color | Color | 描画の色 |
| style | PaintingStyle | 描画のスタイル |
style
styleは2種類あります。
- PaintingStyle.fill
- 描画される形状やPathを塗りつぶします。図形の内部が塗りつぶされ、その形状が色やグラデーションで埋められます。
- PaintingStyle.stroke
- 描画される形状やPathの輪郭線を描きます。形状の外周だけが描かれ、内部は塗りつぶされません。
今回は塗りつぶしたかったので全て PaintingStyle.fill を使用しました。
// ツリーの幹を描画
Paint woodPaint = Paint()
  ..color = Colors.brown
  ..style = PaintingStyle.fill;
// 植木鉢を描画
Paint potPaint = Paint()
  ..color = const Color(0xFFB55233)
  ..style = PaintingStyle.fill;
// ツリーの設定
Paint treePaint = Paint()
  ..color = Colors.green
  ..style = PaintingStyle.fill;
// 星を描画
Paint paint = Paint()
  ..color = Colors.yellow
  ..style = PaintingStyle.fill;
// 飾りを描画
Paint decorationPaint = Paint()..style = PaintingStyle.fill;
Path
moveTo
開始点を決めるメソッドで、図形を描く時の最初に使用するのがmoveToです。
lineTo
moveToで指定した部分のポイントから始まり、lineToで指定した部分に直線を引きます。
close
最初の頂点に戻し、pathを閉じます。
// ツリーのPath
Path trianglePath = Path()
  ..moveTo(position.dx, y - triangleSize)
  ..lineTo(position.dx - triangleSize, y + triangleSize)
  ..lineTo(position.dx + triangleSize, y + triangleSize)
  ..close();
// 星のPath
Path starPath = Path()
  // 始点となる座標を指定
  ..moveTo(size.width * 0.5, 0)
  // 各頂点を結ぶようにパスを指定
  ..lineTo(size.width * 0.62, size.height * 0.38)
  ..lineTo(size.width, size.height * 0.38)
  ..lineTo(size.width * 0.69, size.height * 0.61)
  ..lineTo(size.width * 0.81, size.height)
  ..lineTo(size.width * 0.5, size.height * 0.76)
  ..lineTo(size.width * 0.19, size.height)
  ..lineTo(size.width * 0.31, size.height * 0.61)
  ..lineTo(0, size.height * 0.38)
  ..lineTo(size.width * 0.38, size.height * 0.38)
  // 始点に戻る
  ..close();
Canvas
drawRect
描画領域に長方形を描画します。
drawPath
Pathで指定した複雑な形状を描画します。
save
現在の状態(変換、クリップなど)を保存します。以降の描画で変更を加えた場合、canvas.restore を使用して元の状態に戻すことができます。
translate
指定されたOffsetだけ平行移動させます。
scale
描画を拡大縮小します。
restore
canvas.save で保存した状態に戻します。
drawCircle
円を描画します。
// ツリーの幹を描画
canvas.drawRect(
        Rect.fromCenter(
          center: Offset(size.width / 2, size.height - 50),
          width: 20,
          height: 100,
        ),
        woodPaint);
// 植木鉢を描画
canvas.drawRect(
        Rect.fromCenter(
            center: Offset(size.width / 2, size.height - 10),
            width: 80,
            height: 50),
        potPaint);
// ツリーの葉を描画
canvas.drawPath(trianglePath, treePaint);
// 星を描画
canvas.save(); // キャンバスの状態を保存
canvas.translate(starPosition.dx, starPosition.dy); // 描画位置を調整
canvas.scale(starScale, starScale); // スケールを適用
canvas.drawPath(starPath, paint); // スケール適用後のパスを描画
canvas.restore(); // キャンバスの状態を元に戻す
// 飾りを描画
canvas.drawCircle(Offset(x, y), decorationSize, decorationPaint);
終わりに
クリスマスツリーで使用した内容はCustomPaintのほんの一部しか触れていませんが、詳しく勉強していけば、複雑なUIは勿論、落書きアプリやケーキカットアプリなどアプリ作れそうだなと思いました。
複雑なUIを作成できるので、どんな図形が作れたりするのか、CustomPaint使ってどんなアプリを作れるのかなど考えたりするのが楽しかったです。
ただ、複雑な図形を描画しようとするとその分、Pathも複雑になるので大変そうだなと思いました。
最後までご覧いただきありがとうございました。