はじめに
言語やフレームワークのサンプルやHello Worldを動かすことが出来た新人プログラマの皆さんは学習の次ステップで何をすればいいか悩むと思います。
世間一般ではブラックジャックがメジャーなようですが、
私はマインスイーパを作ることで理解を深める機雷処理言語学習法を実践しています。
この記事ではReact+FastAPIでマイスイーパを作成する流れを記載します。
Windows 10にはマインスイーパが初期インストールされていないので、新入社員や学生さんにマインスイーパを知らない層がいそうなのが怖いですが、気にしないことにします。
開発環境
前回、学習用のReact+FastAPI環境を作成したので、こちらを利用していきます。
FastAPIは新規のソースを用意するので、uvicornコマンドが動作中の場合はCtrl+Cで停止してください。
ReactはApp.jsをそのまま編集していくので、yarn startしたままでOKです。
バックエンド(Python+FastAPI)
APIの仕様
以下のAPIで実装します。
| API | メソッド | パラメータ | 説明 |
|---|---|---|---|
| /ms | GET | なし | session IDの一覧取得 |
| /ms | POST | width : int height : int mine : int seed : int |
sessionの作成 |
| /ms/{session} | GET | session : str | 画面に表示する情報の取得 |
| /ms/{session} | POST | session : str x : int y : int |
セルを開く |
| /ms/{session}/flag | POST | session : str x : int y : int flag : int (1=ON,0=OFF) |
フラッグの設定 |
DELETEメソッドでsessionを削除するAPIも作成したほうがよいが、今回は不採用。
モデル
セルの状態を管理するモデルクラスを実装します。
getPublicInfo()というjsonに変換可能なdictで情報を返すメソッドを用意しています。
このdictをFastAPIで返すとjson型の応答になります。
ロジックの説明は以前に作成した仕組みを参照。
import random
import json


class pointOffset:
    def __init__(self, x, y):
        self.x = x
        self.y = y

    @staticmethod
    def rounds():
        return [pointOffset(-1, -1), pointOffset(0, -1), pointOffset(1, -1),
                pointOffset(-1, 0),                      pointOffset(1, 0),
                pointOffset(-1, 1),  pointOffset(0, 1),  pointOffset(1, 1)]


class Cell:
    def __init__(self, isOpen, isFlag, isMine):
        self.isOpen = isOpen
        self.isFlag = isFlag
        self.isMine = isMine

    def __repr__(self):
        return json.dumps(self.getPublicInfo())

    def getPublicInfo(self):
        result = {
            'open': int(self.isOpen),
            'flag': int(self.isFlag),
        }
        if self.isOpen:
            result['mine'] = int(self.isMine)
        return result


class Field:

    def __init__(self, width, height, mine):
        self.cells = list()
        self.width = width
        self.height = height
        self.mine = mine
        for i in range(self.width * self.height):
            cellMine = True if i < mine else False
            self.cells.append(Cell(False, False, cellMine))
        random.shuffle(self.cells)

    def __repr__(self):
        return json.dumps(self.getPublicInfo())

    def getPublicInfo(self):
        rest = self.mine
        publicCells = list()
        for i, cell in enumerate(self.cells):
            cellInfo = cell.getPublicInfo()
            if cellInfo["open"] == 1 and cellInfo["mine"] == 0:
                cellInfo["number"] = self.roundNum(
                    i % self.width, int(i / self.width))
            if cellInfo["open"] == 0 and cellInfo["flag"] == 1 :
                rest = rest - 1
            publicCells.append(cellInfo)

        status = "continue"
        if self.isOver():
            status = "over"
        elif self.isClear():
            status = "cleared"

        result = {
            'cells': publicCells,
            'width': self.width,
            'height': self.height,
            'mine': self.mine,
            'status': status,
            'rest' : rest
        }
        return result

    def cell(self, x, y):
        if 0 > x or 0 > y or self.width <= x or self.height <= y:
            return None
        return self.cells[y * self.width + x]

    def open(self, x, y):
        cell = self.cell(x, y)
        if cell is None:
            return
        if cell.isOpen:
            return
        cell.isOpen = True
        if not cell.isMine:
            if self.roundNum(x, y) == 0:  # 0なら隣接cellをOpenする
                for offset in pointOffset.rounds():
                    self.open(x + offset.x, y + offset.y)

    def flag(self, x, y, isFlag):
        cell = self.cell(x, y)
        if cell is None:
            return
        cell.isFlag = isFlag

    def roundNum(self, x, y):
        round = 0
        for offset in pointOffset.rounds():
            if self.isMine(x + offset.x, y + offset.y):
                round += 1
        return round

    # 指定セルが存在してmine状態の場合にTrueを返す
    def isMine(self, x, y):
        cell = self.cell(x, y)
        if cell is None:
            return False
        return cell.isMine

    def isOver(self):
        for y in range(self.height):
            for x in range(self.width):
                if self.cell(x, y).isOpen and self.cell(x, y).isMine:
                    return True
        return False

    def isClear(self):
        closeCount = 0
        for y in range(self.height):
            for x in range(self.width):
                if not self.cell(x, y).isOpen:
                    closeCount += 1
        return True if closeCount == self.mine else False
モデルとAPIを繋ぐ管理クラスの実装
シングルトンで保持する動作にします。
本来はsessionをキーにしてモデルの状態をDBに格納するべきですが、今回は簡易実装にしました。
from ms_model import Field
import uuid
import random


class ms_manager:
    singleton_instance = None
    sessions = dict()

    def __new__(cls, *args, **kwargs):
        # シングルトン
        if cls.singleton_instance == None:
            cls.singleton_instance = super().__new__(cls)
        return cls.singleton_instance

    def create(self, width, hight, mine, seed_value):
        random.seed(seed_value)
        hash = str(uuid.uuid4()).replace("-","")
        self.sessions[hash] = {
            "session": hash,
            "status": "new",
            "field": Field(width, hight, mine)
        }
        return {'session': hash}

    def get_list(self):
        session_list = list()
        for session in self.sessions.keys():
            session_list.append(session)
        return session_list

    def get_sessison(self, session):
        if not session in self.sessions:
            return {"error": "session is not found"}
        return self.sessions[session]["field"].getPublicInfo()

    def open(self, session, x, y):
        if not session in self.sessions:
            return {"error": "session is not found"}
        self.sessions[session]["field"].open(x, y)
        return self.sessions[session]["field"].getPublicInfo()

    def flag(self, session, x, y, flag):
        if not session in self.sessions:
            return {"error": "session is not found"}
        self.sessions[session]["field"].flag(x, y, bool(flag))
        return self.sessions[session]["field"].getPublicInfo()
pythonでシングルトンは初めて作りました。不思議な仕様ですね。
APIの実装
FastAPIで、APIの定義を行います。
APIが呼ばれたらmanagerにそのまま引数を渡します。
レスポンスもそのままmanagerの戻り値の辞書を返します。
from fastapi import FastAPI
from ms_manager import ms_manager
from starlette.middleware.cors import CORSMiddleware
from pydantic import BaseModel

app = FastAPI()

app.add_middleware(
    CORSMiddleware,
    allow_origins=["*"],
    allow_credentials=True,
    allow_methods=["*"],
    allow_headers=["*"]
)

class CreateParam(BaseModel):
    width: int
    hight: int
    mine: int
    seed: int

class OpenParam(BaseModel):
    x: int
    y: int

class FlagParam(BaseModel):
    x: int
    y: int
    flag: int


@app.post("/ms")
def ms_post_root(param : CreateParam):
    return ms_manager().create(param.width, param.hight, param.mine, param.seed)


@app.get("/ms")
def ms_get_root():
    return {"session": ms_manager().get_list()}


@app.get("/ms/{session}")
def ms_get_session(session: str):
    return ms_manager().get_sessison(session)


@app.post("/ms/{session}")
def ms_post_session(session: str, param : OpenParam):
    return ms_manager().open(session, param.x, param.y)


@app.post("/ms/{session}/flag")
def ms_post_flag(session: str, param:FlagParam):
    return ms_manager().flag(session, param.x, param.y, param.flag)
以下のコマンドでFastAPIを起動してください。
uvicorn ms_main:app --reload --host 0.0.0.0
APIのテスト用のスクリプトも補足に記載しておきます。*
フロントエンド(React)
実装するイベントは下表とします。
| 操作 | 説明 | API |
|---|---|---|
| リセットボタン | 状態をリセットします。 | POST /ms |
| 描画 | セルの状態を取得します。 | GET /ms/{session} |
| クリック | セルを開きます。 | POST /ms/{session} |
| Ctrl+クリック | フラッグを設定/解除します。 | POST /ms/{session}/flag |
各種操作でバックエンドへの要求し、取得した情報の表示を行います。
画像ファイル類はpublicフォルダに格納して参照します。*
import './Table.css';

import React from "react";
import axios from "axios";


class Table extends React.Component {
    constructor(props) {
      super(props);
      this.state = {
          table : '' ,
          message:''
        };
      this.base_url = "http://localhost:8000/ms";
      this.session = '';
      this.width = 30;
      this.hight = 16;
      this.mine = 99;
      this.fields = null;
    }

    componentDidMount = () => {
        this.updateTable();
    }

    handleClick = () => {
        this.updateTable();
    }

    updateTable = () => {
        axios
            .post(this.base_url , {
                    "width": this.width,
                    "hight": this.hight,
                    "mine": this.mine,
                    "seed" : Date.now()})
            .then(res => {
                var data = res.data;
                this.get_fields(data.session);
                })
            .catch(err =>{
                console.log(err);
            });
    }

    get_fields = (session) => {
        this.session = session;
        const session_url = this.base_url + "/" + this.session;
        axios
            .get(session_url)
            .then(res => {
                this.showTable(res.data);
                })
            .catch(err =>{
                console.log(err);
            });
    }

    showTable = (fields) => {

        this.fields = fields;
        var items = []
        for(var y = 0 ; y < fields.height ; y++){
            for(var x = 0 ; x < fields.width ; x++){
                var i = y * fields.width + x;
                var c = fields.cells[i];
                var filename = '';
                if(c.open === 0)
                    if(c.flag === 1)
                        filename = `${process.env.PUBLIC_URL}/flag.png`;
                    else
                        filename = `${process.env.PUBLIC_URL}/close.png`;
                else
                    if(c.mine === 1)
                        filename = `${process.env.PUBLIC_URL}/mine.png`
                    else if(c.number)
                        filename = `${process.env.PUBLIC_URL}/` + c.number + `.png`
                    else
                        filename = `${process.env.PUBLIC_URL}/open.png`;
                items.push(<img name={i} src={filename} onClick={(e)=>{ this.choiceDiv(e) } } />);
            }
            items.push(<br/>);
        }

        this.setState({table : (<dev>{items}</dev>)});

        if(fields.status === "over")
            alert("over");
        else if(fields.status === "cleared")
            alert("cleared");

        var rest_label = "[Rest:" + fields.rest + "]" ;
        this.setState({message : rest_label});
    }

    choiceDiv = (e) => {
        var num = parseInt(e.currentTarget.name);
        var x = num % this.width;
        var y = num / this.width;

        if( this.fields.status === "over" ||
            this.fields.status === "cleared") {
            return;
        }

        if (e.ctrlKey){
            if( this.fields.cells[num].open === 0){
                var flag = 0;
                if(this.fields.cells[num].flag === 0){
                    flag = 1
                }
                this.setFlag(x, y, flag)
            }
        }
        else{
            if( this.fields.cells[num].open === 0 &&
                this.fields.cells[num].flag === 0){
                this.openCell(x,y)
            }
        }
    }

    setFlag = (x,y,flag) => {
        const flag_url = this.base_url + "/" + this.session + "/flag";
        axios
            .post(flag_url , { "x": x, "y": y, flag: flag})
            .then(res => {
                this.showTable(res.data);
                })
            .catch(err =>{
                console.log(err);
            });
    }

    openCell = (x,y) =>{

        const session_url = this.base_url + "/" + this.session;
        axios
            .post(session_url , { "x": x, "y": y})
            .then(res => {
                this.showTable(res.data);
                })
            .catch(err =>{
                console.log(err);
            });
    }

    render() {
        return (
            <div>
                <button onClick={() => this.handleClick()}>[リセット]</button>
                <div>{this.state.message}</div>
                <div className="Table-fields">{this.state.table}</div>
            </div>
        );
    }
  }

  export default Table;
セルの配置がずれないようにcssを用意します。
.Table-fields {
    font-size: 0;
  }
デフォルトのApp.jsから不要な物を削除し、Tableのみを表示させます。
import './App.css';
import Table from "./Table";

function App() {
  return (
    <div className="App">
      <header className="App-header">
        <Table />
      </header>
    </div>
  );
}

export default App;
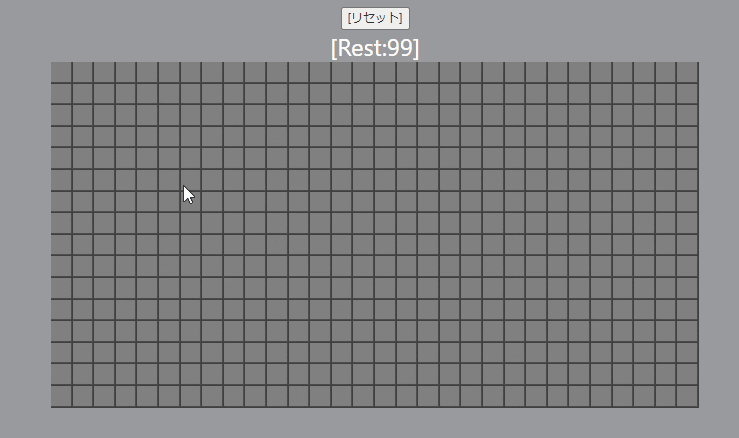
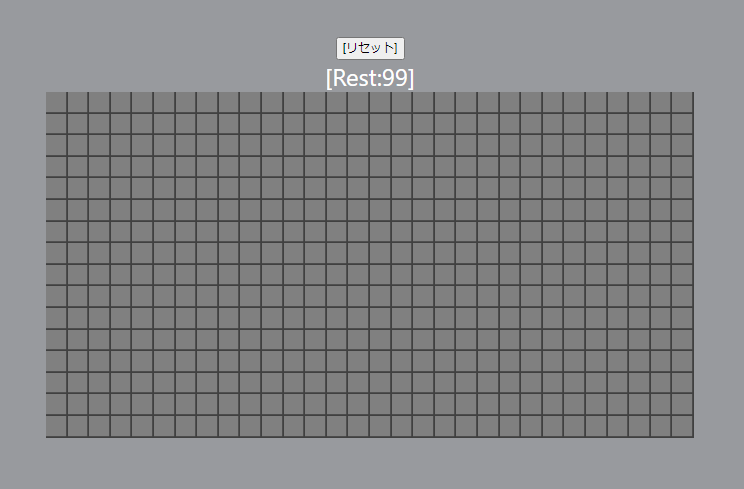
動作確認
ブラウザでReactのページを表示します。
ボタンやセルをクリックしてみてください。
おわりに
モデルがバックエンドにあるので、Reactは操作のイベントと表示だけの実装となりシンプルになったように感じました。
Reactでは描画更新のためにstateに設定するのが重要ということは理解しましたが、ちゃんと画面設計できるようになるには慣れが必要そう。
Reactの勉強というよりは、Web開発の練習にちょうどいい難易度だと思いますので、皆さんも自分で使用とロジックを考えて作ってみてください。
補足
アイコンの作成
使用したアイコンのPNG画像はpythonで作成しました。
生成スクリプトも置いておきます。
from PIL import Image, ImageDraw, ImageFont

w = 24
h = 24
lineWidth = 2
font_path = 'C:/WINDOWS/Fonts/impact.ttf'  # for Windows 太目のフォント
font_size = 20
font_y_offset = -2  # 計算で中央に配置してもいまいちなので微調整
OpenBgColor = (220, 220, 220)
OpenLineColor = (255, 255, 255)

param = [
    {"filename": "1.png", "text": "1",
        "textColor": (0, 0, 255),
        "bgColor": OpenBgColor,
        "lineColor": OpenLineColor},
    {"filename": "2.png", "text": "2",
        "textColor": (0, 100, 0),
        "bgColor": OpenBgColor,
        "lineColor": OpenLineColor},
    {"filename": "3.png", "text": "3",
        "textColor": (255, 0, 0),
        "bgColor": OpenBgColor,
        "lineColor": OpenLineColor},
    {"filename": "4.png", "text": "4",
        "textColor": (0, 0, 100),
        "bgColor": OpenBgColor,
        "lineColor": OpenLineColor},
    {"filename": "5.png", "text": "5",
        "textColor": (100, 25, 25),
        "bgColor": OpenBgColor,
        "lineColor": OpenLineColor},
    {"filename": "6.png", "text": "6",
        "textColor": (0, 100, 100),
        "bgColor": OpenBgColor,
        "lineColor": OpenLineColor},
    {"filename": "7.png", "text": "7",
        "textColor": (0, 0, 0),
        "bgColor": OpenBgColor,
        "lineColor": OpenLineColor},
    {"filename": "8.png", "text": "8",
        "textColor": (100, 100, 100),
        "bgColor": OpenBgColor,
        "lineColor": OpenLineColor},
    {"filename": "open.png", "text": "",    # 0の場合は数字表示しない
        "textColor": (0, 0, 0),
        "bgColor": OpenBgColor,
        "lineColor": OpenLineColor},
    {"filename": "mine.png", "text": "",
        "textColor": (0, 0, 0),
        "bgColor": (255, 0, 0),
        "lineColor": OpenLineColor},
    # 開く前のはLineの色が違う
    {"filename": "close.png", "text": "",
        "textColor": (0, 0, 0),
        "bgColor": (128, 128, 128),
        "lineColor": (64, 64, 64)},
    {"filename": "flag.png", "text": "",    # TODO 旗のデザインにしたいが単色
        "textColor": (0, 0, 0),
        "bgColor": (0, 0, 255),
        "lineColor": (64, 64, 64)},
]

font = ImageFont.truetype(font_path, font_size)

for item in param:
    image = Image.new("RGB", (w, h), item["bgColor"])
    draw = ImageDraw.Draw(image)

    if item["text"]:
        text_w, text_h = draw.textsize(item["text"], font=font)
        draw.text(((w - text_w) / 2, (h - text_h) / 2 + font_y_offset),
                  item["text"],
                  item["textColor"],
                  font=font)

    draw.line(((0, h-lineWidth), (w, h-lineWidth)),
              item["lineColor"], width=lineWidth)
    draw.line(((w-lineWidth, 0), (w-lineWidth, h)),
              item["lineColor"], width=lineWidth)

    image.save(item["filename"])
APIのテスト
APIを動作確認するためのPythonスクリプトです。
dockerコンテナで別なターミナルを起動して実行してください。
Python環境があれば、ホストPCで実行してもよいです。
import requests
import json
import time

base_url = "http://127.0.0.1:8000/ms"


def printField(response):
    cells = response["cells"]
    width = response["width"]
    hight = response["height"]
    status = response["status"]

    print("[{}*{}]".format(width, hight))

    for i, cell in enumerate(cells):
        if i % width == 0 and i != 0:
            print("")  # 改行

        if cell["open"] == 0 and cell["flag"] == 1:
            print("F", end="")
        elif cell["open"] == 0 and cell["flag"] == 0:
            print("/", end="")
        elif cell["open"] == 1:
            if "mine" in cell and cell["mine"] == 1:
                print("*", end="")
            elif "number" in cell:
                print("{}".format(cell["number"]), end="")

    print("\nstatus={}\n".format(status))


def main():
    response = requests.post(base_url,
                             json={'seed': int(time.time()),
                                     'width': 5,
                                     'hight': 6,
                                     'mine': 2,
                                     })
    res_create = response.json()
    session_id = res_create['session']

    session_url = "{}/{}".format(base_url, session_id)
    response = requests.get(session_url)
    printField(response.json())

    loop = True
    while loop:
        print("input [x y]")
        # "1 0"のようにスペースで区切ってxとyの座標を入力しEnterキー
        input_x, input_y = map(int, input().split())

        response = requests.post(session_url,
                                 json={'x': input_x, 'y': input_y})
        res_open = response.json()
        printField(res_open)

        if res_open["status"] != "continue":
            loop = False


if __name__ == '__main__':
    main()