1
1

Delete article

Deleted articles cannot be recovered.

Draft of this article would be also deleted.

Are you sure you want to delete this article?

More than 3 years have passed since last update.

【SwiftUI】NeumorphismButton作ってみた

Last updated at Posted at 2021-06-18

環境

【Xcode】11.7
【Swift】5.2.4
【iOS】13.7
【macOS】Catalina バージョン 10.15.7

作り方

ベースの色を作成

extension Color {
    static let offWhite = Color(red: 245 / 255, green: 245 / 255, blue: 255 / 255)
}

アプリ全体で使っていくので、extentionで定義しておきます。

ViewModifierとして設定

struct NeumorphismStyle: ViewModifier {
    var height: CGFloat
    var ratio: CGFloat
    
    func body(content: Content) -> some View {
        content
            .padding(10)
            .background(
                GeometryReader(){ geometry in
                    RoundedRectangle(cornerRadius: 30,
                                     style: .continuous)
                        .fill(Color.offWhite)
                        .shadow(color: Color.black.opacity(0.2), radius: 10, x: 10, y: 10)
                        .shadow(color: Color.white.opacity(0.5), radius: 10, x: -5, y: -5)
                        .frame(width:geometry.size.width * self.ratio,
                               height: self.height)
                }
            )
    }
}

高さ→値で指定
幅→親要素の幅に対する倍率

汎用的に使うために設定したViewのサイズを参照し幅を決めていきます。
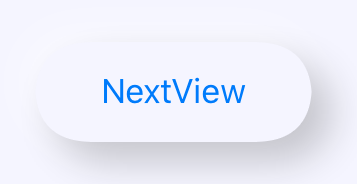
設定方法

NavigationLink(destination: SecondView()) {
                    Text("NextView")
                        .modifier(NeumorphismStyle(height: 50, ratio: 1.5))
                }

image.png

参考記事

1
1
0

Register as a new user and use Qiita more conveniently

  1. You get articles that match your needs
  2. You can efficiently read back useful information
  3. You can use dark theme
What you can do with signing up
1
1

Delete article

Deleted articles cannot be recovered.

Draft of this article would be also deleted.

Are you sure you want to delete this article?