はじめに
SwiftUI で GeometryReader を ScrollView の入れ子にする構造にしたところ、高さのレイアウトがおかしくなったので、解決する方法を検討しました。
環境
- macOS 12.1
- Xcode 13.2.1
作りたかったもの
正方形のセルが 4 × 5 の Grid 状に並んでいて、縦スクロールできる画面です。

親 View に ScrollView、子 View に GeometryReader の構造にした例
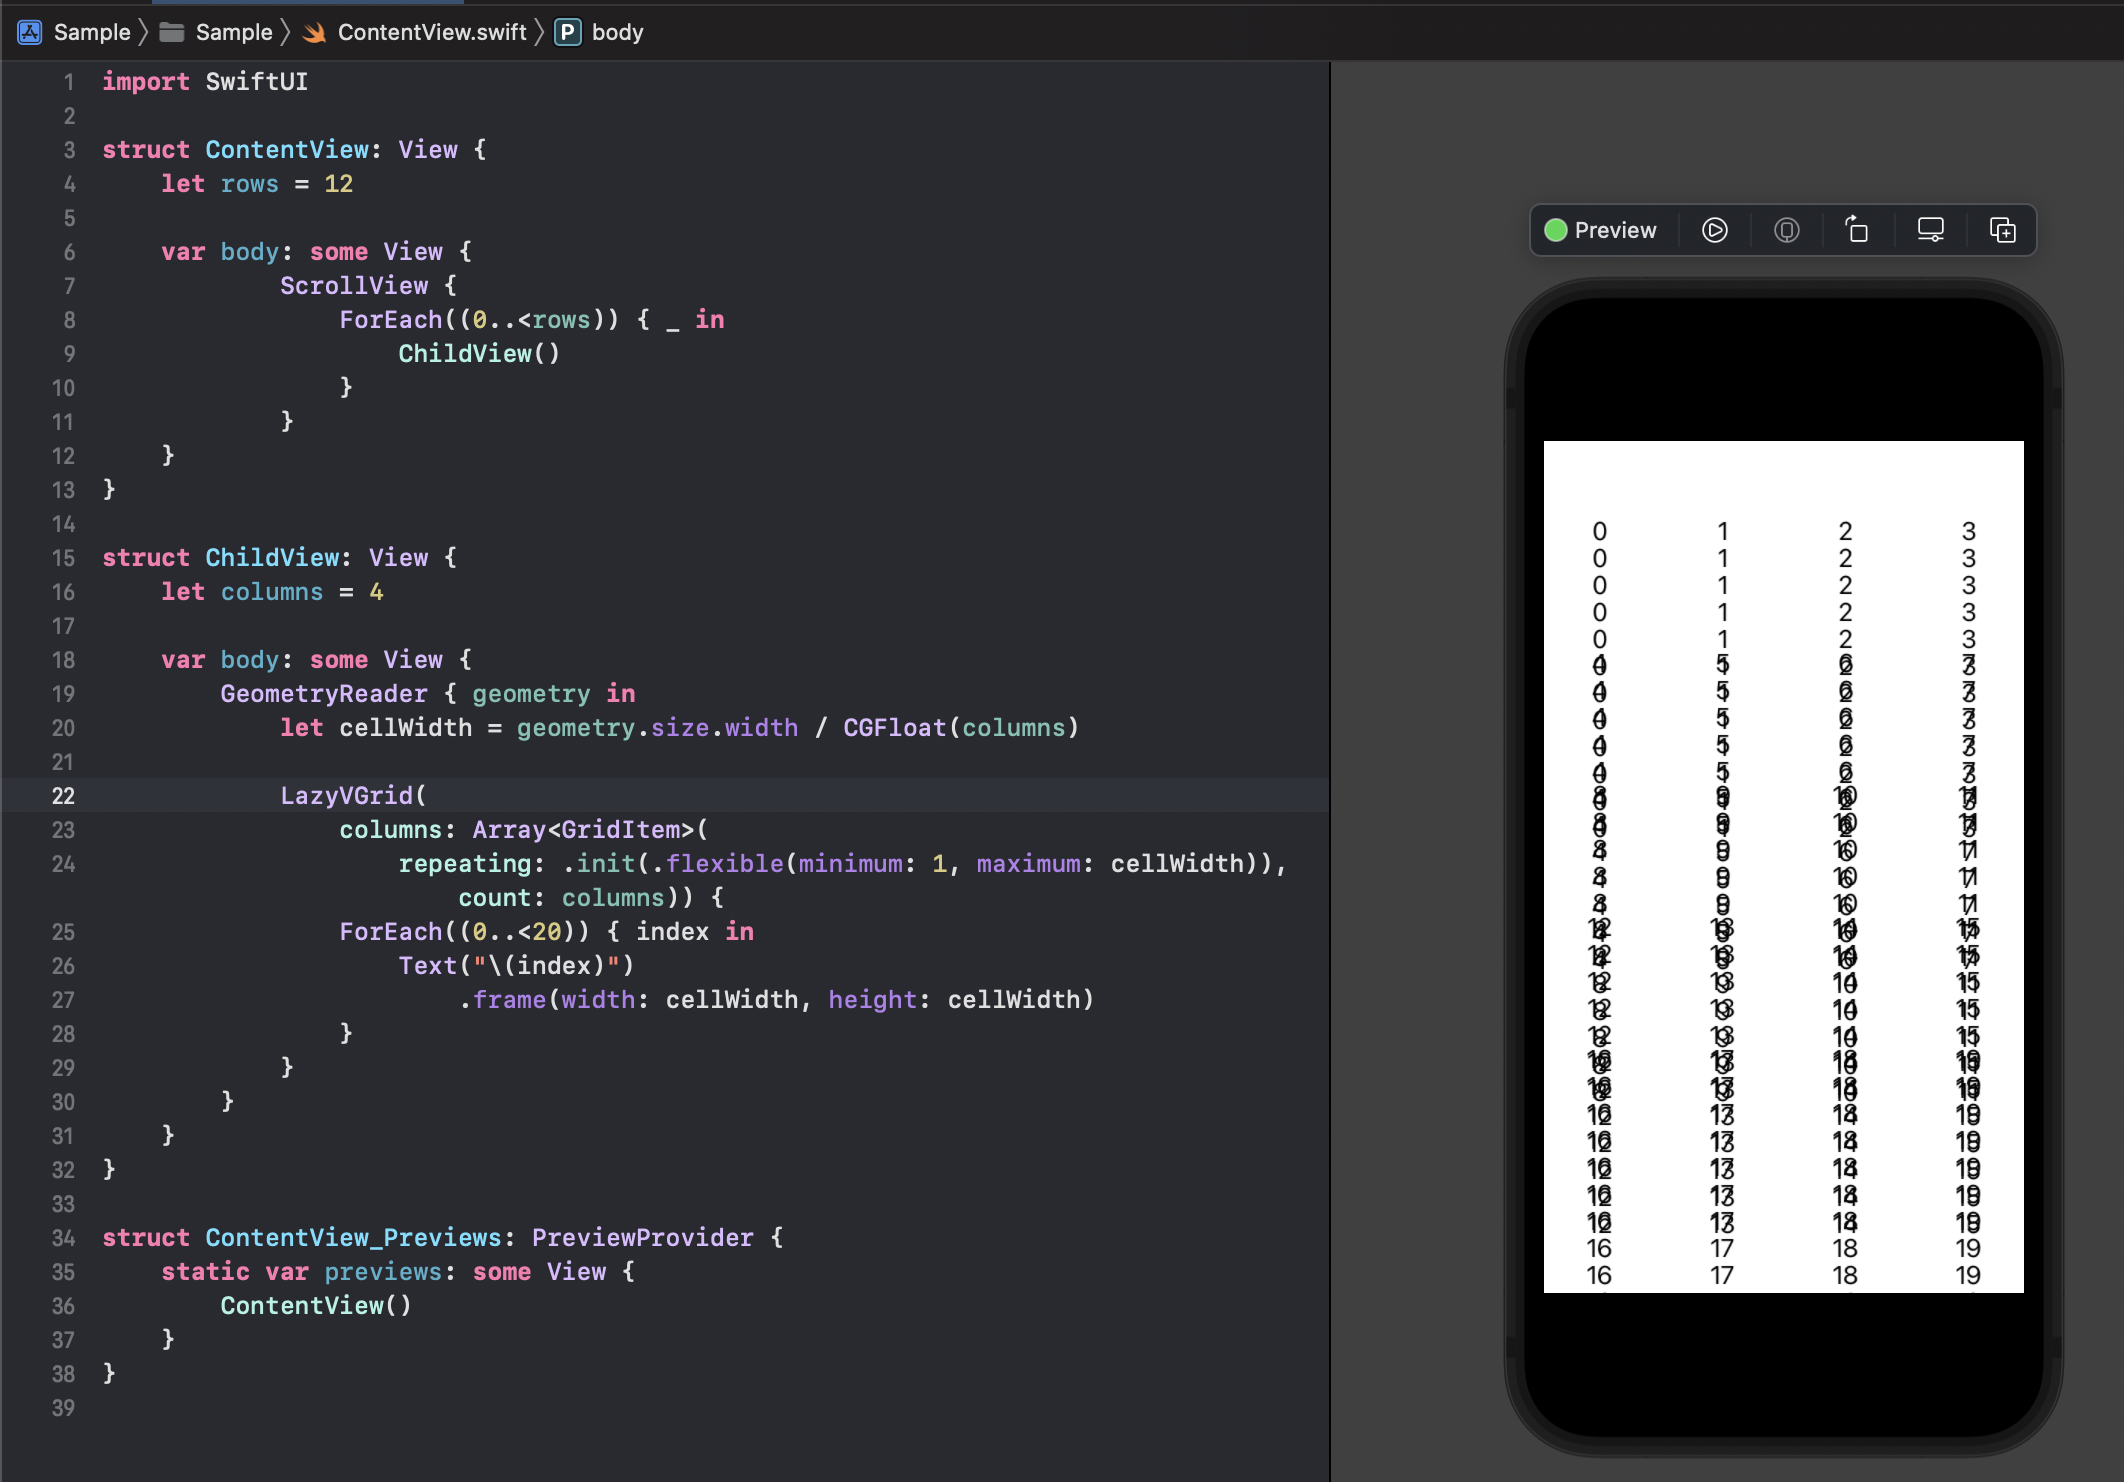
タイトルに書いたレイアウトが崩れてしまったパターンです。
この構造にすると GeometryReader の高さがうまく計算されずに 10px となるため、ChildView が重なってしまいました。
import SwiftUI

struct ContentView: View {
    let rows = 12

    var body: some View {
        ScrollView {
            ForEach((0..<rows)) { _ in
                ChildView()
            }
        }
    }
}

struct ChildView: View {
    let columns = 4

    var body: some View {
        GeometryReader { geometry in
            let cellWidth = geometry.size.width / CGFloat(columns)

            LazyVGrid(
                columns: Array<GridItem>(
                    repeating: .init(.flexible(minimum: 1, maximum: cellWidth)), count: columns)) {
                ForEach((0..<20)) { index in
                    Text("\(index)")
                        .frame(width: cellWidth, height: cellWidth)
                }
            }
        }
    }
}
試したパターン
親 View で GeometryReader の中に ScrollViewを入れ子にして子 View に width を渡し、セルサイズを計算させる
ScrollView の中に GeometryReader をいれるとレイアウトが崩れるので、親 View で GeometryReader を使って width を取得し、子 View に渡してみました。
うまく計算されていますが、padding とか inset の計算を考えるとちょっと面倒くさいですね。

import SwiftUI

struct ContentView: View {
    let rows = 12

    var body: some View {
        GeometryReader { geometry in
            ScrollView {
                ForEach((0..<rows)) { _ in
                    ChildView(
                        containerWidth: geometry.size.width
                    )
                }
            }
        }
    }
}

struct ChildView: View {
    let columns = 4
    let containerWidth: CGFloat

    var body: some View {
        let cellWidth = containerWidth / CGFloat(columns)

        LazyVGrid(
            columns: Array<GridItem>(
                repeating: .init(.flexible(minimum: 1, maximum: cellWidth)), count: columns)) {
            ForEach((0..<20)) { index in
                Text("\(index)")
                    .frame(width: cellWidth, height: cellWidth)
            }
        }
    }
}
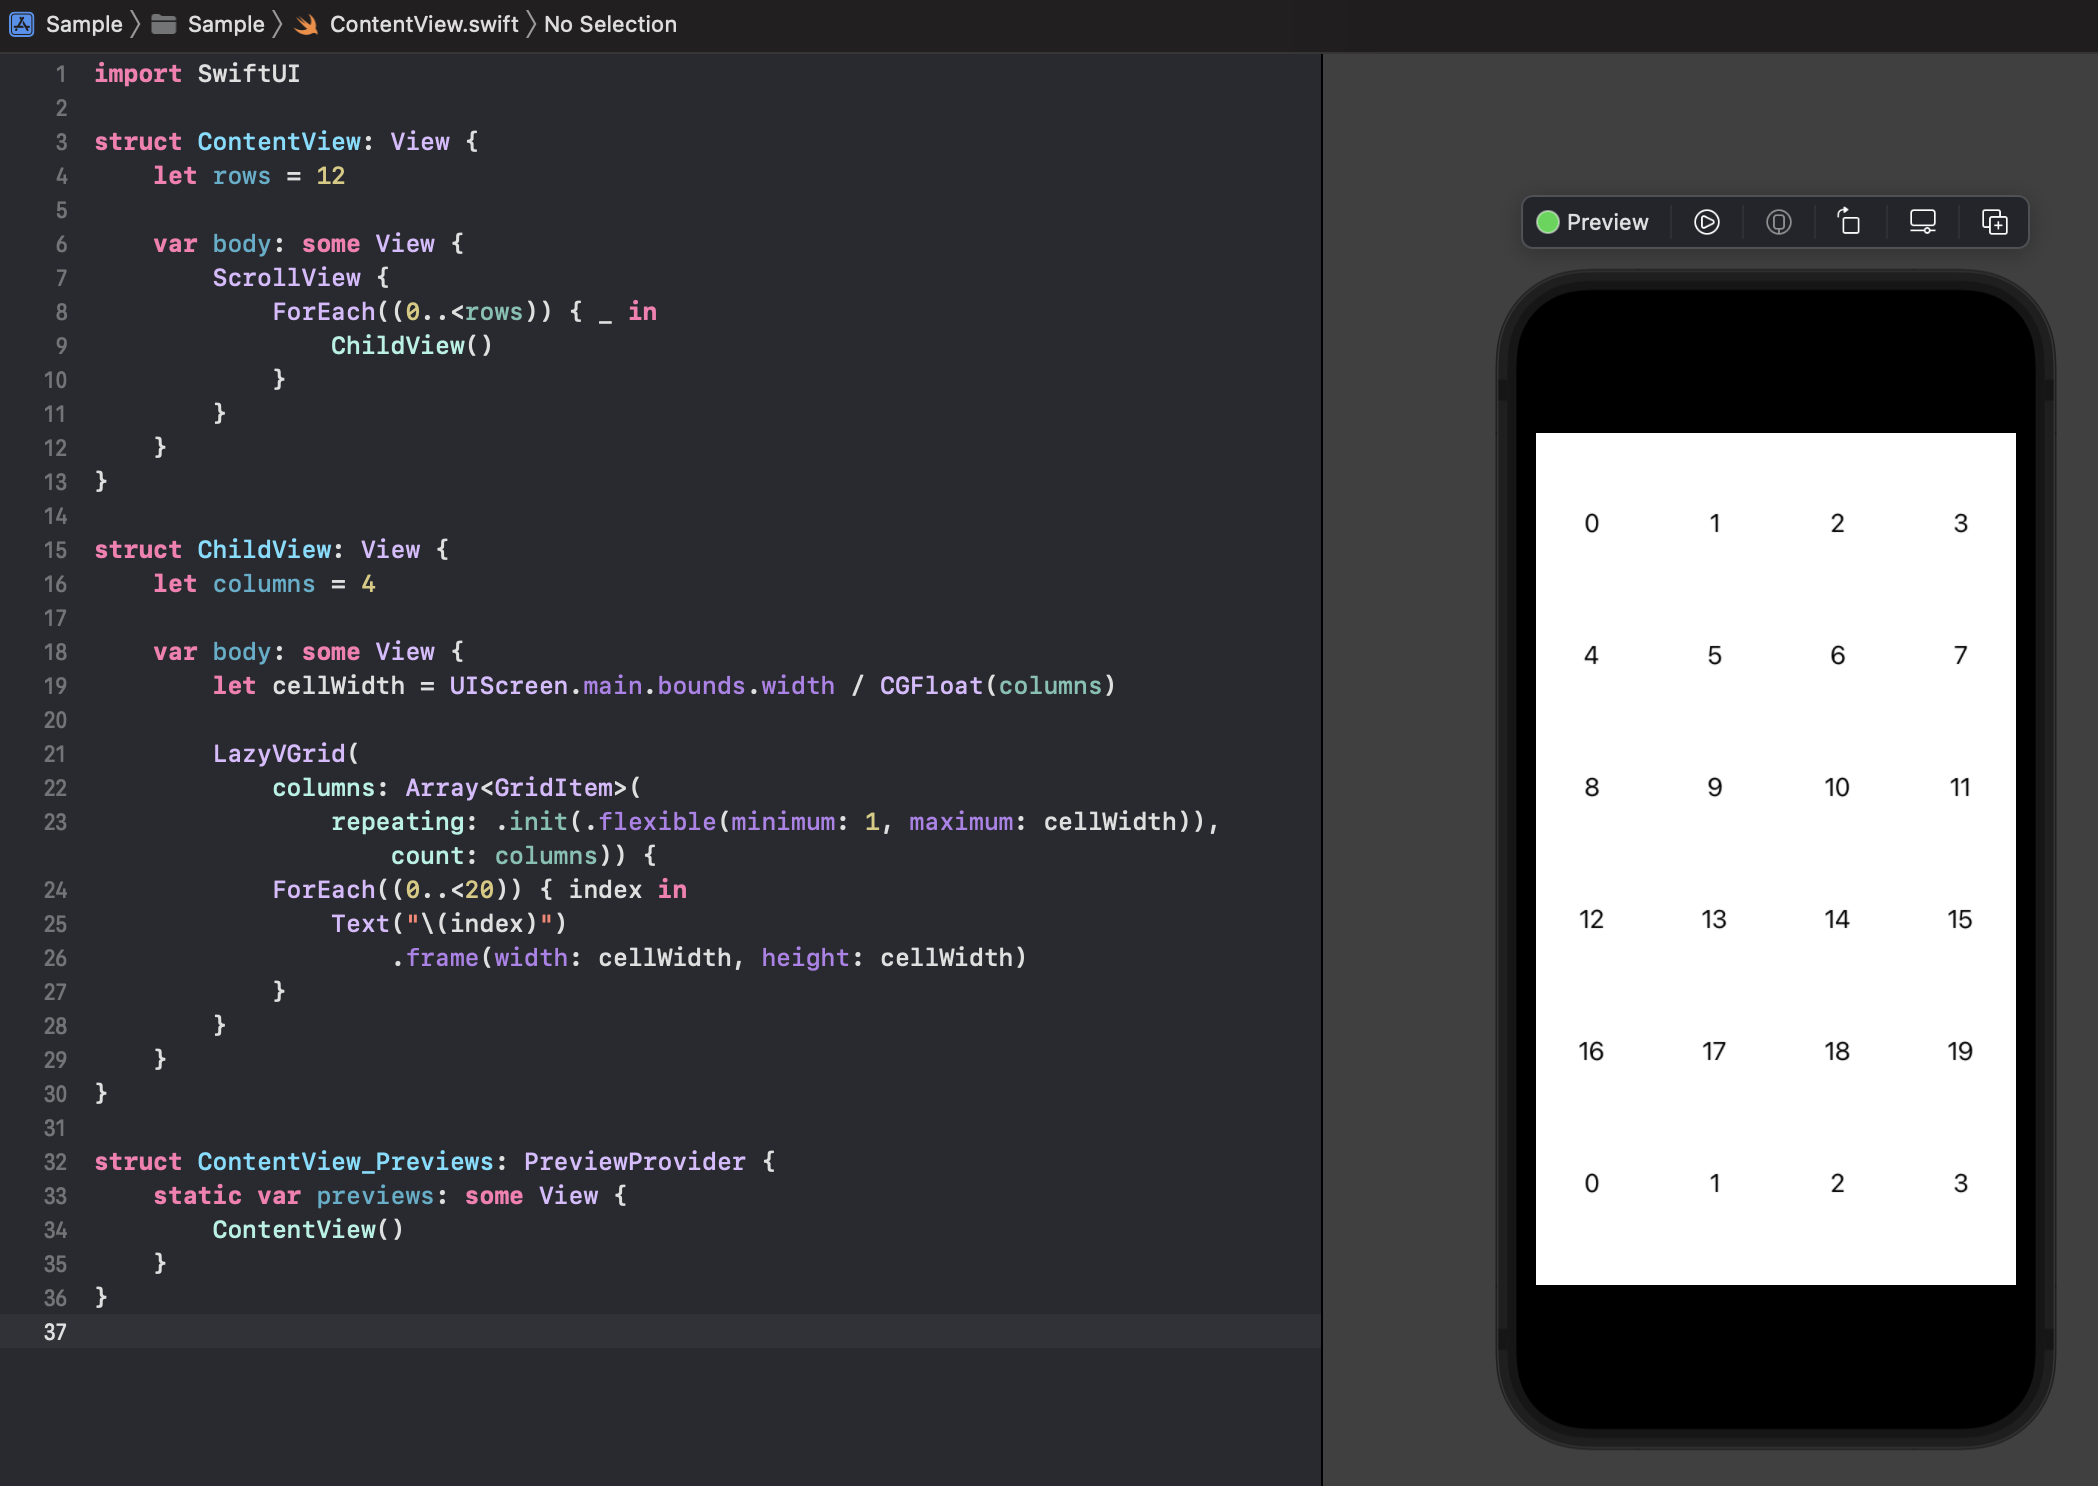
子 View で UIScreen から width を取得してセルサイズを計算させる
GeometryReader を使わずに UIScreen を使う方法です。
こちらも padding や inset があると計算が面倒ですが、親 View からサイズを渡されることもなく子 View で完結できるので、多少マシかも。
struct ContentView: View {
    let rows = 12

    var body: some View {
        ScrollView {
            ForEach((0..<rows)) { _ in
                ChildView()
            }
        }
    }
}

struct ChildView: View {
    let columns = 4

    var body: some View {
        let cellWidth = UIScreen.main.bounds.width / CGFloat(columns)

        LazyVGrid(
            columns: Array<GridItem>(
                repeating: .init(.flexible(minimum: 1, maximum: cellWidth)), count: columns)) {
            ForEach((0..<20)) { index in
                Text("\(index)")
                    .frame(width: cellWidth, height: cellWidth)
            }
        }
    }
}
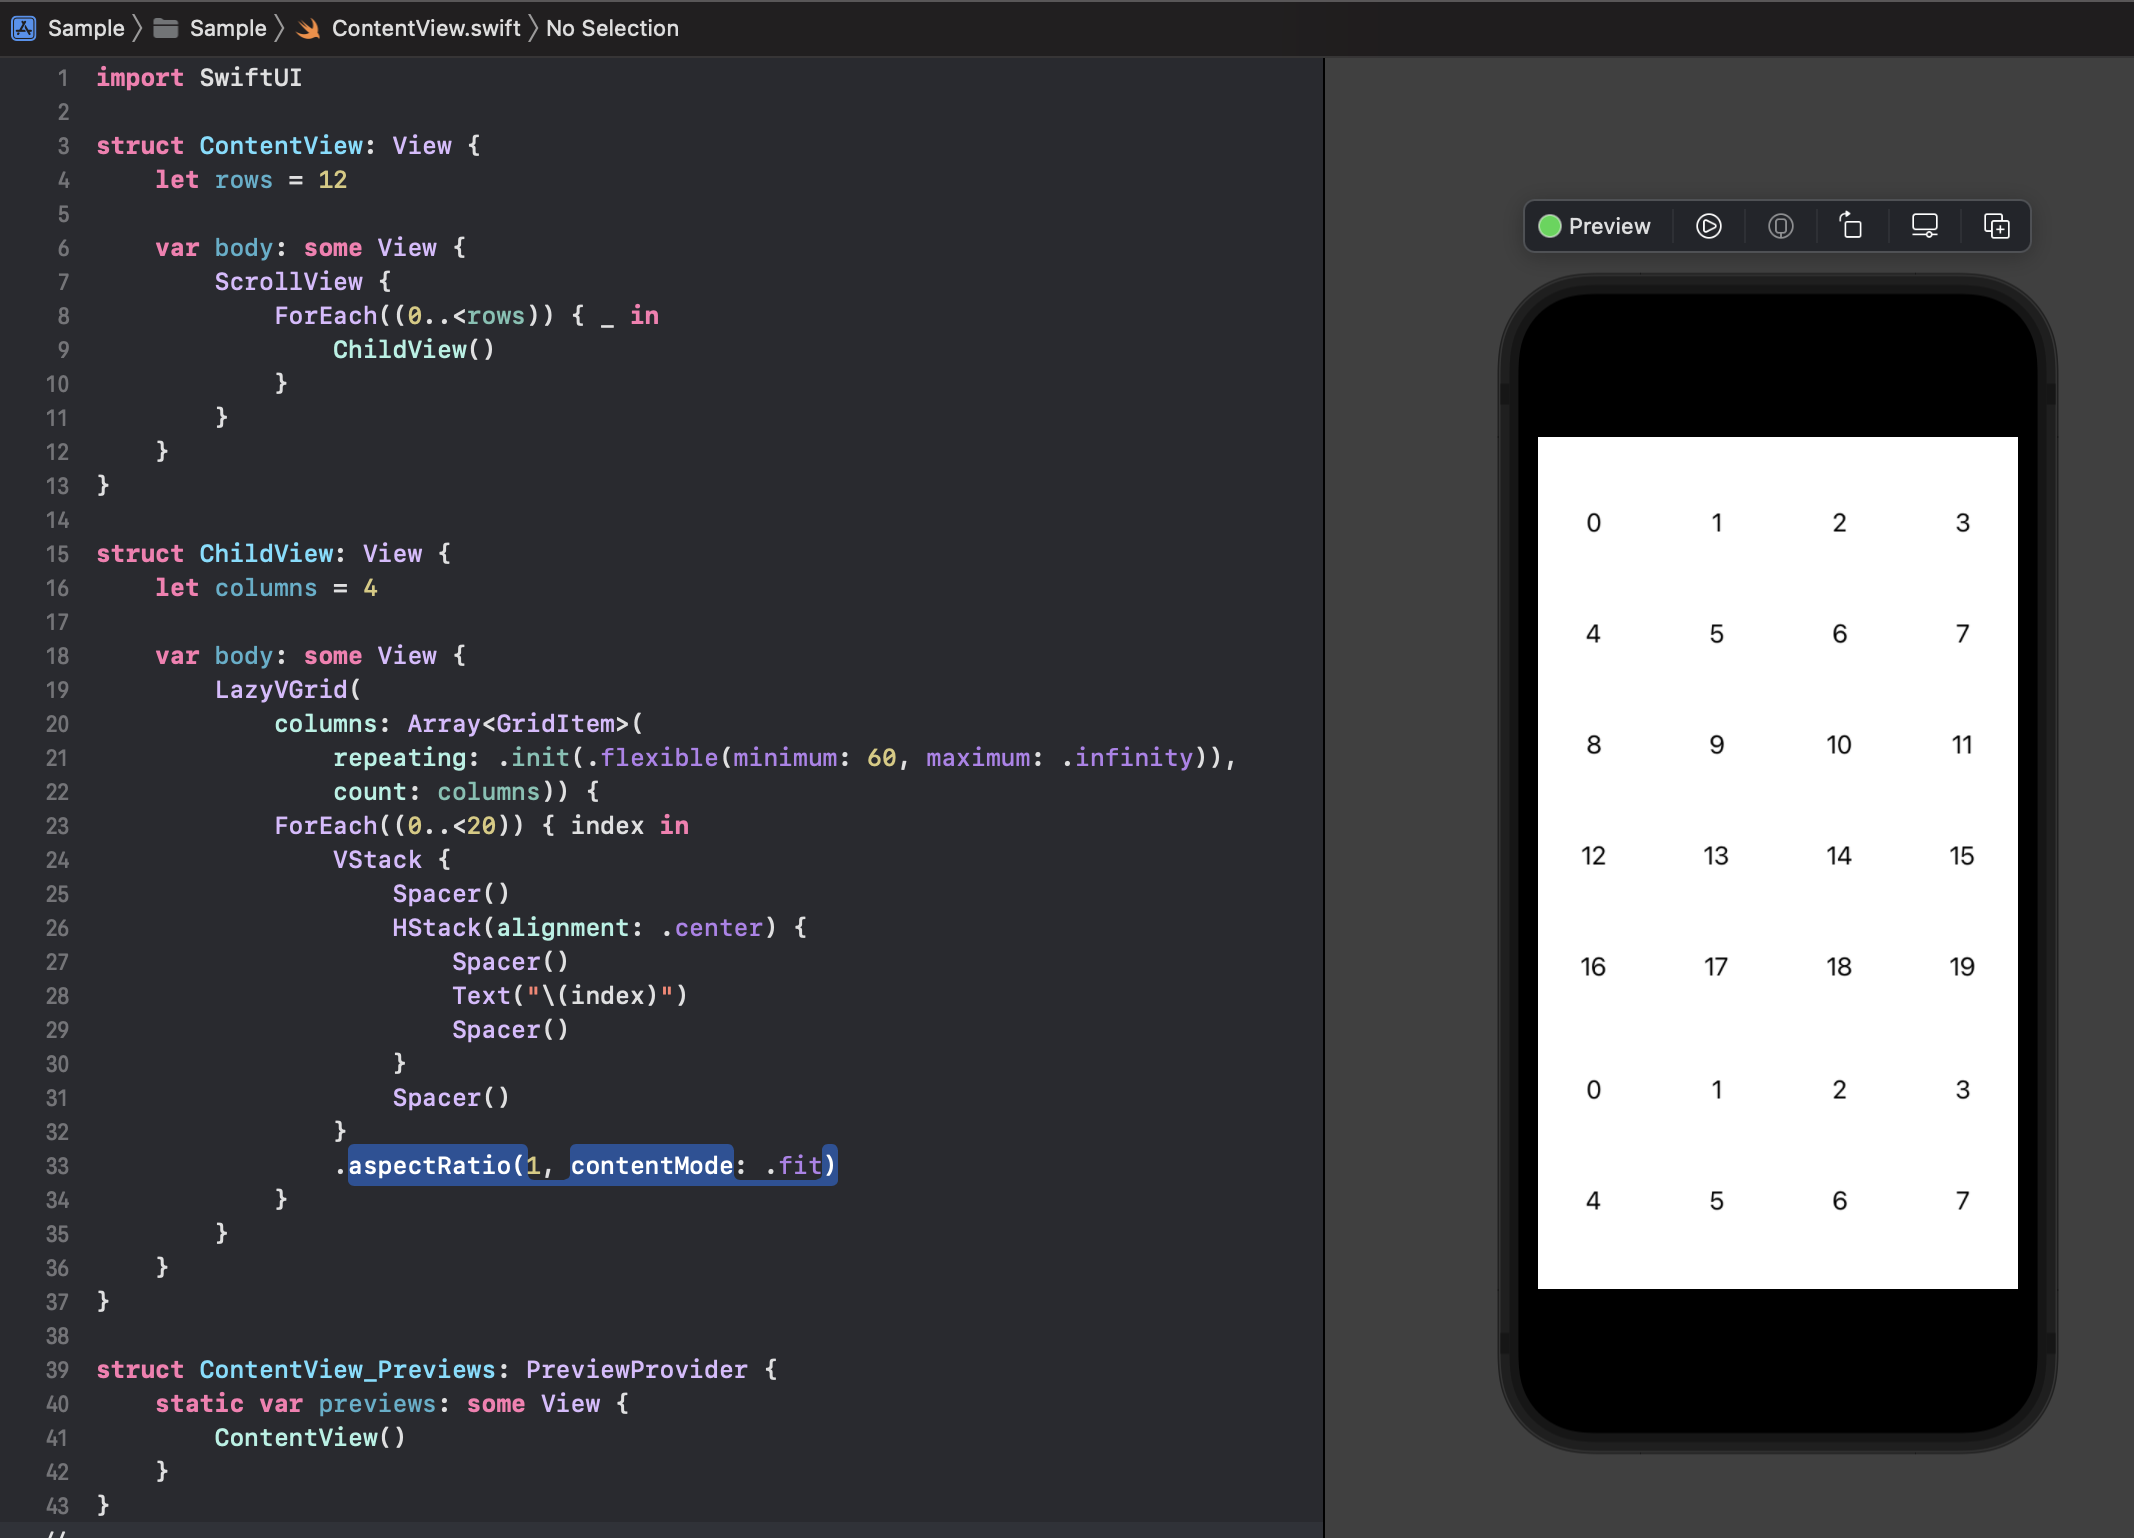
GeometryReader を使わず、Spacer と aspectRatio を活用してレイアウトする
Twitter で d_date さんに、GeometryReader を使わず、Spacer と aspectRatio を活用してレイアウトする方法を教えていただきました。
という感じなので、StackViewを組む要領でこんなふうに書いたりしますね pic.twitter.com/bCrVEgW25t
— Date (@d_date) January 19, 2022
こちらのコードを手元で動かしたときの画像です。
import SwiftUI

struct ContentView: View {
    let rows = 12

    var body: some View {
        ScrollView {
            ForEach((0..<rows)) { _ in
                ChildView()
            }
        }
    }
}

struct ChildView: View {
    let columns = 4

    var body: some View {
        LazyVGrid(
            columns: Array<GridItem>(
                repeating: .init(.flexible(minimum: 60, maximum: .infinity)),
                count: columns)) {
            ForEach((0..<20)) { index in
                VStack {
                    Spacer()
                    HStack(alignment: .center) {
                        Spacer()
                        Text("\(index)")
                        Spacer()
                    }
                    Spacer()
                }
                .aspectRatio(1, contentMode: .fit)
            }
        }
    }
}
記事公開後に追記した方法
GeometryReader を使わず、maxWidth と maxHeight を .inifinity にし、aspectRatio を指定してレイアウトする
記事を読んだ会社の同僚から GeometryReader を使わず、Spacer と aspectRatio を活用してレイアウトする をベースにした改良版を教えていただいたので、追記しました。
ChildView の ForEach の内容がシンプルになりました。
Text の frame を .frame(maxWidth: .infinity, maxHeight: .infinity) とすることで、いい感じにサイズを調整しています。

import SwiftUI

struct ContentView: View {
    let rows = 12

    var body: some View {
        ScrollView {
            ForEach((0..<rows)) { _ in
                ChildView()
            }
        }
    }
}

struct ChildView: View {
    let columns = 4

    var body: some View {
        LazyVGrid(
            columns: Array<GridItem>(
                repeating: .init(.flexible(minimum: 60, maximum: .infinity)),
                count: columns)) {
            ForEach((0..<20)) { index in
                Text("\(index)")
                    .frame(maxWidth: .infinity, maxHeight: .infinity)
                    .aspectRatio(1, contentMode: .fit)
            }
        }
    }
}
結論
GeometryReader を使わず、Spacer と aspectRatio を活用してレイアウトする か、GeometryReader を使わず、maxWidth と maxHeight を .inifinity にし、aspectRatio を指定してレイアウトする の方法が変にハマることもなさそうですね。
最初私も Spacer でレイアウトを調整していたんですが、なんか計算でうまいことできんの?って思って GeometryReader を使った結果、どはまりしました。
GeometryReader を正しく使えたら UI 実装の幅も広がりそうではありますが、現状どうにもとっつきにくい印象なので、極力使わない方向でいこうと思います。
これぞ!という使い道を知っている方は教えていただけるとうれしいです。