はじめに
この記事は AWS Advent Calendar 2020 の24日目の記事です。
Advent Calendarで AWSでやらかして3桁万円請求された話 という記事を読んで、同じくAWSを運用している身として「ハッ!」としたので、急ぎ料金請求に関する対策を講じました。
予算の設定と通知される金額を設定する
予算に対してどれくらいの料金を使用しているか、日次でどのくらい請求されているかを通知する方法は複数考えられます。
- AWS Budgetsで予算と閾値の設定→AWS ChatbotでSlackに通知
- 簡単
- しかし閾値を超えないと通知が来ないので複数の閾値を設定しないと怖い
- AWS Cost and Usage ReportsでS3にコスト情報を出力する
- S3に新しいオブジェクトが追加されたらLambdaをキックしてSlackに通知
- ただし1時間ごとでさえ出力される情報量が多い
料金の推移を詳細に追従したいなら下の選択肢かと思います。
膨大な費用請求を避ける目的であれば上の選択肢で事足ります。今回はこれを取り上げたいと思います。
AWS SNSの設定
- SNSのホームにアクセス
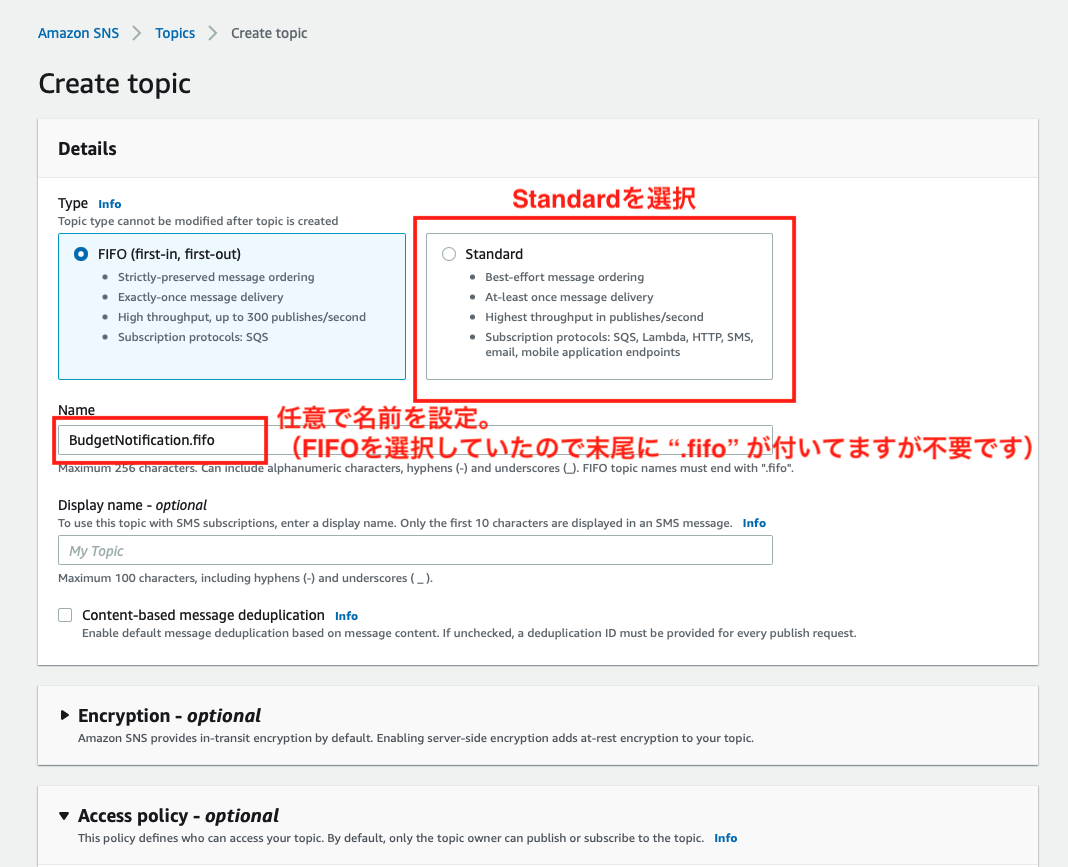
- "Create topic"をクリック
- TypeでStandardを選択
- Nameを任意で設定
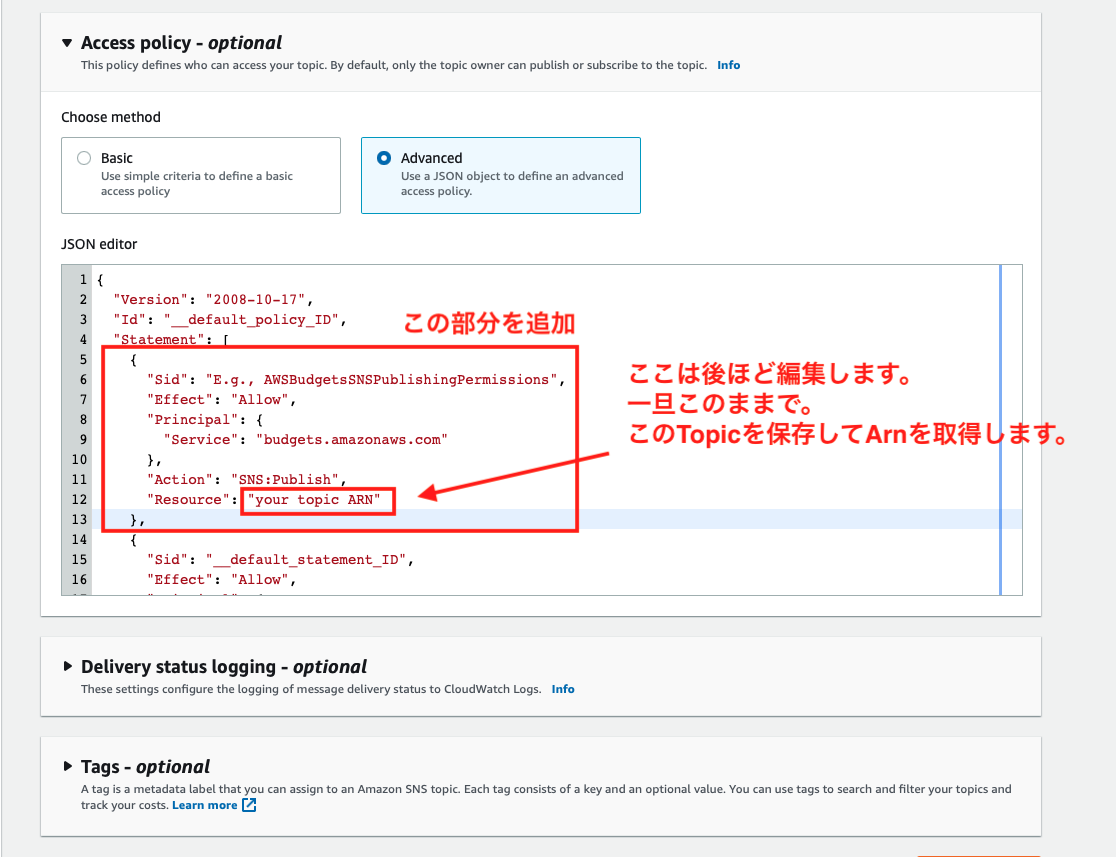
- Access Policyで "Advanced" を選択
- Statementの配列
"Statement": []に以下のjsonを追加 - この状態で一度保存
{
  "Sid": "E.g., AWSBudgetsSNSPublishingPermissions",
  "Effect": "Allow",
  "Principal": {
    "Service": "budgets.amazonaws.com"
  },
  "Action": "SNS:Publish",
  "Resource": "your topic ARN"
},
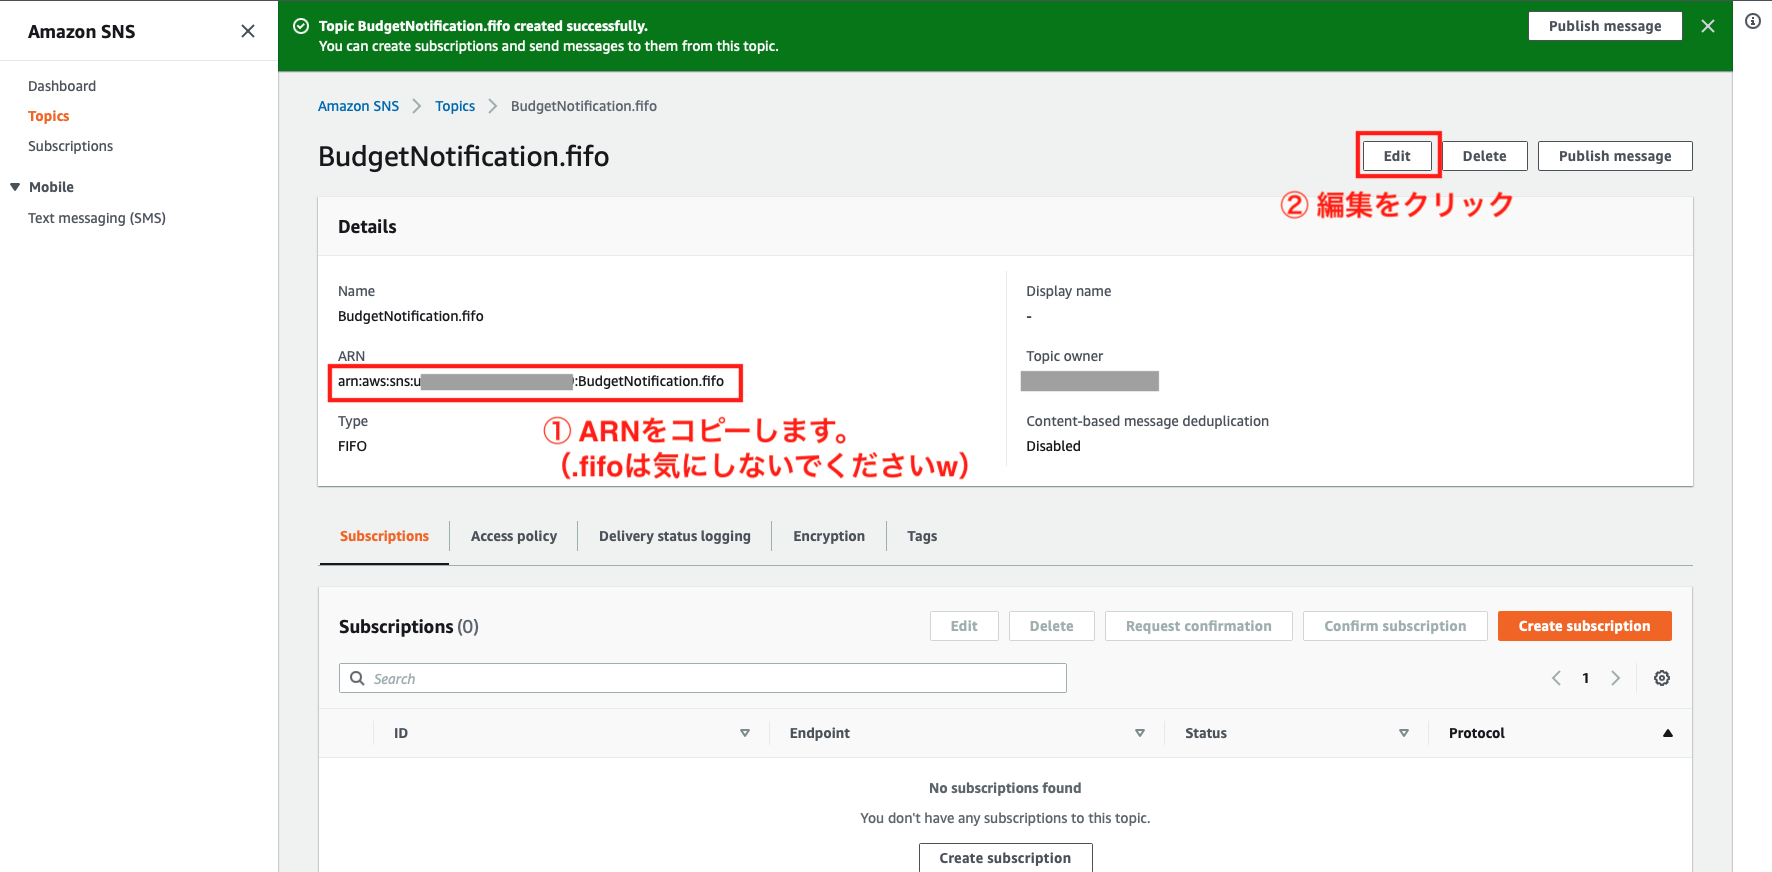
- 保存するとARNが生成されるのでこれをコピー
- 編集をクリック
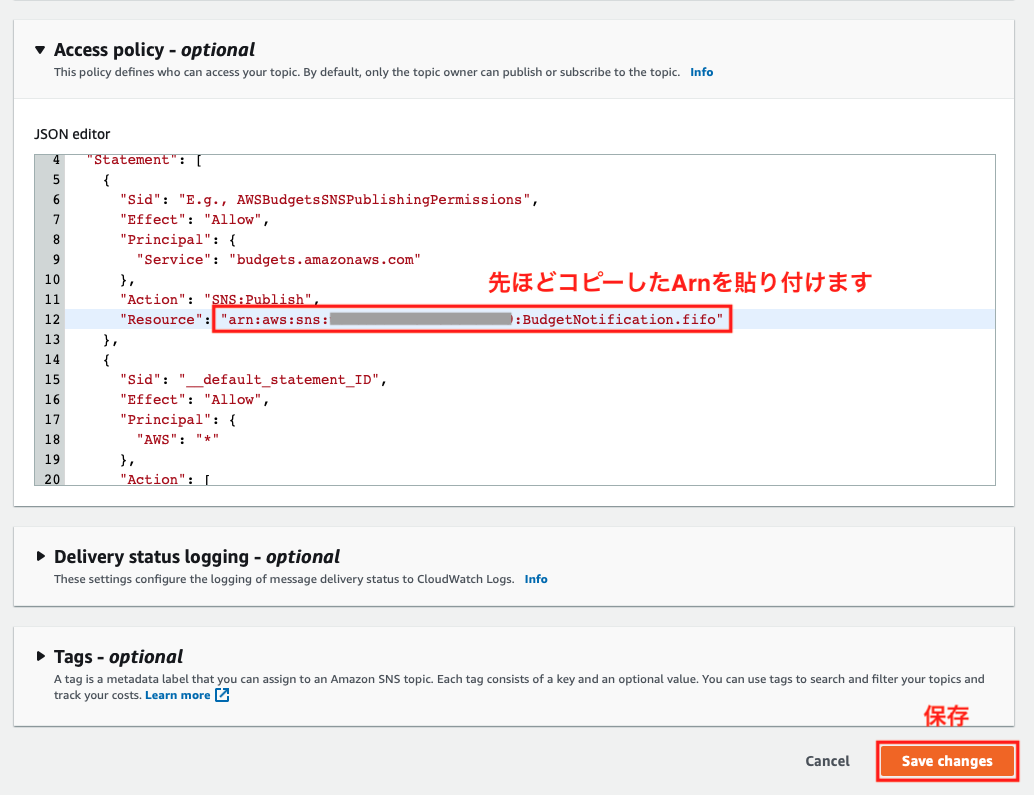
- Access Policyで
"your topic ARN"をコピーしたARNに変更 - 変更を保存
AWS Chatbotの設定
AWS Chatbot のコンソールにアクセスします。
- "Configure new clients" をクリック
- Slackを選択
- AWSがSlackへのアクセスを許可するか聞かれるので "許可" を選択
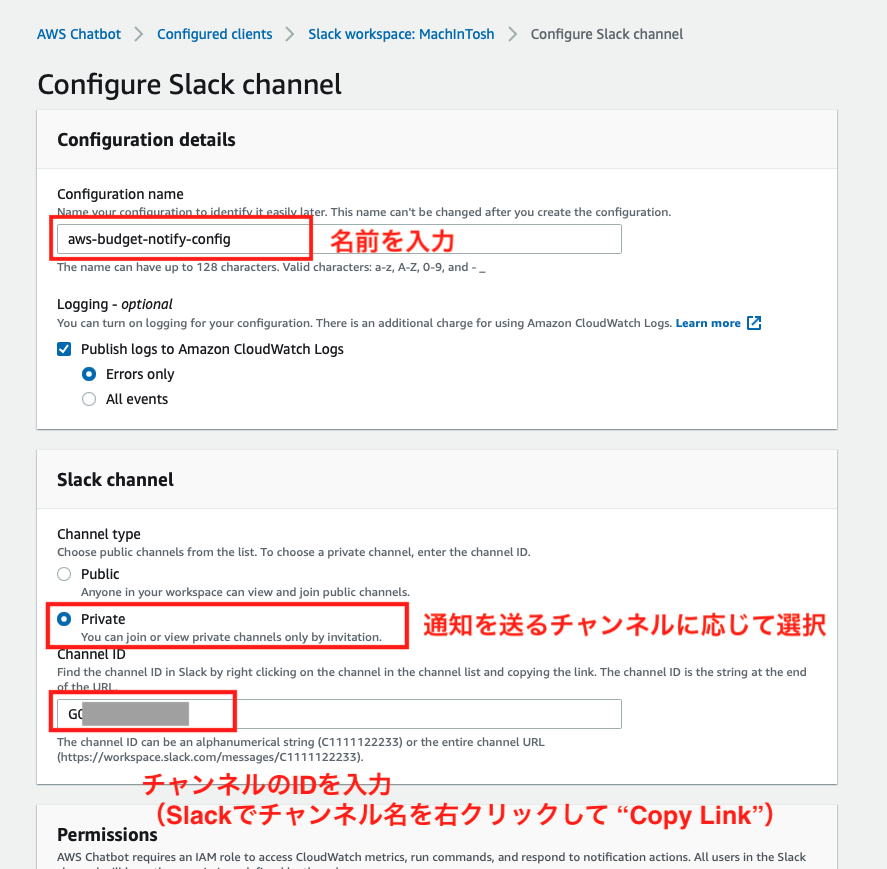
- "Configure Slack Channel" という画面に遷移される
- Configuration nameを入力
- 通知するSlackのチャンネル情報を入力
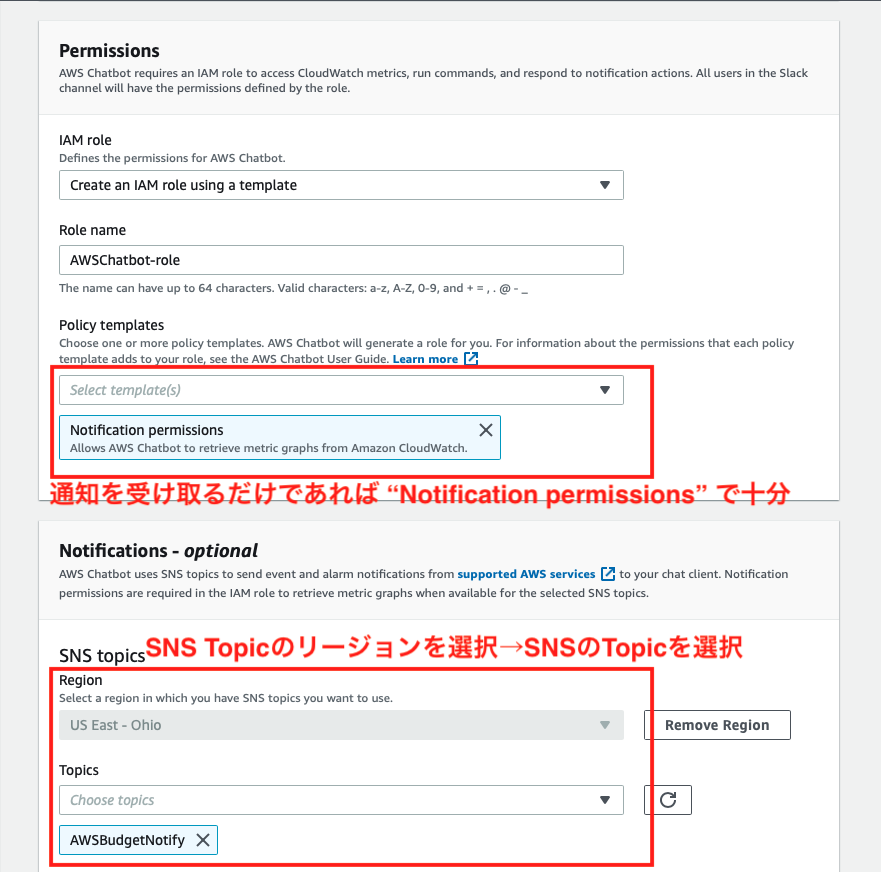
- Slackに対するChatbotのIAM Roleを作成する
- 上で作成したSNS Topicの情報を入力
- 保存
これでChatbotがSNS TopicをSubscribeするようになります。
AWS Budgetsの設定
AWS Budgetsにアクセスします。
注意
IAM Userを利用している場合、デフォルトではrootアカウントにしか権限がないのでエラーメッセージが表示されます。Full AdminのPolicyを持っていても表示されます。
そこで、IAM Userに料金情報にアクセスできるように設定します。
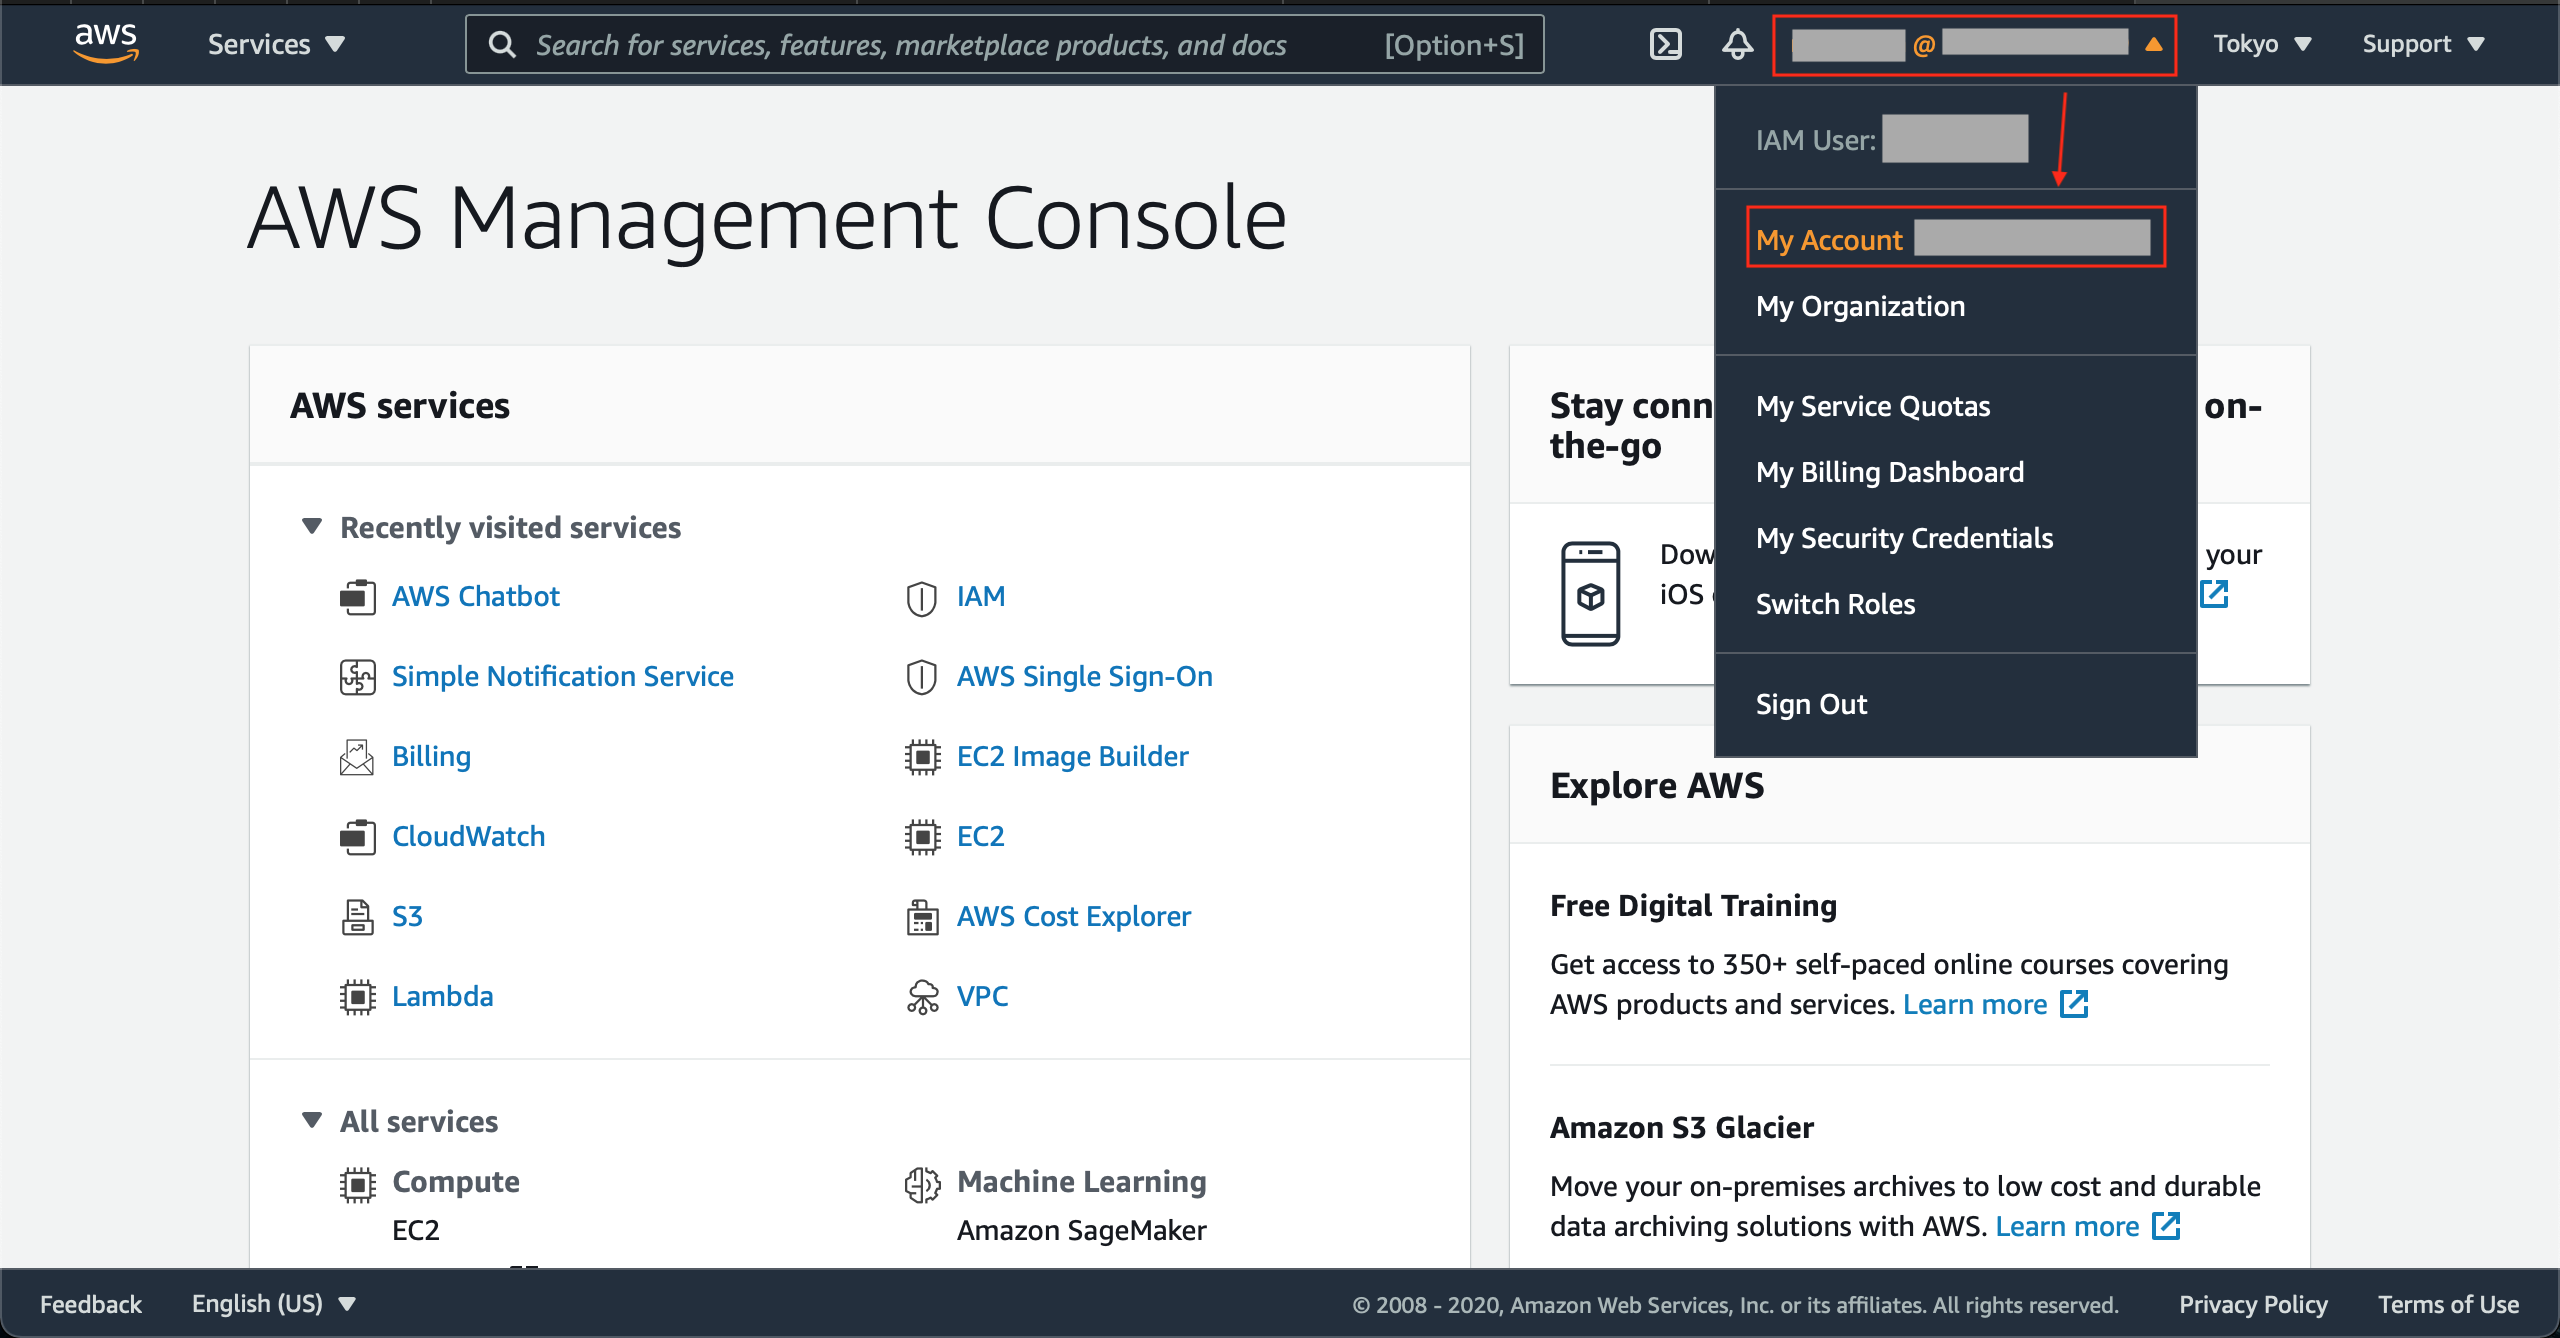
- 一旦、rootアカウントでログインしなおす
- ユーザー名をクリック
- My Account をクリック
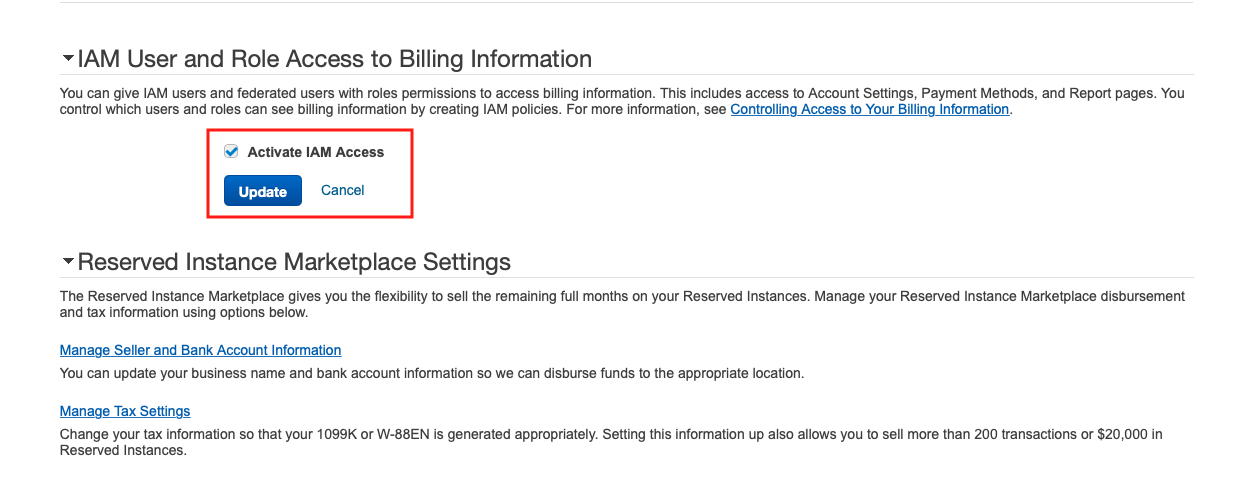
- 下にスクロールし "IAM User and Role Access to Billing Information" を広げる
- "Activate IAM Access" にチェック
- "Update" を押す
Budget Typeの設定
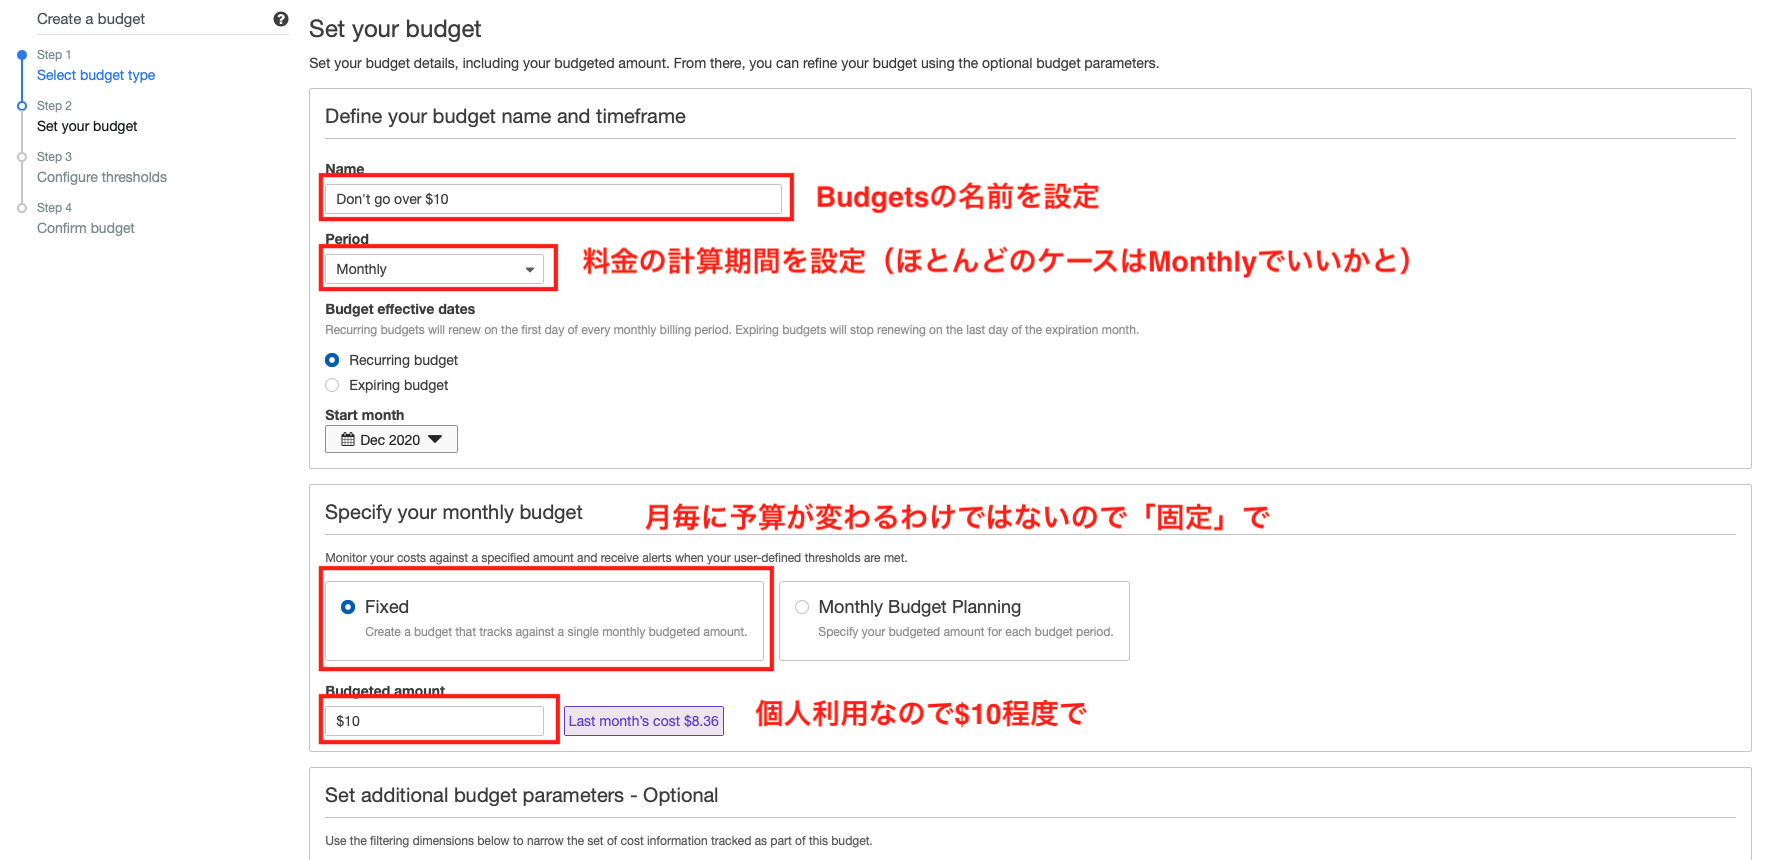
- "Create a budget" をクリック
- BudgetのNameを設定
- Periodを選択
- Specify your monthly budgetで "Fixed" を選択(予算が固定であれば)
- 上記のPeriodでの予算を設定
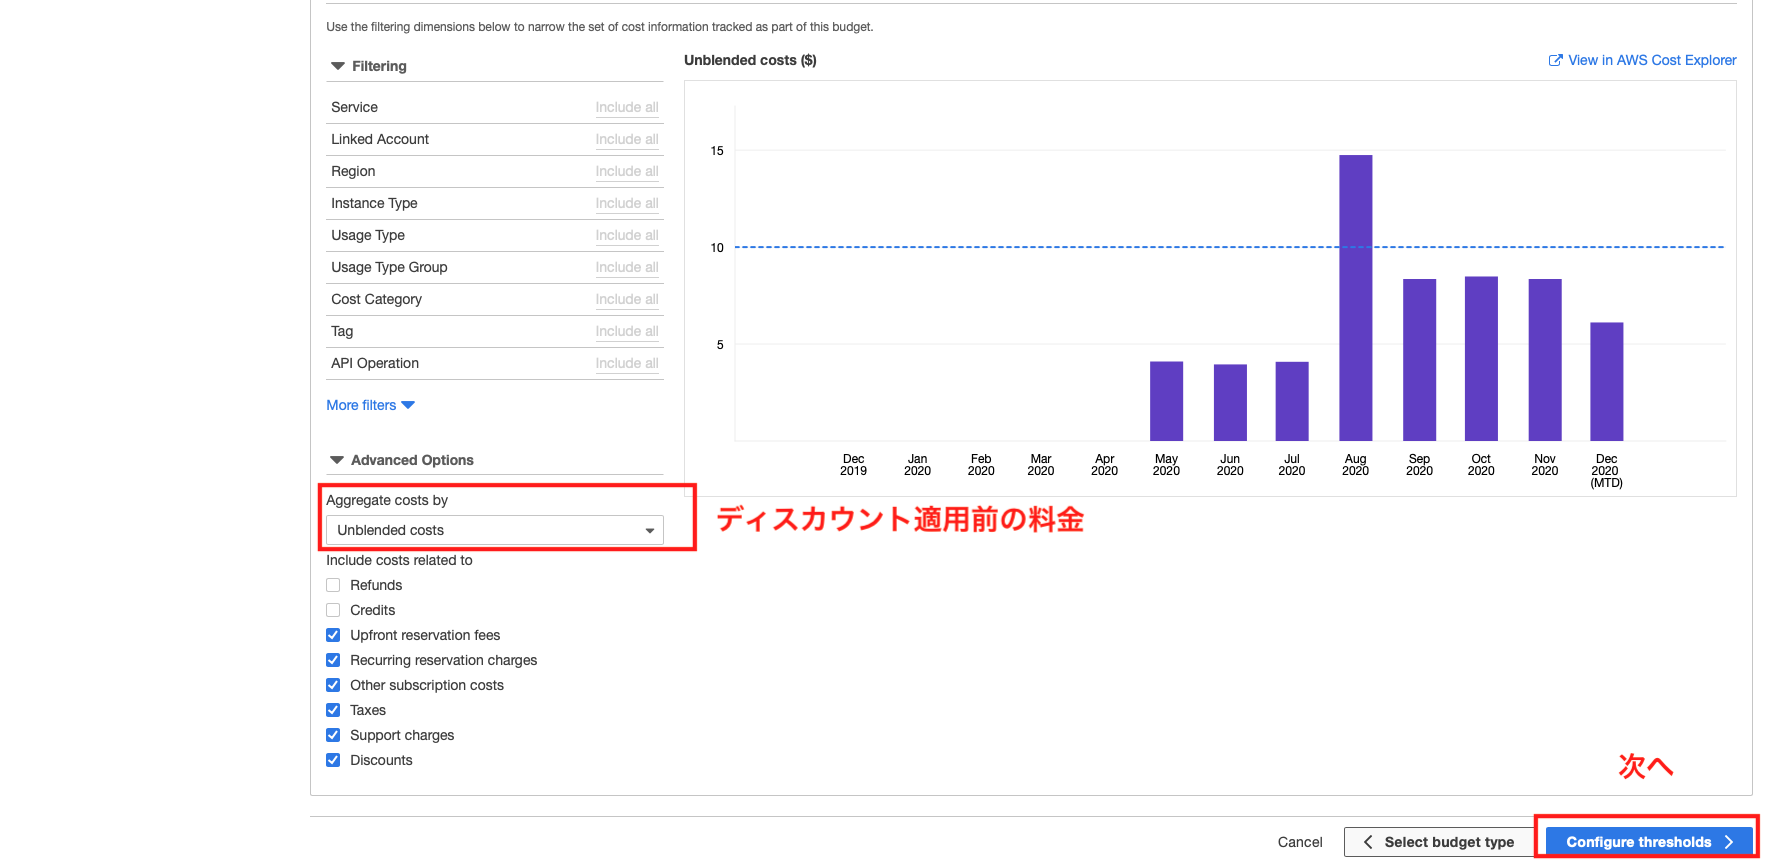
- 必要に応じて Aggregate costs by を変更
- "Configure thresholds" で次へ
thresholdsの設定
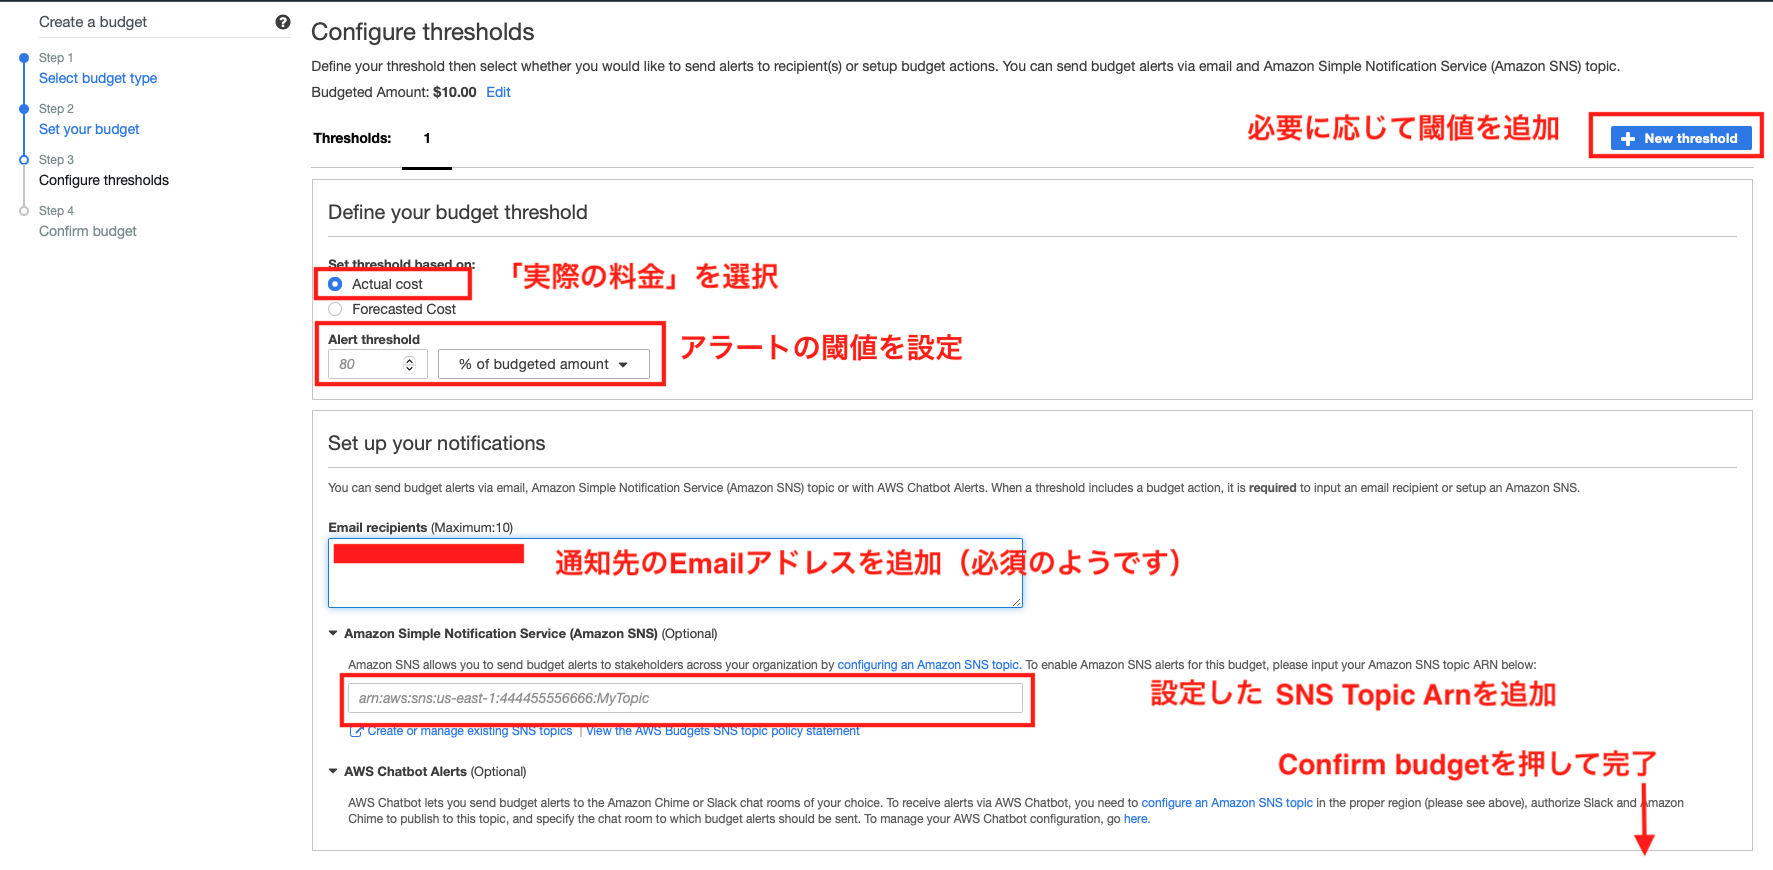
- 実際の料金に基づいて閾値を設定する場合は"Actual cost"を設定
- 閾値を設定
- Email Addressを入力(必須のようです)
- Amazon SNSに先ほど設定したSNS TopicのArnを入力
- Confirm budgetをクリックして完了
以上で設定は終わりです。お疲れ様でした!
さいごに
通知のthresholdを設定してから時間が経っていないため、まだ通知が来ていません。汗
Advent Calendarの件もあるので、とりいそぎ手順だけでも投稿することにしました。実際の通知が来たらこちらの投稿を編集する予定です。(間に合わずすみません汗)
追記
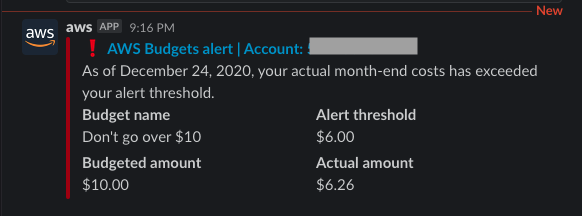
21:16にSlackに通知が来ました!これで設定がしっかり完了していたようです!
みなさんもクラウドインフラの高額請求には気をつけて、自分の資産を守りましょう。
それではみなさん、メリークリスマス!🎄

