はじめに
去年買ったM5Stack CAT-M UNITで1年いろいろ遊んでセンサー値を送信して
Wifiの無いところでのIotに挑戦していました。
去年の記事
今回 Timer Camera F を購入したので画像をLINEに送信してみました
https://docs.m5stack.com/en/unit/timercam_f
必要なもの
- SIM7080G-CAT-M-NB-IOT-UNIT
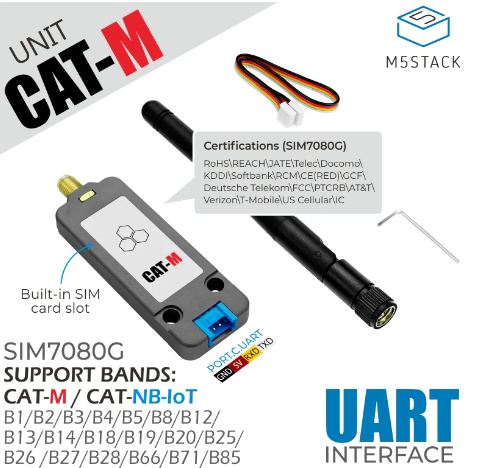
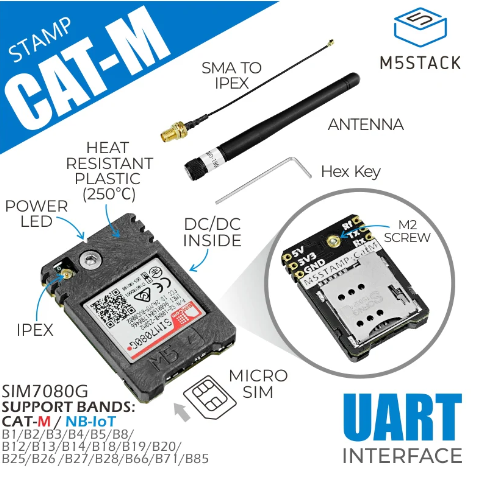
- M5Stamp SIM7080G搭載 CAT-Mモジュール
国内ではモジュール、アンテナともに技適認証されたStamp型が発売されています
https://www.switch-science.com/products/8194
https://shop.m5stack.com/products/m5stamp-cat-m-module-sim7080g
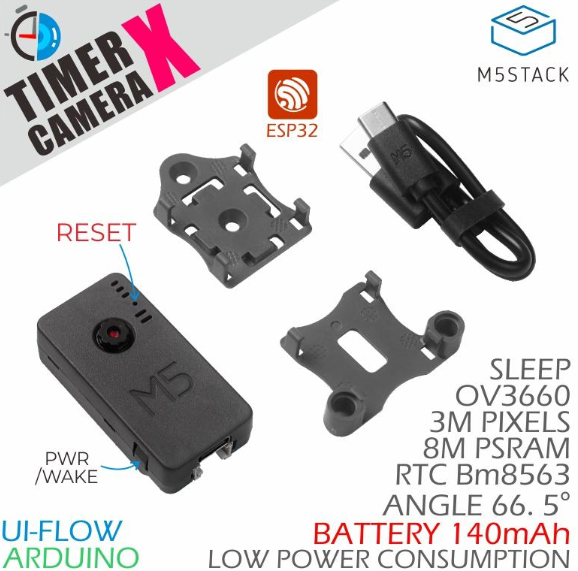
- ESP32 PSRAM Timer Camera X (OV3660)
https://www.switch-science.com/products/6742
https://shop.m5stack.com/products/esp32-psram-timer-camera-x-ov3660
- ESP32 PSRAM Timer Camera F (OV3660)
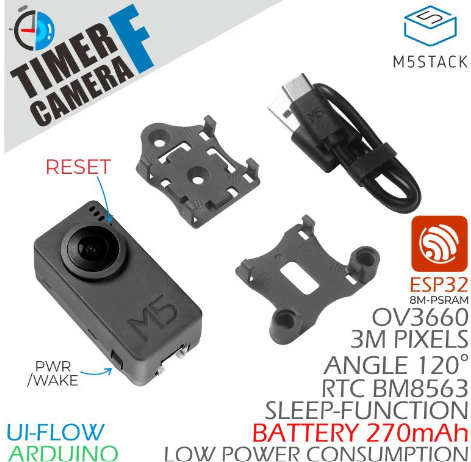
上のレンズが魚眼レンズのタイプです
https://www.switch-science.com/products/6786
https://shop.m5stack.com/products/esp32-psram-timer-camera-fisheye-ov3660
-
povo2.0 SIM
基本料無料 データ通信128kbps 180日超の継続利用に一定の条件有 最大5回線
https://povo.jp/ -
LINE アカウント
https://notify-bot.line.me/ja/
トークンを発行
スケッチ
-
ライブラリ
Wire@^1.0.1
m5stack/Timer-CAM@0.0.3
vshymanskyy/TinyGSM@^0.11.5 -
ボード
M5stack-Timer-CAM
https://docs.m5stack.com/en/quick_start/timer_cam/arduino
参考記事
ほぼ上の記事のコピペですがWiFiClientSecureのところをTinyGsmClientSecure に変え
grove端子をUARTに使いRX=G13 TX= G4 を指定します
SIM7070_SIM7080_SIM7090 Series_AT Command Manual_V1.04
12.2.10 AT+CACFG Configure Transparent Transmission Parameters
を見るとデフォルトのパケットサイズは1320バイトとあるので分割して送信します
なおこれは設定により
AT+CACFG="TRANSPKTSIZE",1460
を書き込むことで最大1460バイトまで拡大可能になります
最後にWifiより送信に失敗するおそれがあるので
ステータスコード"200"が帰ってこない場合は再送信するようにしました
#include <Arduino.h>
#include "battery.h"
#include "led.h"
#include "bmm8563.h"
#include "esp_camera.h"
#include "camera_pins.h"
#include <Wire.h>

#define TINY_GSM_MODEM_SIM7080
#include <TinyGsmClient.h>

#define SerialMon Serial
#define SerialAT Serial1
// LINE通知用トークン
#define LINE_TOKEN "****your line token****"
// 通知メッセージ(バッテリー残量を表示)
#define MESSAGE "BAT %.2f volt"
// 区切り用のランダム文字列
#define BOUNDARY "123456789000000000000987654321"
// メッセージヘッダ
#define MESSAGE_HEADER "\r\n--" BOUNDARY "\r\nContent-Disposition: form-data; name=\"message\"\r\n\r\n"
// 画像ヘッダ
#define IMAGE_HEADER "\r\n--" BOUNDARY "\r\nContent-Disposition: form-data; name=\"imageFile\"; filename=\"image.jpg\"\r\nContent-Type: image/jpeg\r\n\r\n"
// 最後の区切り
#define BOUNDARY_LAST "\r\n--" BOUNDARY "--\r\n"

unsigned long sleep_time = 20 * 60;//送信間隔 20分

#define BM8563_I2C_SDA 12
#define BM8563_I2C_SCL 14

TinyGsm        modem(SerialAT);
TinyGsmClientSecure client(modem);

void enterSleep()
{
  SerialMon.println("Enter Sleep! Wake Up after " + String(sleep_time) + " Sec.");
  delay(500);

  SerialMon.println("modem.poweroff");


  bmm8563_setTimerIRQ(sleep_time);//sec, max time is 255 * 60

  bat_disable_output();//バッテリーのみのときはここで電源断(VSYS_VIN)

  esp_deep_sleep(sleep_time * 1000000UL);
  esp_deep_sleep_start();//USB給電時はESP32はdeepSleep Groveの5Vは通電

}

void setup()
{
  bat_init();
  Wire.begin(BM8563_I2C_SDA, BM8563_I2C_SCL);
  bmm8563_init();
  led_init(CAMERA_LED_GPIO);
  SerialMon.begin(115200);
  SerialAT.begin(115200, SERIAL_8N1, 13, 4);//timercamF

  modem.init();


  //modem.sendAT(GF("+CACFG=\"TRANSPKTSIZE\",1460"));//パケットサイズを拡大する
  /* 最初だけ必要?
  String modemInfo = modem.getModemInfo();
  SerialMon.print("Modem Info: ");
  SerialMon.println(modemInfo);
  modem.gprsConnect("povo.jp", "", "");
  SerialMon.print(F("waitForNetwork()"));
  while (!modem.waitForNetwork()) SerialMon.print(".");
  SerialMon.println(F(" Ok."));
  */

  SerialMon.print(F("gprsConnect(povo.jp)"));
  modem.gprsConnect("povo.jp", "", "");
  SerialMon.println(F(" done."));

  SerialMon.print(F("isNetworkConnected()"));
  while (!modem.isNetworkConnected()) SerialMon.print(".");
  SerialMon.println(F(" Ok."));

  SerialMon.print(F("My IP addr: "));
  IPAddress ipaddr = modem.localIP();
  SerialMon.println(ipaddr);

  //カメラ初期設定
  camera_config_t config;
  config.ledc_channel = LEDC_CHANNEL_0;
  config.ledc_timer = LEDC_TIMER_0;
  config.pin_d0 = Y2_GPIO_NUM;
  config.pin_d1 = Y3_GPIO_NUM;
  config.pin_d2 = Y4_GPIO_NUM;
  config.pin_d3 = Y5_GPIO_NUM;
  config.pin_d4 = Y6_GPIO_NUM;
  config.pin_d5 = Y7_GPIO_NUM;
  config.pin_d6 = Y8_GPIO_NUM;
  config.pin_d7 = Y9_GPIO_NUM;
  config.pin_xclk = XCLK_GPIO_NUM;
  config.pin_pclk = PCLK_GPIO_NUM;
  config.pin_vsync = VSYNC_GPIO_NUM;
  config.pin_href = HREF_GPIO_NUM;
  config.pin_sscb_sda = SIOD_GPIO_NUM;
  config.pin_sscb_scl = SIOC_GPIO_NUM;
  config.pin_pwdn = PWDN_GPIO_NUM;
  config.pin_reset = RESET_GPIO_NUM;
  config.xclk_freq_hz = 20000000;
  config.pixel_format = PIXFORMAT_JPEG;
  config.frame_size = FRAMESIZE_VGA;//
  /*
  FRAMESIZE_VGA,       640x480
    FRAMESIZE_SVGA,      800x600
    FRAMESIZE_XGA,       1024x768
    FRAMESIZE_HD,        1280x720
    FRAMESIZE_SXGA,      1280x1024
    FRAMESIZE_UXGA,      1600x1200
    FRAMESIZE_FHD,       1920x1080
    FRAMESIZE_P_HD,       720x1280
    FRAMESIZE_P_3MP,      864x1536
    FRAMESIZE_QXGA,      2048x1536
 */
  config.jpeg_quality = 5;//少ないほど高品質
  config.fb_count = 1;

  // camera init
  esp_err_t err = esp_camera_init(&config);
  if (err != ESP_OK)
  {
    SerialMon.printf("Camera init failed with error 0x%x", err);
    return;
  }

  sensor_t *s = esp_camera_sensor_get();
  //initial sensors are flipped vertically and colors are a bit saturated
  s->set_vflip(s, 1);       //上下反転
  s->set_brightness(s, 3);  //blightness 明るさ
  s->set_saturation(s, -1); //saturation 彩度

}


void loop()
{
  camera_fb_t *fb = NULL;
  fb = esp_camera_fb_get();

  if (!fb)
  {
    SerialMon.println("Camera capture failed");
    return;
  }

  SerialMon.println("capture complete");
  SerialMon.printf("image size: %u\n", fb->len);
  for (auto t = millis(); millis() - t < 15000 && !client.connect("notify-api.line.me", 443);)
;
  if (!client.connected())
  {
    SerialMon.println("connect failed.");
    esp_restart();
  }

  char message[64];
  auto messageLength = snprintf(message, sizeof(message), MESSAGE, bat_get_voltage()*0.001);
  auto contentLength = strlen(MESSAGE_HEADER) + messageLength + strlen(IMAGE_HEADER) + fb->len + strlen(BOUNDARY_LAST);
  client.println("POST /api/notify HTTP/1.0");
  client.println("Authorization: Bearer " LINE_TOKEN);
  client.println("Content-Type: multipart/form-data;boundary=" BOUNDARY);
  client.println("Content-Length: " + String(contentLength));
  client.println();
  SerialMon.printf("content length: %u\n", contentLength);
  SerialMon.printf("write message header: %u\n", client.write((uint8_t *)MESSAGE_HEADER, strlen(MESSAGE_HEADER)));
  SerialMon.printf("write message data: %u\n", client.write((uint8_t *)message, messageLength));
  SerialMon.printf("write image header: %u\n", client.write((uint8_t *)IMAGE_HEADER, strlen(IMAGE_HEADER)));
  auto p = fb->buf;
  auto rest = fb->len;
  while (rest > 0 && client.connected())
  {
    auto n = client.write(p, rest > 1320 ? 1320 : rest); // default packet size = 1320 最大1460まで
    p += n;
    rest -= n;
  }
  SerialMon.printf("write image data: %u\n", fb->len - rest);
  SerialMon.printf("write last boundary: %u\n", client.write((uint8_t *)BOUNDARY_LAST, strlen(BOUNDARY_LAST)));
  client.flush();
  String response;
  while (client.connected())
  {
    response =client.readStringUntil('\n') ;
    SerialMon.print(response + '\n');
  }
  client.stop();
  esp_camera_fb_return(fb);
  if (response.indexOf("200") > -1){
    SerialMon.println("send OK");
    enterSleep();
  }
}
仕様
- LINE
LINE Notify API Document
https://notify-bot.line.me/doc/ja/
画像は 最大 2048×2048px / JPEG のみ
なおカメラの解像度は 最大2048x1536px
アップロードはresponse headerにあり私の環境では
1時間あたり50回の制限があります
- povo
povo2.0の通信速度128kbpsですがSIM7080GのUARTが115.2kbpsなのでこれが上限になります
やってみたところ接続開始から送信完了まで長くても1分以下で実際は画像データ送信より接続確立に時間がかかっている感じでした。
基本料無料ですが6ヶ月オプションを購入しないと利用停止予告のメールが届きます
Q. 一人何回線まで契約できますか。
A.KDDI合計で5回線まで
https://kdlsupport.zendesk.com/hc/ja/articles/4405641621007-%E4%B8%80%E4%BA%BA%E4%BD%95%E5%9B%9E%E7%B7%9A%E3%81%BE%E3%81%A7%E5%A5%91%E7%B4%84%E3%81%A7%E3%81%8D%E3%81%BE%E3%81%99%E3%81%8B-
-
本体バッテリ
上記のスケッチでは270mAhの内蔵バッテリーで20分間間隔で28時間稼働しました
商品説明では「1時間に1枚で1か月以上のバッテリー寿命」とあるので改良の余地がありそう -
電源オフ
本体には電源オフのボタンはありません。
LEDの下にリセットボタン(細い針金等で押す)で再起動はできますが電源を切るにはソフトウェアAPIを使う必要があります -
Sleep
バッテリーのみで使用時に bmm8563_setTimerIRQ(sleep_time) の秒数後に電源(VSYS_VIN)が入る。
最大225*60秒=3時間45分。
https://github.com/m5stack/TimerCam-arduino/blob/a83fca723aa03c38f1bfcefe3e72cf757425691f/src/utility/RTC8563_Class.h#L113
スタンバイ電流は2μA
USB給電時はESP32 はdeepsleepに入り、Grove端子の5V出力は通電しているのでCAT-Mで電力消費します
終わりに
LTE通信のカメラを1万円程度でランニングコストほぼ無料で作ることができました
あとは太陽光パネルで充電すれば屋外の圃場などを遠隔観察することができます
(追記 2022-12-4)ボードバージョンによるエラー
VScode+PlatformIOでは正常なのに ArduinoIDEでコンパイルするとシリアルモニターでエラーが出たので調べたらこんな記事がありました
Arduino IDE ESP32ボードのバージョンアップに伴うTimerCameraライブラリの変更内容
https://msr-r.net/timer-camera-lib/
(追記 2022-12-11)時間を指定してのタイマー
上記では sleep_time の間隔で撮影送信していましたが、例えば日暮れ17:30から日の出6:30までは撮影をしないようにしてみます。
まず一度下記のスケッチを書き込んでRTCの時刻を合わせます
手動で時刻を合わせるコード
#include "bmm8563.h"
#define BM8563_I2C_SDA 12
#define BM8563_I2C_SCL 14
rtc_date_t date;

void setup() {
  Serial.begin(115200);
  bmm8563_init();

  date.year = 2022;
  date.month = 12;
  date.day = 11;
  date.hour = 20;
  date.minute = 00;
  date.second = 00;
  bmm8563_setTime(&date);

}

void loop() {
  bmm8563_getTime(&date);
  Serial.printf("Time: %d/%d/%d %02d:%02d:%-2d\r\n", date.year, date.month,
                date.day, date.hour, date.minute, date.second);
  delay(5000);
}
(追記 2022-12-24)モデムから時刻を取得
この記事を参考にモデムの同期した時刻でRTC時刻を合わせます
#include "TimeLib.h"
(略)

void getNetworkTime_setRtcTime(){
  //getNetworkTime
  int year1,month1,day1,hour1,min1,sec1;
  float timezone;
  modem.getNetworkTime(&year1, &month1, &day1, &hour1, &min1, &sec1, &timezone); // 時刻取得
  setTime(hour1, min1, sec1, day1, month1, year1);  //時刻セット
  //setRtcTime
  date.year = year();
  date.month = month();
  date.day = day();
  date.hour = hour();
  date.minute = minute();
  date.second = second();
  bmm8563_setTime(&date);
}
次に最初の timercam_LTE.ino の一部に追加します
#include "TimeLib.h"
(略)
unsigned long sleep_time = 20 * 60;//送信間隔 20分
int sleep_hour = 17;
int sleep_min = 30;
int wakeup_hour = 6 ;
int wakeup_min = 30 ;
rtc_date_t date;

void enterNightSleep(){
  bmm8563_getTime(&date);
  Serial.printf("Time: %d/%d/%d %02d:%02d:%-2d\r\n", date.year, date.month,
                date.day, date.hour, date.minute, date.second);
  if ((date.hour > sleep_hour) || (date.hour == sleep_hour && date.minute > sleep_min) || (date.hour < wakeup_hour) ) {
    SerialMon.printf("Enter Sleep! Wake Up %d:%d\r\n",wakeup_hour,wakeup_min);
    delay(500);
    SerialMon.println("modem.poweroff");
    bmm8563_clearIRQ();
    bmm8563_setDateIRQ( wakeup_min ,wakeup_hour, -1, -1);//( minute, hour, day, week)  -1 :disable
    bat_disable_output();

    esp_deep_sleep(sleep_time * 1000000UL);
    esp_deep_sleep_start();
 }
}

void setup()
{
  (略)
  bat_init();
  bmm8563_init();
  modem.init();
  (略)

  getNetworkTime_setRtcTime()
  enterNightSleep();
(追記 2023-1-15)モデムリセット
SIM7080GにはATコマンドでpower off することができます modem.sendAT("+CPOWD=1")
ただしCAT-M UNITではpower on するためのPOWERKEYピンが引き出されていないので再起動できません
何らかの原因でモデムとの通信が出来ずにフリーズしてしまった場合watchdog timerなどでESP32は再起動しても繰り返しフリーズすることがあります。
そのためESP32とモデム両方を再起動させるためRTC(bmm8563)を使って強制的に電源を入れ直します
int reset_time =5;
void reset()
{
  SerialMon.println("reset! Wake Up after " + String(reset_time) + " Sec.");
  bmm8563_clearIRQ();
  bmm8563_setTimerIRQ(reset_time);
}
例えば通信出来ないときに再起動させるには
  if (!modem.waitForNetwork()){
    reset();
  };