2022/11/29に R.Swift 7.0.0 がリリースされ、Swift Package Manager ビルドツールプラグインの機能が追加されました。この R.Swift プラグインの導入方法についてREADMEに沿って説明します。
- R.Swift 7.0.0 リリースノート
- リリース一覧
インフォメーション
記事執筆現在、既に 7.2.4 がリリースされており、引き続き頻繁なリリースが続きそうな勢いです。
導入される方は最新のリリースを導入すると良いと思います ![]()
R.Swiftのプラグインとは
R.Swiftにはこれまでプラグインの機能はありませんでした。今回の7.0.0で新規に追加されたものです。
この機能により、R.generated.swiftが自動生成されます。
なお、そもそもプラグインとは何かを知りたい方は、以下の記事を読まれることをおすすめします ![]()
![]()
R.Swiftのプラグインの導入方法
R.Swiftのプラグインの導入方法は、2種類あります。
- Xcode project
- Xcode project の "Package Dependencies" から R.Swift を追加する方法
- Package.swift
- Package.swift に記述する方法
当記事では、Xcode project で導入する方法を説明します。
README.md をみると以下のように丁寧に説明されています。
結論から言えば、この通りにやればもう完璧なのですが、私は最後かなり戸惑ったのでその実体験をもとに、スクショと共に一緒に見ていきたいと思います ![]()
Xcode project - SPM
- In Project Settings, on the tab "Package Dependencies", click "+" and add
github.com/mac-cain13/R.swift- Select your target, on the tab "General", in the section "Frameworks, Libraries, and Embeded Content", click "+" and add
RswiftLibrary- Select your target, on the tab "Build Phases", in the section "Run Build Tool Plug-ins", click "+" and add
RswiftGenerateInternalResources- Right-click on your project, click
RswiftModifyXcodePackages, clickRun, clickAllow Command to Change Files- Build your project, now the
Rstruct should be available in your code, use auto-complete to explore all static references
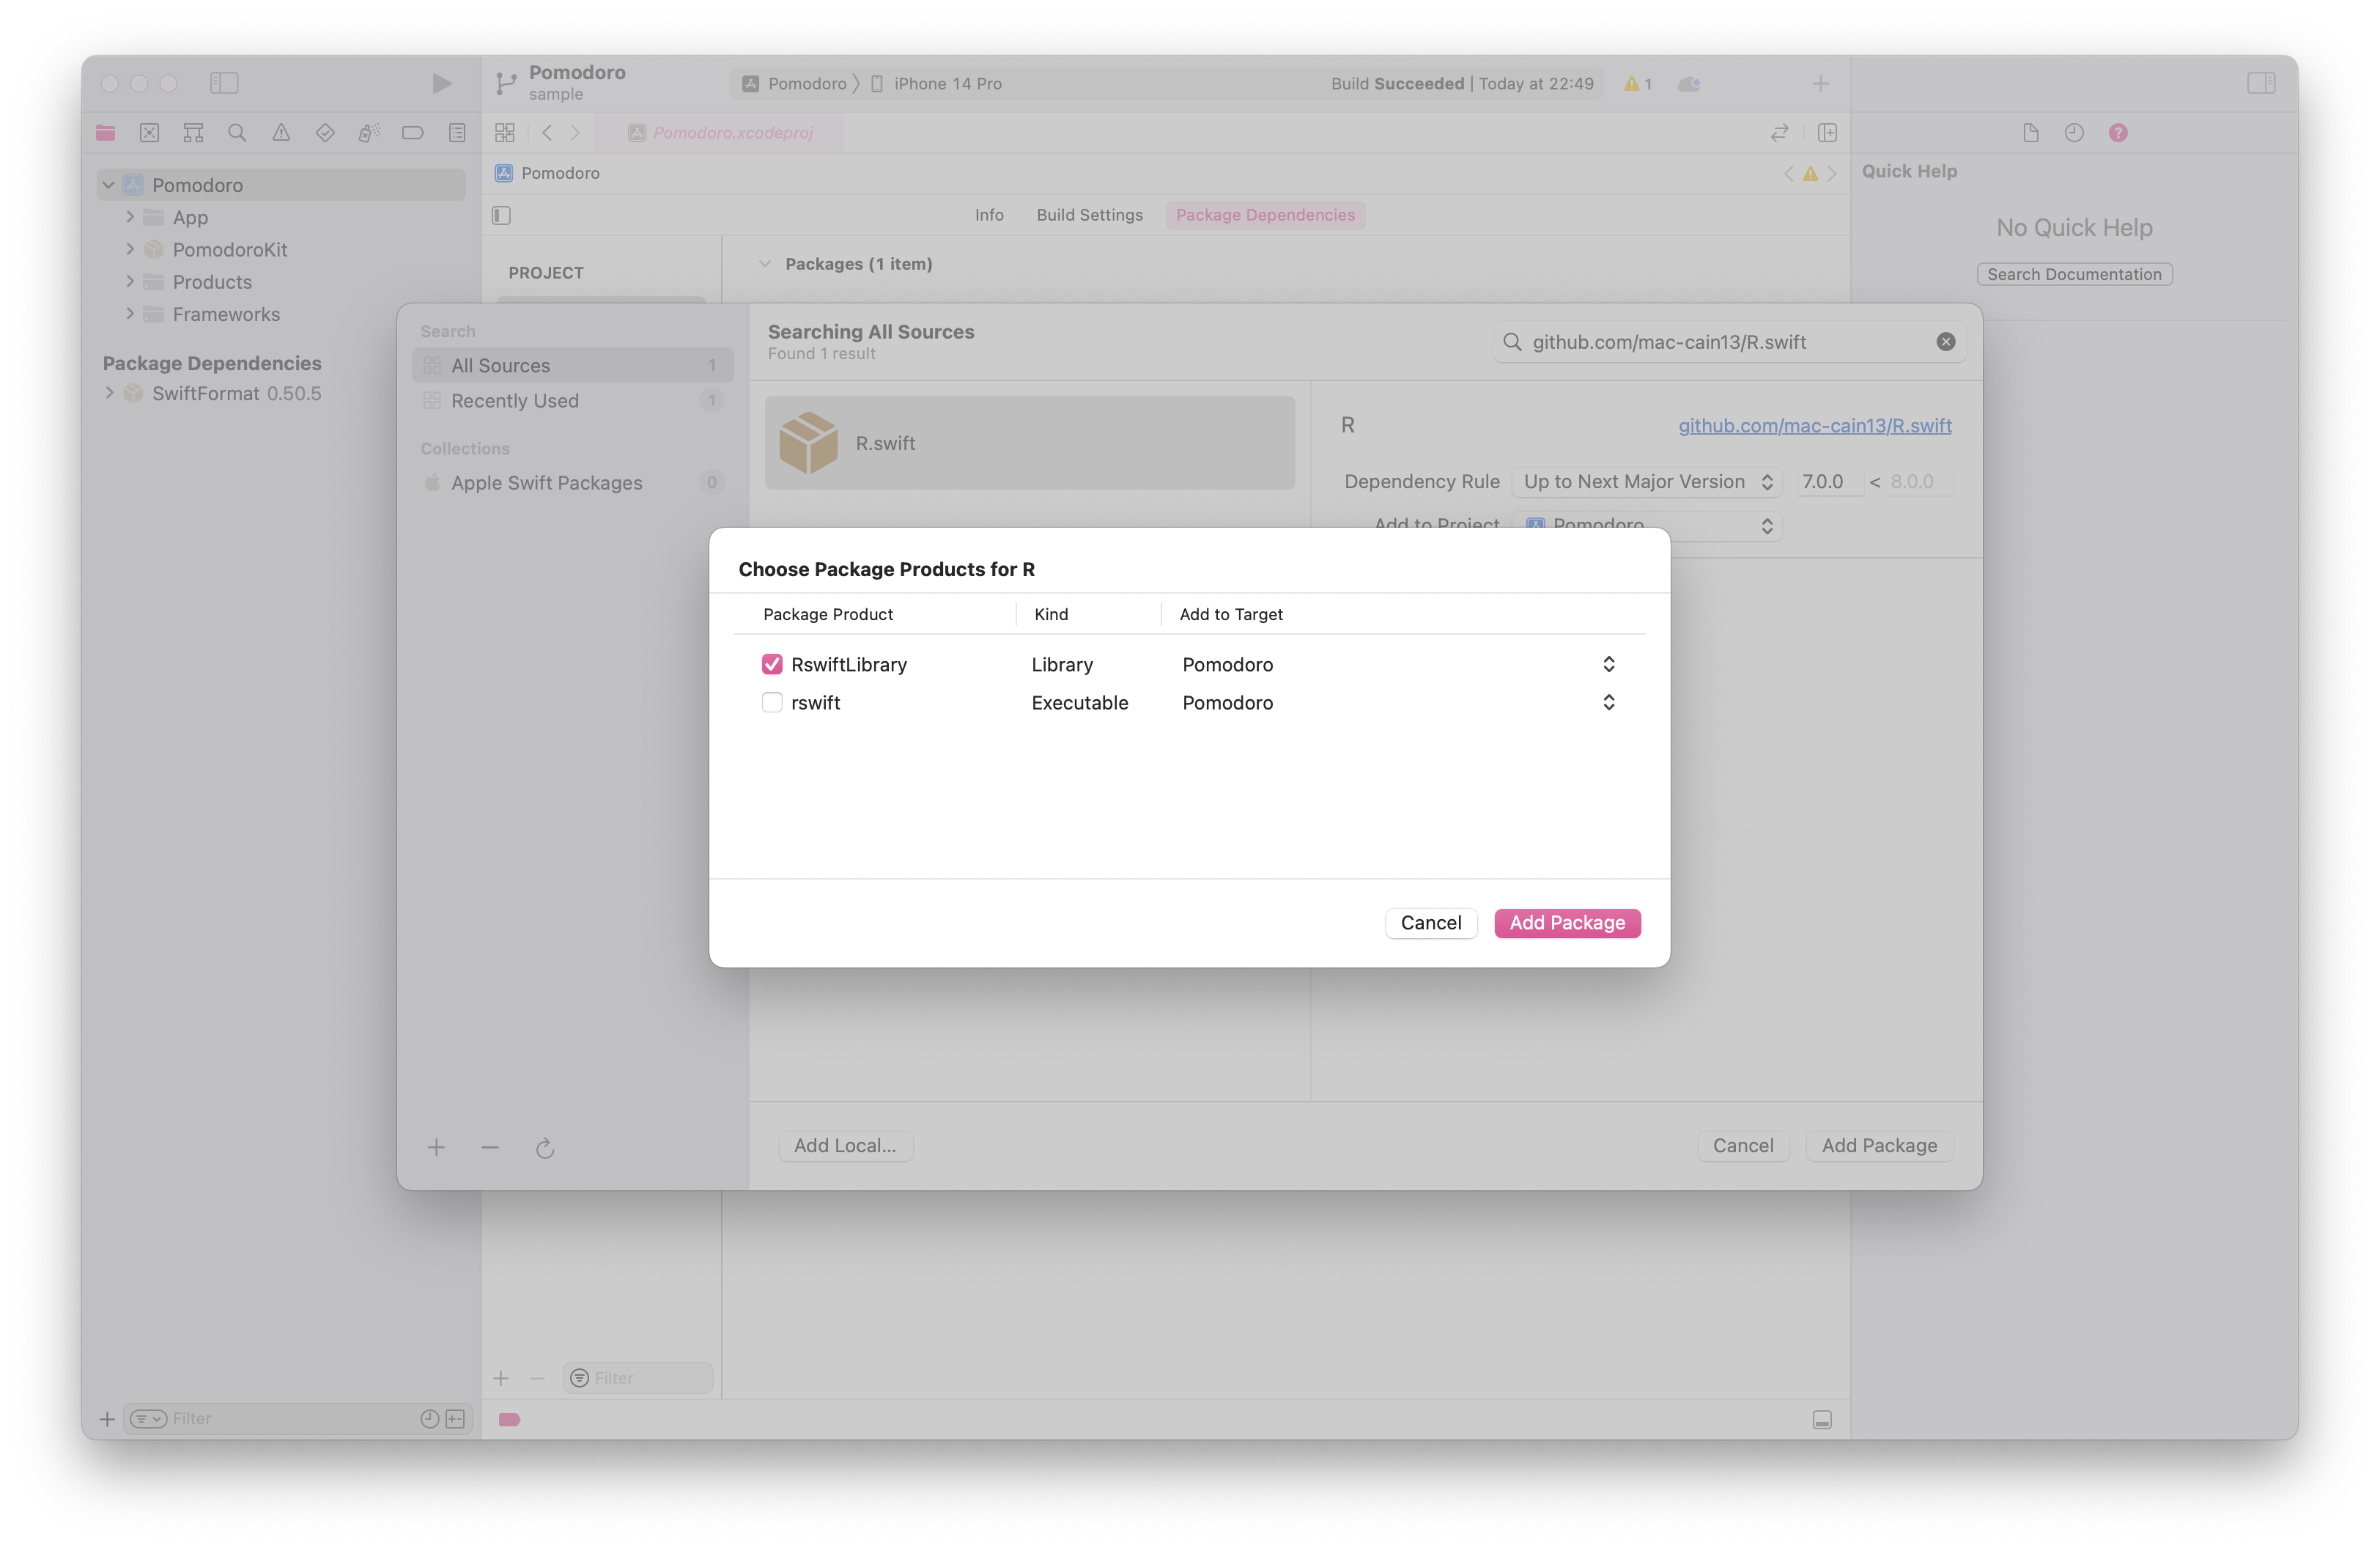
1. In Project Settings, on the tab "Package Dependencies", click "+" and add github.com/mac-cain13/R.swift
SwiftPMを使っている方にはおなじみのとこです。
プロジェクト設定の "Package Dependencies" タブを開き、"+" ボタンをクリックします。

右上の検索バーに github.com/mac-cain13/R.swift を入力し、R.Swiftを検索します。
"Dependency Rule" を適宜変更してください(画像の場合は、 Up to Next Major Version で、7.0.0以上を指定しています)。
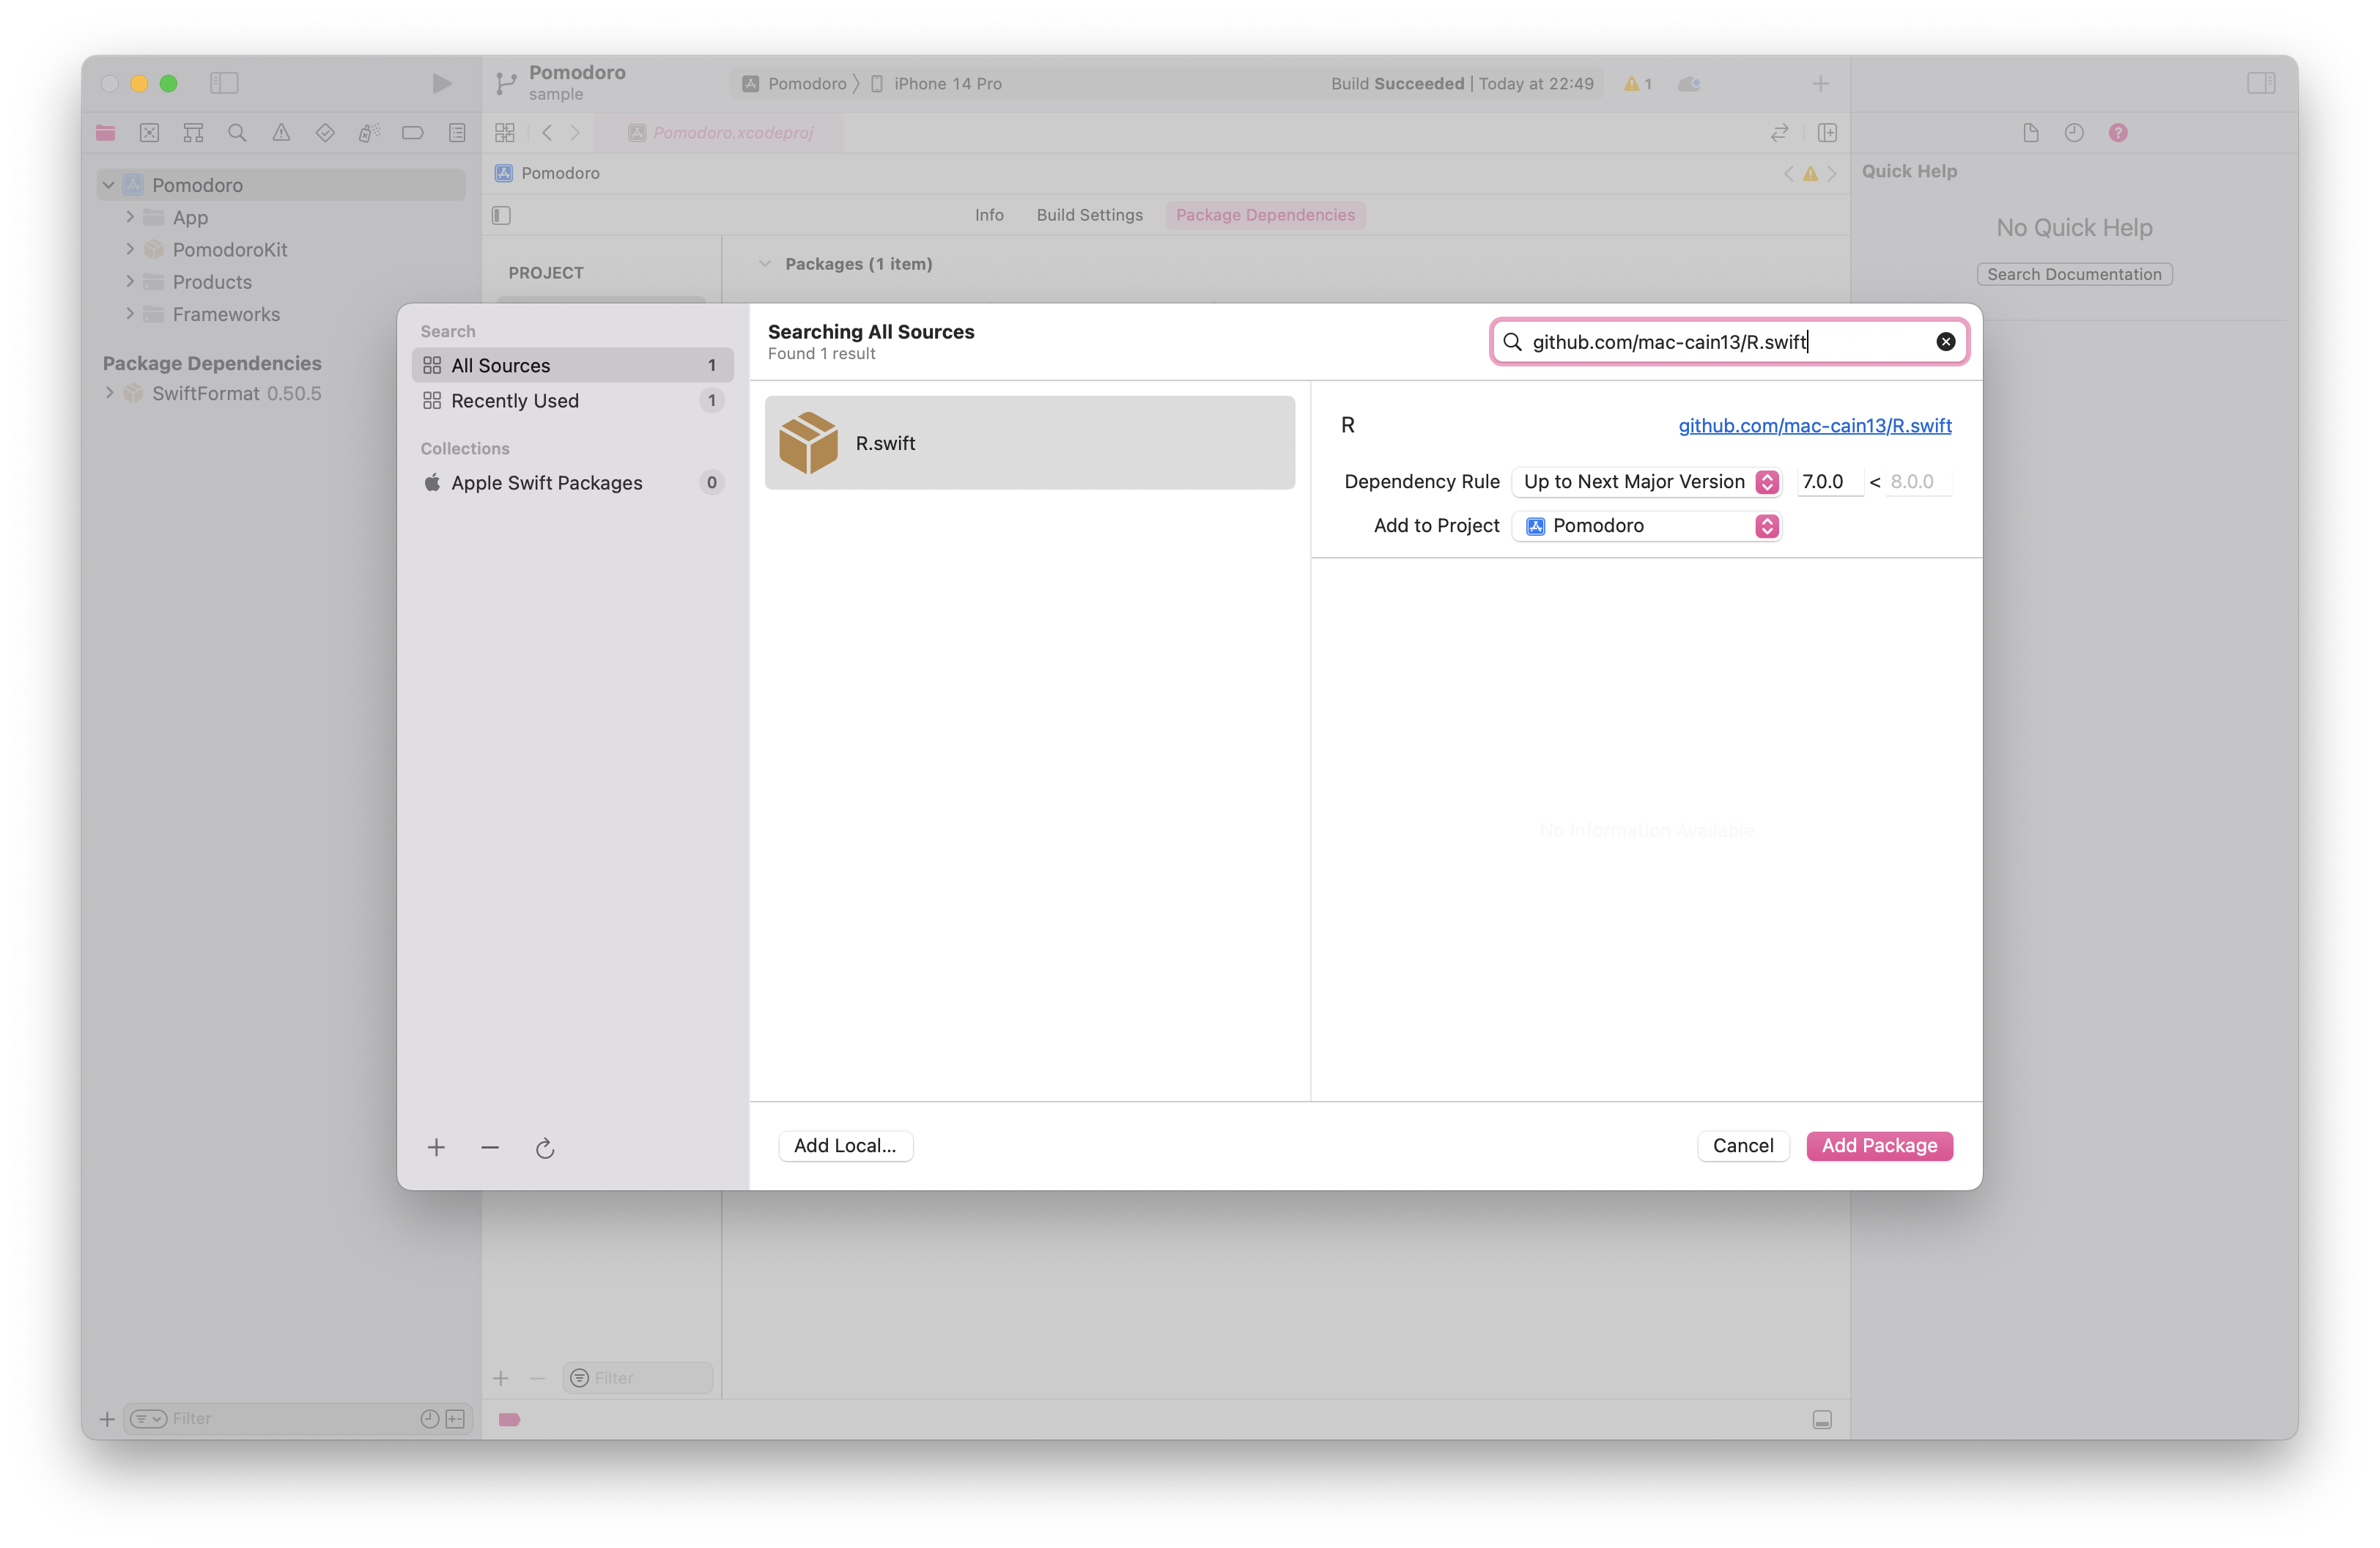
"Package Product" で選択候補が2つ出ますが、 RswiftLibrary のみチェックを入れます。
戸惑った点
コマンドラインツールの rswift はチェックしなくてもOKでした。
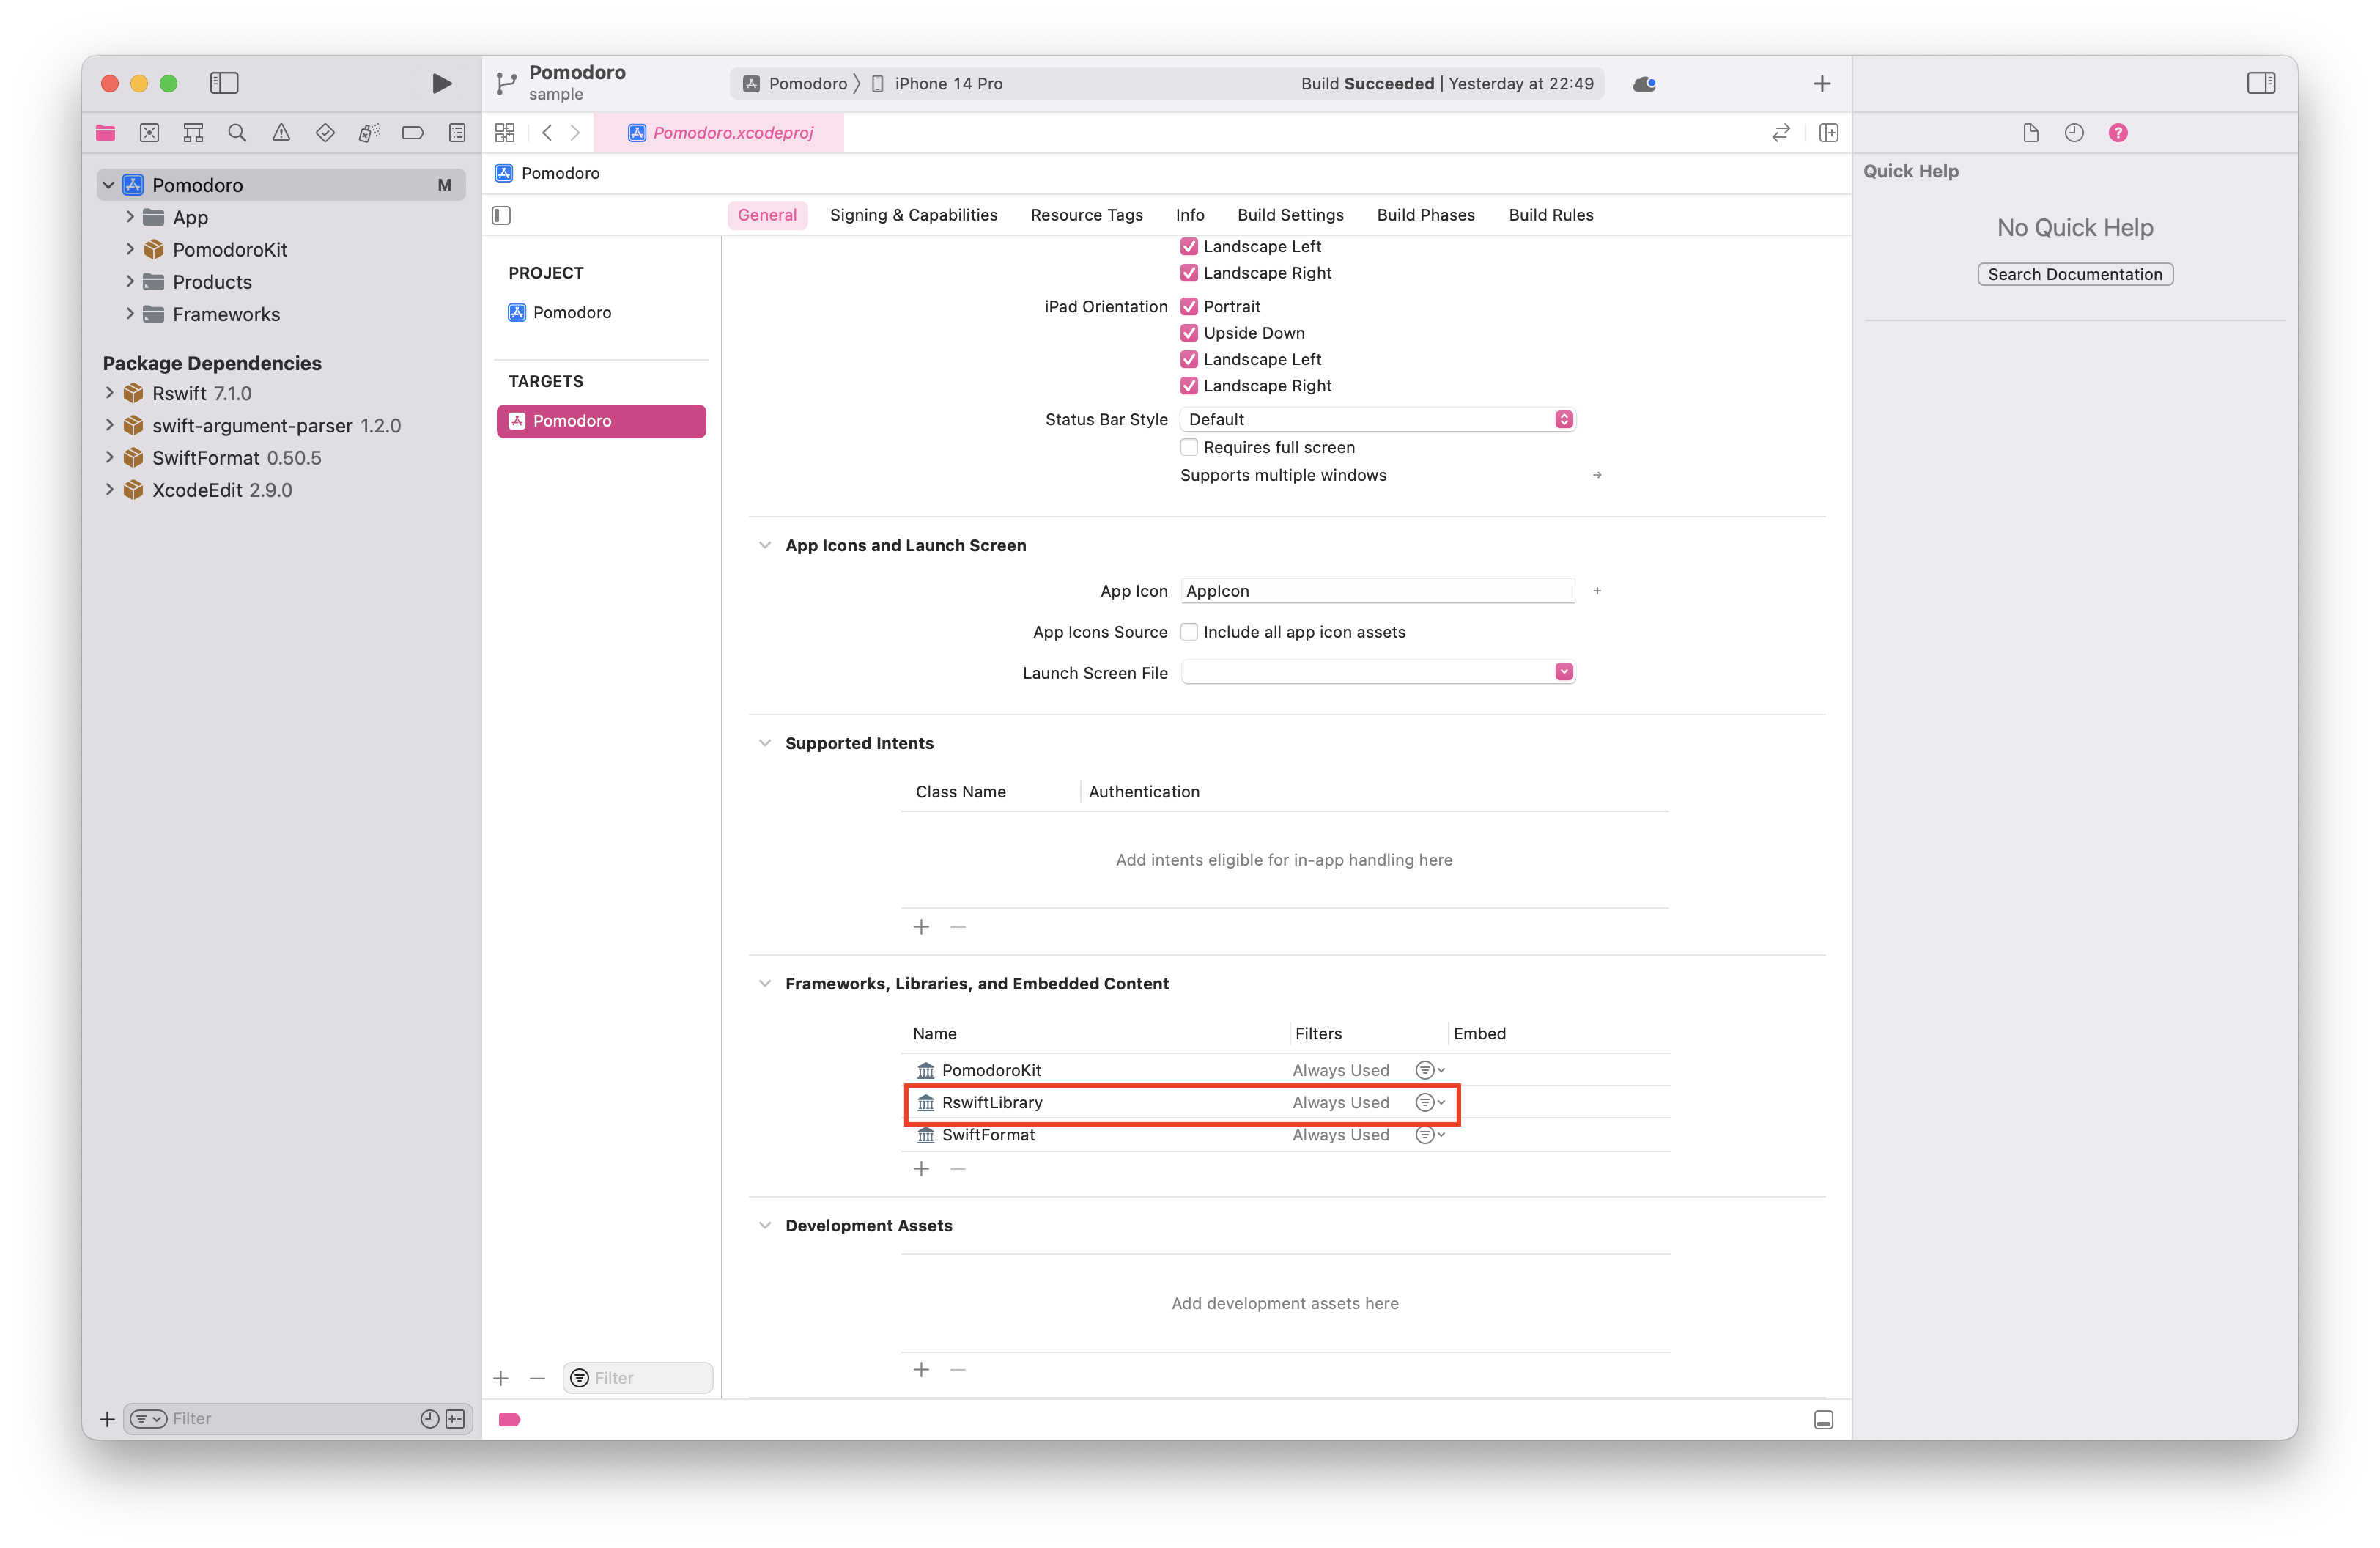
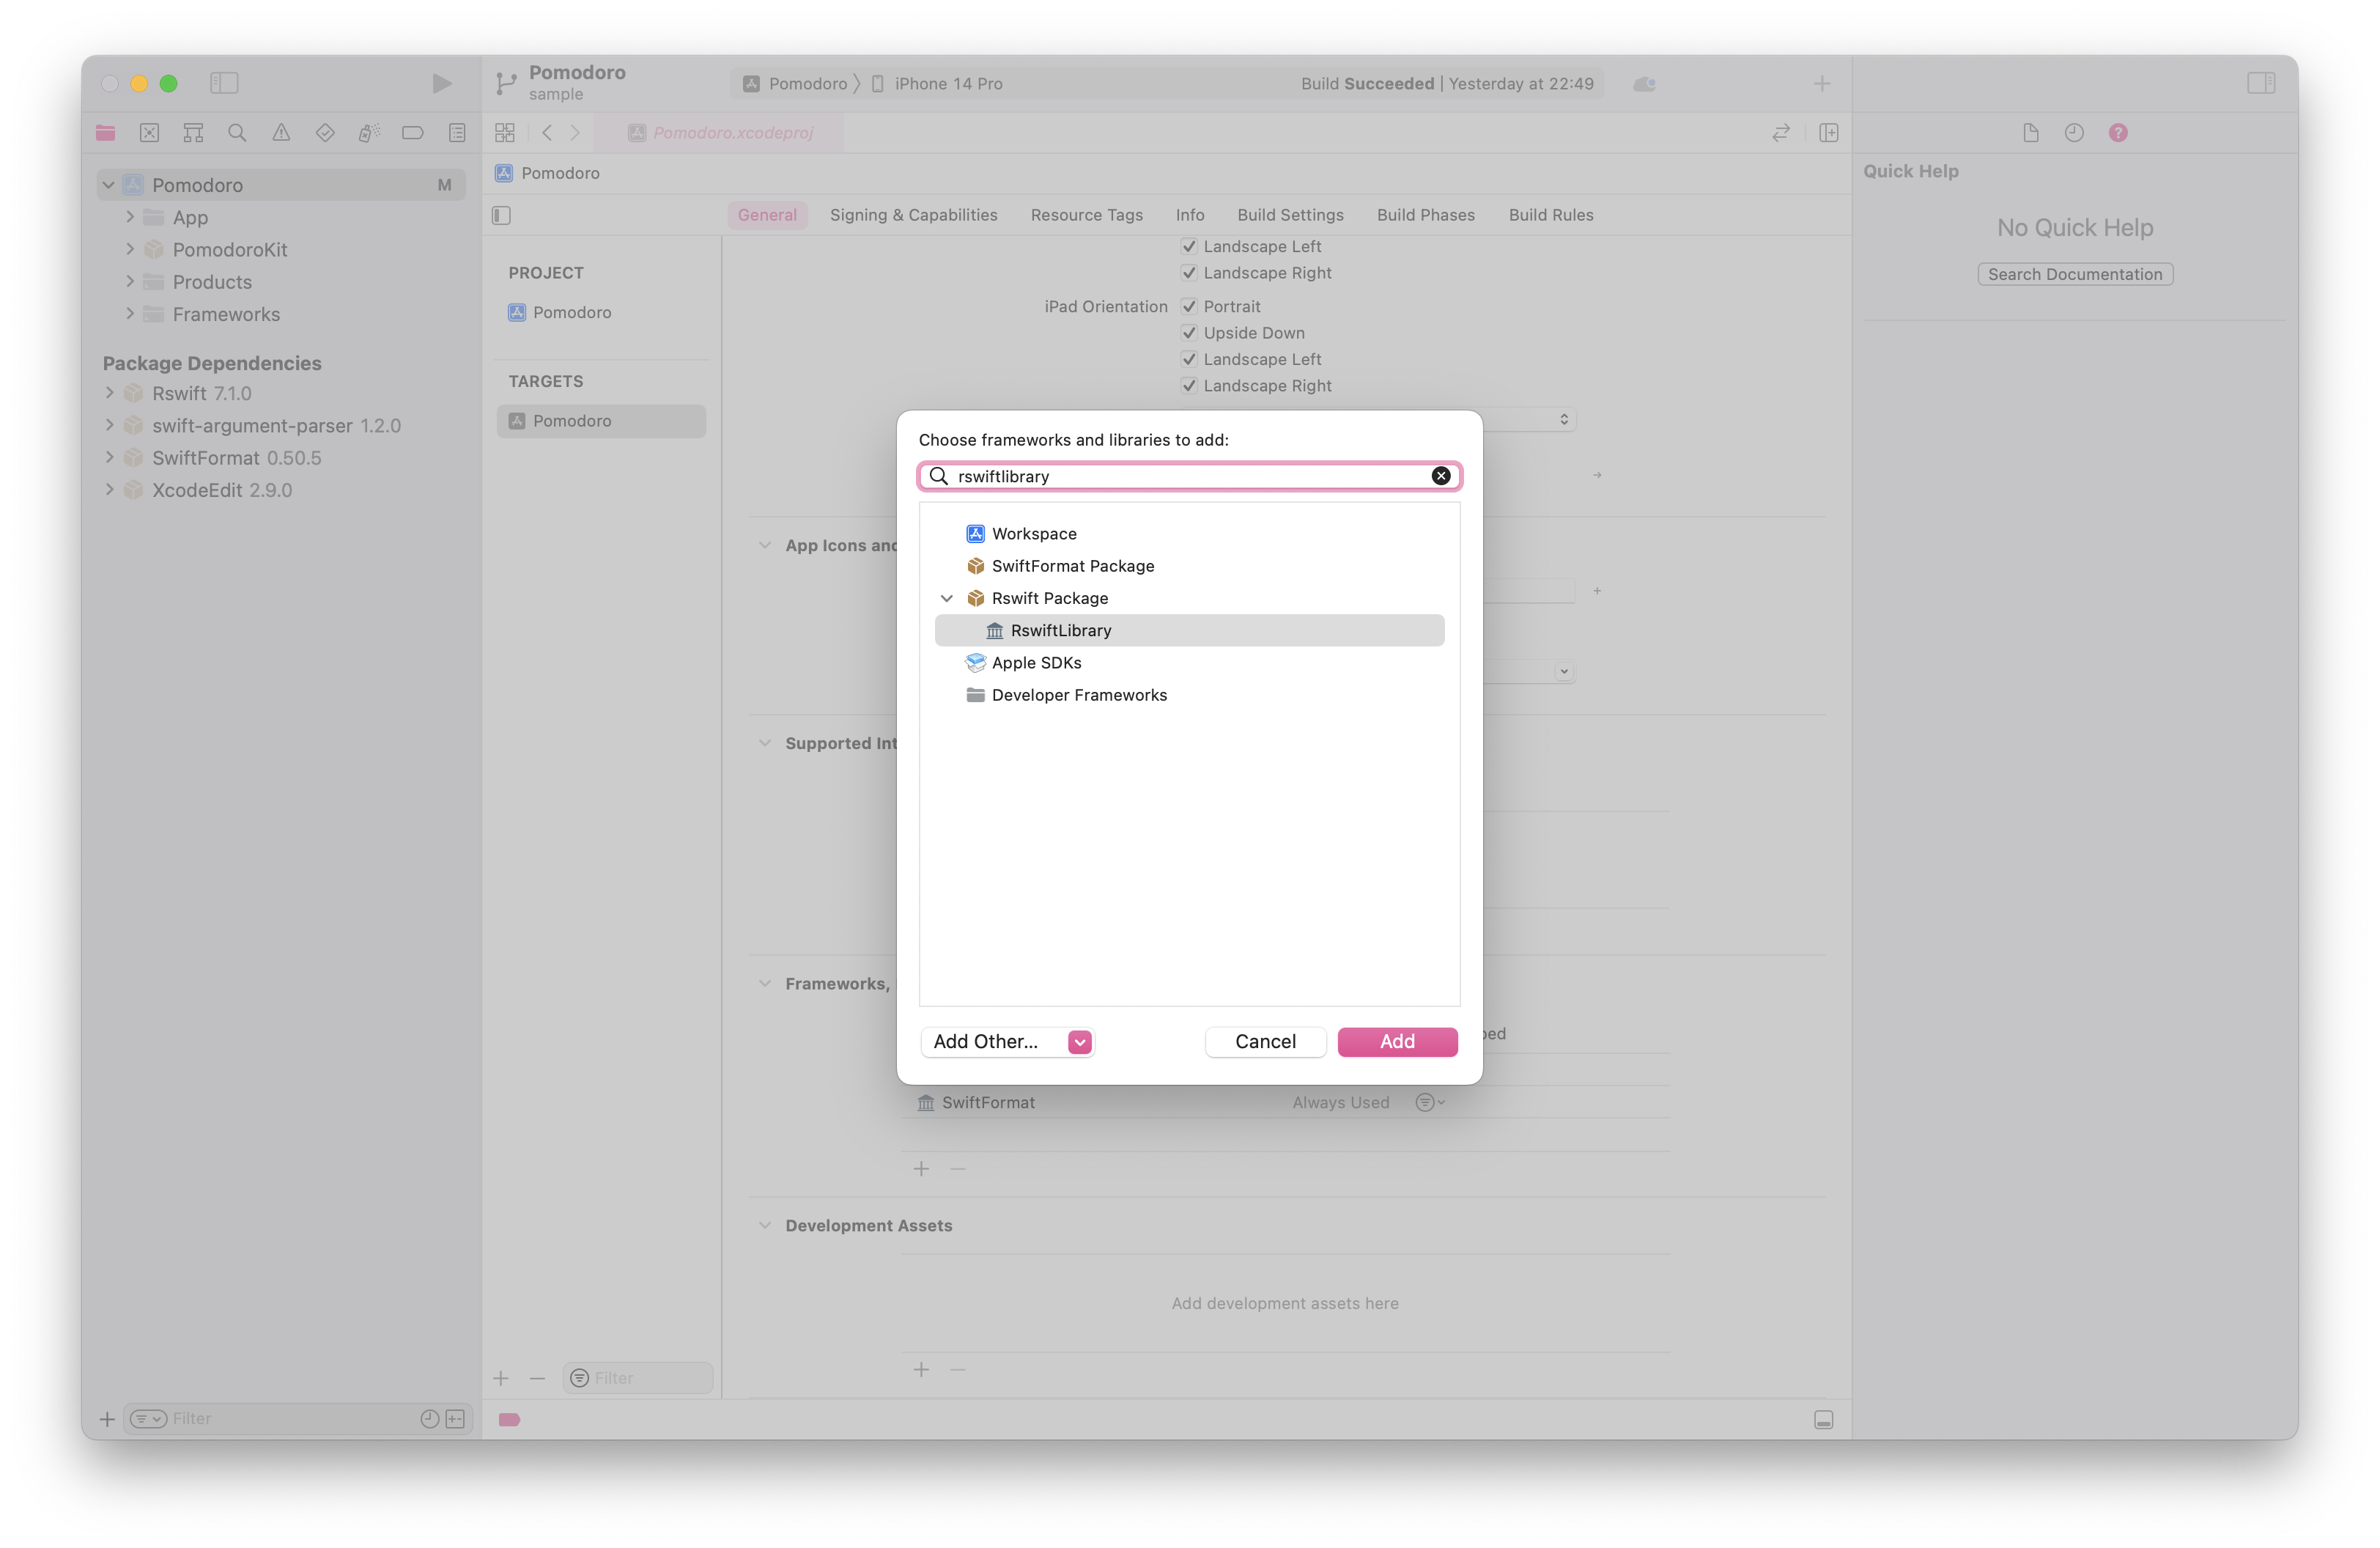
2. Select your target, on the tab "General", in the section "Frameworks, Libraries, and Embeded Content", click "+" and add RswiftLibrary
ターゲット設定を選択し、"General" タブを開き、"Frameworks, Libraries, and Embeded Content" のセクションで、 "+" をクリックします。
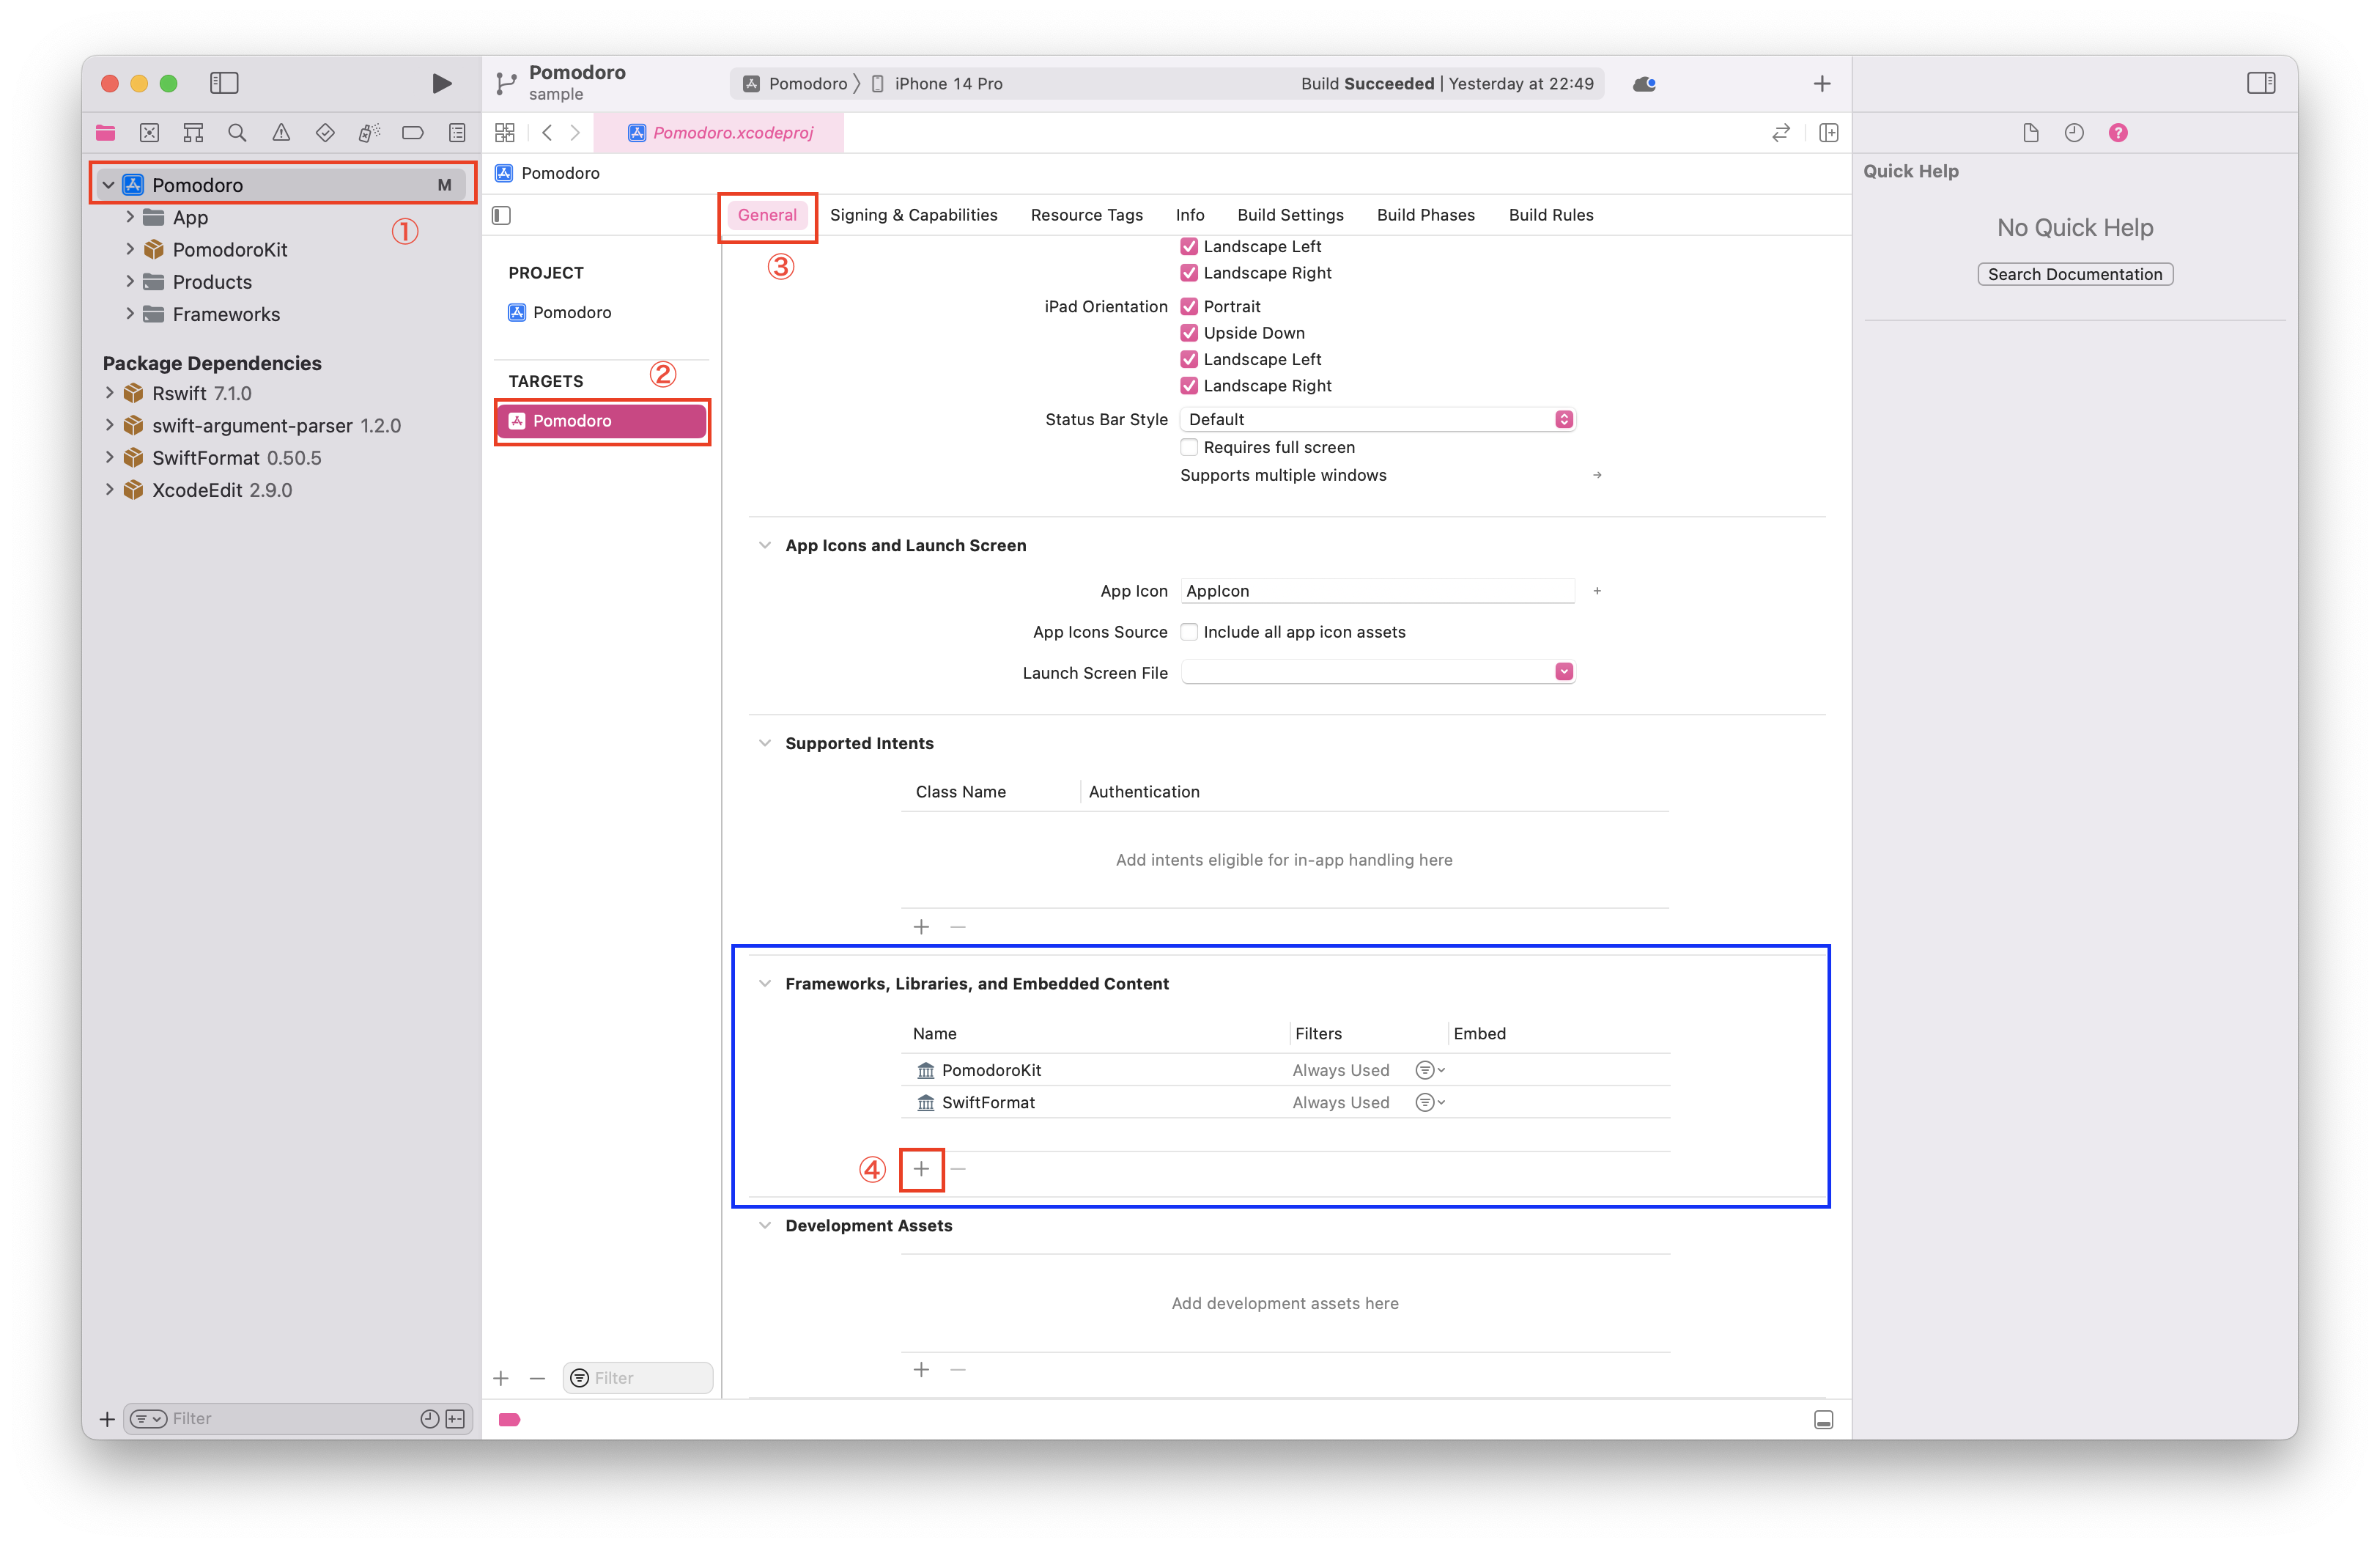
検索バーに RswiftLibrary を入力し、表示されている RswiftLibraryを選択して、追加ボタンをクリックします。
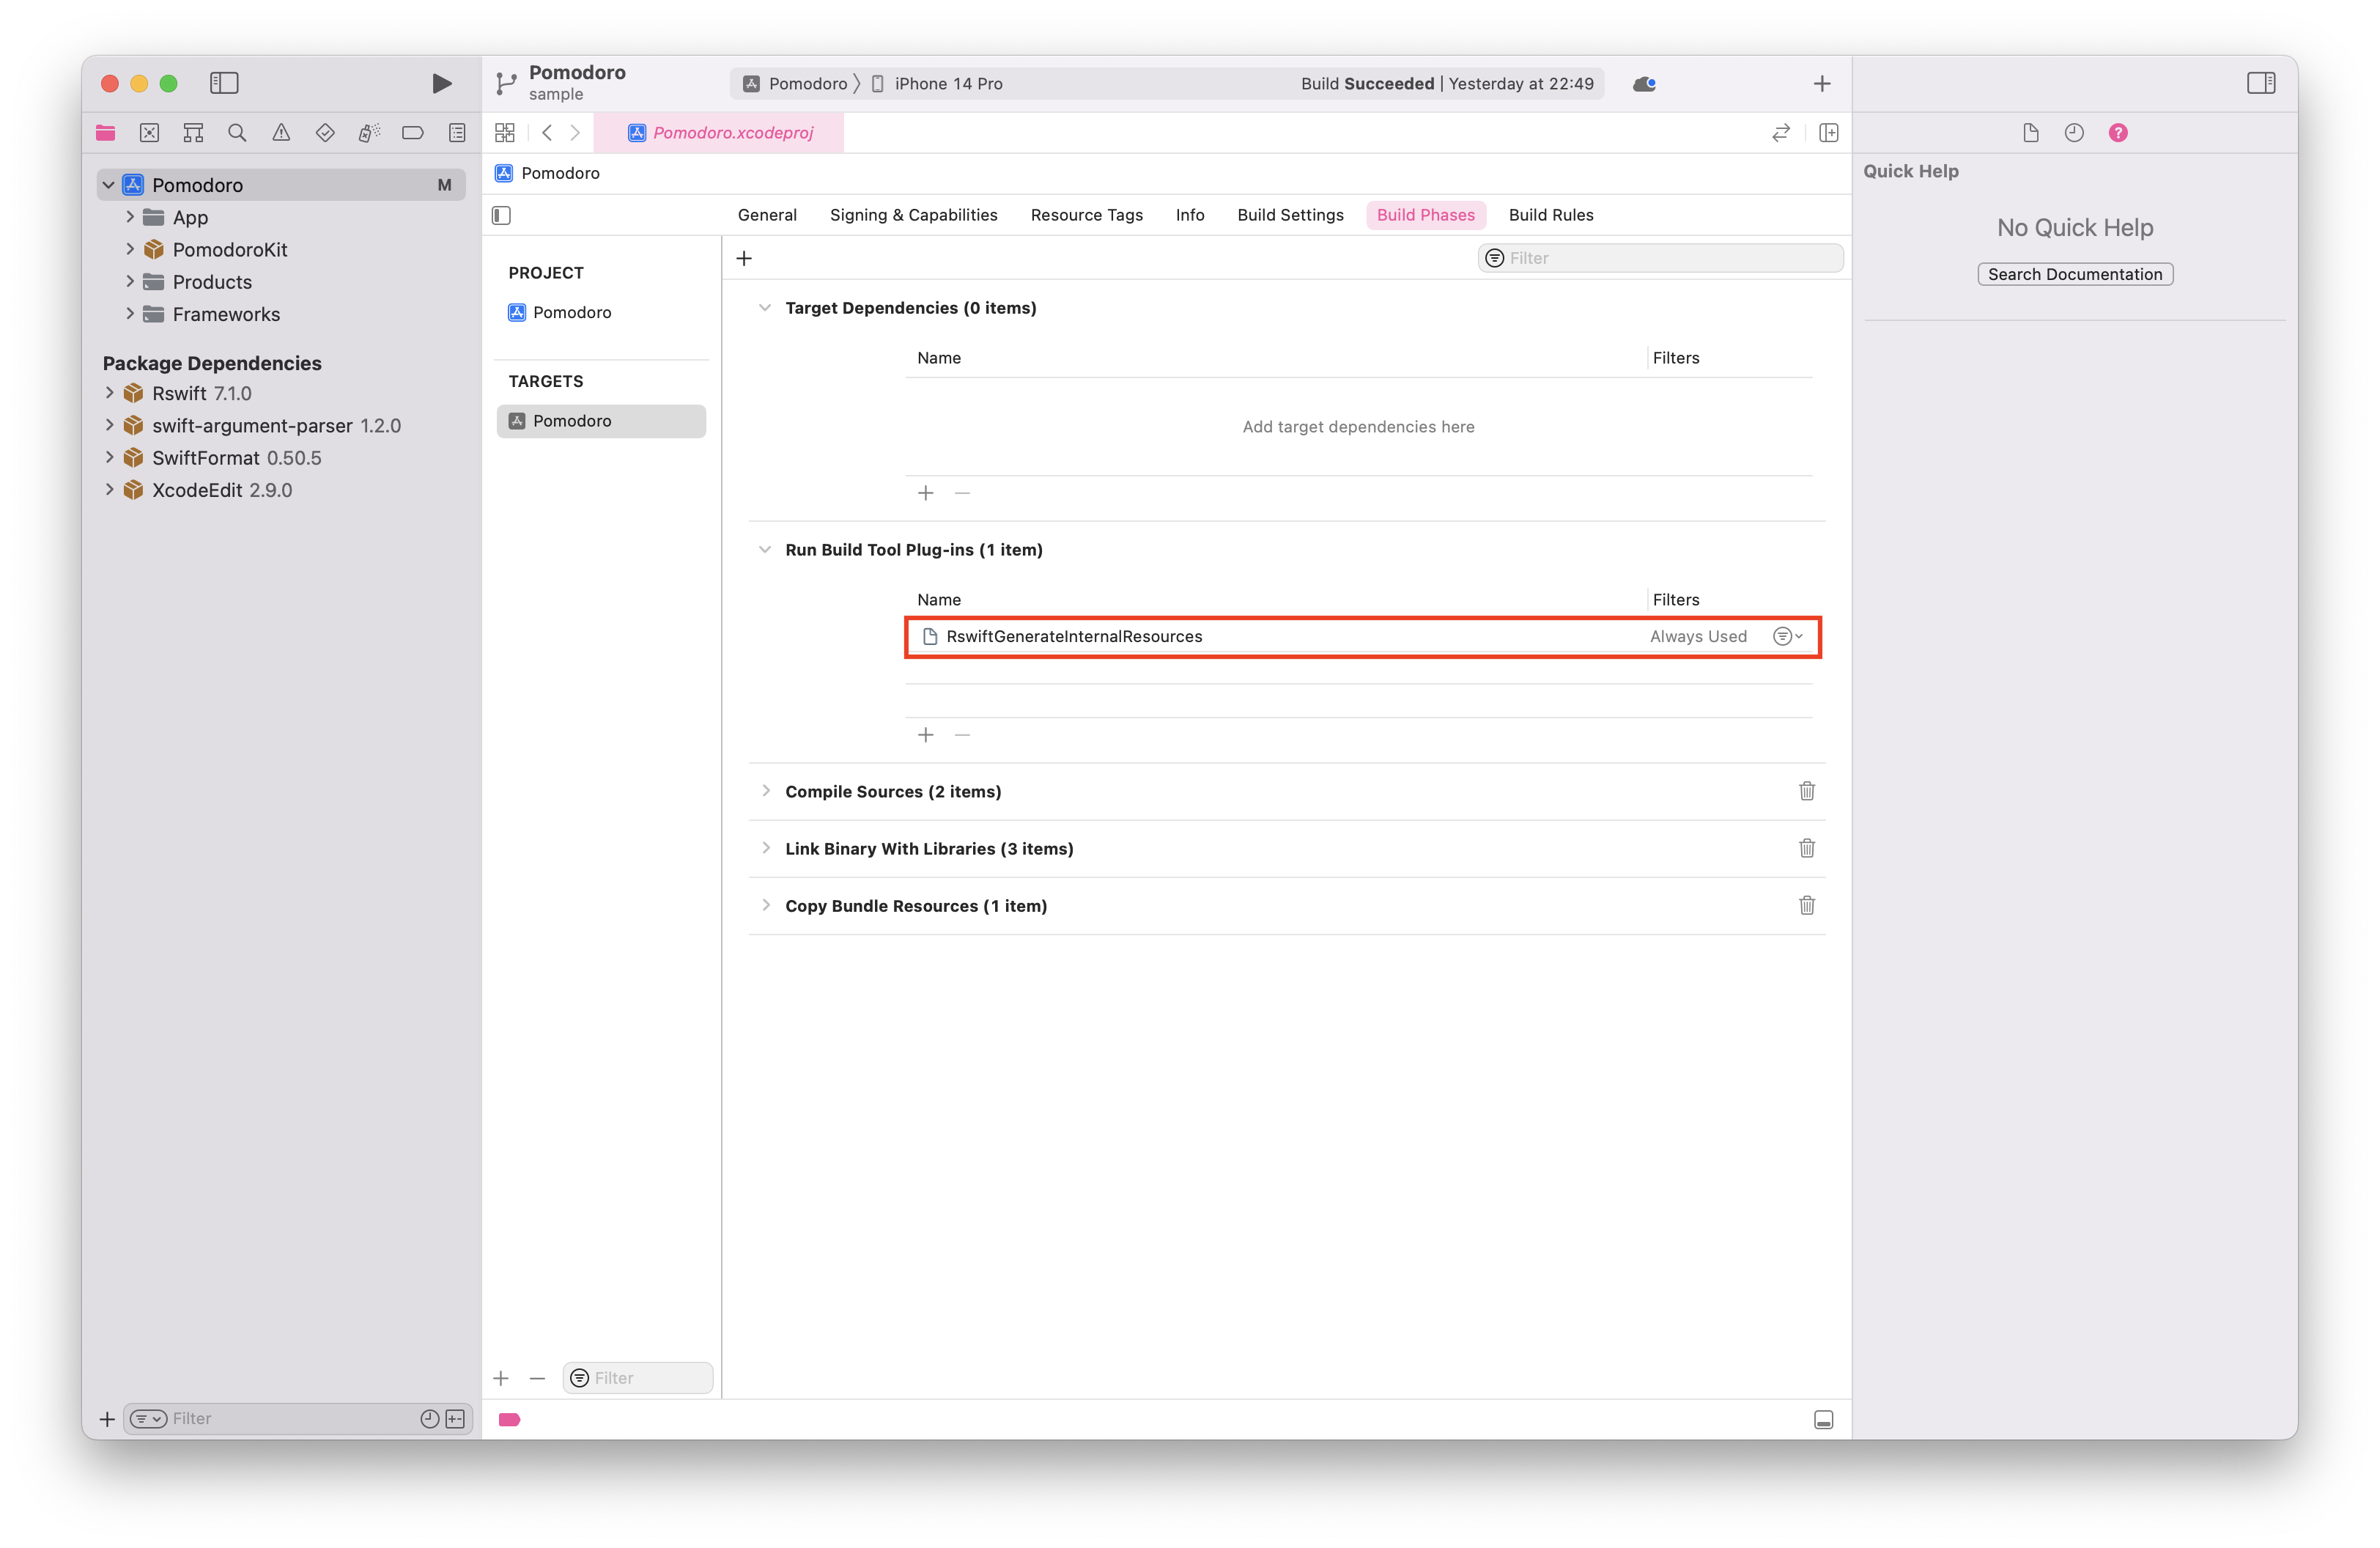
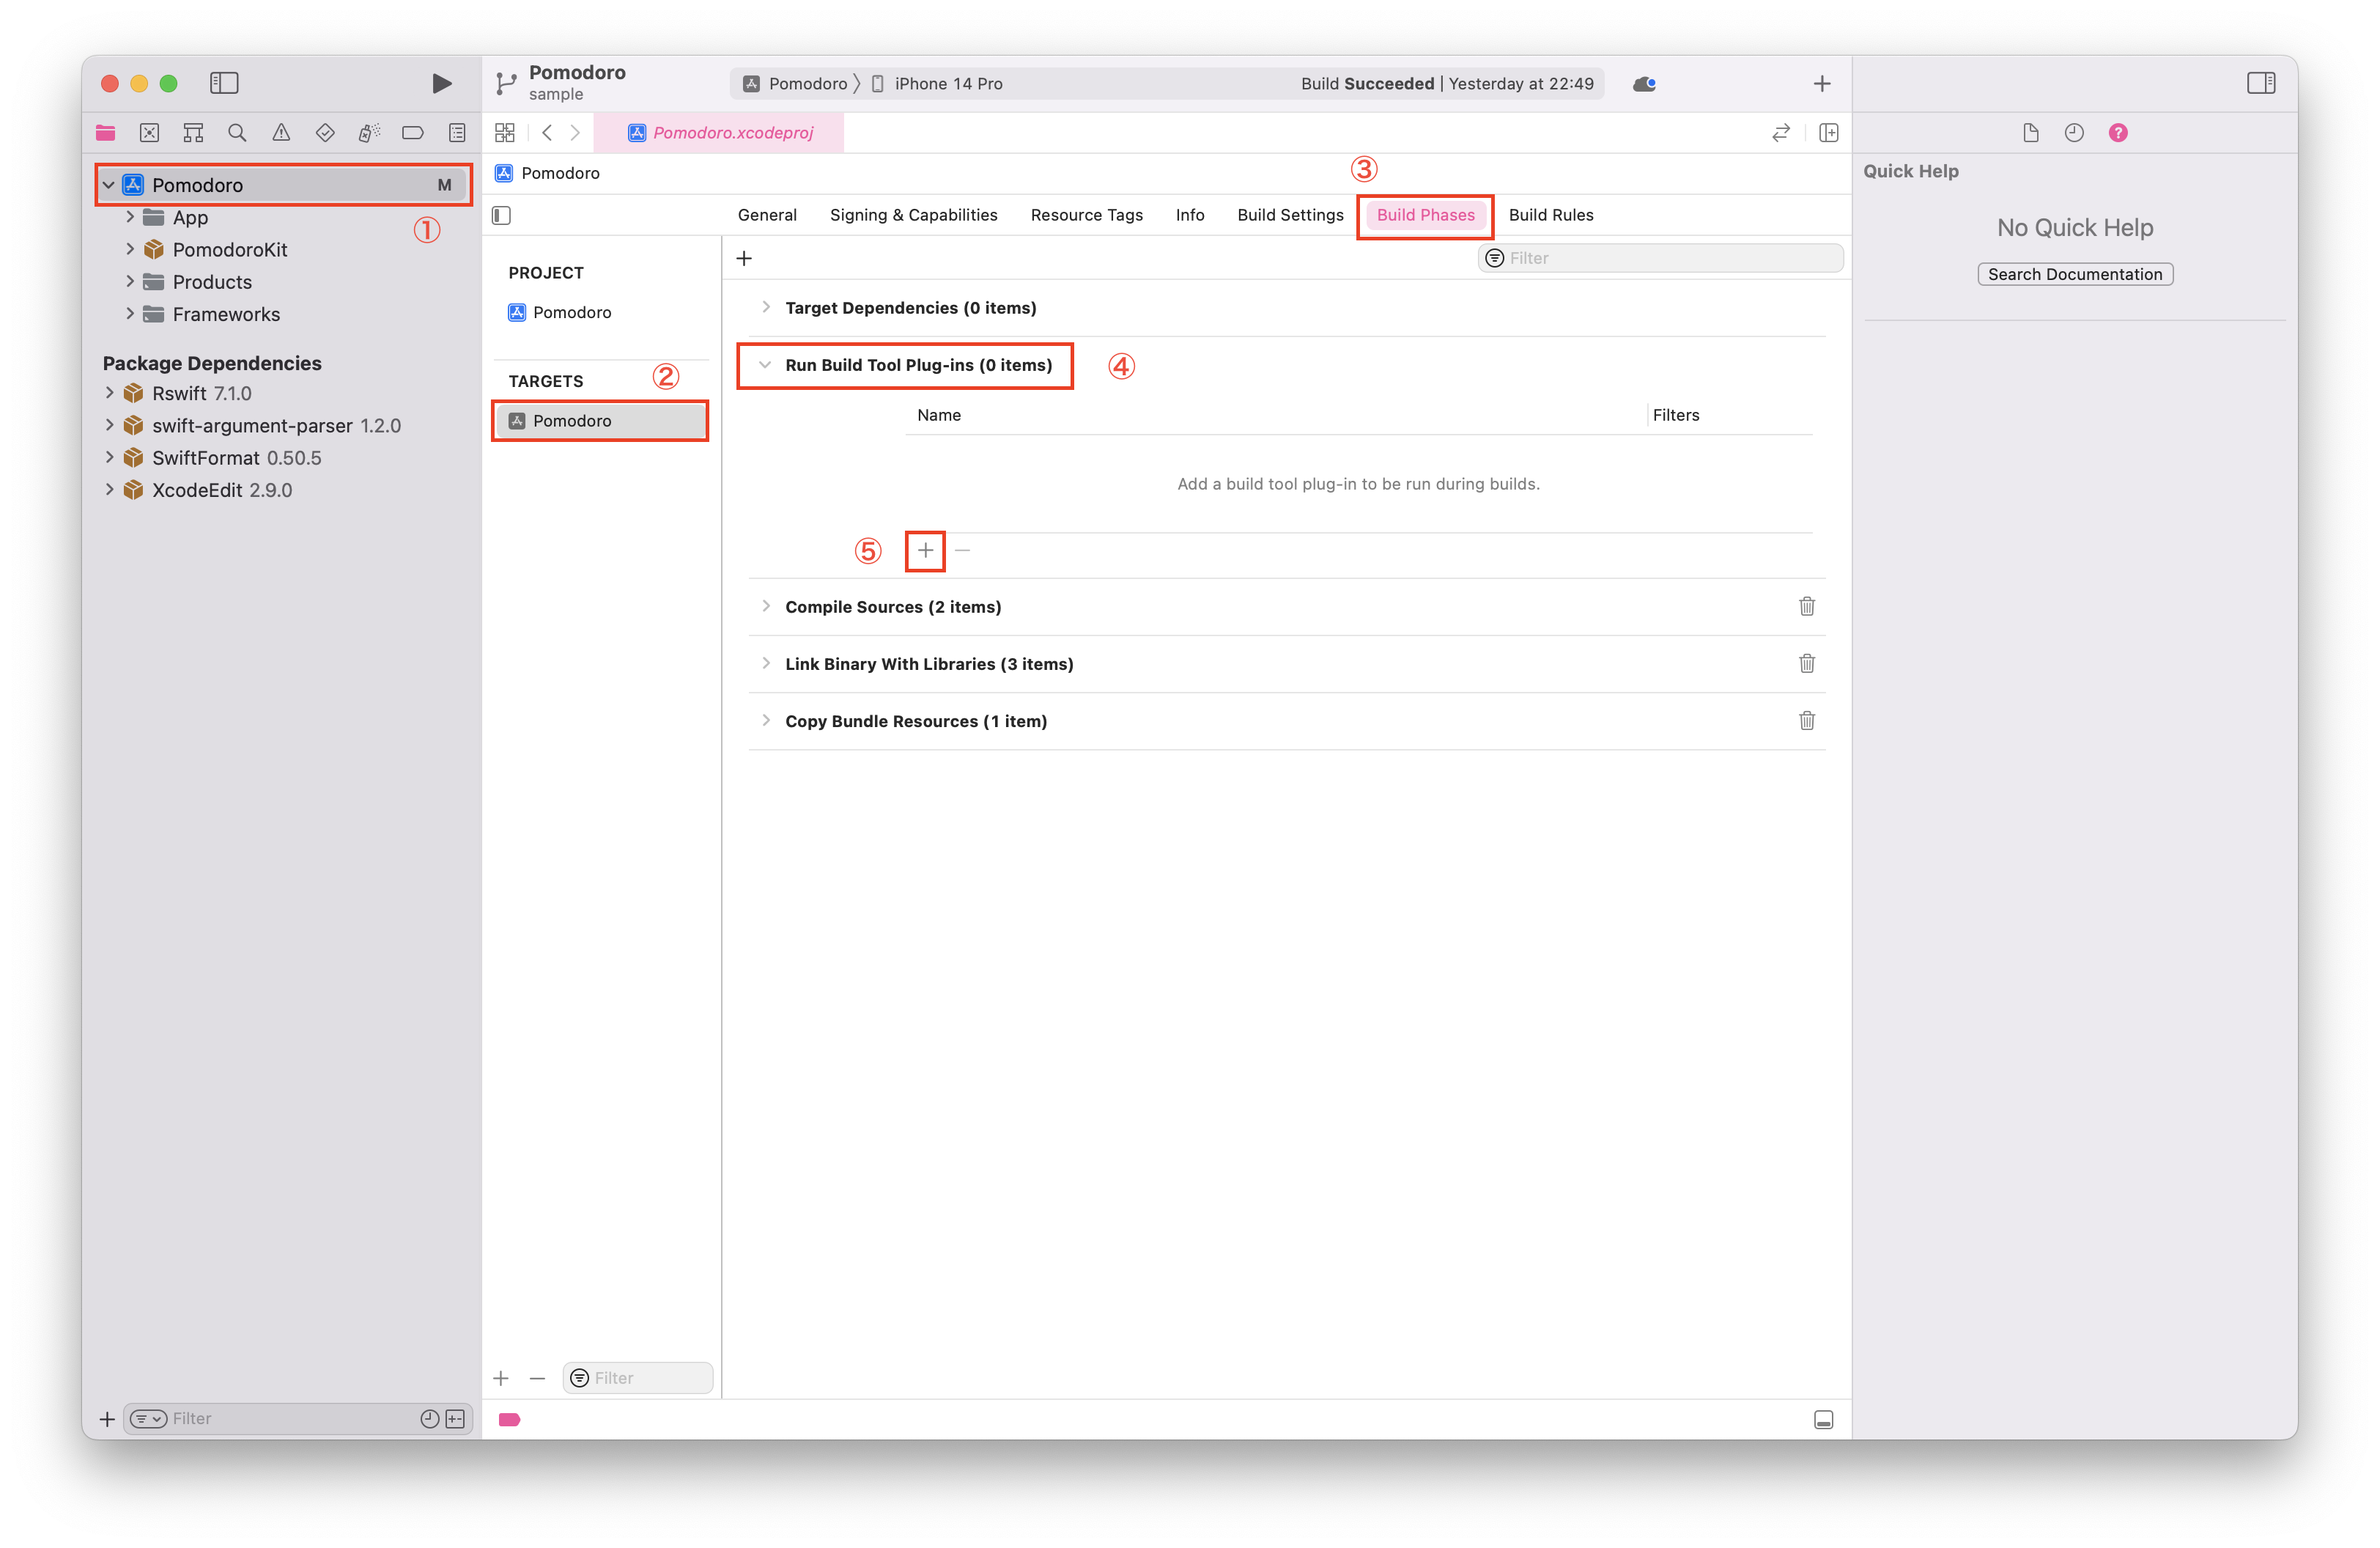
3. Select your target, on the tab "Build Phases", in the section "Run Build Tool Plug-ins", click "+" and add RswiftGenerateInternalResources
ターゲット設定を選択し、"Build Phases" タブの "Run Build Tool Plug-ins" セクションで、"+" をクリックします。
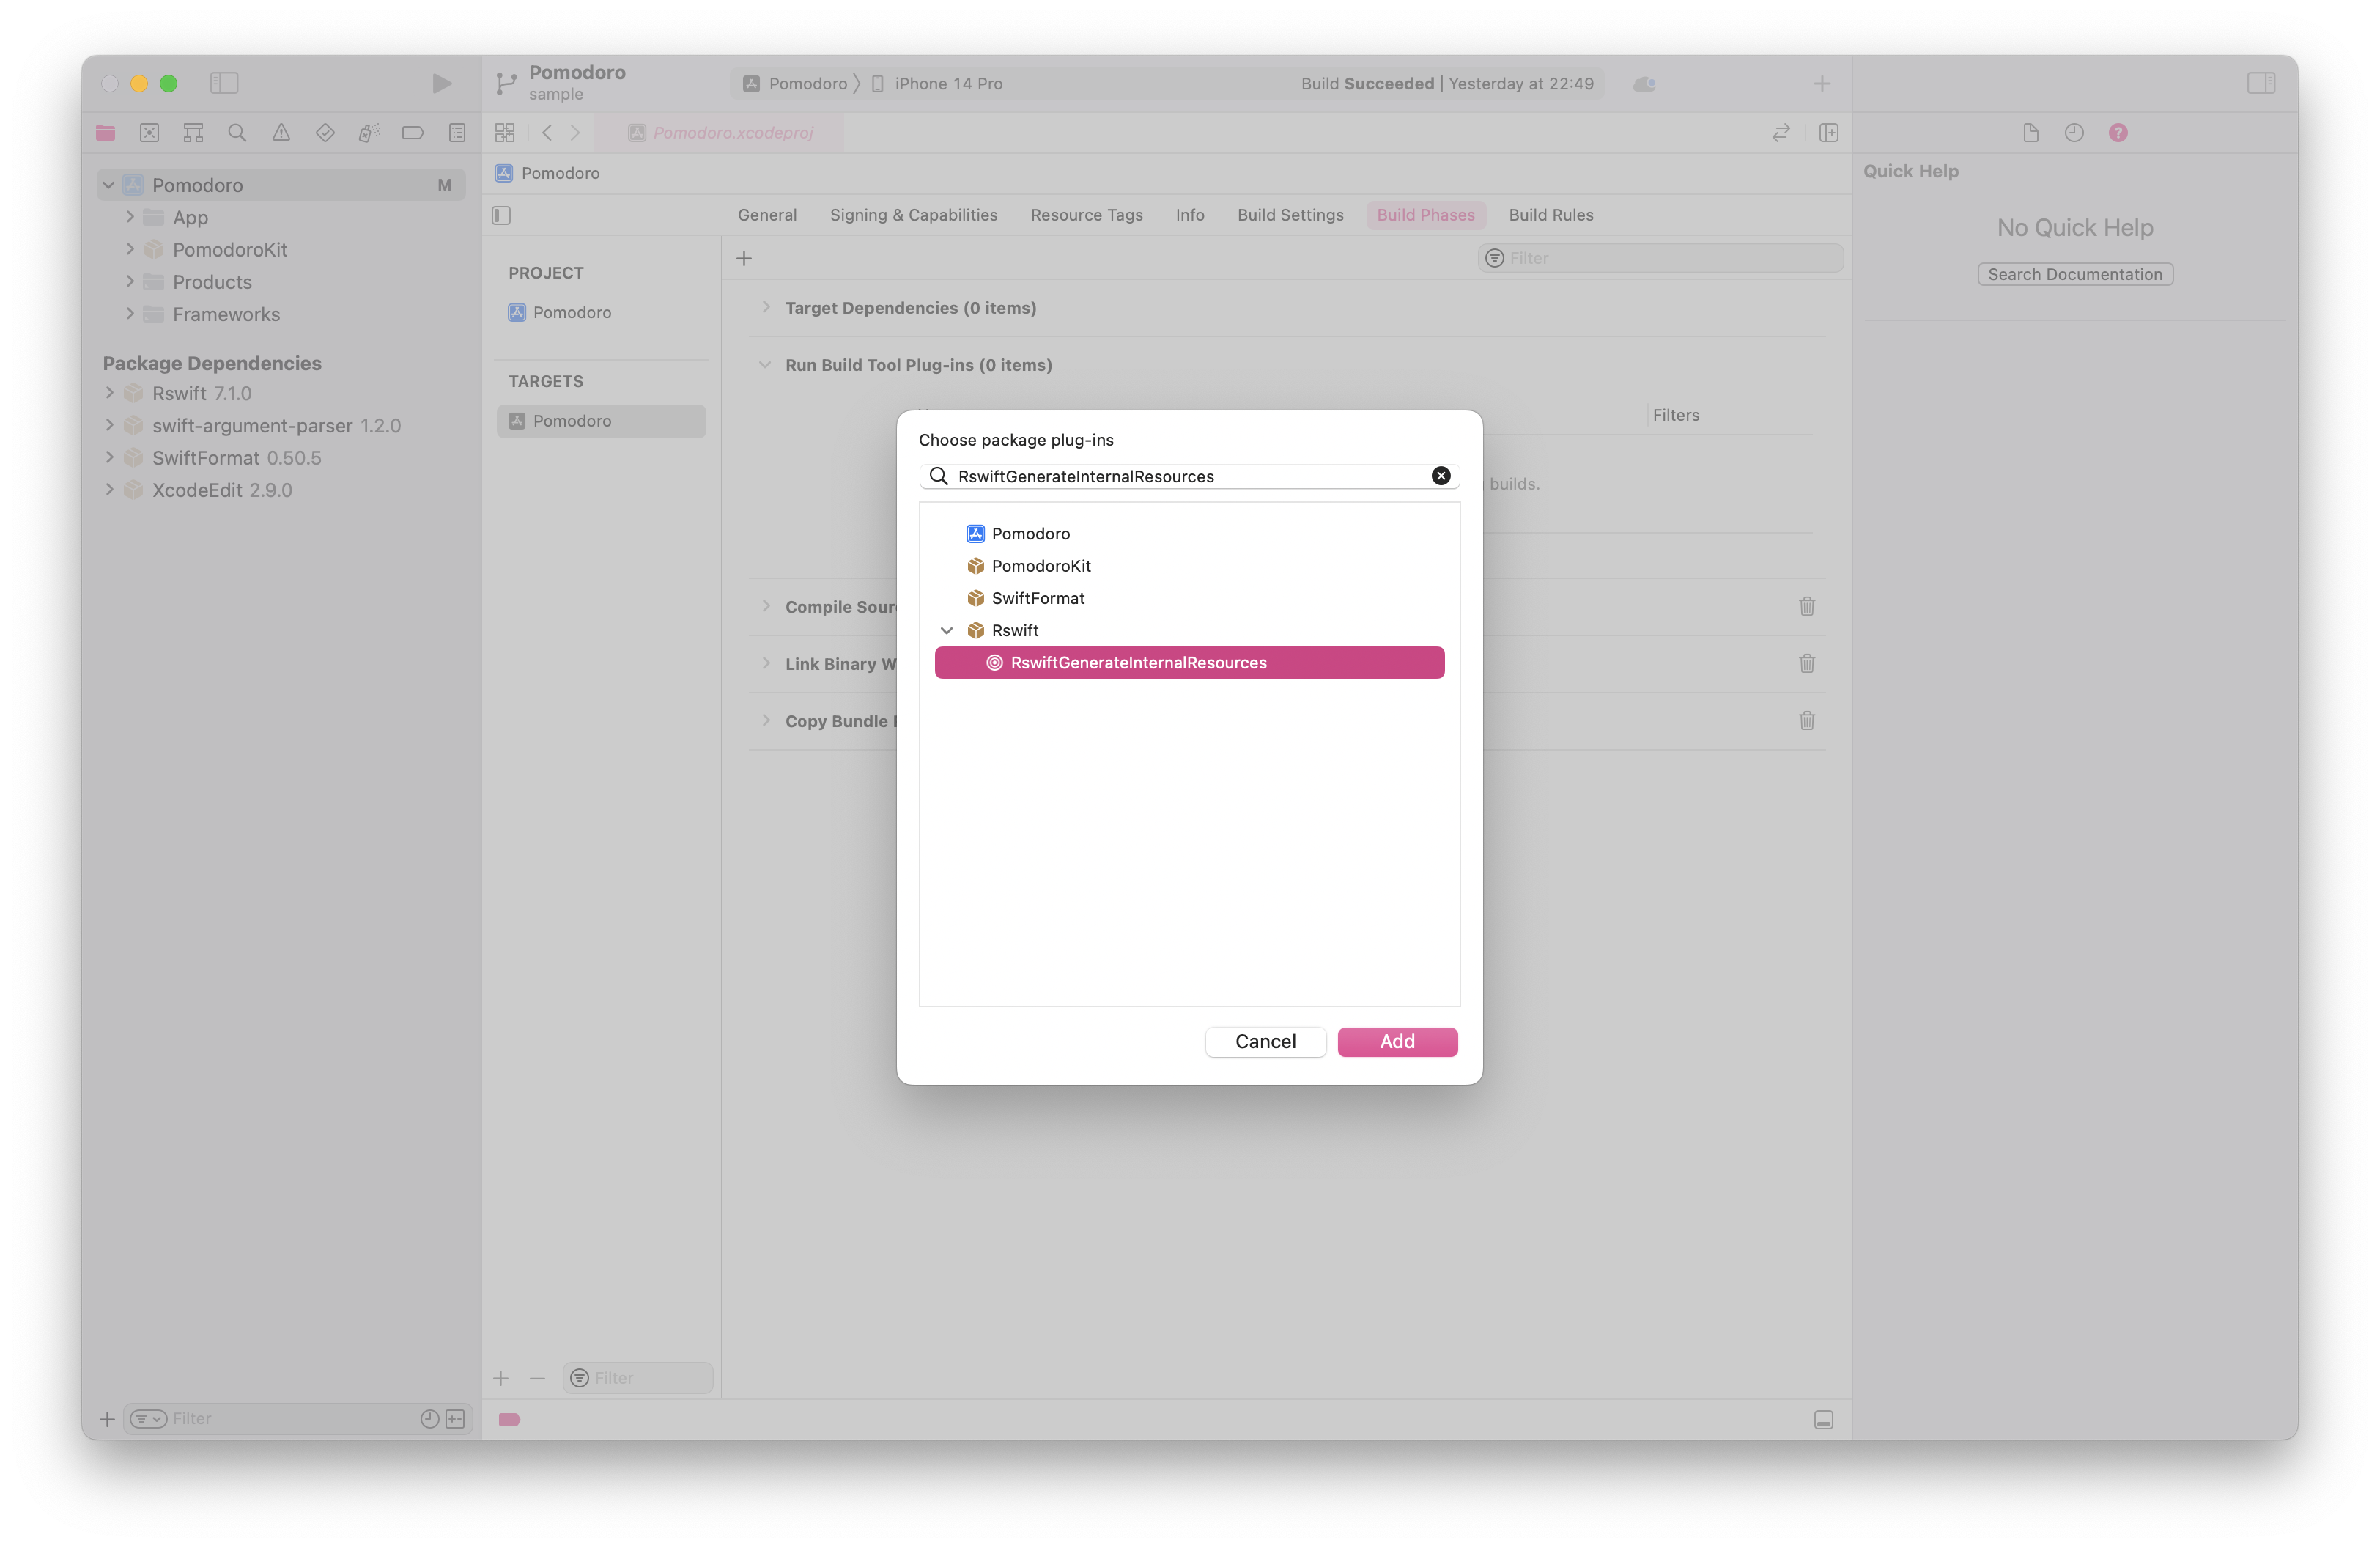
検索バーに RswiftGenerateInternalResources を入力し、表示されている RswiftGenerateInternalResourcesを選択して、追加ボタンをクリックします。
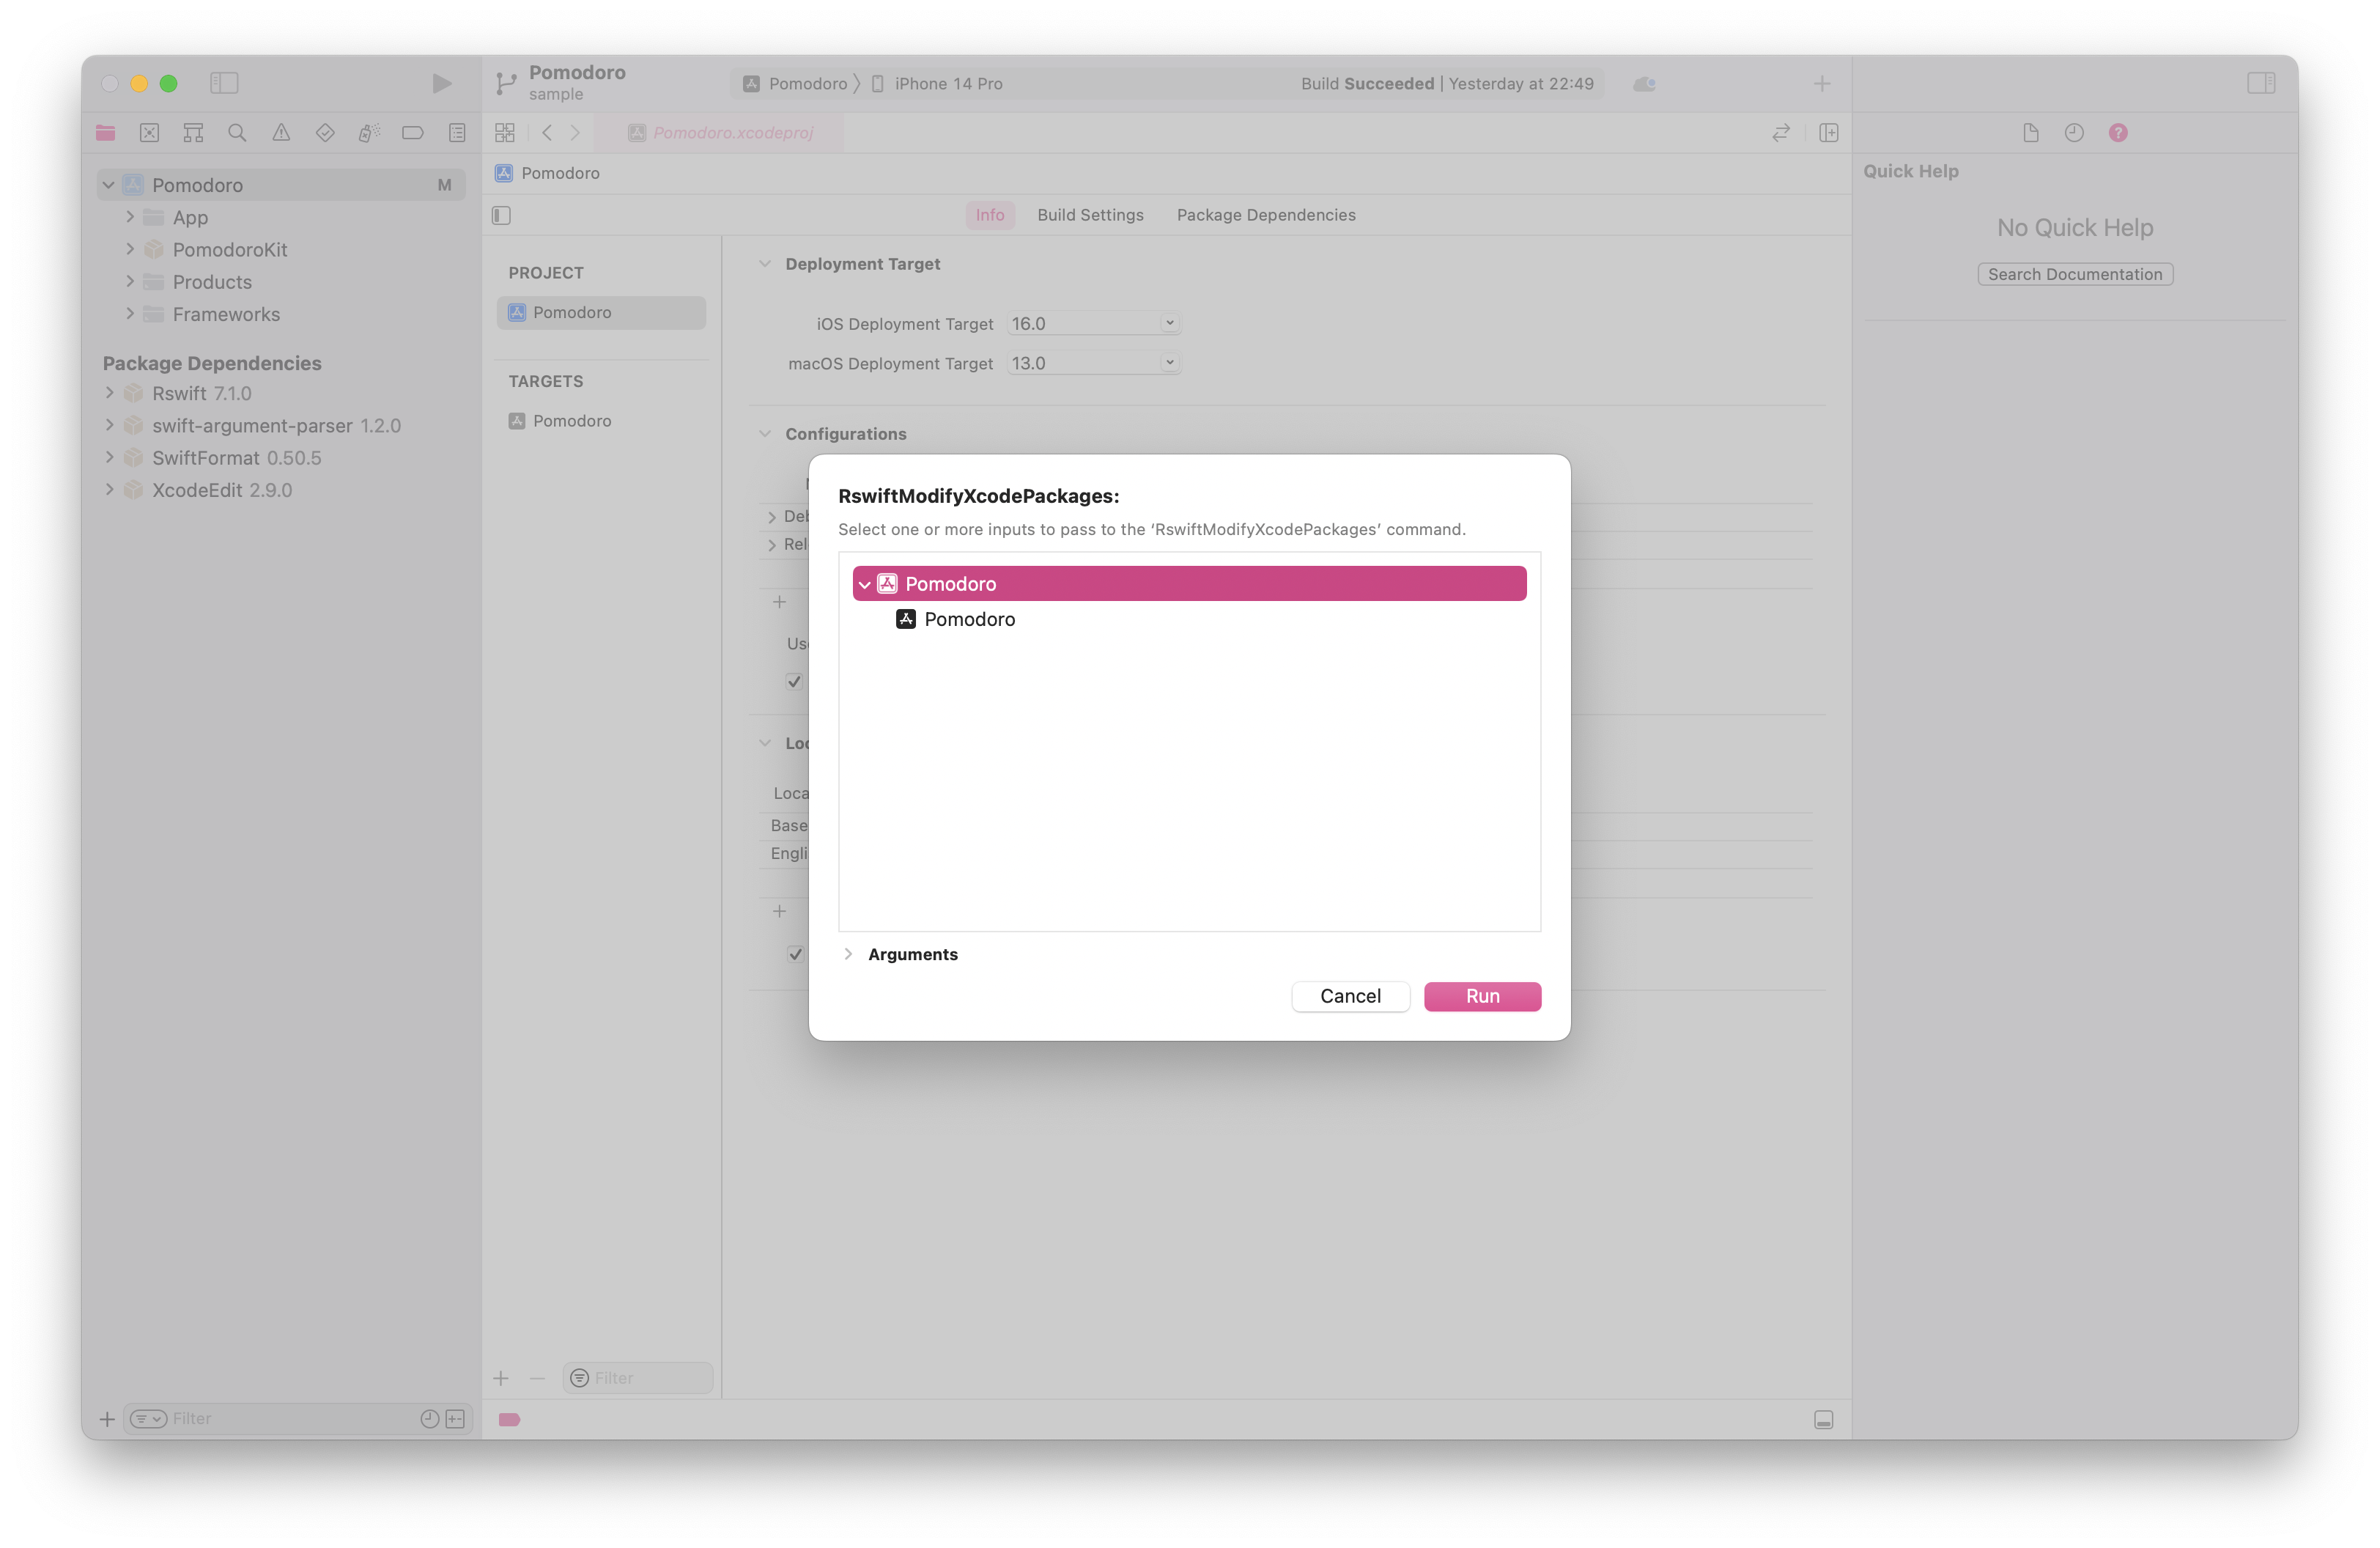
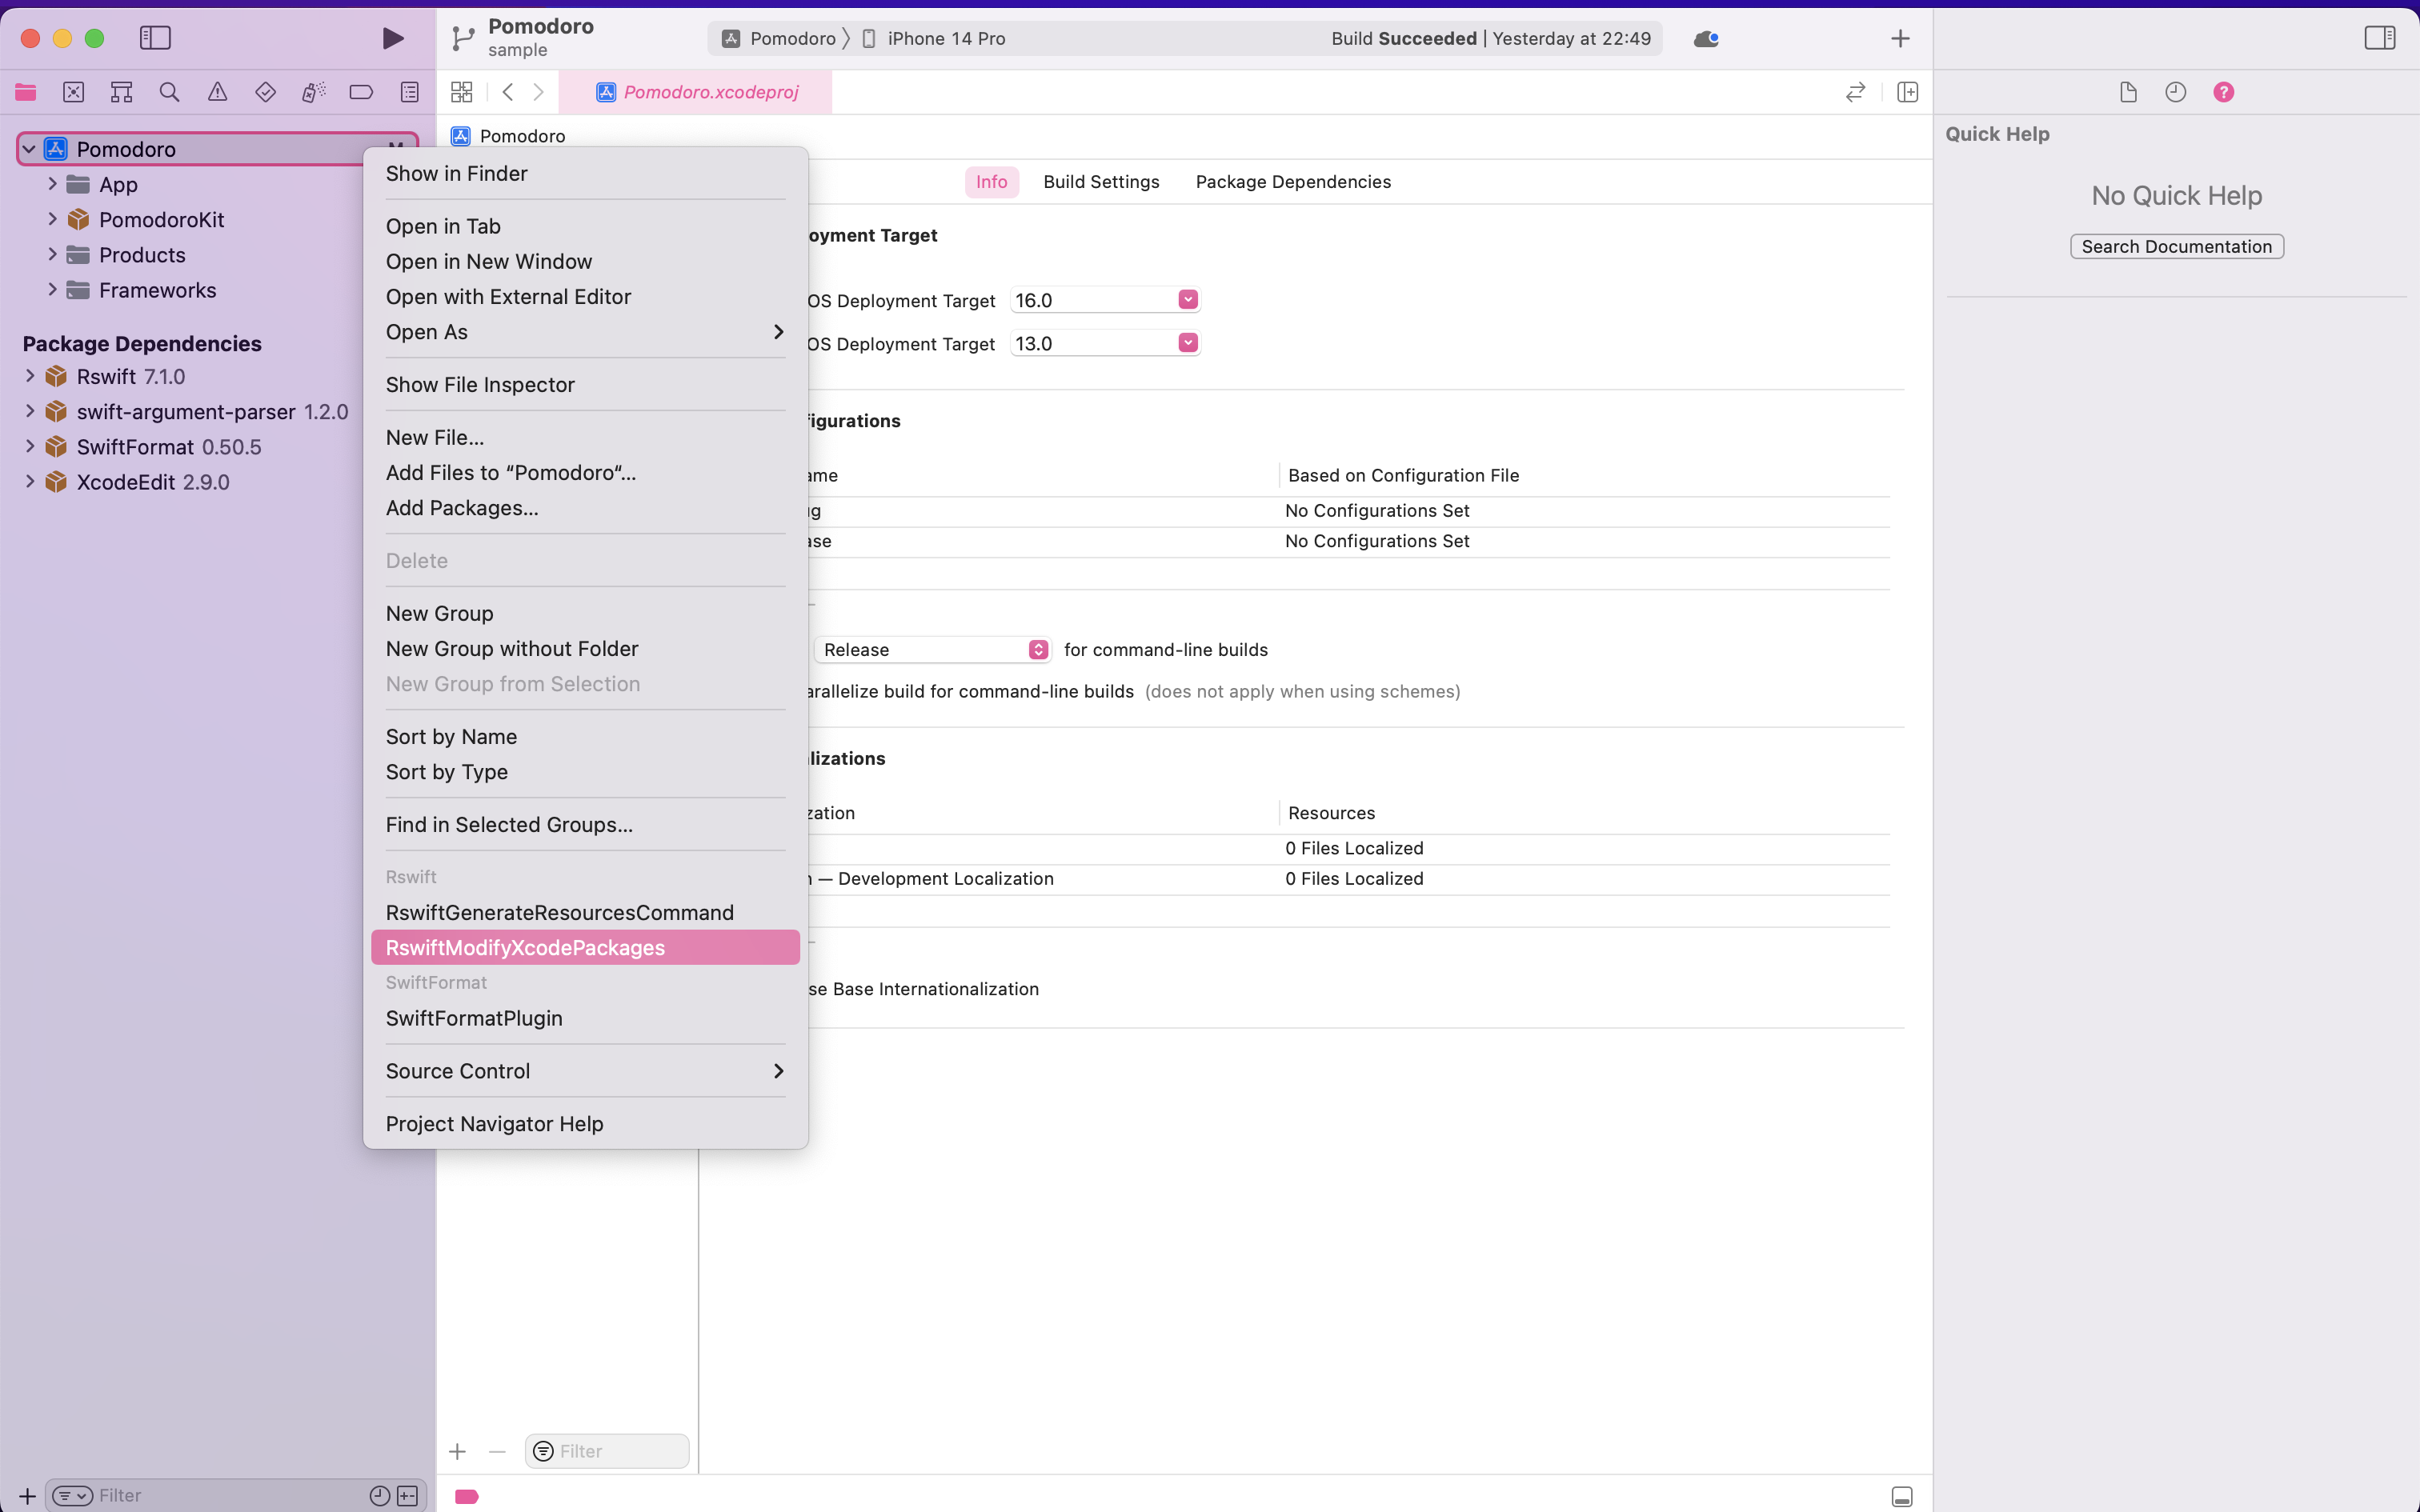
4. Right-click on your project, click RswiftModifyXcodePackages, click Run, click Allow Command to Change Files
プロジェクト上で右クリックし、RswiftModifyXcodePackagesをクリックします。
その後ダイアログが出てきたら、 Allow Command to Change Files をクリックします。
5. Build your project, now the R struct should be available in your code, use auto-complete to explore all static references
プロジェクトをビルドします。
...これで R 構造体がコードで利用可能になりました!
え?とここで戸惑った点は以下の通りです。
戸惑った点
R.generated.swift ファイルを、手動で生成する必要はありません。
戸惑った点
import Rswift を書く必要はありません。
R 構造体の使用方法
Swiftファイルで、 R. と入力すると、オートコンプリートですべての静的リファレンスを検索できます。
この項では、以下の使用例を記述します。
R 構造体の使用例
- コード例
import SwiftUI
// `import Rswift` は書きません。

struct SampleView: View {
    var body: some View {
        VStack {
            Text(R.string.localizable.greeting())  // 文字列
                .font(.largeTitle)
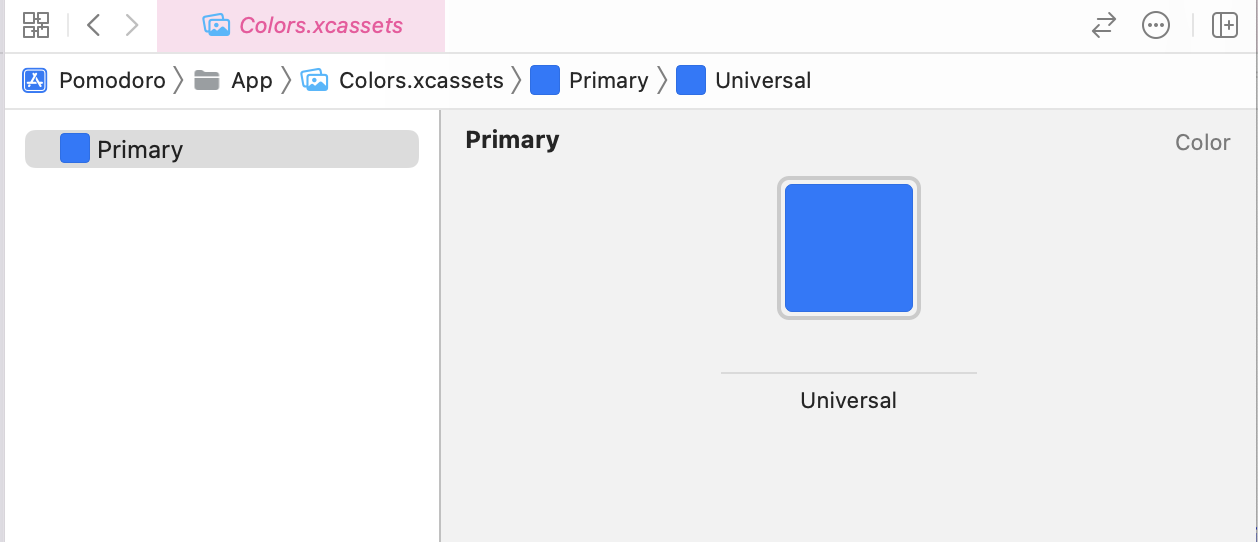
                .foregroundColor(Color(R.color.primary))  // 色

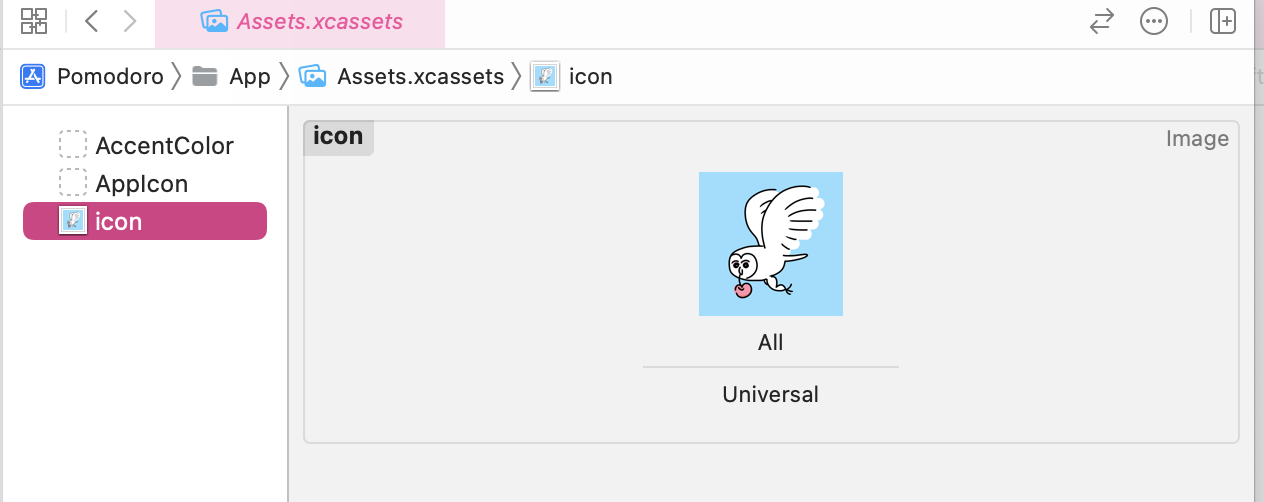
            Image(R.image.icon)  // 画像
                .resizable()
                .aspectRatio(contentMode: .fit)
                .frame(width: 200)
        }
    }
}

struct SampleView_Previews: PreviewProvider {
    static var previews: some View {
        SampleView()
    }
}
- プレビュー

R.xxx を省略して書きたい場合
まず、従来の R.Swift では、以下のように Typealias を使うことで、R.xxx を省略して書くことができました。
typealias L10n = R.string.localizable
typealias Image = R.image
typealias Color = R.color
R.Swift 7.x 以降では、 R が _R 構造体のインスタンスになったことにより、以下のように変数として定義することで、同様の機能を果たすことができます。
let l10n = R.string.localizable
let image = R.image
let color = R.color
インフォメーション
・省略形の変数名は、私は上記のように定義してみましたが、この辺りはお好みで。
・なお L10n とは、localization の lとn の間に10文字あることからついた名称です。類似ライブラリの SwiftGen では、 L10n という表記が採用されているので、真似してみました。
R.xxx を省略して書いた場合の使用例
- コード例
import SwiftUI
// `import Rswift` は書きません。

struct SampleView: View {
    var body: some View {
        VStack {
            Text(l10n.greeting())  // 省略形を使った文字列
                .font(.largeTitle)
                .foregroundColor(Color(color.primary))  // 省略形を使った色

            Image(image.icon)  // 省略形を使った画像
                .resizable()
                .aspectRatio(contentMode: .fit)
                .frame(width: 200)
        }
    }
}

struct SampleView_Previews: PreviewProvider {
    static var previews: some View {
        SampleView()
    }
}
よりすっきりしました。
R.generated.swift の所在
R.generated.swiftファイルを、手動で生成する必要はありません。
と記載しましたが、それではこのファイルは一体どこにあるのでしょうか?
R の定義に飛ぶと、確かにこのファイルは存在しています。
まず、右側カラムの "Show the File inspector" を確認したところ、"Not Applicable" (該当なし)でした。
次に、左側カラムの検索バーで、ファイル名や _R などを検索ワードにして探しましたが、ヒットしませんでした。
プロジェクトファイル内にない ![]() ...??ということで、以下の方法でやっとファイルの所在がわかりました。
...??ということで、以下の方法でやっとファイルの所在がわかりました。
画像のように、Xcode の R.generated.swift 内で、右クリックしポップアップメニューを表示し、 Navigate > Show in Finder をクリックします。

Finder が開きました。階層が深いです。

パスを確認したところ以下のようなパスでした。
アプリに内包されているのではなく、ユーザーディレクトリの Library/Developer/Xcode/DerivedData/ の中に生成されていることがわかりました。
/Users/{ユーザー名}/Library/Developer/Xcode/DerivedData/{アプリ名}-hawjwftgyaobilfxndsomwxfakir/SourcePackages/plugins/{アプリ名}.output/{アプリ名}/RswiftGenerateInternalResources/{アプリ名}/Resources/R.generated.swift
R.generated.swift ファイルを手動で生成する方法
なお、R.generated.swift ファイルを手動で生成することもできます。
ただし、ツールによる自動生成ファイルはGit管理に入れるべきではない、各自で管理すべき、という考え方があるので、私は今のところ用途は思いついてません。
プロジェクト上で右クリックし、 RswiftGenerateResourcesCommand をクリックします。

Run をクリックします。

Finder を開くと、プロジェクトの最上位階層に R.generated.swift ファイルが生成されているのが確認できます。

最後に
以上、R.Swiftのプラグインの導入方法の説明でした。
ご覧いただきありがとうございます。
