本記事の目的
Laravel9にjwt-authを追加し、ログインからtokenを送ることでユーザー情報を取得できるまで行う。
環境
PHP 8.1.2
Laravel 9.1.0
PHP-Open-Source-Saver/jwt-auth 1.4.1
前提条件
Laravel9.0が起動できている。

パッケージのインストール
composer requireでパッケージをインストールする。
composer require php-open-source-saver/jwt-auth
パッケージの構成ファイルを公開する。
php artisan vendor:publish --provider="PHPOpenSourceSaver\JWTAuth\Providers\LaravelServiceProvider"
以下のコマンで.envにJWT_SECRETを追加する。
php artisan jwt:secret
APIの作成
Models/User.phpを修正
Models/User.php
<?php

namespace App\Models;

use Illuminate\Contracts\Auth\MustVerifyEmail;
use Illuminate\Database\Eloquent\Factories\HasFactory;
use Illuminate\Foundation\Auth\User as Authenticatable;
use Illuminate\Notifications\Notifiable;
use Laravel\Sanctum\HasApiTokens;
use PHPOpenSourceSaver\JWTAuth\Contracts\JWTSubject;

class User extends Authenticatable implements JWTSubject
{
    use HasApiTokens, HasFactory, Notifiable;

    /**
     * The attributes that are mass assignable.
     *
     * @var array<int, string>
     */
    protected $fillable = [
        'name',
        'email',
        'password',
    ];

    /**
     * The attributes that should be hidden for serialization.
     *
     * @var array<int, string>
     */
    protected $hidden = [
        'password',
        'remember_token',
    ];

    /**
     * The attributes that should be cast.
     *
     * @var array<string, string>
     */
    protected $casts = [
        'email_verified_at' => 'datetime',
    ];

  /**
   * Get the identifier that will be stored in the subject claim of the JWT.
   *
   * @return mixed
   */
  public function getJWTIdentifier()
  {
    return $this->getKey();
  }

  /**
   * Return a key value array, containing any custom claims to be added to the JWT.
   *
   * @return array
   */
  public function getJWTCustomClaims()
  {
    return [];
  }
}
config/auth.phpを修正
config/auth.php
    'defaults' => [
        'guard' => 'api', // apiに書き換え
        'passwords' => 'users',
    ],

    'guards' => [
        'web' => [
            'driver' => 'session',
            'provider' => 'users',
        ],
        // apiを追加
        'api' => [
            'driver' => 'jwt',
            'provider' => 'users',
        ],
    ],
routes/api.phpを修正
routes/api.php
<?php

use Illuminate\Http\Request;
use Illuminate\Support\Facades\Route;
use App\Http\Controllers\AuthController;

/*
|--------------------------------------------------------------------------
| API Routes
|--------------------------------------------------------------------------
|
| Here is where you can register API routes for your application. These
| routes are loaded by the RouteServiceProvider within a group which
| is assigned the "api" middleware group. Enjoy building your API!
|
*/

// 認証なしで叩けるAPI
Route::group(['prefix' => 'auth'], function(){
  Route::post("login", [AuthController::class, 'login']);
});

// 認証ありで叩けるAPI
Route::group(['prefix' => 'auth', 'middleware' => 'auth:api'], function(){
  Route::get('me', [AuthController::class, 'me']);
});
Controllers/AuthController.phpを作成し、中身を下記のように修正する。
Controllers/AuthController.php
<?php

namespace App\Http\Controllers;

use App\Http\Controllers\Controller;
use Illuminate\Support\Facades\Auth;
use Illuminate\Http\Request;

class AuthController extends Controller
{
  /**
   * Get a JWT via given credentials.
   *
   * @return \Illuminate\Http\JsonResponse
   */
  public function login(Request $request)
  {
    $credentials = request(['email', 'password']);

    if (! $token = auth()->attempt($credentials)) {
      return response()->json(['error' => 'Unauthorized'], 401);
    }

    return $this->respondWithToken($token);
  }

  /**
   * Get the authenticated User.
   *
   * @return \Illuminate\Http\JsonResponse
   */
  public function me()
  {
    return response()->json(auth()->user());
  }

  /**
   * Get the token array structure.
   *
   * @param  string $token
   *
   * @return \Illuminate\Http\JsonResponse
   */
  protected function respondWithToken($token)
  {
    return response()->json([
      'access_token' => $token,
      'token_type' => 'bearer',
      'expires_in' => auth()->factory()->getTTL() * 60
    ]);
  }
}
初期ユーザーをDBに登録する為に、seeders/DatabaseSeeder.phpを修正する。
seeders/DatabaseSeeder.php
<?php

namespace Database\Seeders;

use Illuminate\Database\Console\Seeds\WithoutModelEvents;
use Illuminate\Database\Seeder;
use Illuminate\Support\Facades\DB;
use Illuminate\Support\Str;

class DatabaseSeeder extends Seeder
{
    /**
     * Seed the application's database.
     *
     * @return void
     */
    public function run()
    {
      DB::table('users')->insert([
        [
          'name'=>'test',
          'email'=>'test@test.com',
          'email_verified_at' => now(),
          'password' => '$2y$10$92IXUNpkjO0rOQ5byMi.Ye4oKoEa3Ro9llC/.og/at2.uheWG/igi', // password
          'remember_token' => Str::random(10),
        ]
      ]);
    }
}
動作の確認
config:clearを行い、設定ファイルを読み込む
php artisan config:clear
migrateとdb:seedを行い、初期データを登録する。
php artisan migrate
php artisan db:seed
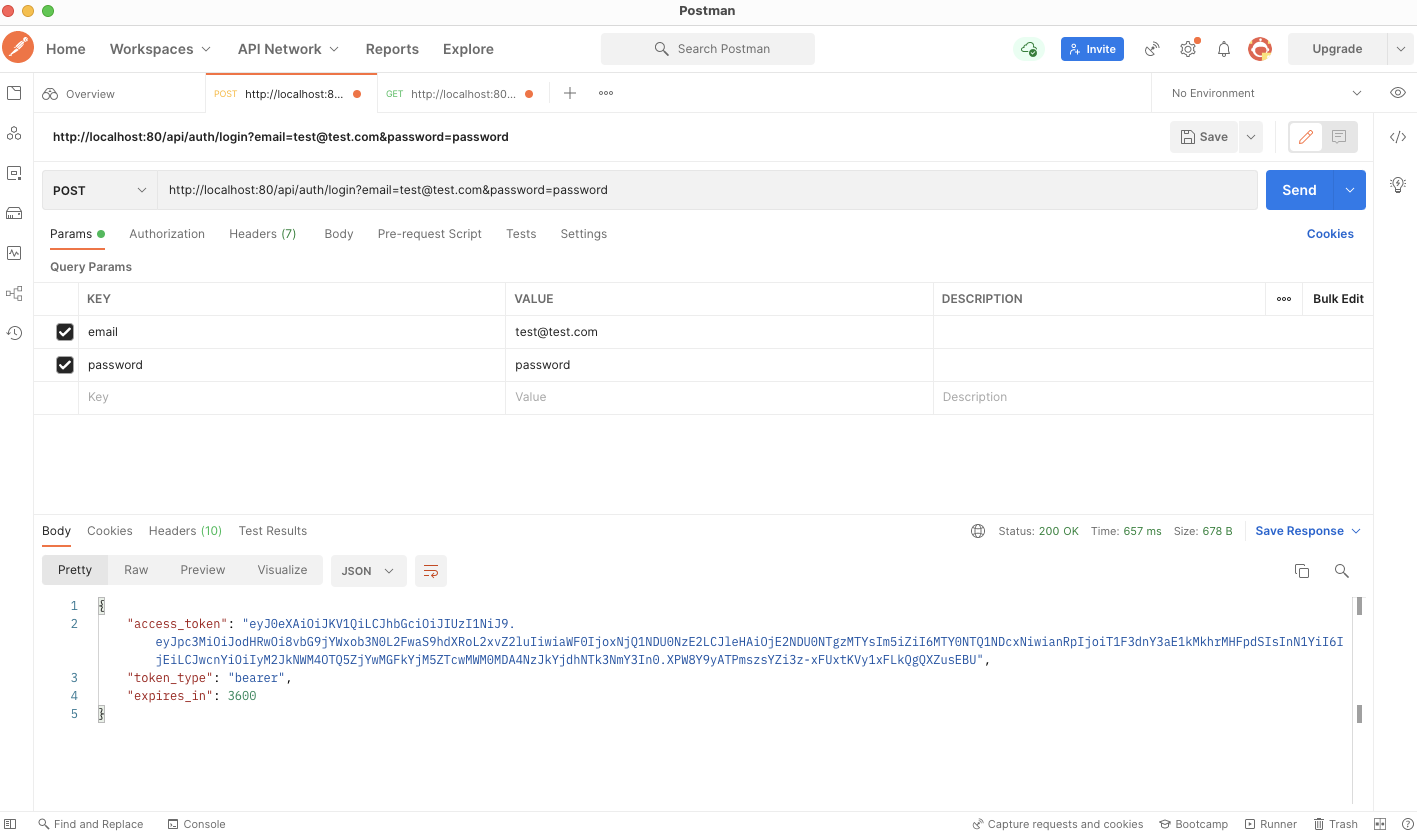
loginのAPIを叩き、tokenが返ってくるのを確認する。
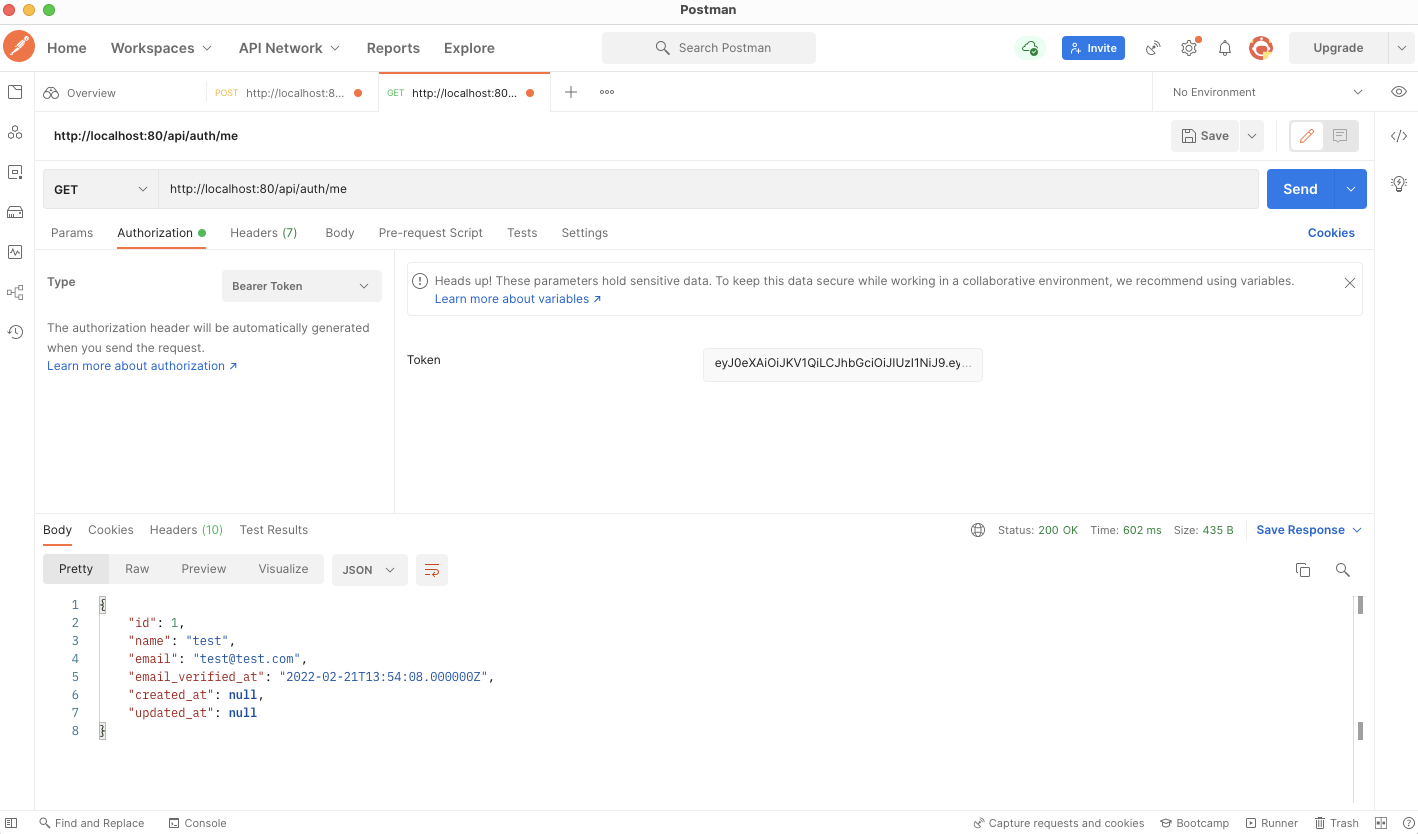
meのAPIに、返ってきたtokenを渡して、ユーザー情報が取得できるのを確認する。
参考サイト
PHP-Open-Source-Saver/jwt-authのGitHub
PHP-Open-Source-Saver/jwt-authのドキュメント