この記事はDrupal Advent Calendar 2015の4日目の記事です。
この内容は2015年11月20日(金)に大阪の梅田で開催された『D8 Release Party!』の席で、コミュニティメンバーとして参加した中でLTしたものとなります。
端的な自己紹介となりますが、普段はインフラ・サーバ・ネットワーク全般を生業としていて、サーバの構成管理や監視、構成変更等を行う仕事をメインとしています。そんなサイドから見たDrupalへの視点として、先月リリースされたDrupal8を構築する内容をまとめてみました。また、今回は昨日12/3にリリースされたばかりのphp7の実装も試しています。
というわけで早速CentOS7にD8を導入してみます。
構成
以下としました。いずれもyumによるインストールとしています。
・CentOS 7.0
・php 7.0
・PostgreSQL 9.5
・apache 2.4.6
動作要求環境
D8は以下の構成を要求としますが、CentOS6上でも動作する様です。
Drupal 8: System requirements
・PHP 5.5.9 or higher
・PostgreSQL 9.1.2 or higher with PDO
・MySQL 5.5.3/MariaDB 5.5.20
・Percona Server 5.5.8 or higher with PDO and an InnoDB-compatible primary storage engine,
・SQLite 3.6.8 or high
・Drupal will work on Apache 2.x hosted on UNIX/Linux, OS X, or Windows.
ポートの開放
CentOS7から利用可能なfirewalldを利用し、ポートの開放を行います。
default-zoneをdmzとする
# firewall-cmd --set-default-zone=dmz
Apacheの80番ポート開放
# firewall-cmd --zone=dmz --add-port=80/tcp ̶permanent
PostgreSQLの6543(デフォルトでは5432)ポート開放 (但し外部からpgAdminⅢ等でアクセスする際に適宜開放)
# firewall-cmd --zone=dmz --add-port=6543/tcp -permanent
各種リポジトリ導入
yum経由でインストールする際に必要なリポジトリを導入します。
epel (他リポジトリ利用の為)
# yum install -y epel-release
remi (依存性解決用のレポジトリ利用)
# rpm -Uvh http://rpms.famillecollet.com/enterprise/remi-release-7.rpm
webtatic (php7導入の為)
# rpm -Uvh https://mirror.webtatic.com/yum/el7/webtatic-release.rpm
pgdg (PosttgreSQL9.5系導入の為)
# rpm -ivh http://yum.postgresql.org/9.5/redhat/rhel-7-x86_64/pgdg-centos95-9.5-2.noarch.rpm
Apache 2.4のインストール
CentOS7の基本のリポジトリから入手します。
# yum install httpd httpd-devel
※ 以下はRewriteルールが適用されていない場合のみ設置です。通常は設置しません。
<Directory /var/www/html/>
 RewriteEngine on
 RewriteBase /
 RewriteCond %{REQUEST_FILENAME} !-f
 RewriteCond %{REQUEST_FILENAME} !-d
 RewriteRule ^(.*)$ index.php?q=$1 [L,QSA]
</Directory>
PostgreSQL 9.5.x(最新版)インストール
pgdgリポジトリ経由でインストールします。
# yum -y --disableplugin=priorities install postgresql95-server
以下はPostgreSQL周りのパラメータ例です。ご参考までに。
# チェックポイント周り設定
checkpoint_completion_target 0.8
checkpoint_segments          6
checkpoint_timeout           30min

# 接続設定系
listen_addresses          '*'
max_connections           100
port                      6543

# ログ周り設定
log_destination           stderr
log_directory             /var/log/pg_log/
log_filename               postgresql-%d.log
log_line_prefix            [%m][%p][%u][%d][%h][%e]
log_rotation_age          1d
log_truncate_on_rotation  on

# SSD用設定(但し換装ディスクがSSDの場合のみ)
random_page_cost     4.0
host all all 127.0.0.1/32 trust
host all all 0.0.0.0/0 md5
PostgreSQL起動
PostgreSQLを起動します。enableでCentOS6の"chkconfig {hoge} on"相当の処理となります。
# systemctl enable postgresql-9.5.service
# systemctl start postgresql-9.5.service
PostgreSQLのユーザとDB作成
psqlコマンドを利用してユーザとDB作成します。
"postgres"ユーザでログイン
# su - postgres
以下クエリを発行
create user drupal SUPERUSER PASSWORD 'Hellow_Drupal_1204!';
create database drupal owner=drupal;
php7導入
php7をwebtaticのリポジトリ経由で必要なパッケージを丸ごとインストールします。
yum install --enablerepo=webtatic-testing php70w php70w-opcache php70w-mbstring php70w-pgsql php70w-dom php70w-gd
D8の入手と展開
Drupal.org https://www.drupal.org/8
にあるD8本体を入手後、展開します。
# cd /var/www/html/`
# wget http://ftp.drupal.org/files/projects/drupal-8.0.0.tar.gz
# tar -zxvf drupal-8.0.0.tar.gz
# mv ./drupal-8.0.0 ./drupal8
# cd ./drupal8/sites/default
# mkdir files
# cp -pi default.settings.php settings.php
# chmod 777 files
# chmod 777 settings.php (外部からの攻撃の対象となる為、インストール後のパーミッションの設定変更を忘れず!)
Apache起動
PostgreSQL同様、起動時にサービスを自動起動するためにenableした後、サービスの起動を行います。
# systemctl enable httpd.service
# systemctl start httpd.service
サイトアクセス
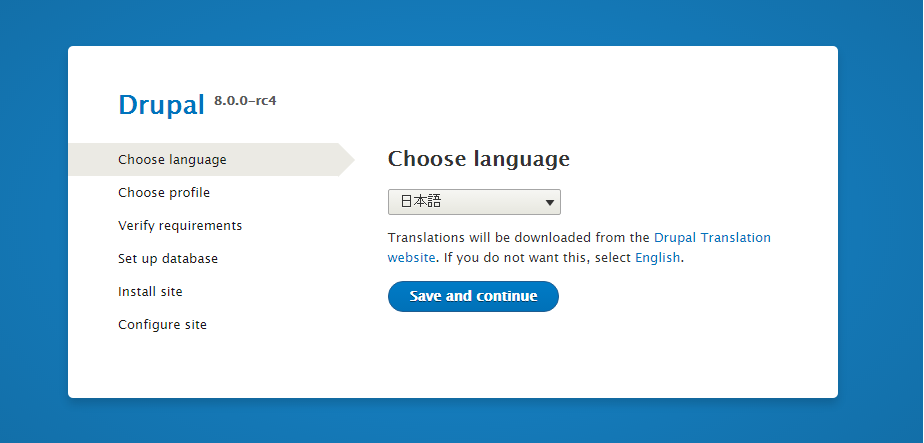
「http://{サーバIP}/drupal8」 へアクセスしましょう。インストール画面が表示されます。

続きは「スタジオ・ウミ」様の「Drupal 8 入門 : インストール編」を御覧ください。「スタジオ・ウミ」様、リンクのご承認ありがとうございます!
https://drupal.studio-umi.jp/blog/Drupal-8-tutorial-installation
以上、最小限の動作する環境を構築しました。
セキュリティ面やその他詳細設定の追加の余地は十二分にあると思いますので、動作させたい環境にあわせて適宜変更して運用していただければと思います。
これにて私の「Drupal Advent Calendar 2015」の12/4分の投稿を終了します。
最後まで閲覧して頂き、ありがとうございました。