SDImageを使いたかったので軽く調べました。
これから何回も使うかもしれないので自分用にメモ
手順1:Bridge用のHeaderFileを作る##
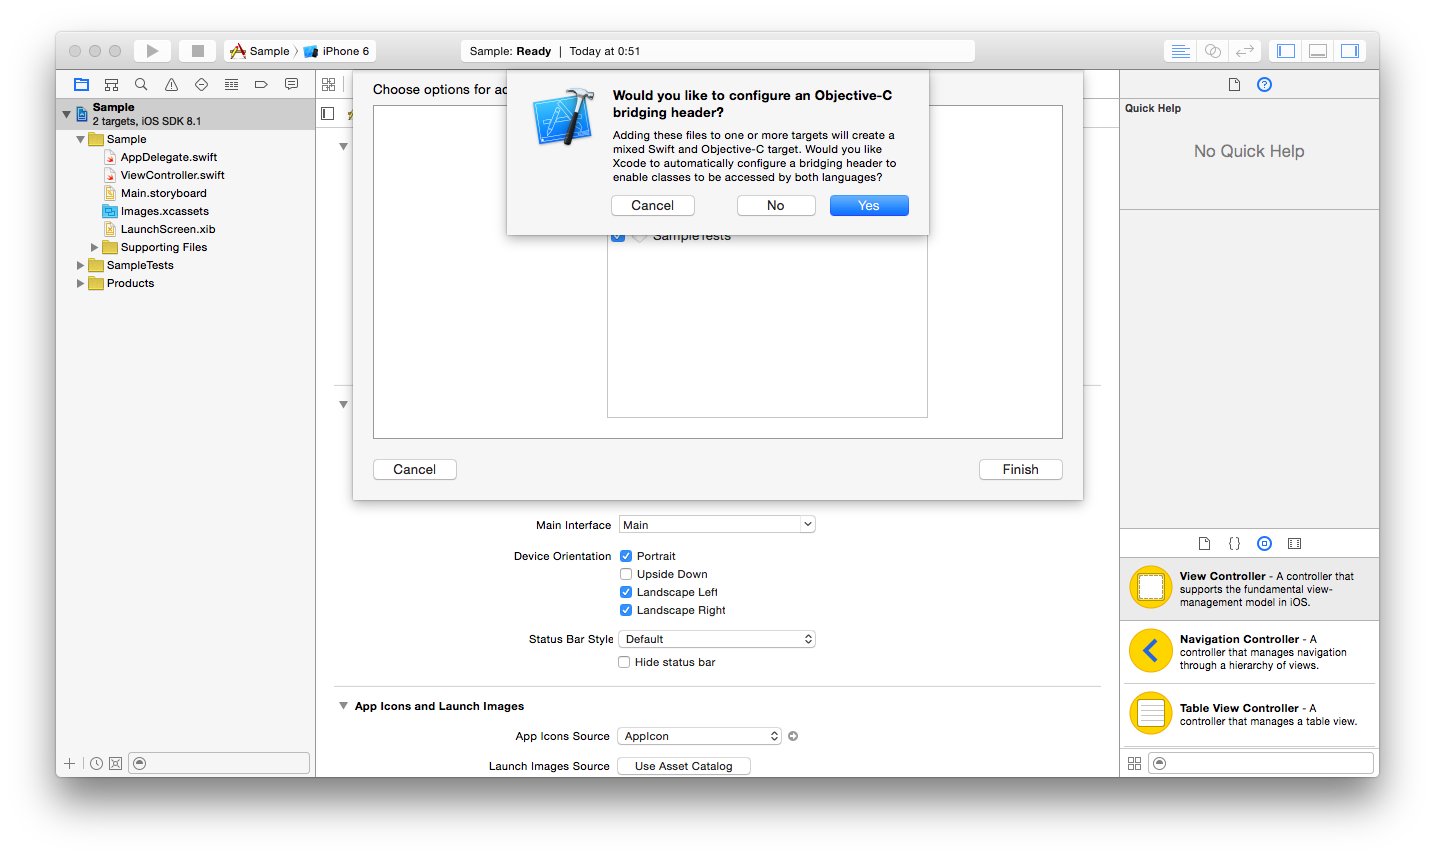
普通にSwiftのProjectにObjective-Cのファイルを突っ込めば勝手に作ってくれます。この時に以下の画像でいうSampleとSampleTest両方をTargetにするとHeaderファイルが2個できて邪魔なのでTargetは片方で後述のBuildSettingsのところでいじればいいと思います。

手順2:BuildSettingsをいじる##
手順1で自動でファイルを作ってもらった場合は手順2はスキップできます###
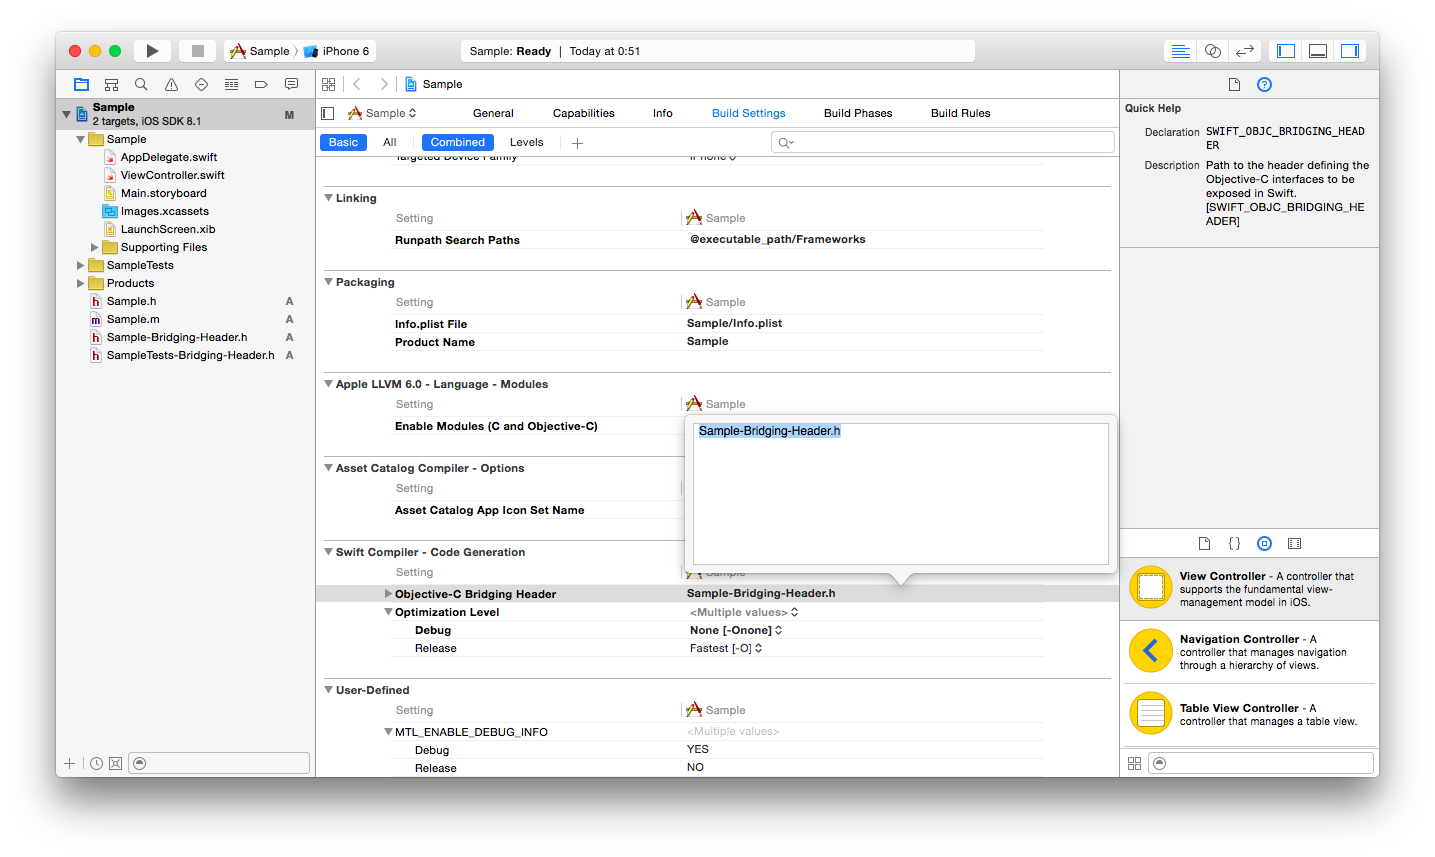
HeaderFileができたら次はBuildSettingsでBridge用のHeaderのパスを指定します。
場所は
Build Settings>Swift Compiler - Code Generating>Objective-C Bridging Header
です。
そこに作成したHeaderFileのパスを入力します。

手順3:Bridging-Headerに使いたいObjective-Cのソースをインポートする##
最後にHeaderFileにSwiftで使いたいObjective-Cのソースが書かれたファイルのHeaderを以下のような感じでimportすれば完成です。
# ifndef Twitter_Twitter_Bridging_Header_h
# define Twitter_Twitter_Bridging_Header_h

# import "Sample.h"

# endif
疑問##
参考にしたサイトでは
__Packaging > Defines Module > Yes__に設定
とあったが、別にYesにしなくても動きました。
どちらにするのがより正しいのでしょうか?
参考##
SwiftにObjective-Cのコードをimportする(http://takerpg.hatenablog.jp/entry/2014/12/02/223702)