S3 bucketの作成
まずはhtmlファイル等を格納するS3のbucketを作成します。
Cloudfrontから配信するのでパブリックアクセス許可やStatic website hostingの設定は不要です。
lambda関数の作成
次にBasic認証を処理するlambda関数を作成します。
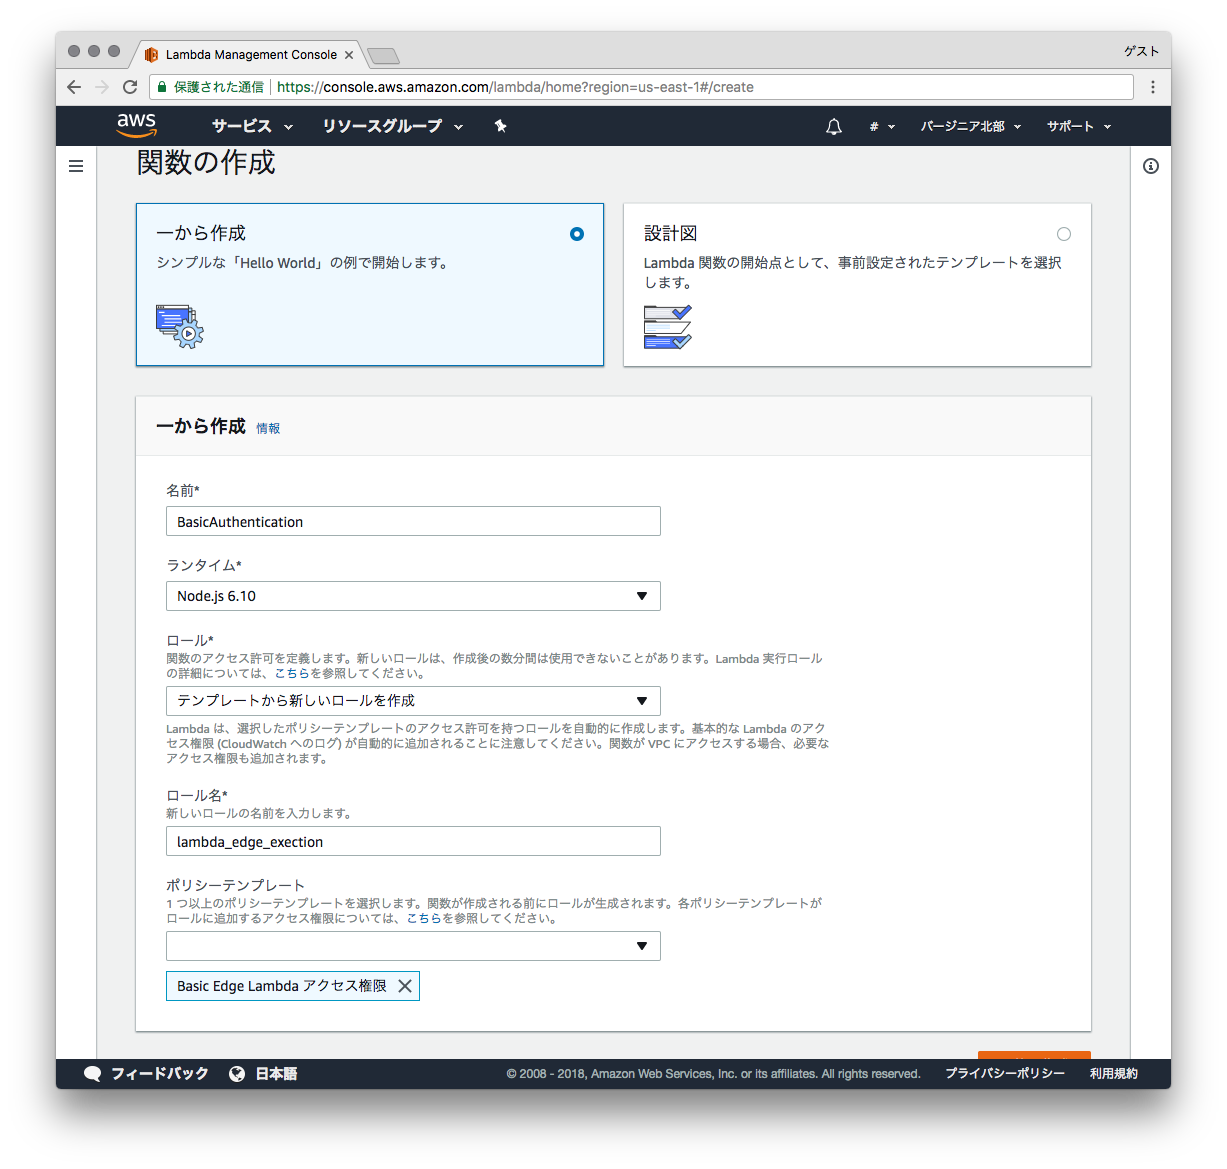
この時、右上のリージョン設定で「バージニア北部」を選択してから「関数の作成」をしてください。
名前に"BasicAuthentication"(任意の名前)
ランタイムはNode.js 6.10を選択
ロールは"テンプレートから新しいロールを作成"を選択
ロール名には"lambda_edge_exection"(任意の名前)
ポリシーテンプレートは"Basic Edge Lambdaアクセス権限"を選択
関数の作成をクリックしてしばらくすると次の画面に切り替わります。
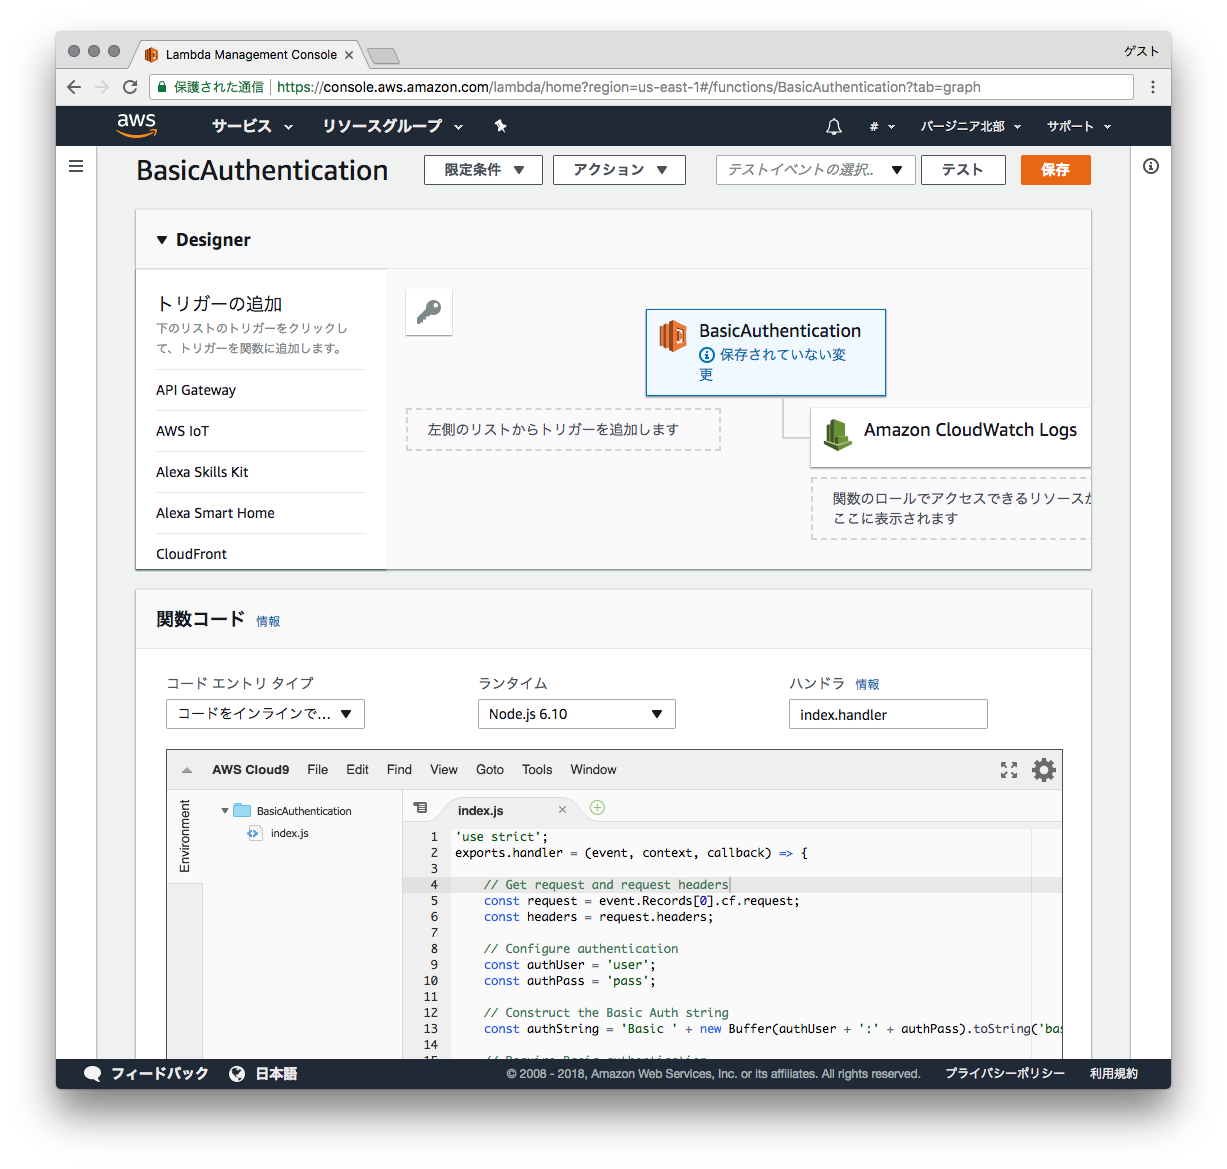
少しスクロールしたところの「関数コード」のエリアに以下のコードをコピペします。
9行目、10行目のauthUser、authPassでBasic認証のログイン用のIDとパスワードが設定できます。
'use strict';
exports.handler = (event, context, callback) => {

    // Get request and request headers
    const request = event.Records[0].cf.request;
    const headers = request.headers;

    // Configure authentication
    const authUser = 'user';
    const authPass = 'pass';

    // Construct the Basic Auth string
    const authString = 'Basic ' + new Buffer(authUser + ':' + authPass).toString('base64');

    // Require Basic authentication
    if (typeof headers.authorization == 'undefined' || headers.authorization[0].value != authString) {
        const body = 'Unauthorized';
        const response = {
            status: '401',
            statusDescription: 'Unauthorized',
            body: body,
            headers: {
                'www-authenticate': [{key: 'WWW-Authenticate', value:'Basic'}]
            },
        };
        callback(null, response);
    }

    // Continue request processing if authentication passed
    callback(null, request);
};
入力後、右上の「保存」ボタンをクリックして保存します。
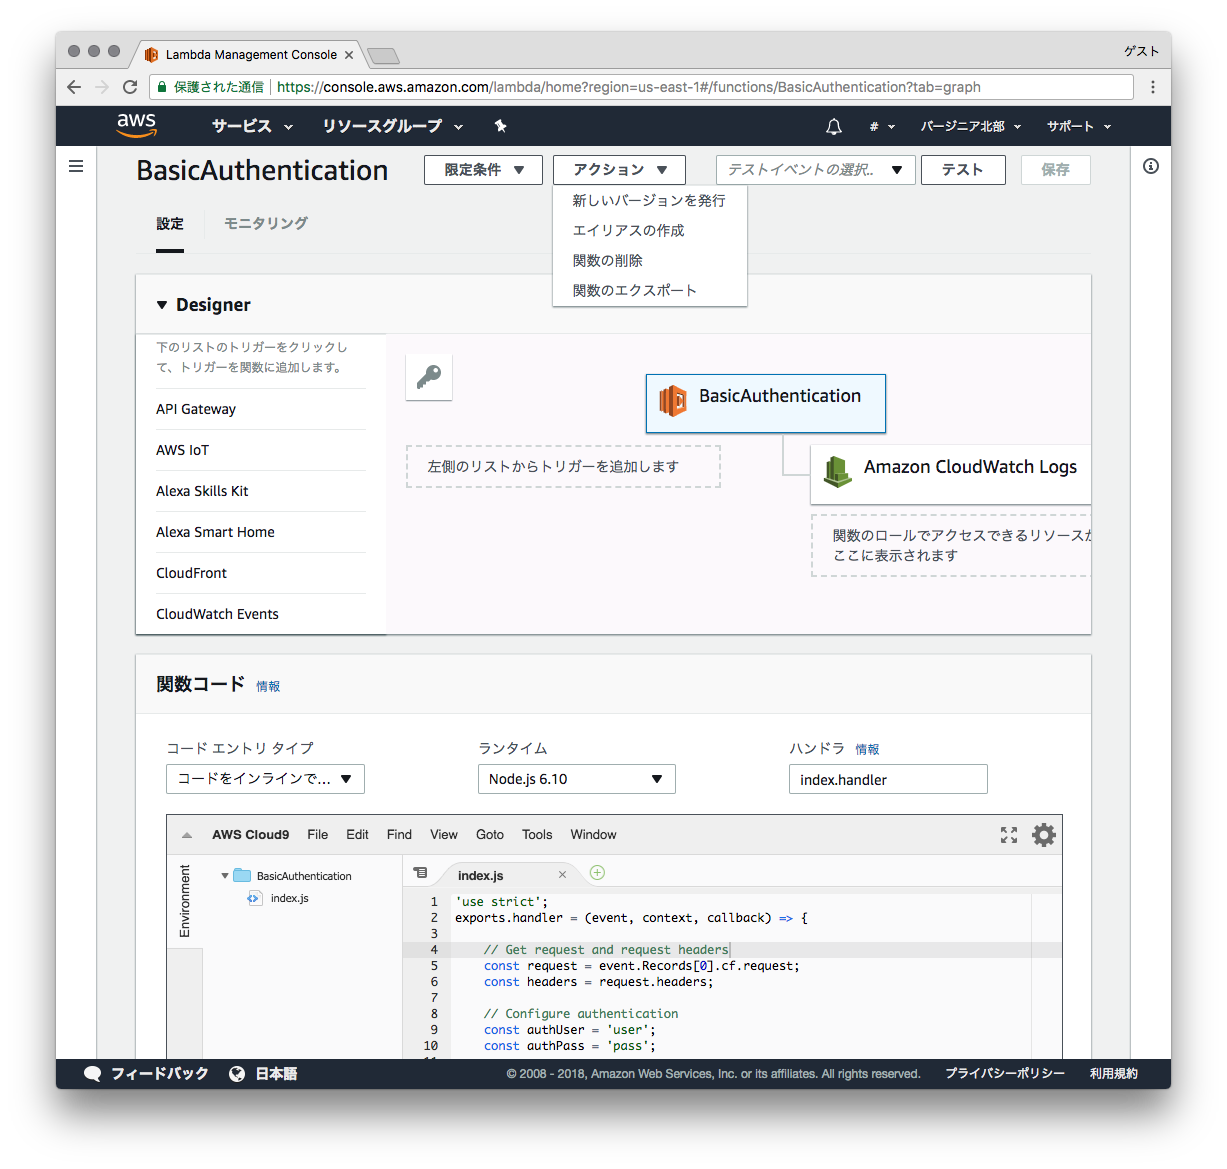
その後、「アクション」メニューから「新しいバージョンを発行」を選択します。
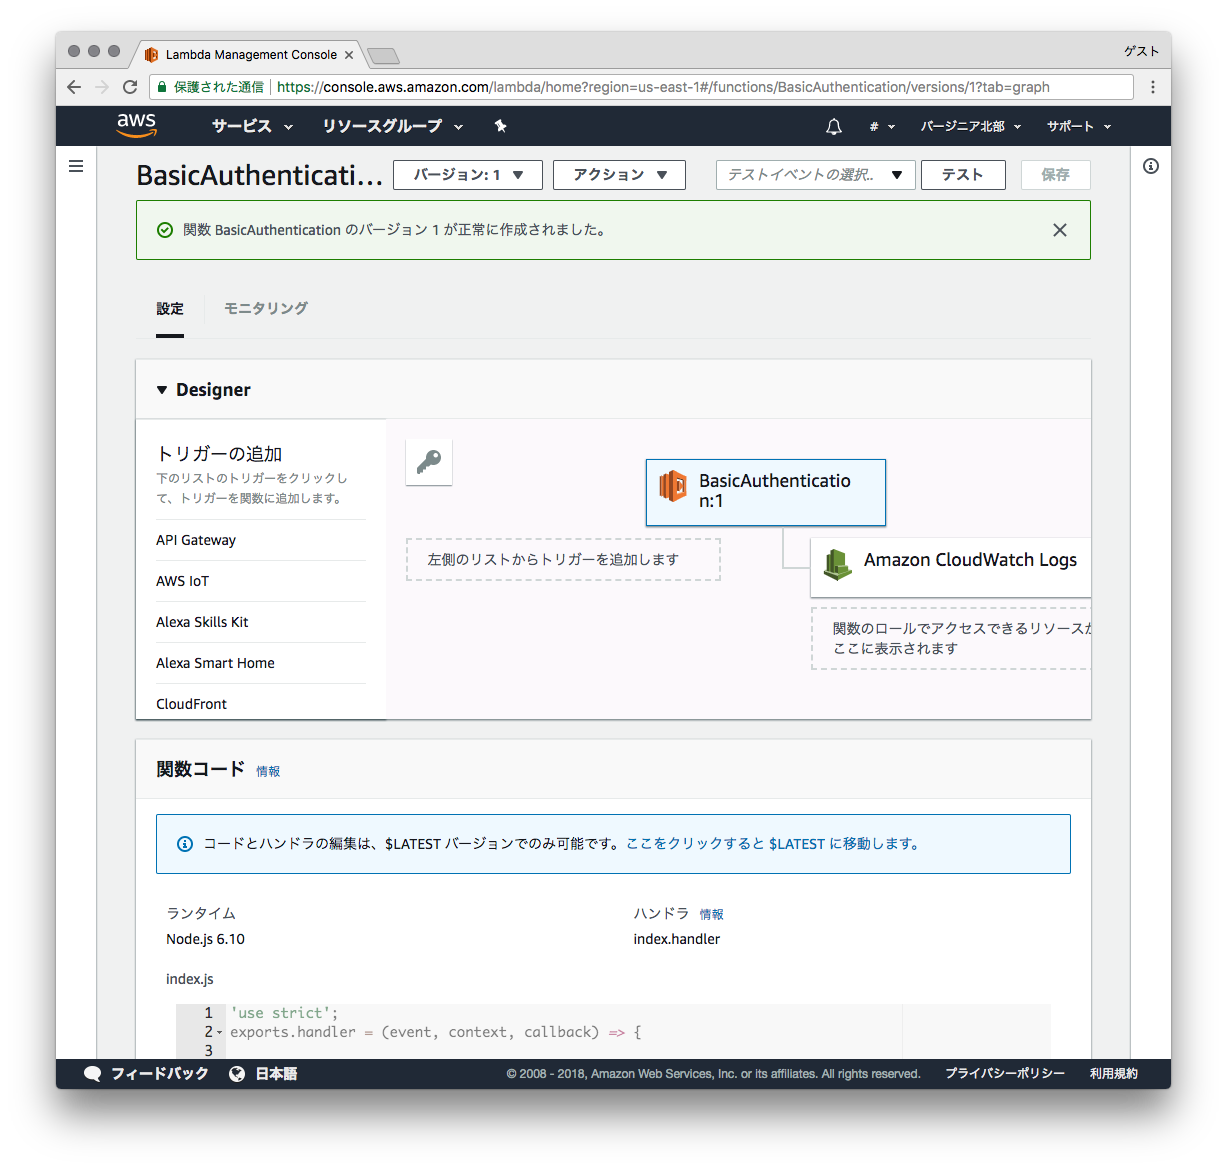
出てきたポップアップの「発行」をクリックするとバージョン1として保存されます。
保存されたら、右上に表示されているARNの値をコピーしておきます。
例)
arn:aws:lambda:us-east-1:xxxxxxxxxxxx:function:BasicAuthentication:1
Cloudfrontの作成
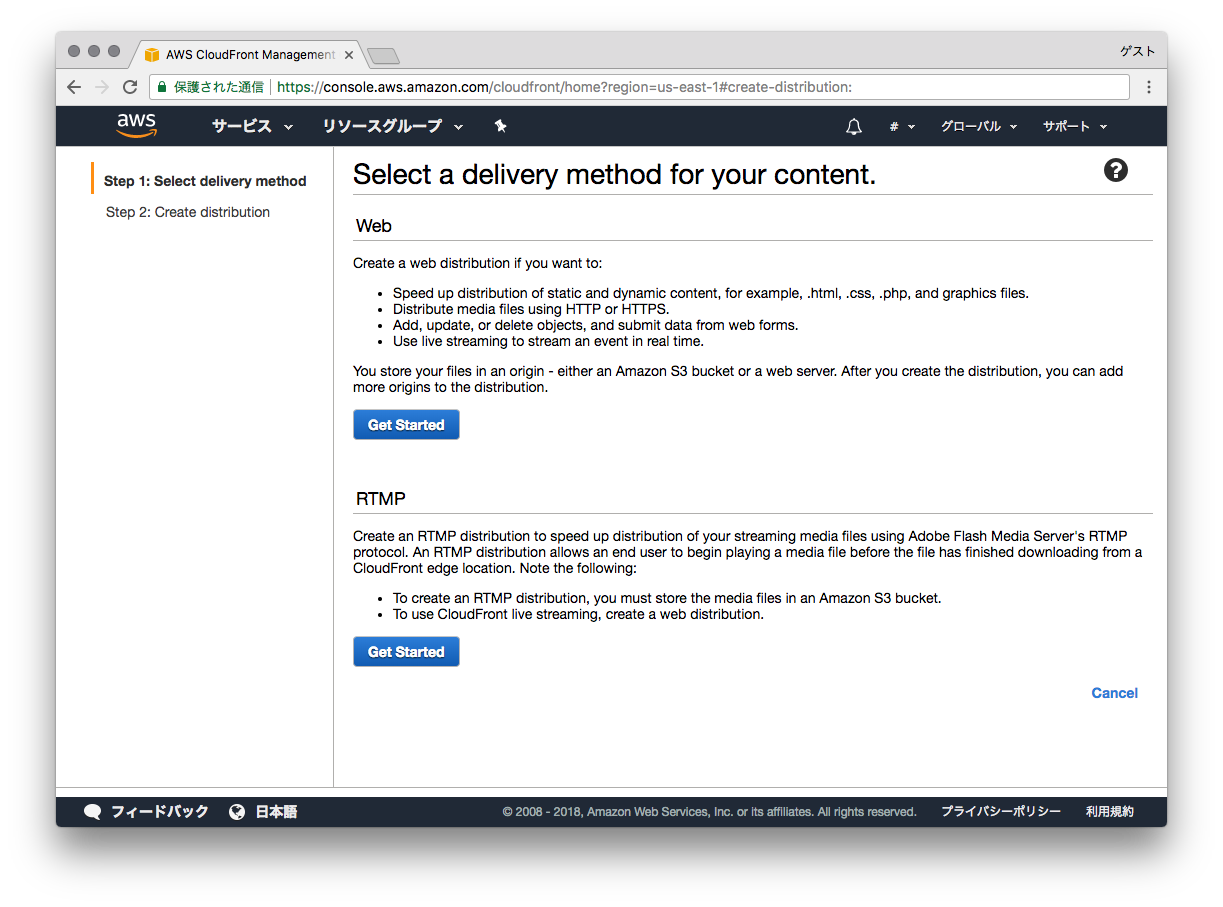
次にCloudfrontのdistributionを作成します。
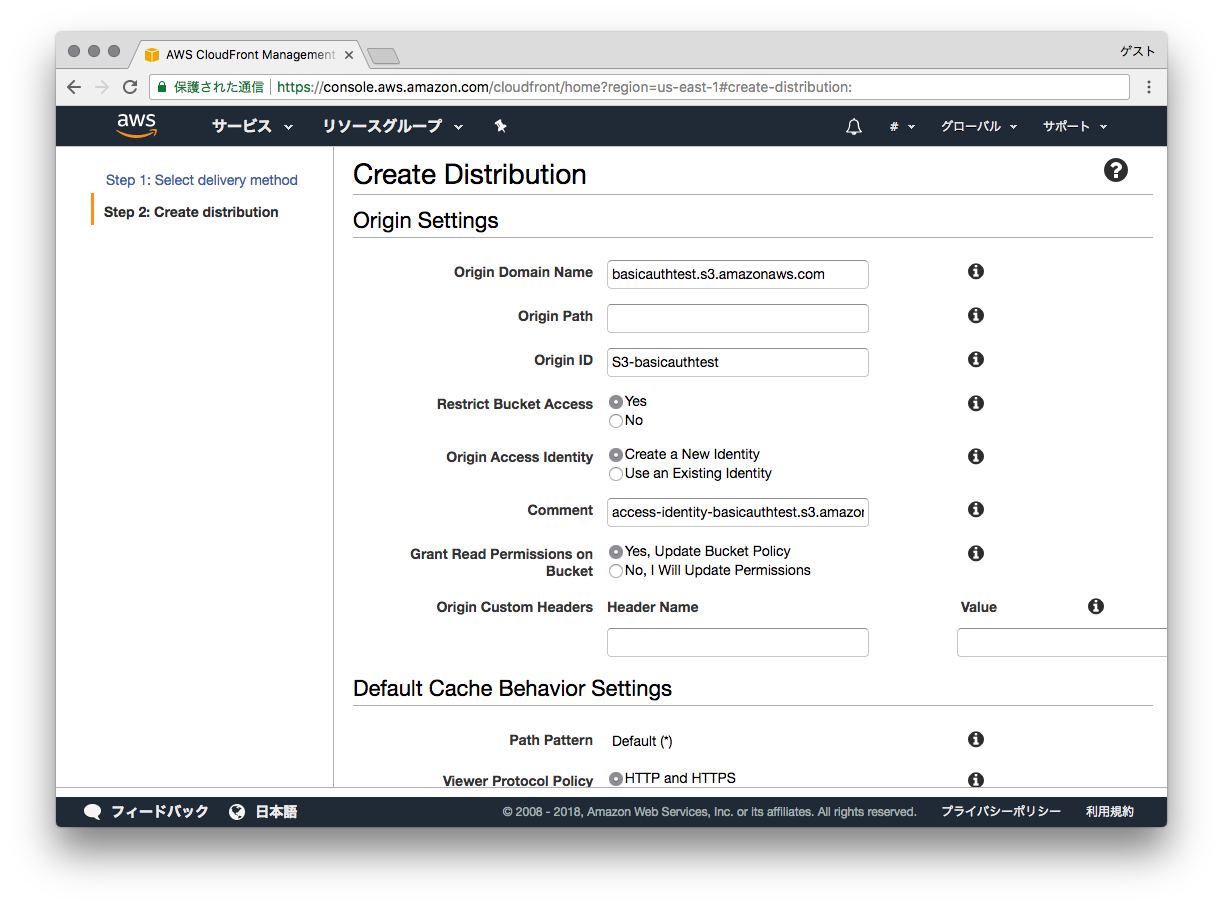
Origin Settings
Origin Domain Nameのところに先ほど作成したS3のbucketを選択します。
Restrict Bucket AccessをYes
Origin Access IdentityをCreate a New Identity
Grant Read Permissions on BucketをYes, Update Bucket Policy
とすることで該当のbucketのPolicyがCloudfrontから読み取りできるように設定されます。
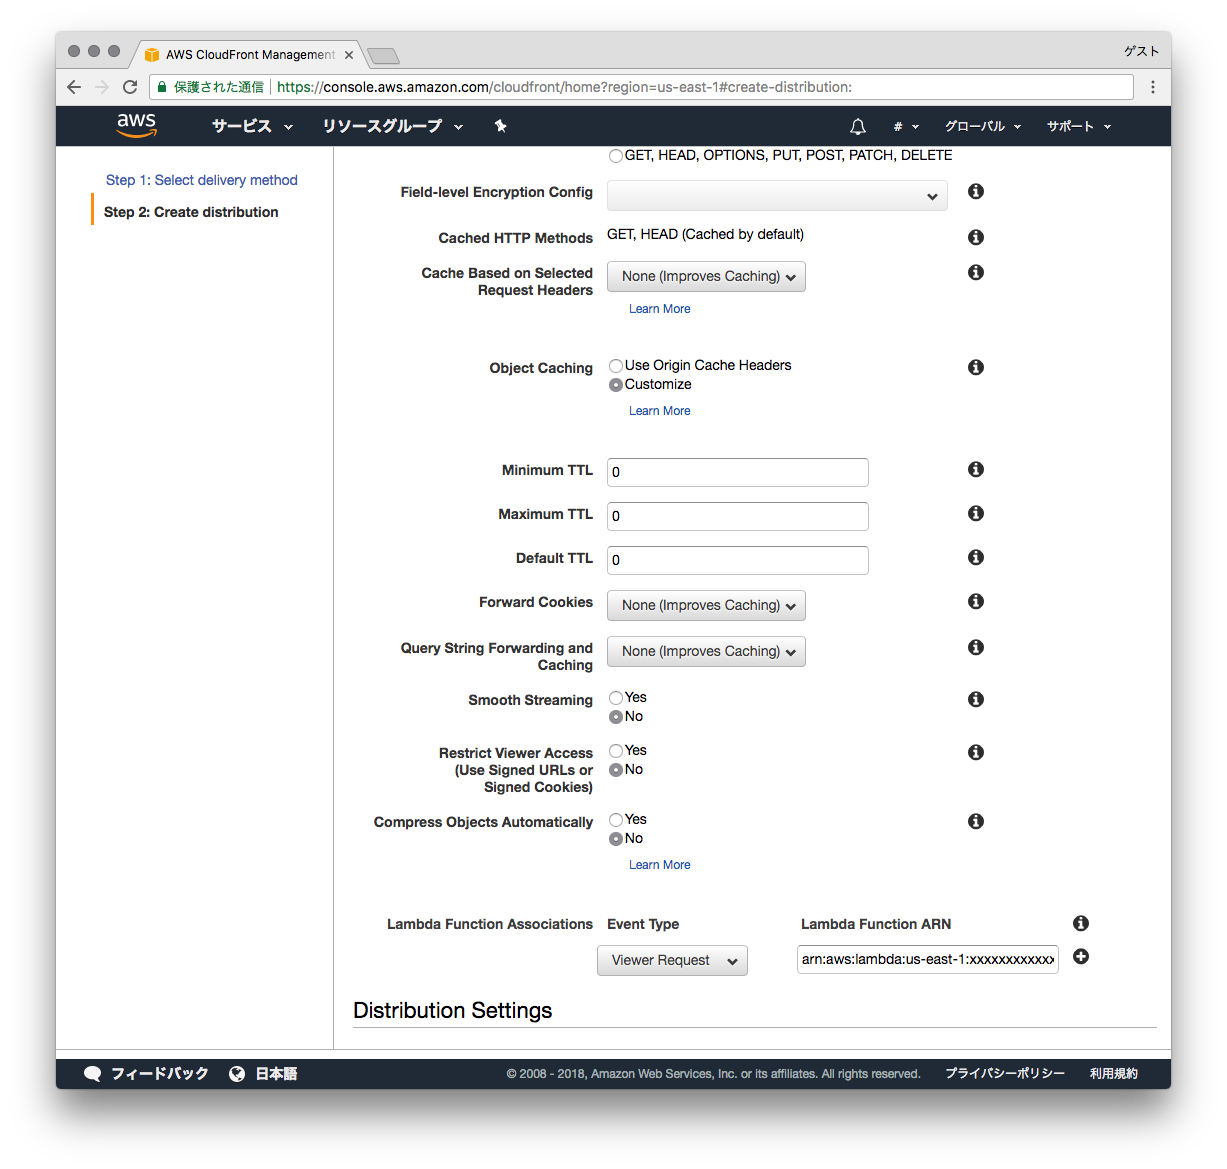
Default Cache Behavior Settings
Object Cachingを"Customize"にして
各TTLを0にすることでキャッシュされないようになるので、テスト環境の構築時には便利です。
そして、今回の設定のポイントである「Lambda Function Associations」の部分に
Event Typeに"Viewer Request"を選択
Lambda Function ARNに先ほどコピーしたARNをペーストします。
Distribution Settingsのところで
Default Root Objectに"index.html"
と設定しておくことでroot URL(ドメイン+/で終わるURL)でアクセスした時のデフォルトファイルを設定できます。
最後に右下の「Create Distoribution」をクリックして完了を待ちます。
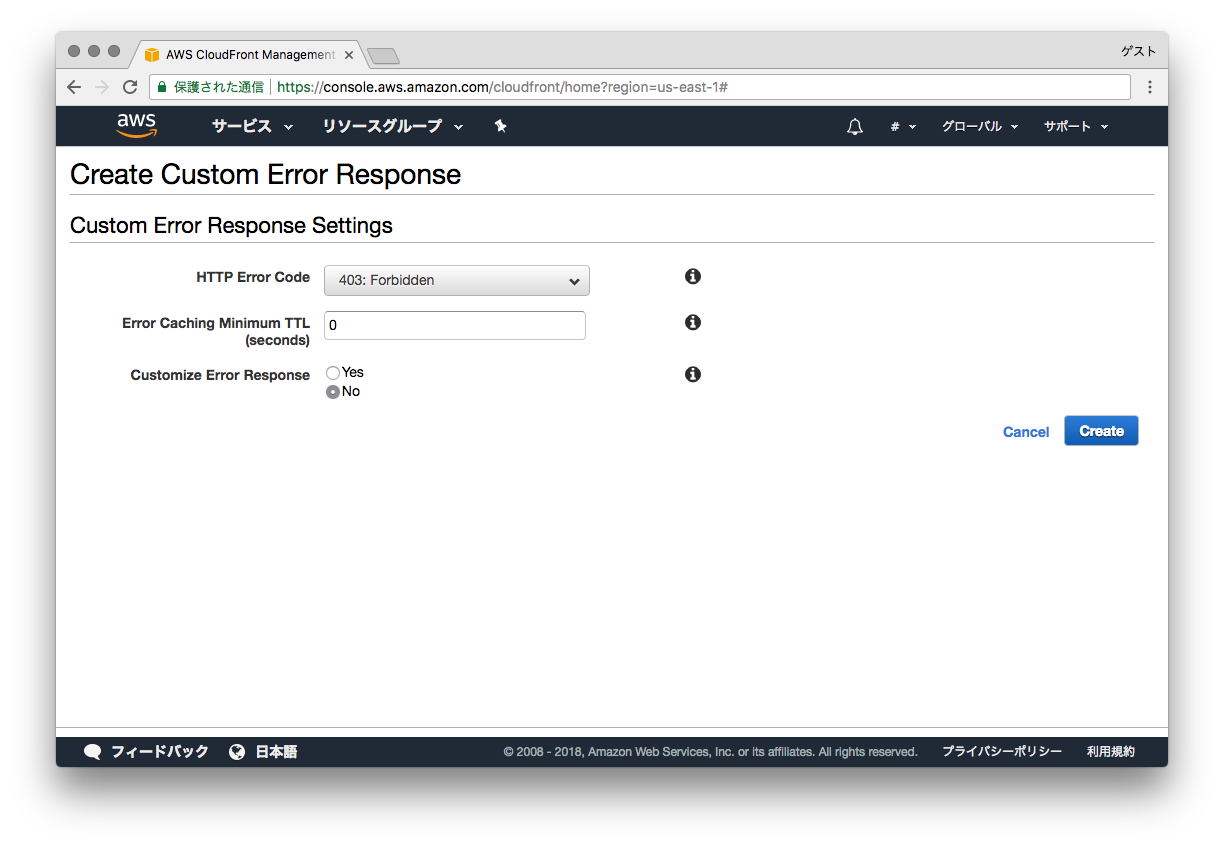
ここまででも使えるのですが、デフォルトの設定でエラーキャッシュが効いてしまうのでそれを無効にしておきます。
作成したDistoributionを選択して、「Error Pages」のタブで「Create Custom Error Response」をクリックします。
403エラー時のTTLを0に設定
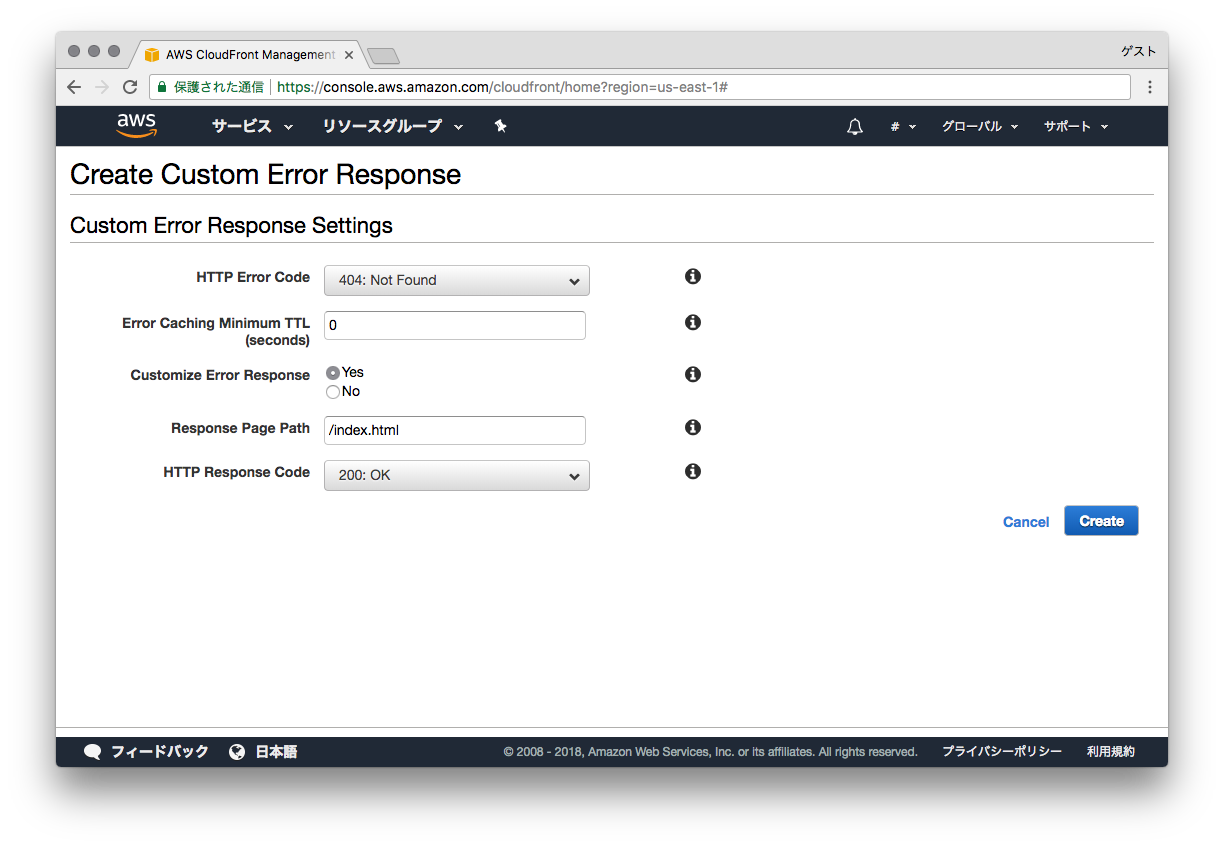
angular等のSPAでのルーティングをうまく利用するために404エラーはindex.htmlを開く、のようにしたい場合は
Custom Error ResponseをYes
にすることで設定可能です。
(Response Page Pathは / から始まる必要があります。)
Basic認証を外すとき
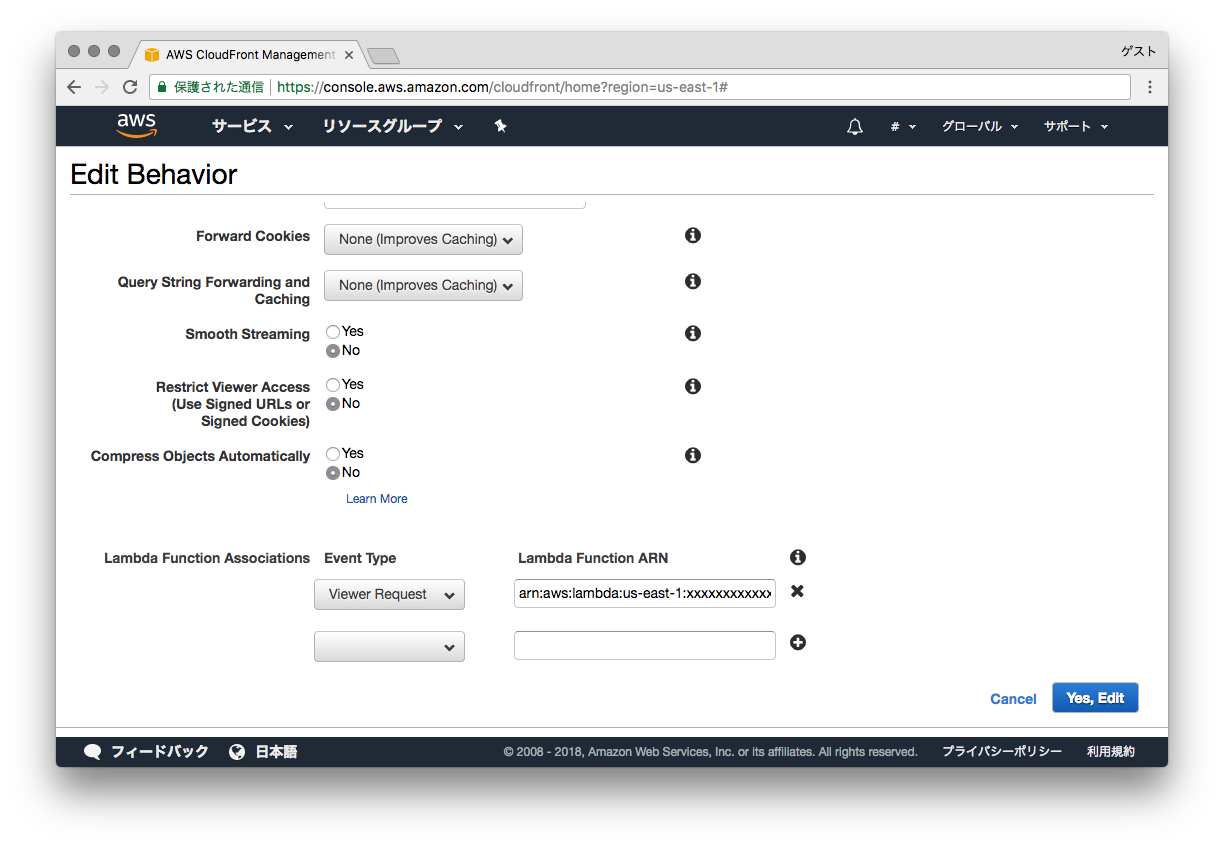
Distoributionの「Behaviors」タブから設定されているBehaviorを選択し、Editをクリックします。
Lambda Function Associationsにあるlambda functionの右のXをクリックして削除します。
右下の「Yes, Edit」をクリックします。
しばらくすると設定が反映されます。
参考にしたURL
https://hackernoon.com/serverless-password-protecting-a-static-website-in-an-aws-s3-bucket-bfaaa01b8666
http://blog.jicoman.info/2017/10/s3-basic-using-cloudfront-lambda-edge/
