環境
- サーバー:Heroku
- ローカルPC:macOS
- Bot用フレームワーク:hubot
- ソースコード管理:Github
Slack側設定
- Slack App Directoryにアクセス
-
hubotを検索し、ワークスペースにインストール - 設定画面で名前、アイコンをカスタマイズ
-
APIトークンをメモ ※後にHerokuと連携するときに使用
Github設定
- 新規にボット用リポジトリを作成
Heroku側設定
■ そもそもHerokuとは?
- セールスフォース・ドットコムが提供するPaaS
■ 特徴
- デプロイが非常に簡単で手間が少ない
- 外部サービス(Githubとの連携も簡単にできる
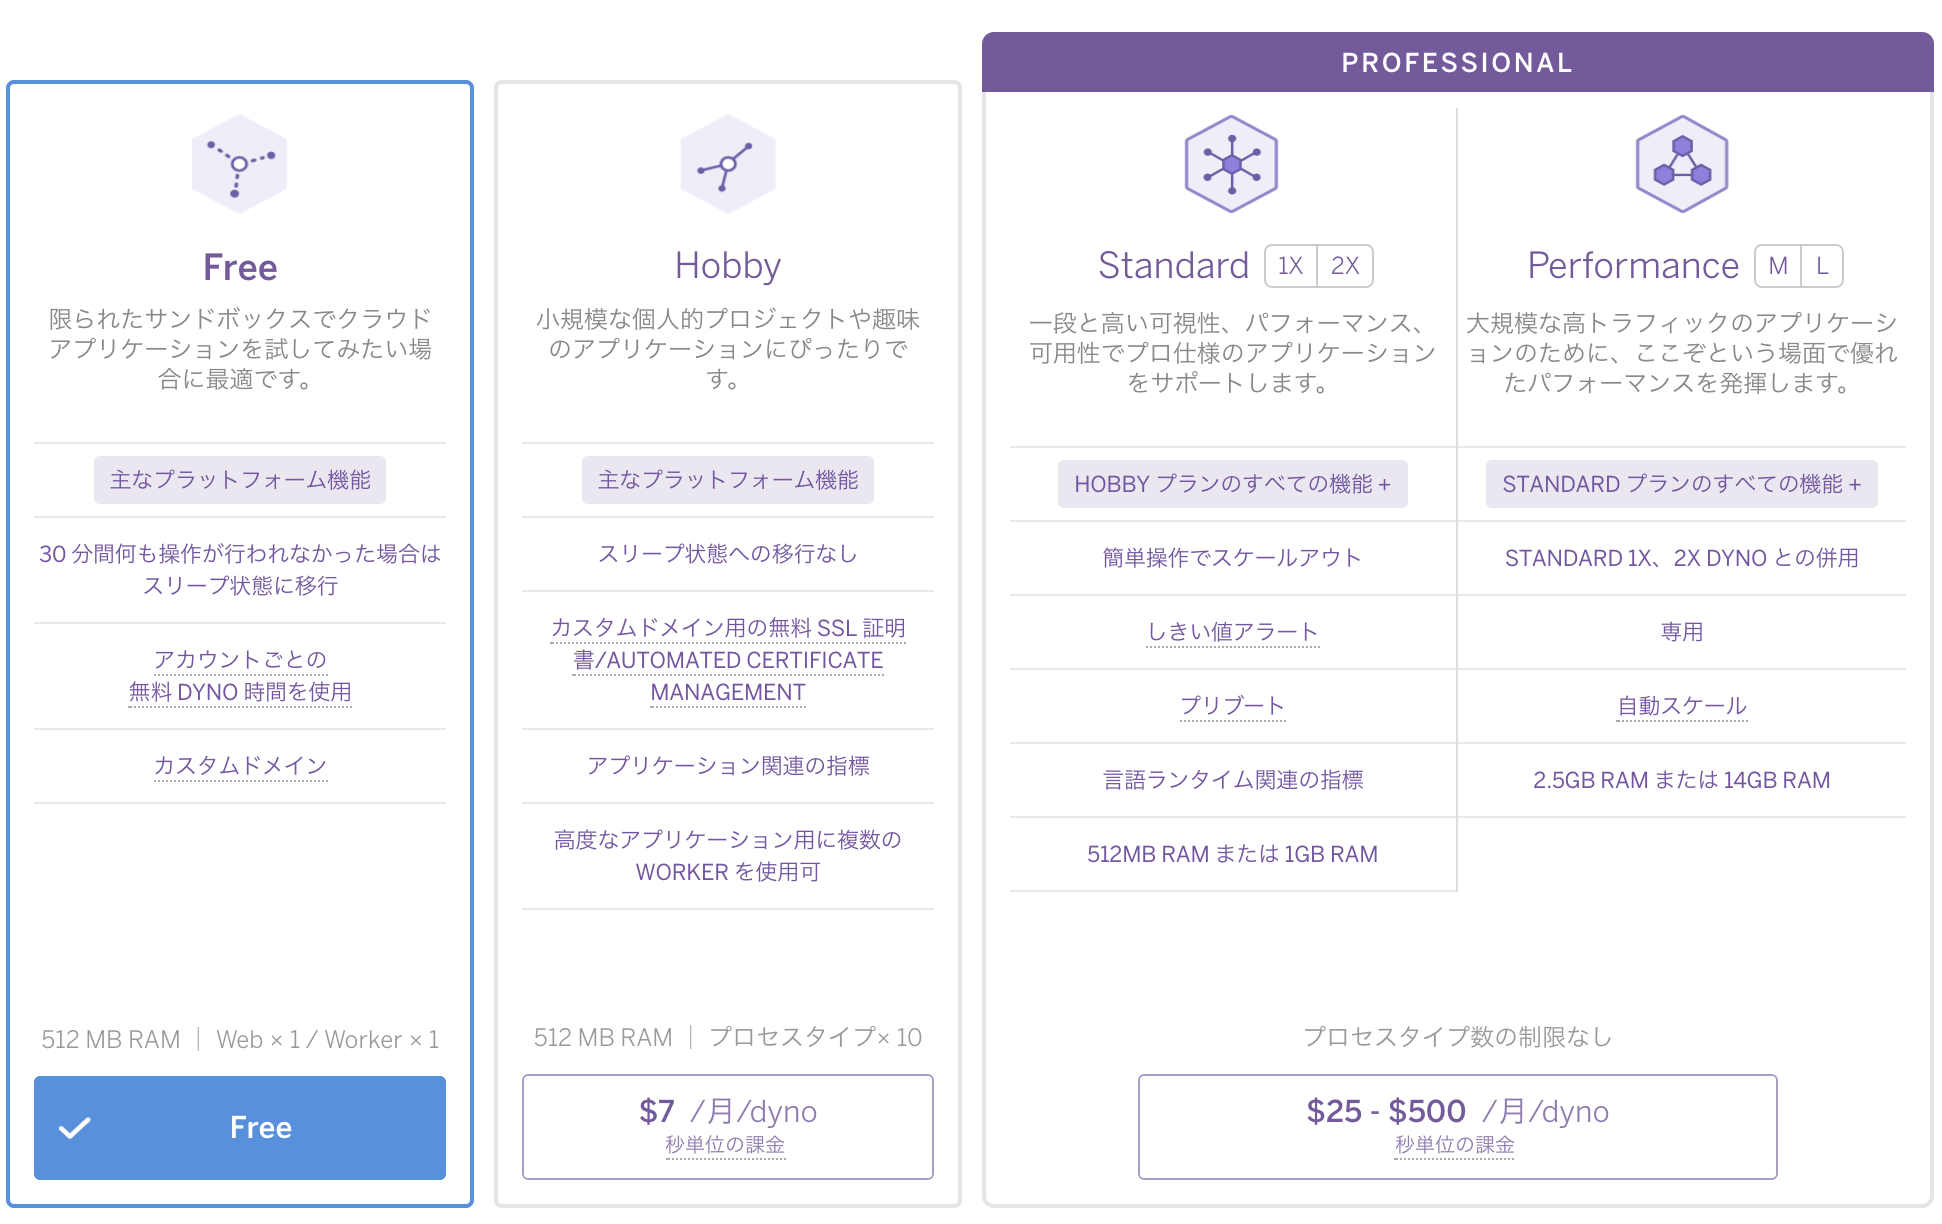
■ 価格
- 月1000時間分までは無料
→複数台のサーバを運用しなければ費用はかからない(要クレジットカード登録)
■ Heroku側設定
Heroku Sign UpでFreeプランのアカウントを作成
Web経由でHerokuにログイン
[Account Setting]→[Billing]でクレジットカード情報を登録
[New]→[Create new app]からAppを作成
[app name]→[Deploy]→[App connectef to Github]でGithubのボット用リポジトリと連携
[app name]→[Setting]→[Config Vars]で環境変数を設定
HUBOT_SLACK_TOKEN : Slack設定で取得したAPIトークン
TZ:Asia/Tokyo
macOS(ローカル環境)の設定
- 1: hubotに必要なパッケージをインストール
   $brew install node
   $npm install -g yo generator-hubot
- 2: Githubのボット用リポジトリをクローン
$git clone <URL>
- 3: hubotのインストール
   $cd <Githubリポジトリ>
   $yo hubot
   ========================
   [?] ======================================================================
   We're constantly looking for ways to make yo better!
   May we anonymously report usage statistics to improve the tool over time?
   More info: https://github.com/yeoman/insight & http://yeoman.io
   ==========================================================================:
   <y/nを任意に選択>
                        _____________________________
                       /                             \
      //\              |      Extracting input for    |
     ////\    _____    |   self-replication process   |
    //////\  /_____\   \                             /
    ======= |[^_/\_]|   /----------------------------
     |   | _|___@@__|__
     +===+/  ///     \_\
      | |_\ /// HUBOT/\\
      |___/\//      /  \\
            \      /   +---+
             \____/    |   |
              | //|    +===+
               \//      |xx|

   ?Owner <任意に記入>
   ?Bot name <Bot名>
   ?Description <任意に記入>
   ?Bot adapter <slackを記入>
- 4: nodeのバージョン情報の更新
   $vim package.json
   ========================
   - "node":"0.10.x"
   + "node":"10.9.0"
- 5: リポジトリの更新
   $git add .
   $git commit -m "<hogehoge>"
   $git push -u origin master
- 6: 起動スクリプトの確認
   $cat Procfile
   web: bin/hubot -a slack
ここまでの作業が正常であれば、
リポジトリを更新するとHerokuに自動デプロイされ、Slack上のBotが有効化される。
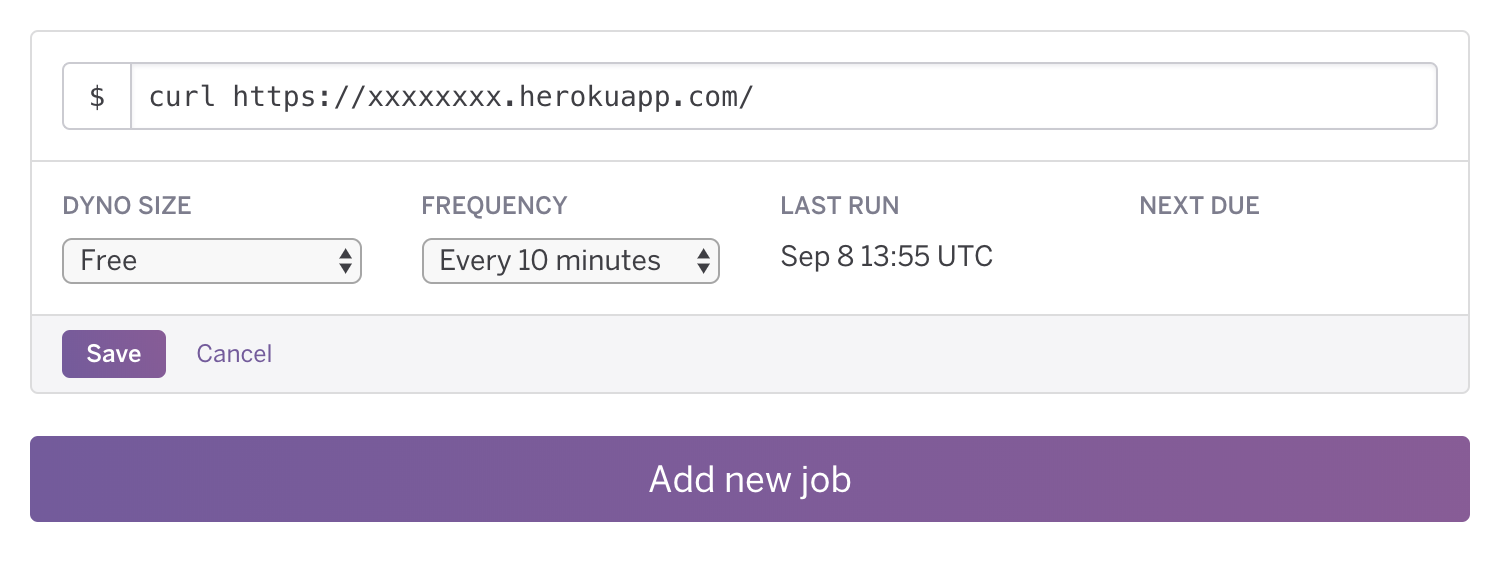
Botが眠らないために...
HerokuのFreeプランの場合、30分反応がないとスリープ状態となってしまいます。
回避するために、Heroku SchedulerというAdd-onを導入します。
Web経由でHerokuにログイン
[app name]→[Resources]→[Add-ons]で
Heroku Schedulerを検索し、appに導入Heroku Schedulerで以下に設定
DYNOSIZE:Free
FREQUENCY:Every 10 minutes
$:curl https://xxxxxxxx.herokuapp.com/
※xxxxxxxxはapp nameに変更