概要
windows10からTortoiseSVN のリポジトリにアクセスするまでの手順を書く.
普段はgitを使用しているけれど,SVNのリポジトリにアクセスすることがあった.
ネットに載っている諸々の記事では必要なこと以外もあるので簡潔に手順だけ載せる.
環境
- windows10
- TortoiseSVN
準備
- TortoiseSVNのインストール
- SSHクライアントのPuttyのインストール
- ホストサーバに公開鍵を登録してもらう
秘密鍵のputty形式に変換
自分はopen-sshの鍵を使っていたのでputty形式に変更した
ここのqiitaの記事を参考に
SVNのコンフィグ設定
- 「右クリックメニュー」-> 「tortoiseSVN」-> 「Settings」
- Networkタブ

- SSHに以下のようにputtyクライアントを設定
- "C:\Program Files\putty\plink.exe" -l [ユーザ名] -pw [パスワード] -i [.ppkファイル(秘密鍵)への絶対パス]
補足解説
tortoiseSVNのクライアントにputty付属のsshクライアントplinkを設定する.plink.exeはputtyをインストールすると同時に入る.
exe起動に伴って通常のsshと同様のオプションを記述する.今回はユーザ名とパスワードと鍵を指定した.
チェックアウトする
- 「右クリックメニュー」-> 「SVN CheckOut」
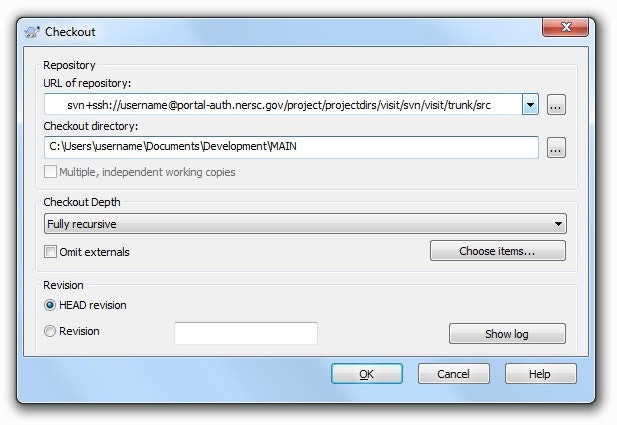
- リポジトリのURLとローカルディレクトリのパスを指定
- 「OK」ボタンでチェックアウト開始
まとめ
win10でtortouiseSVNを使ってリポジトリをチェックアウトした
gitのほうが楽だと感じました