概要
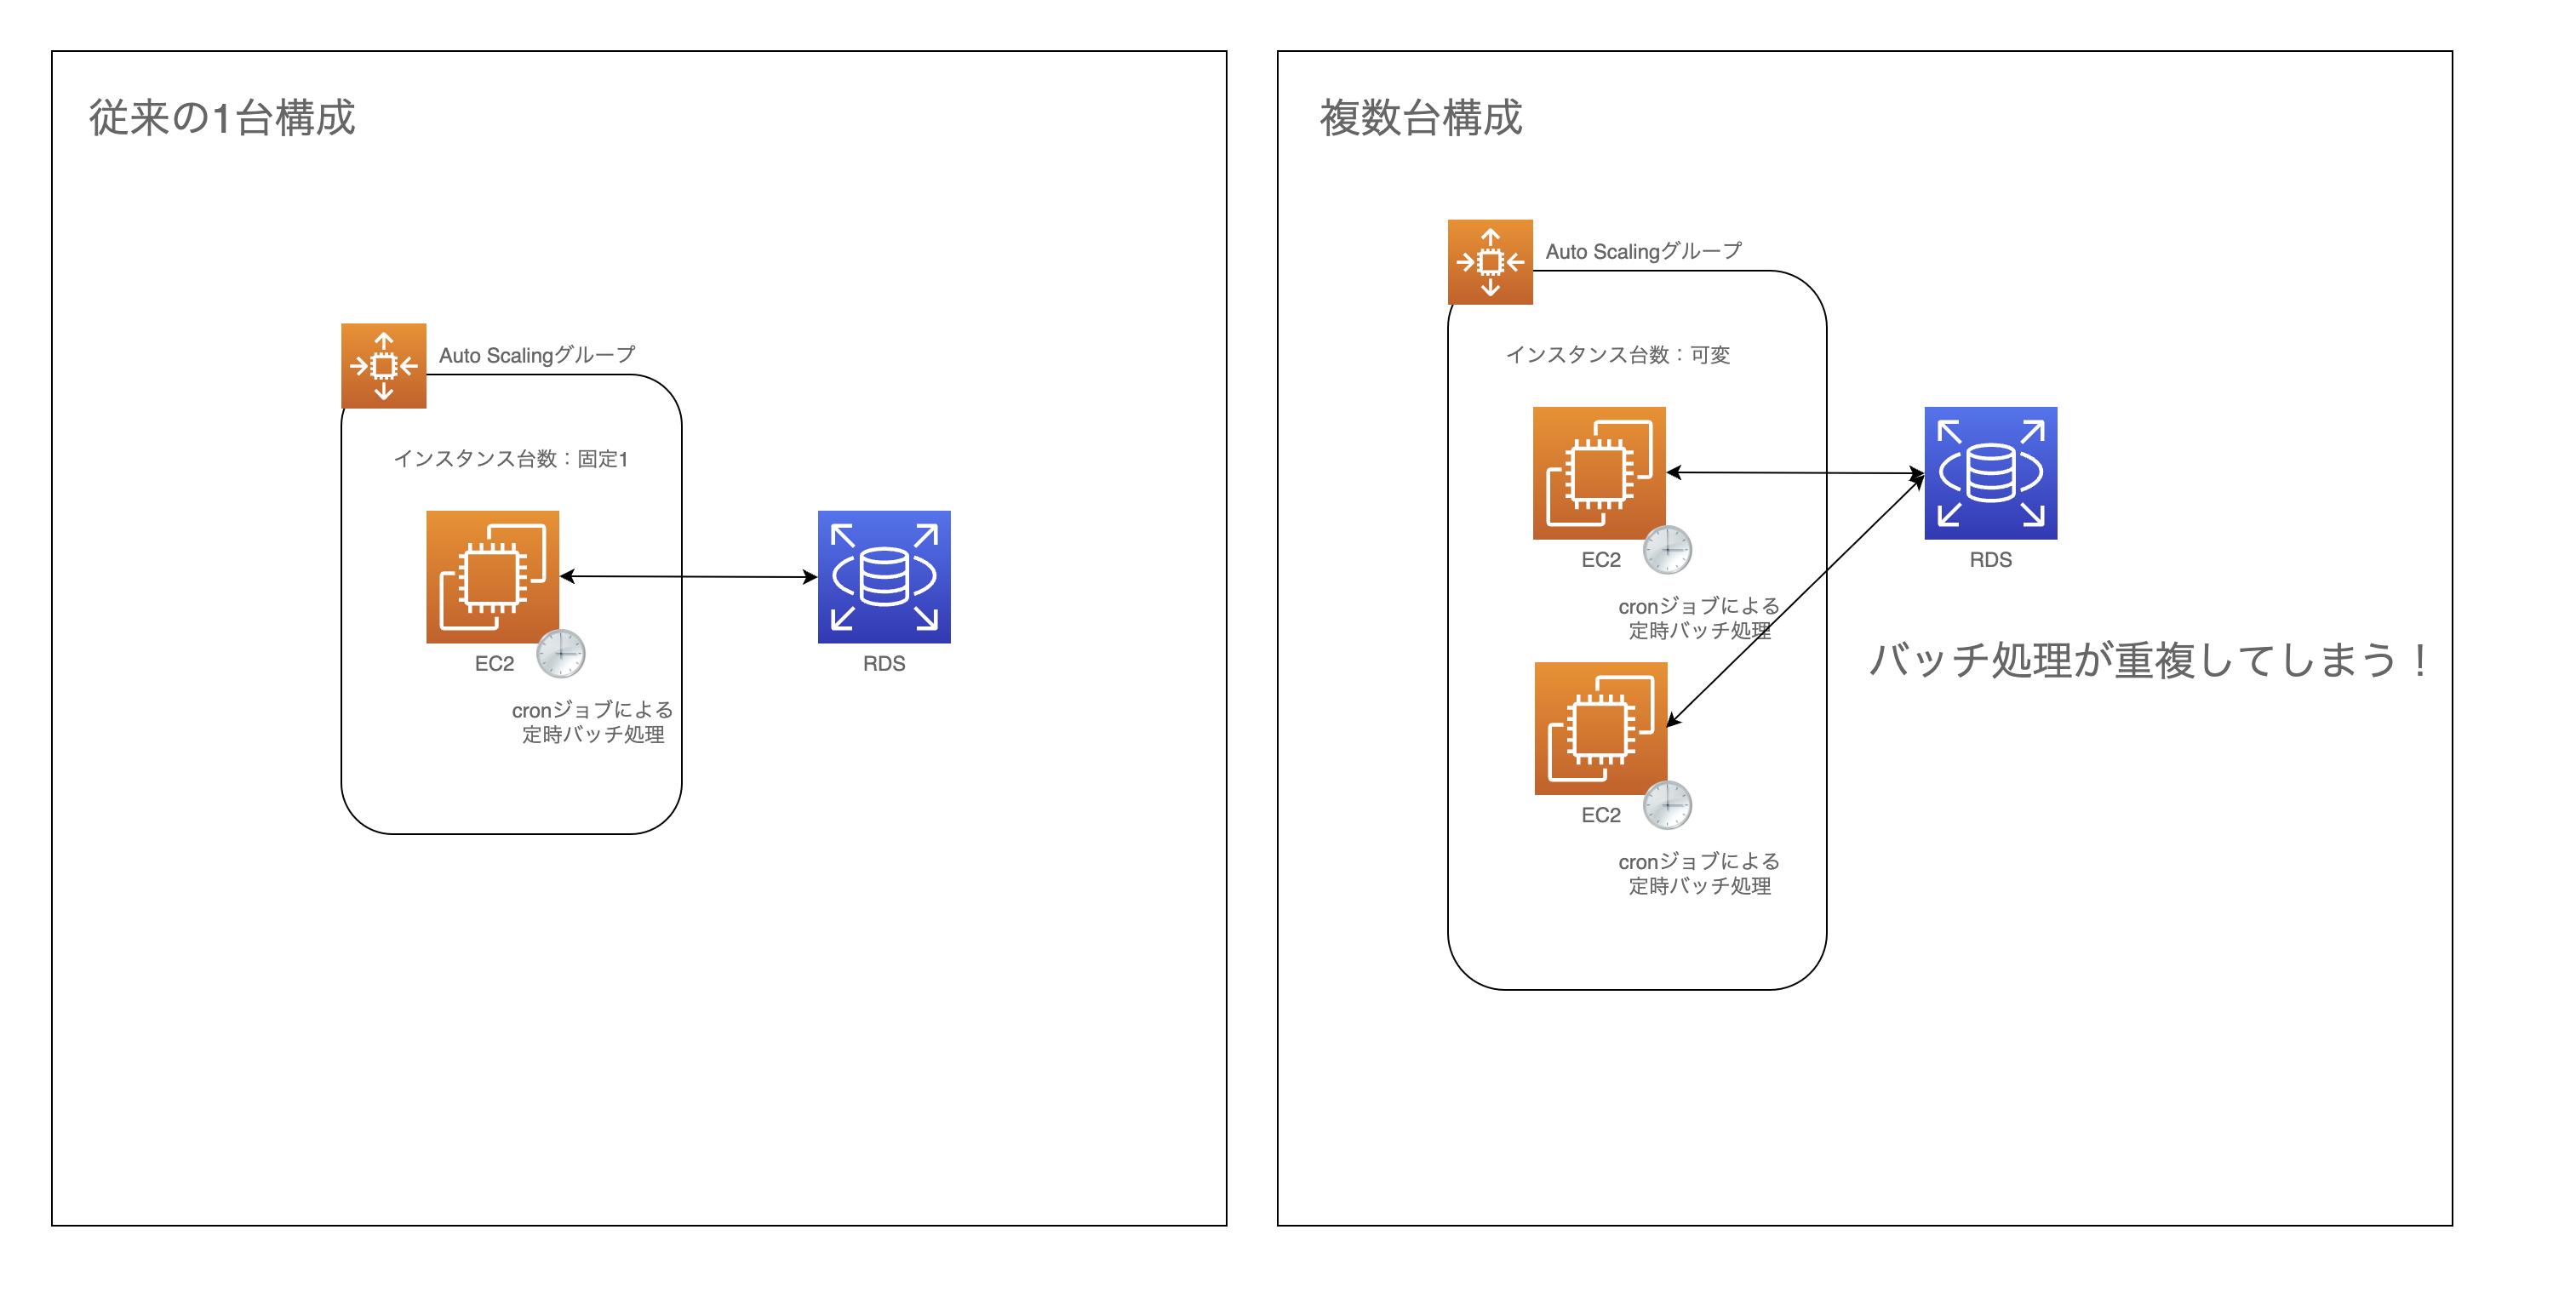
EC2インスタンス1台構成で動かしていたWebアプリを、AutoScalingを用いてEC2複数台で運用にするようにしました。
今までEC2インスタンス内にcronを仕込んで、日次や月次の定時処理を行わせていましたが、インスタンスが複数台になることで、バッチ処理が重複して行われるようになりました。
構成図
対応案
対応案として、ざっくり以下の二つがありました。
案1
AutoScalingしないタスクサーバーを1台用意して、バッチ処理はその子に任せる。
案2
インスタンス内のcron契機でのバッチ処理はやめて、EventBridgeを利用したLambda契機でアプリにリクエストを送りバッチ処理を行う。
リクエストはELBによりインスタンス1台に振り分けられるので、重複して処理が行われることがなくなる。
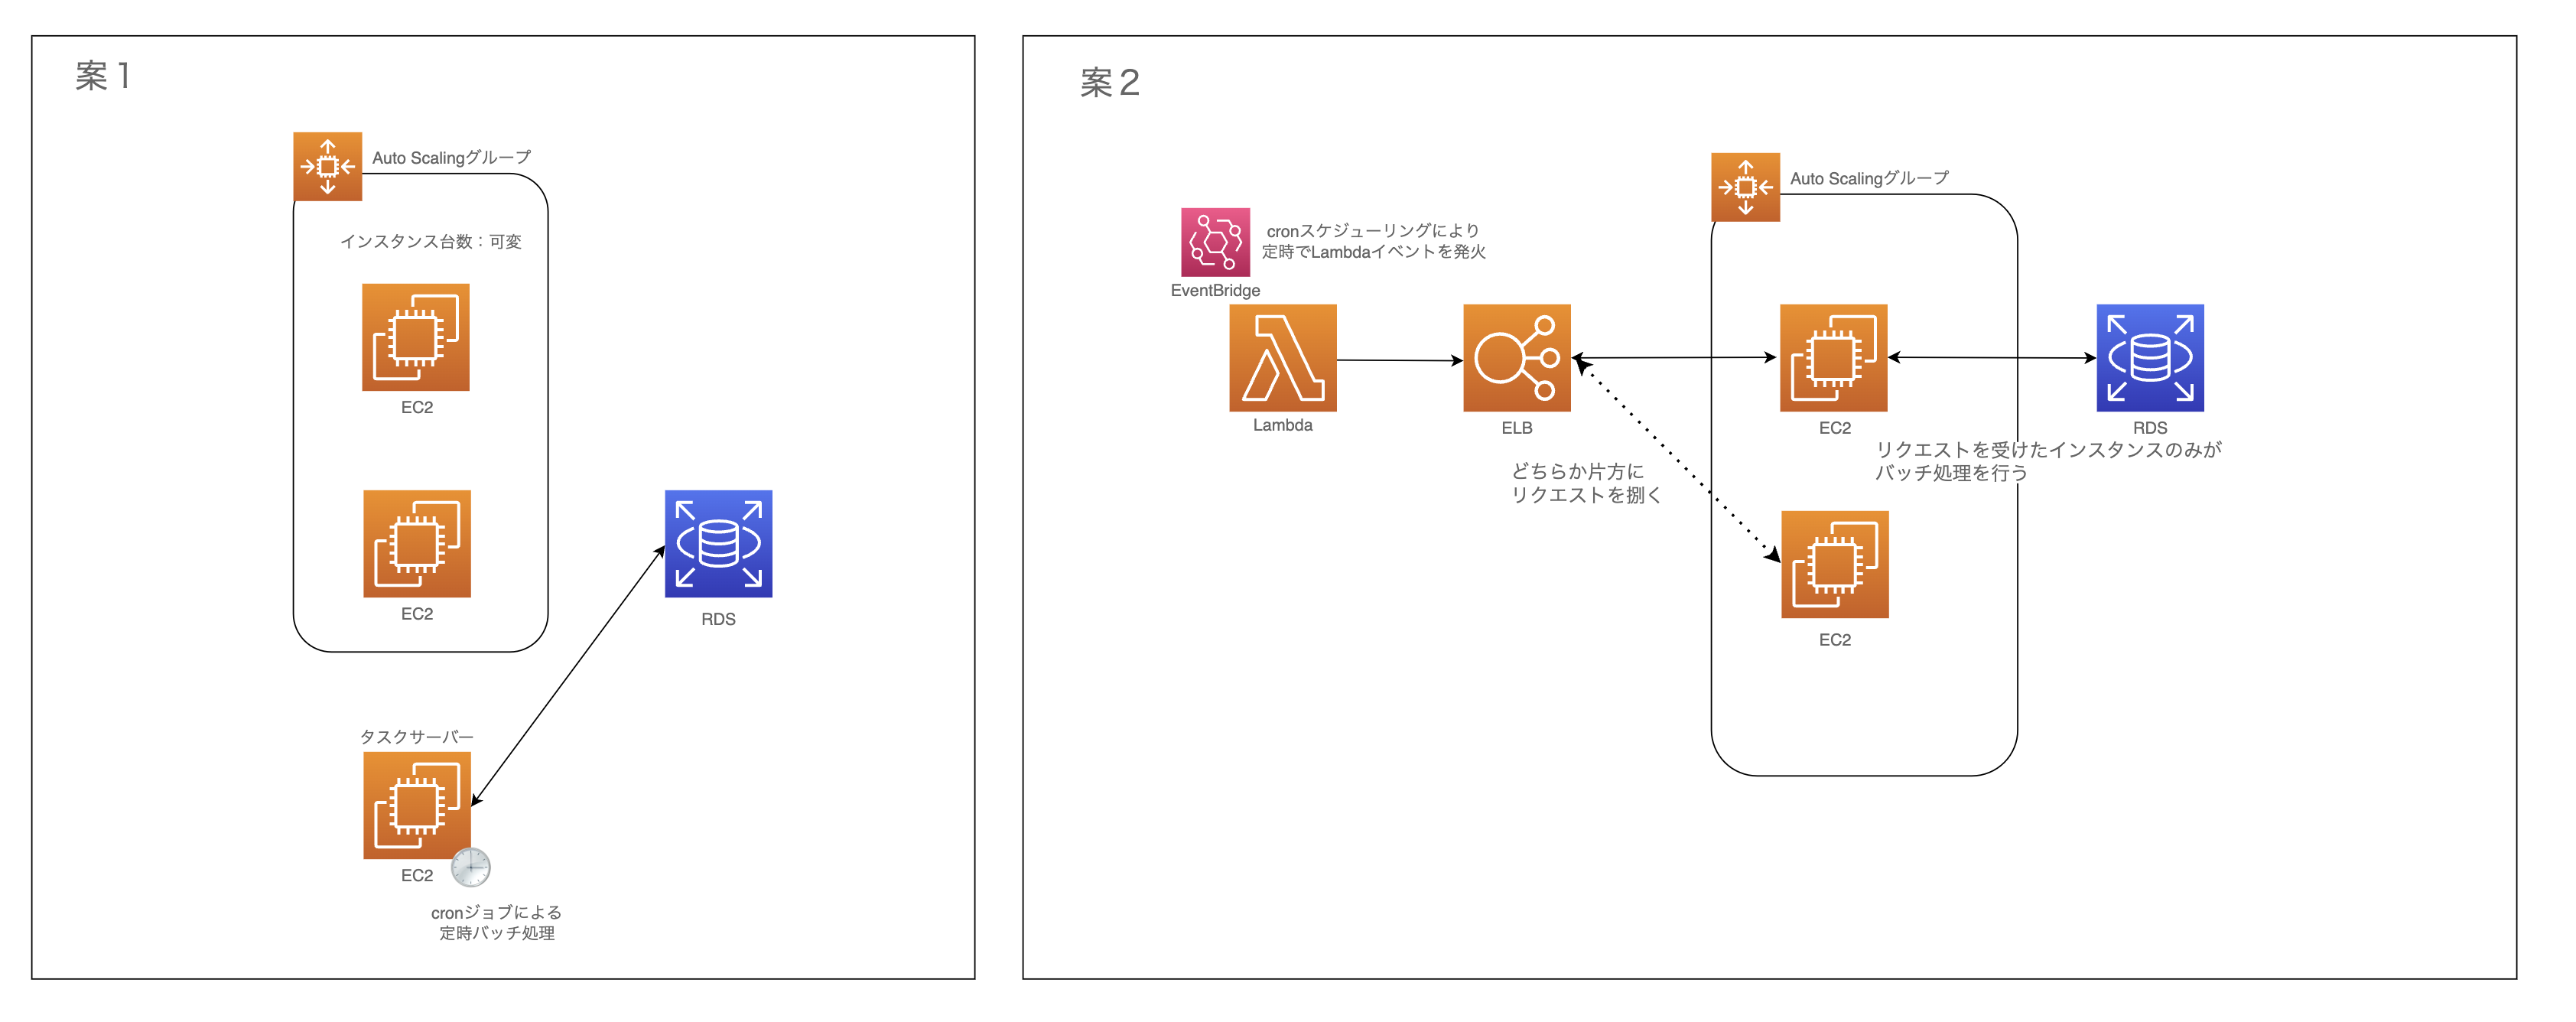
わざわざタスクサーバーを用意するには、仕事がなさすぎてコストが勿体無いということで、今回は案2で改修を進めることにしました。
(あと案2の方が面白そうだった😊)
対応内容
Lambaを作成しEventBridgeを紐付ける
Lambdaを作成し、トリガーとしてEventBridgeを紐づける。
cronはUTCで設定しないといけないので注意!
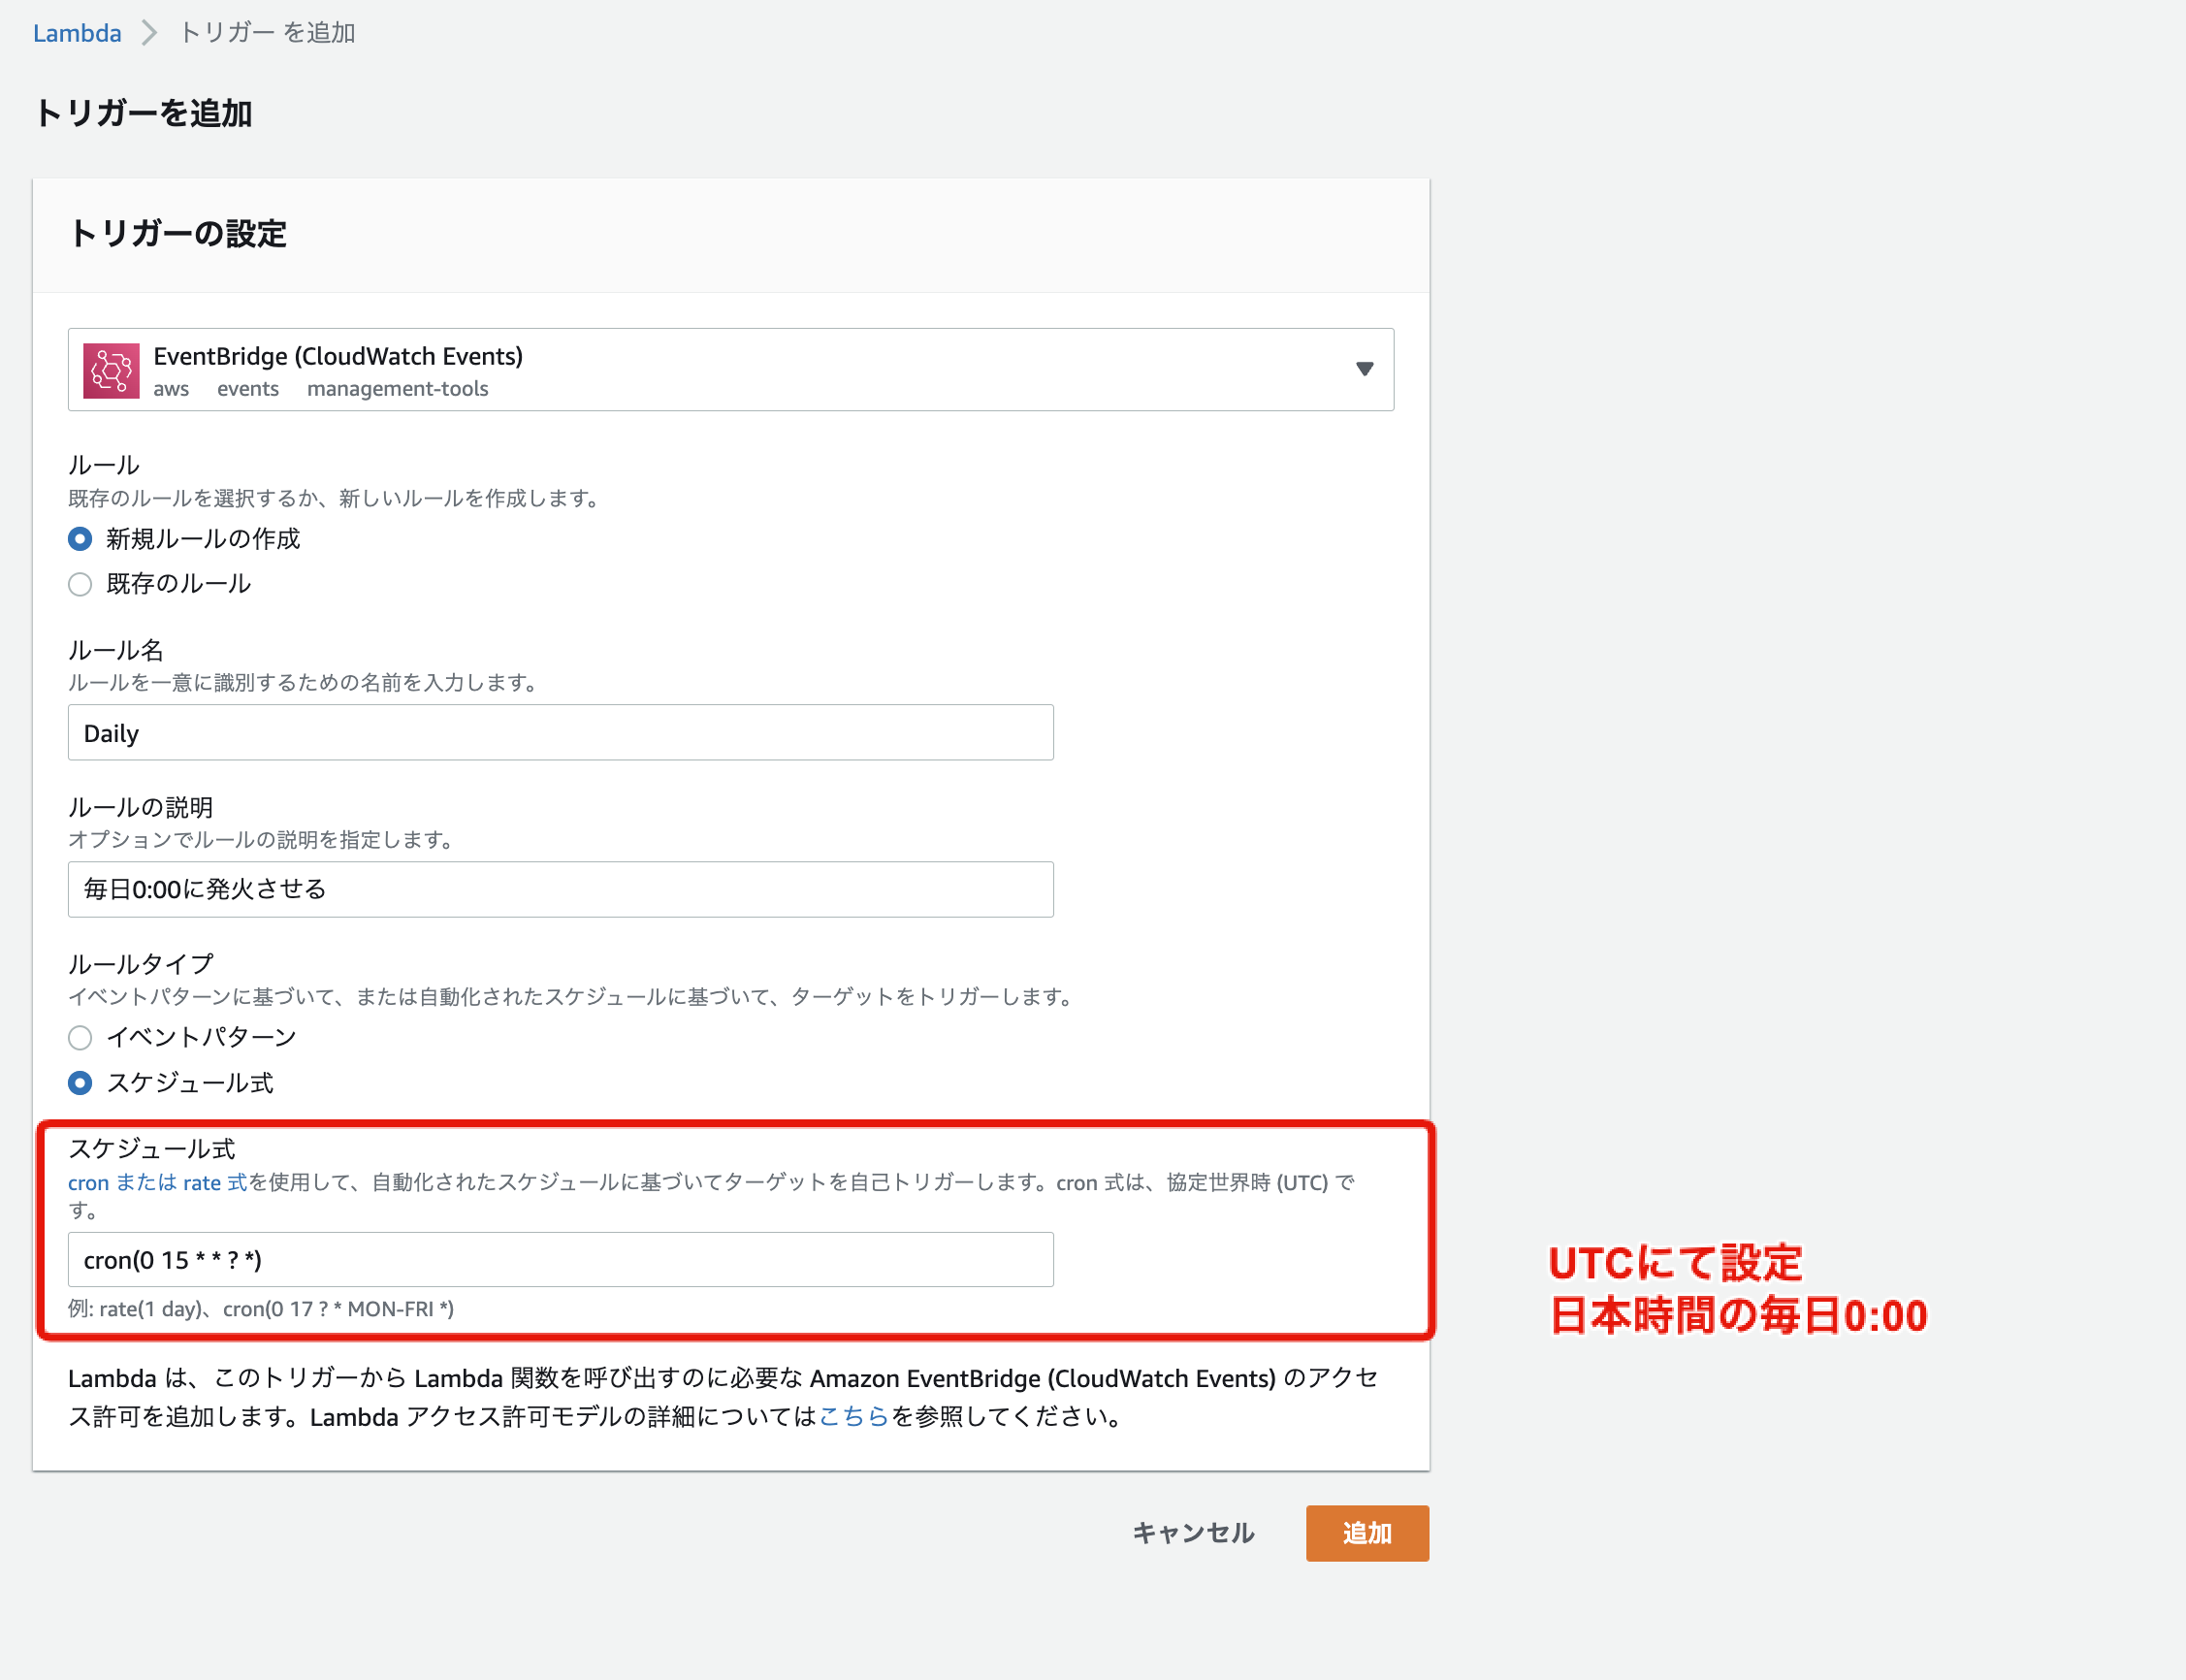
※スケジュール式設定する際の参照ページ
https://docs.aws.amazon.com/ja_jp/lambda/latest/dg/services-cloudwatchevents-expressions.html
アプリのエンドポイントを叩くソースコードを作成
Pythonで作成しています。
import json
import os
import urllib.request

# Lambdaの環境変数に設定した値を持ってくる
# アプリのバッチ起動エンドポイント
APP_URL = os.environ['APP_URL']
# アプリを叩く際のトークン
AUTH_TOKEN = os.environ['AUTH_TOKEN']

def lambda_handler(event, context):

    print(event)
    triggerEvent = ''
    try:
        # event引数を'/'で分割して、最後の配列値を取得することで、どのバッチから呼ばれたかを判断する
        # event['resources'][0]の例: arn:aws:events:{region}:{accountId}:rule/Daily
        resource = event['resources'][0].split('/')[-1]

        if resource == 'Daily':
            # 毎日0時00分に実行するイベント
            print('Event is Daily.')
            triggerEvent = 'Daily'

        elif resource == 'Monthly':
            # 毎月1日0時00分に実行するイベント
            print('Event is Monthly.')
            triggerEvent = 'Monthly'

        else:
            # 想定していないイベント
            print(f'Unknown event. resource : {resource}')
            triggerEvent = 'Unknown'

        # アプリにリクエストを投げる
        data = {
            'trigger': triggerEvent,
            'auth_token': AUTH_TOKEN,
        }
        headers = {
            'Content-Type': 'application/json',
        }
        req = urllib.request.Request(APP_URL, json.dumps(data).encode(), headers)
        with urllib.request.urlopen(req) as res:
            body = str(res.read(), 'utf-8')

        # リクエスト結果
        if body == 'success':
            print('Success! App batch launch.')
            return {
                'statusCode': 200,
                'body': json.dumps('Success! App batch launch.')
            }
        else:
            # 変なイベントから呼ばれることが想定されないのでここには入らないはず
            print('Failed! App batch launch.')
            return {
                'statusCode': 500,
                'body': json.dumps('Failed! App batch launch.')
            }

    except Exception as error:
        # リクエスト中に予期せぬエラーが発生した場合はSlack通知を行う
        print(str(error))
        postMessage(str(error), resource)


# Slack通知処理
def postMessage(errorMessage, event_resource):
    ## 関係ないので省略
アプリ側のソースコード(余談)
インスタンスで動かしているWebアプリがRailsプロジェクトなので、余談ですがそちらについても記載しておきます。
ルーティングとControllerをいじります。
  # バッチ起動用
  post 'hogehoge', to: 'batch#launch'
# バッチ起動用のController.
class BatchController < ApplicationController
  # LambdaはCSRFトークンを持っていないのでスキップさせる
  skip_before_action :verify_authenticity_token

  # Lambdaからキックされる
  def launch
    auth_token = params[:auth_token]

    # auth_tokenが設定されていない不正リクエストはバッチ処理をさせずにリターンする
    if auth_token != 'hogehoge'
      render json: 'failed'
      return
    end

    trigger = params[:trigger]
    result = 'success'

    case trigger
    when 'Daily' then
      Batch::Daily.execute
    when 'Monthly' then
      Batch::Monthly.execute
    else
      # ここにくることはないはず
      result = 'failed'
    end

    render json: result
  end
end
所感
EventBridgeとLambdaを組み合わせることで簡単にバッチ処理を作成できました。
ポイントはevent['resources'][0]を見ることで、どのEventBridgeからLambdaが呼ばれたかが分かることです。
これで、バッチ処理分Lambdaを作成しなくても、どのバッチから処理が呼ばれたか判別することができ、Lambdaを一つ用意するだけで済みます。
面白かった!