概要
HubSpotを使えばこんな感じでユーザーとやり取りするためのチャット機能を簡単に実装できたので残しておきます。
実装手順
HubSpot側の準備
チャットフローの準備
コミュニケーション -> チャットフロー からチャットフローを作成する
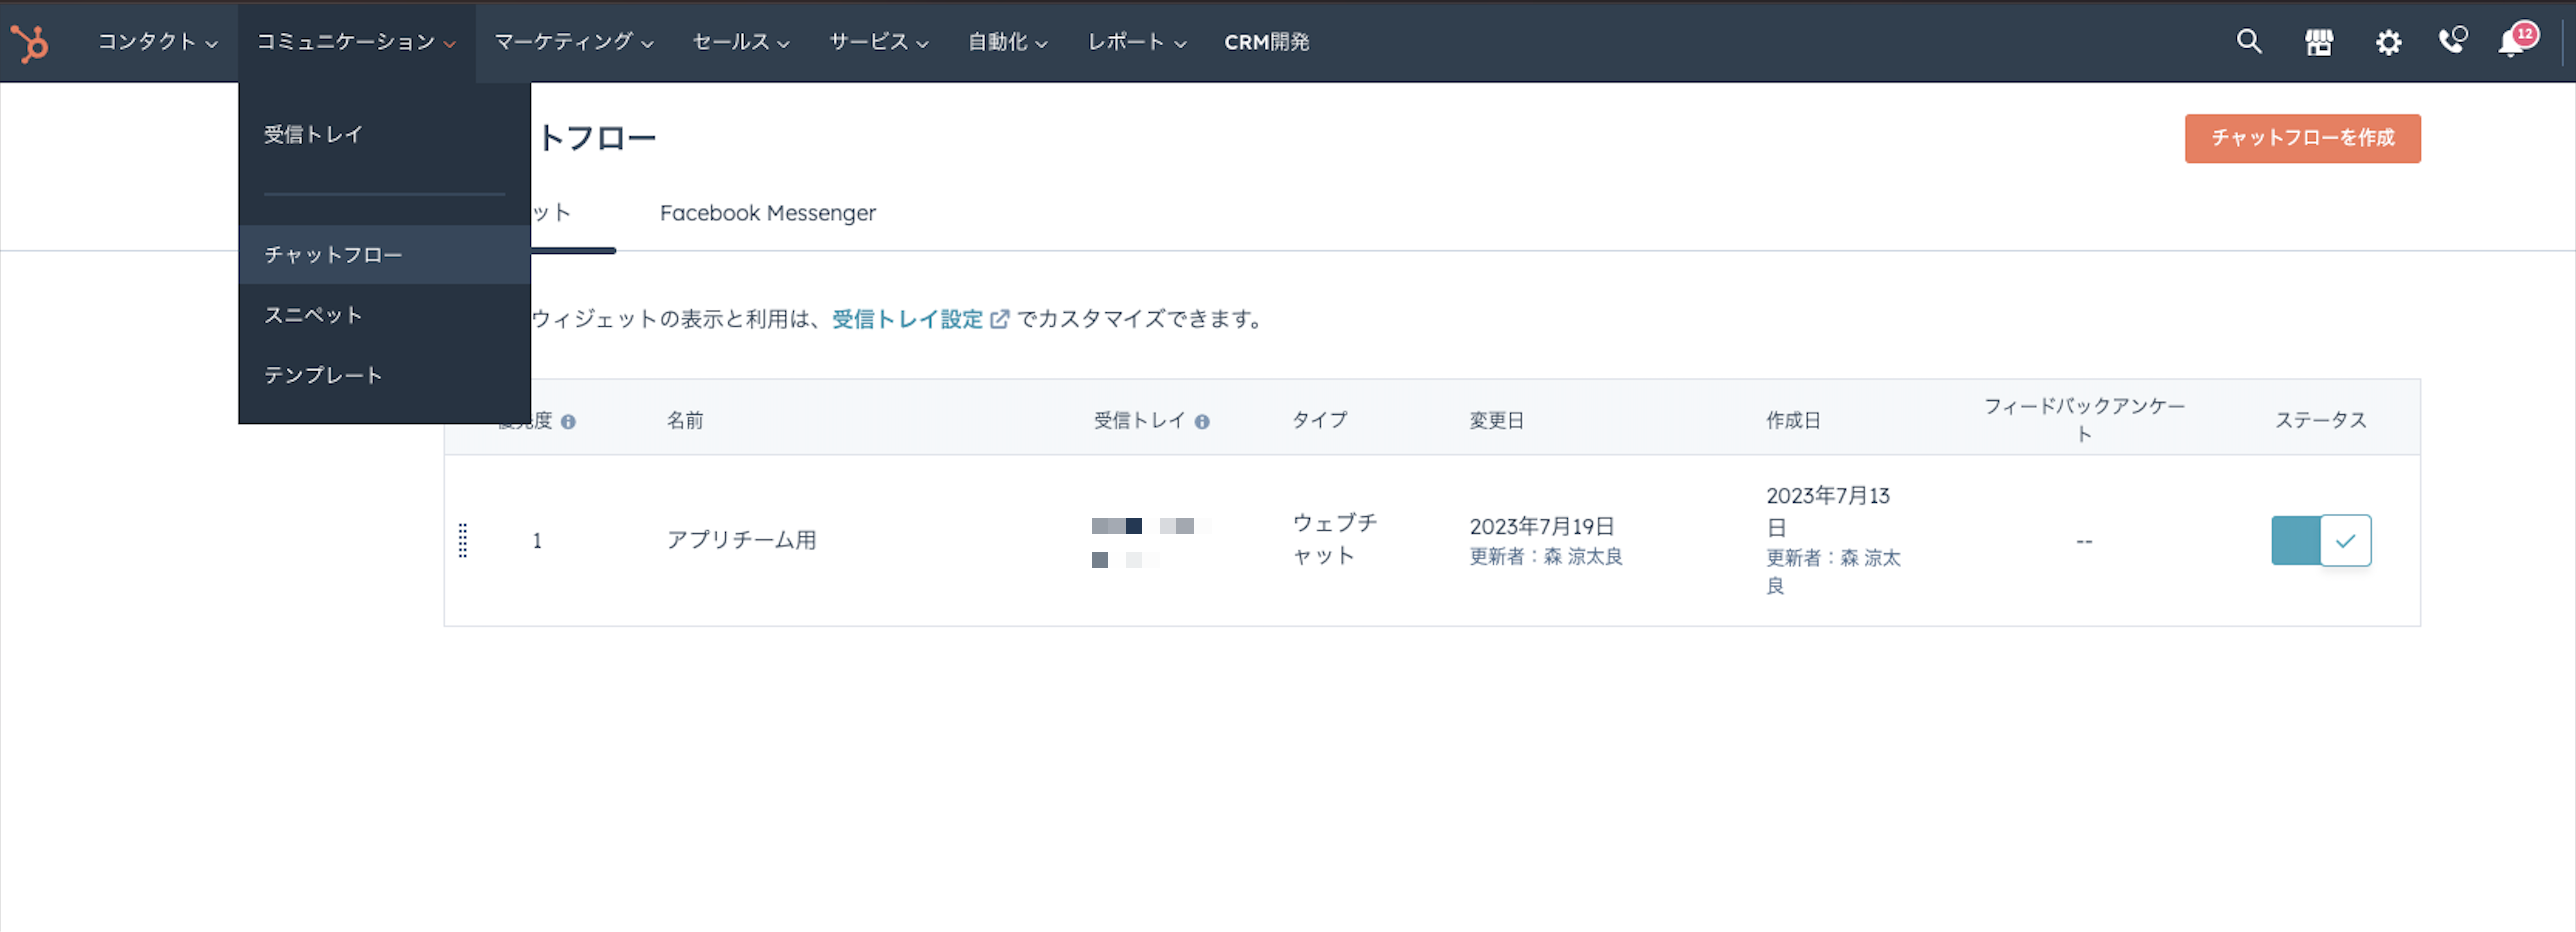
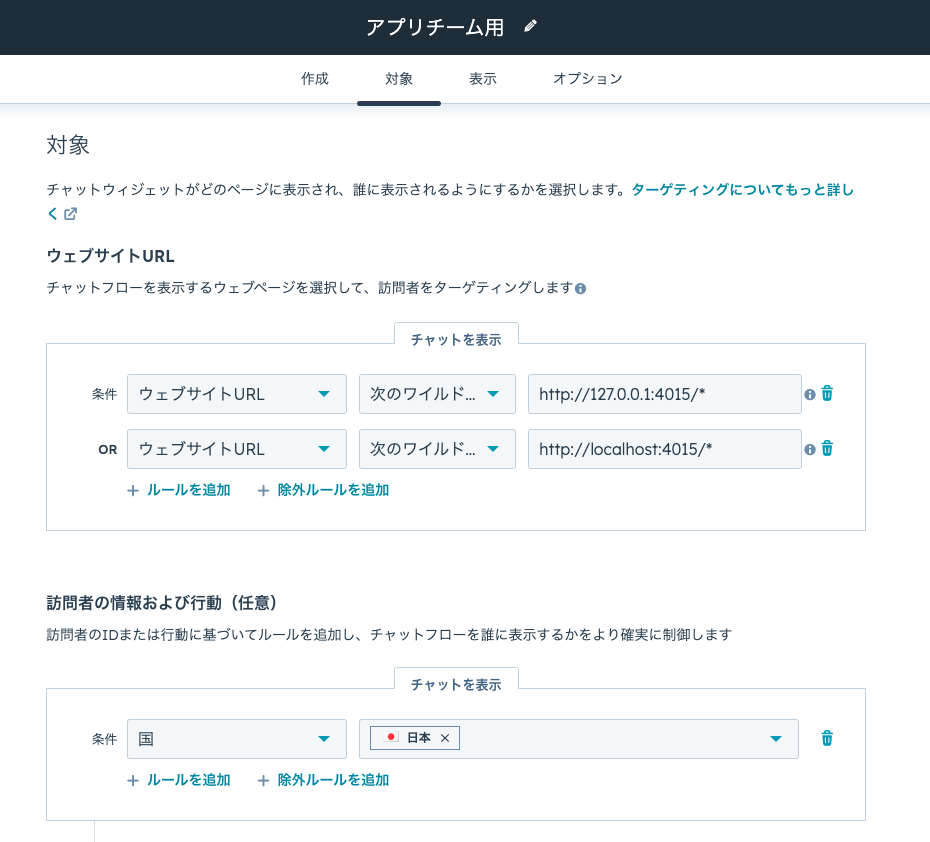
表示対象を設定できたり、ウェルカムメッセージを設定できるので便利✨
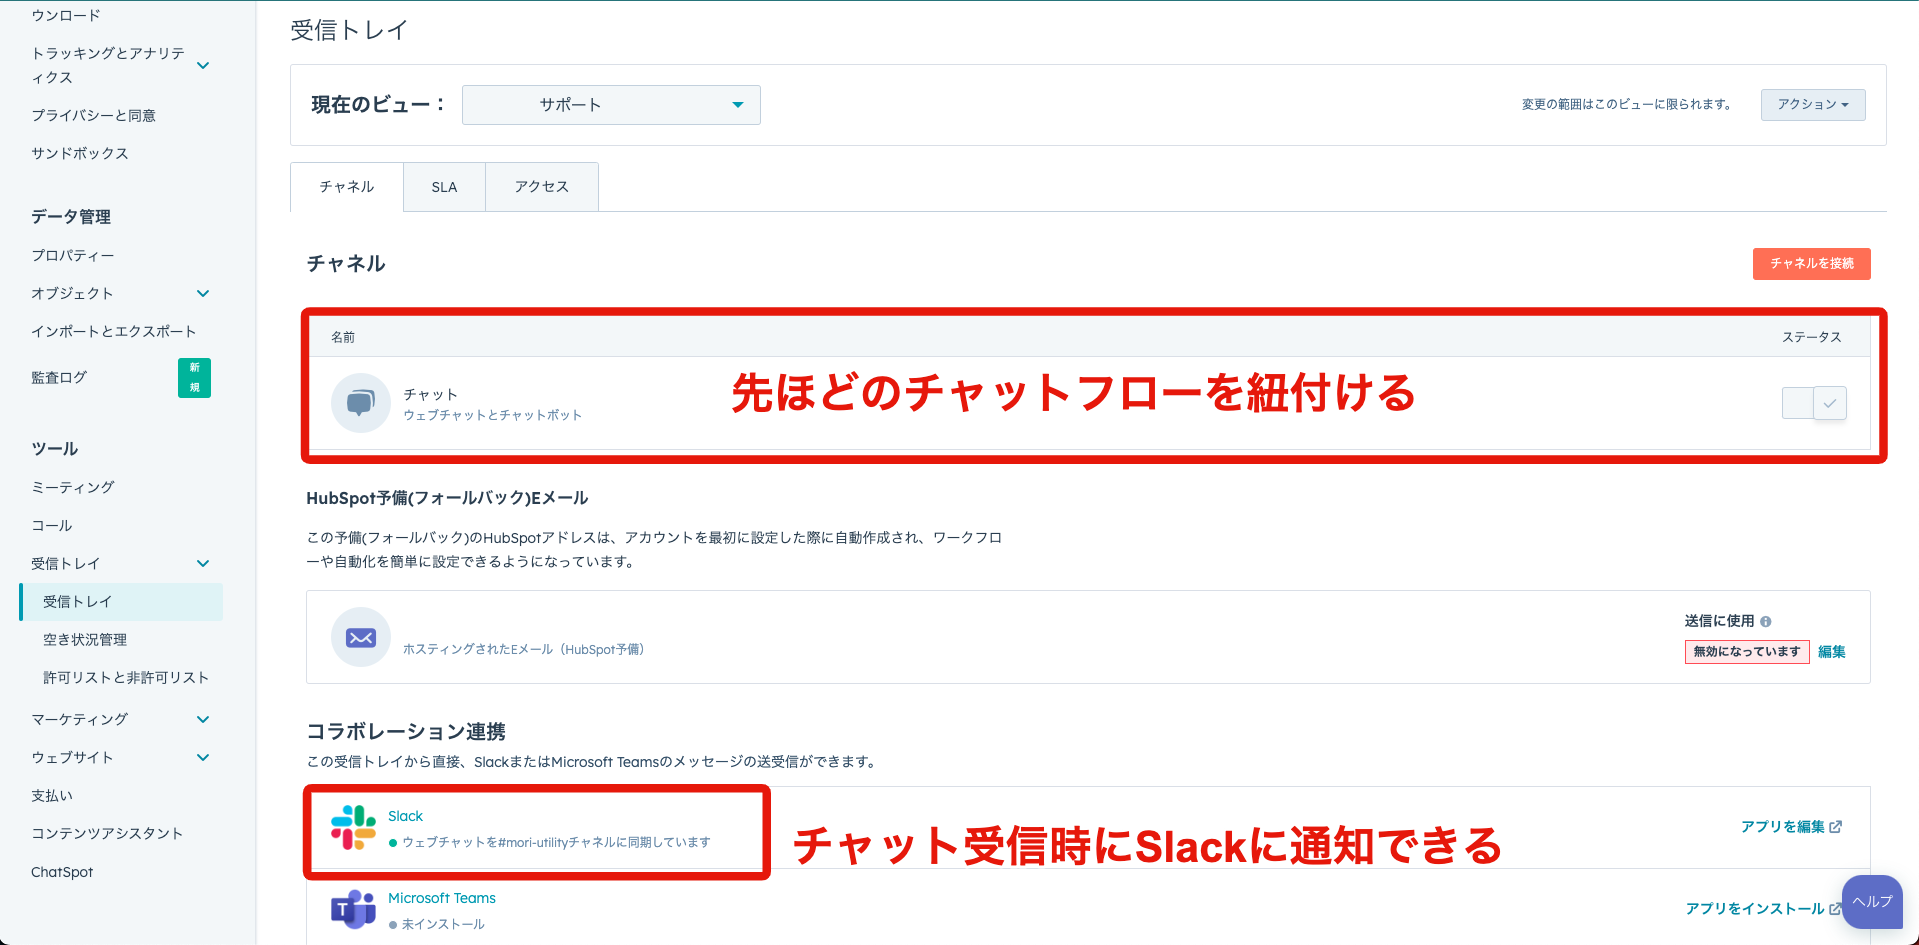
受信トレイの設定
設定 -> 受信トレイ から設定を行う
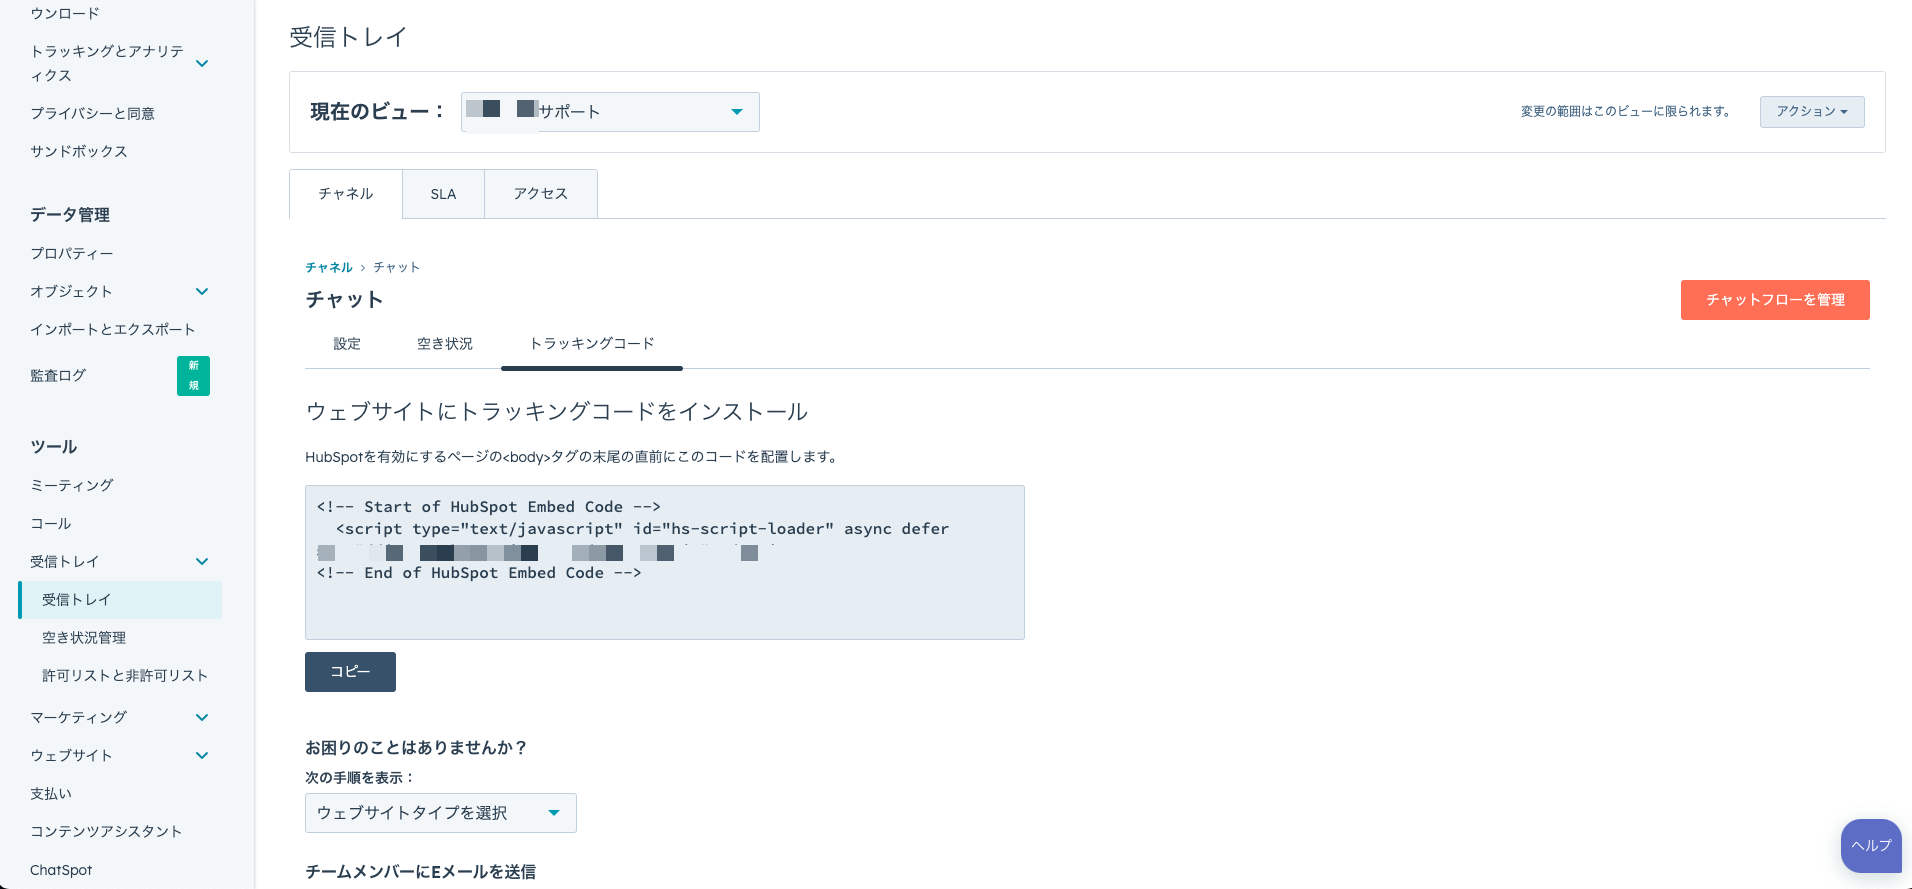
チャットのトラッキングコードを取得しておく。
このトラッキングコードを仕込んだサイトにチャットが表示されるようになる。
Webアプリ側の準備
訪問者識別APIの概念
メールアドレスを必須paramとしてHubSpotの訪問者識別APIを叩くことで、HubSpot上のコンタクトとチャットを紐づけることができるトークンを取得できる。
セキュリティ的にバックエンドで行うことが望ましい。
既存コンタクトがあればそのコンタクトと紐付けを行う
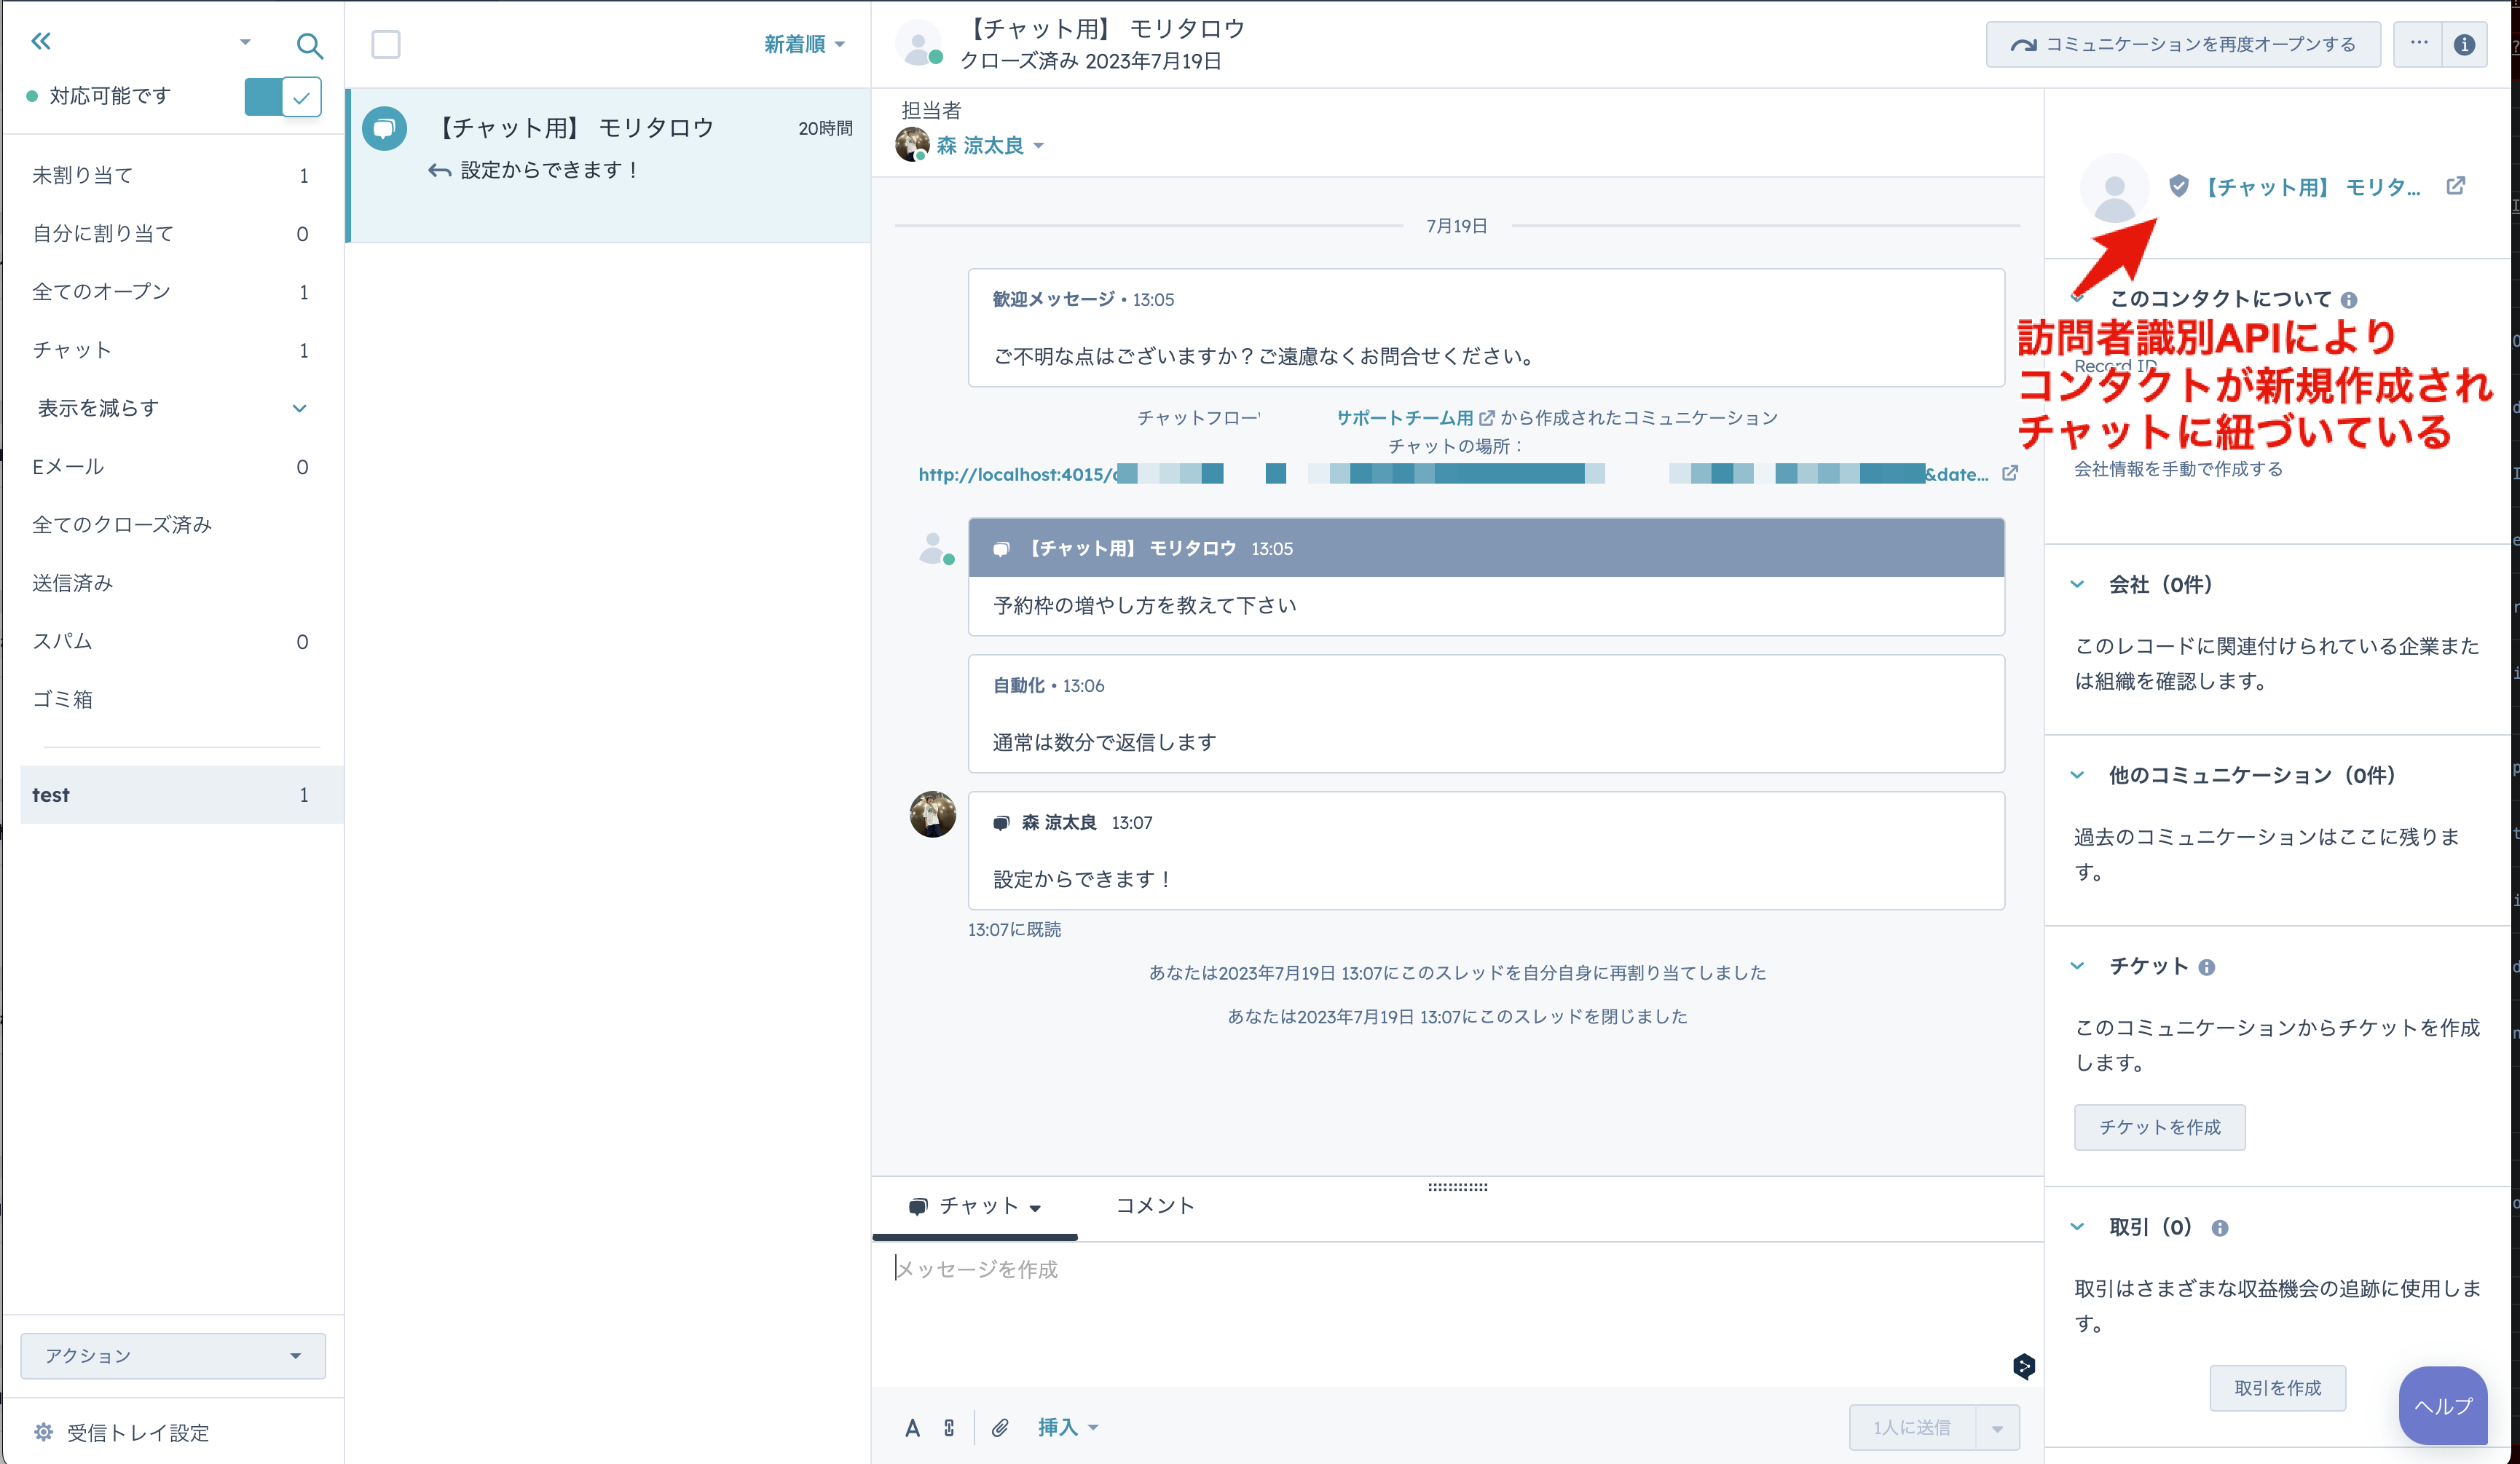
既存コンタクトがない場合はparamのfirstNameとlastNameをもとにチャット開始時にHubSpot側のコンタクトを新規作成する。
※公式リファレンス
https://developers.hubspot.jp/docs/api/conversation/visitor-identification
フロントエンドコード
ログイン後の共通処理を記載したVue.jsのmounted()ライフサイクルにて実装。
基本的にはトラッキングコードを仕込むだけでチャットウィジェットは表示される。
チャットとコンタクトを紐づけるためには訪問者識別APIで取得したトークンを設定した後にトラッキングコードのスクリプトを挿入すればOK。
  async mounted() {
    let identificationToken = ''
    let identificationEmail = ''
    // HubSpotの訪問者識別APIを叩いてトークンを取得する
    try {
      // バックエンドのエンドポイントを叩く
      const response = await axios.get('/hubSpot/getToken')
      if (!response.raw.token || !response.raw.email)
        throw new Error('HubSpotとの疎通に失敗しました。')
      identificationToken = response.raw.token
      identificationEmail = response.raw.email
    } catch (error) {
      // HubSpotのコンタクト情報と疎通が取れない場合やエラーが起きた場合はチャットを用意しない
      console.error(error)
      return
    }

    // チャットウィジェットにHubSpotのコンタクト情報を設定する
    window.hsConversationsSettings = {
      loadImmediately: false,
      identificationToken,
      identificationEmail,
    }

    // コンタクト情報の設定後にスクリプトを動的に読み込む
    let script = document.createElement('script')
    script.type = 'text/javascript'
    script.id = 'hs-script-loader'
    script.async = true
    script.defer = true
    script.src = '//js-na1.hs-scripts.com/hogehoge.js'
    document.body.appendChild(script)

    if (window.HubSpotConversations) {
      // APIがすでに準備できている場合は、直ちにウィジェットを読み込む
      window.HubSpotConversations.widget.load()
    } else {
      // スクリプトを動的に読み込むことでAPIの準備が間に合っていない場合は、APIの準備ができたタイミングでウィジェットを読み込む
      window.hsConversationsOnReady = [
        () => {
          window.HubSpotConversations.widget.load()
        },
      ]
    }
  },
バックエンドコード
HubSpotの訪問者識別APIを叩いて取得したトークンをフロントに返す。
/**
 * HubSpotからトークンを取得する
 * HubSpot側のコンタクトにリクエストのメールアドレスに合致するものが
 * ある:既存コンタクトと紐付けが行われるトークン
 * ない:【チャット用】コンタクトを新規生成して紐付けが行われるトークン
 * https://developers.hubspot.jp/docs/api/conversation/visitor-identification
 */
export class GetHubSpotTokenService {

  async run() {
    /* アプリ内のユーザー情報を設定 */
    const user = User.currentUser
    if (!user) throw new Error('ログインユーザーが見つかりませんでした')

    const identificationEmail = user.email
    const url = 'https://api.hubapi.com/conversations/v3/visitor-identification/tokens/create'
    const HUBSPOT_API_KEY = process.env.HUBSPOT_API_KEY
    const config = {
      headers: { 'Content-Type': 'application/json', authorization: `Bearer ${HUBSPOT_API_KEY}` },
    }
    const params = {
      email: identificationEmail,
      firstName: user.name,
      lastName: '【チャット用】', // チャットから作成されたユーザーとわかりやすいようにしておく
    }

    const identificationResult = await axios.post(url, params, config)
    if (!identificationResult.data.token)
      throw new Error('HubSpotからトークンが返却されませんでした')
    const result = {
      email: identificationEmail,
      token: identificationResult.data.token,
    }
    return result
  }
}
結果
HubSpotの受信トレイ