概要
今では、かわいく、おもしろいフェースステッカーをどこでも見るようになりました。カメラアプリだけでなく、ソーシャルメディアやエンタテイメントのアプリでも使用されています。今回の投稿では、HUAWEI ML Kitを使用して2Dステッカーを作成する方法をご紹介します。近いうちに、3Dステッカーの開発プロセスをお知らせしますので、ご期待ください。
シナリオ
ビューティカメラやソーシャルメディアアプリ(TikTok、Weibo、WeChatなど)など、写真を撮影して編集する場合に使用するアプリは、画像のカスタマイズに使用できる幅広いステッカーを用意しています。このようなステッカーを使って、ユーザーはより人目を引き、共有できるコンテンツを作成できます。
準備
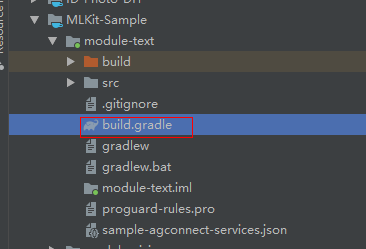
Huawei Mavenリポジトリをプロジェクトレベルのbuild.gradleファイルに追加する
Android Studioプロジェクトのルートディレクトリにあるbuild.gradleファイルを開きます。

Mavenリポジトリアドレスを追加します。
buildscript {
     {
        maven {url 'http://developer.huawei.com/repo/'}
    }
}
allprojects {
    repositories {
        maven { url 'http://developer.huawei.com/repo/'}
    }
}
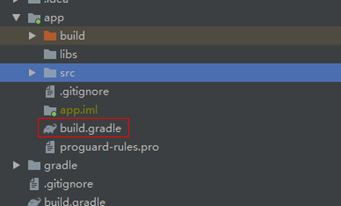
SDK依存関係をアプリレベルのbuild.gradleファイルに追加する
// Face detection SDK.
implementation 'com.huawei.hms:ml-computer-vision-face:2.0.1.300'
// Face detection model.
implementation 'com.huawei.hms:ml-computer-vision-face-shape-point-model:2.0.1.300'
AndroidManifest.xmlファイルでカメラ、ネットワークアクセス、およびストレージの権限を適用する
<uses-feature android:name="android.hardware.camera" />
<uses-permission android:name="android.permission.CAMERA" />
<uses-permission android:name="android.permission.WRITE_EXTERNAL_STORAGE" />
<uses-permission android:name="android.permission.READ_EXTERNAL_STORAGE" />
コードの開発
顔分析機能を設定する
顔の輪郭ポイントを取得し、FacePointEngineに渡す
MLFaceAnalyzerSetting detectorOptions;
detectorOptions = new MLFaceAnalyzerSetting.Factory()
        .setFeatureType(MLFaceAnalyzerSetting.TYPE_UNSUPPORT_FEATURES)
        .setShapeType(MLFaceAnalyzerSetting.TYPE_SHAPES)
        .allowTracing(MLFaceAnalyzerSetting.MODE_TRACING_FAST)
        .create();
detector = MLAnalyzerFactory.getInstance().getFaceAnalyzer(detectorOptions);
カメラのコールバックを使用してカメラのフレームデータを取得し、顔分析機能を呼び出して顔の輪郭ポイントを取得し、FacePointEngineに渡します。これにより、ステッカーフィルタはポイントを後で利用できます。
@Override
public void onPreviewFrame(final byte[] imgData, final Camera camera) {
    int width = mPreviewWidth;
    int height = mPreviewHeight;

    long startTime = System.currentTimeMillis();

    if (isFrontCamera()){
        mOrientation = 0;
    }else {
        mOrientation = 2;
    }
    MLFrame.Property property =
            new MLFrame.Property.Creator()
                    .setFormatType(ImageFormat.NV21)
                    .setWidth(width)
                    .setHeight(height)
                    .setQuadrant(mOrientation)
                    .create();

    ByteBuffer data = ByteBuffer.wrap(imgData);

    SparseArray<MLFace> faces = detector.analyseFrame(MLFrame.fromByteBuffer(data,property));

    if(faces.size()>0){
        MLFace mLFace = faces.get(0);
        EGLFace EGLFace = FacePointEngine.getInstance().getOneFace(0);
        EGLFace.pitch = mLFace.getRotationAngleX();
        EGLFace.yaw = mLFace.getRotationAngleY();
        EGLFace.roll = mLFace.getRotationAngleZ() - 90;
        if (isFrontCamera())
            EGLFace.roll = -EGLFace.roll;
        if (EGLFace.vertexPoints == null) {
            EGLFace.vertexPoints = new PointF[131];
        }
        int index = 0;

        for (MLFaceShape contour : mLFace.getFaceShapeList()) {
            if (contour == null) {
                continue;
            }
            List<MLPosition> points = contour.getPoints();

            for (int i = 0; i < points.size(); i++) {
                MLPosition point = points.get(i);
                float x = ( point.getY() / height) * 2 - 1;
                float y = ( point.getX() / width ) * 2 - 1;
                if (isFrontCamera())
                    x = -x;
                PointF Point = new PointF(x,y);
                EGLFace.vertexPoints[index] = Point;
                index++;
            }
        }

        FacePointEngine.getInstance().putOneFace(0, EGLFace);

        FacePointEngine.getInstance().setFaceSize(faces!= null ? faces.size() : 0);
    }else{
        FacePointEngine.getInstance().clearAll();
    }
    long endTime = System.currentTimeMillis();
    Log.d("TAG","Face detect time: " + String.valueOf(endTime - startTime));
}
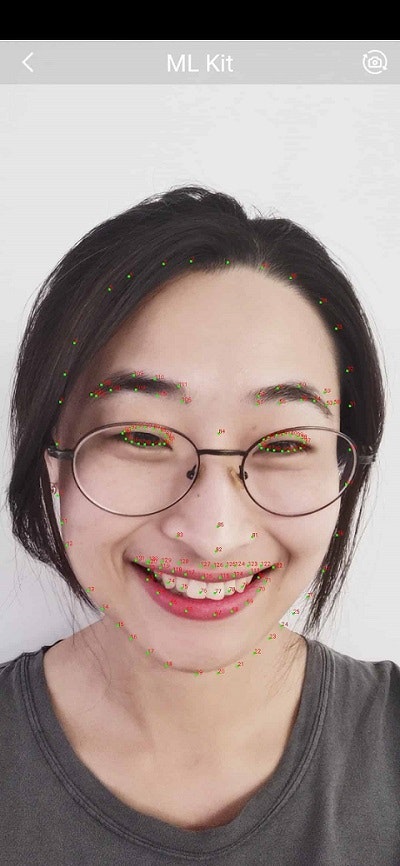
ML Kit APIが返す顔の輪郭ポイントは下記の画像で確認できます。

ステッカーのJSONデータの定義
猫のステッカーを作る
猫のステッカーのJSONファイルを作成し、フェースインデックスを使用して眉毛(84)の間の中心点と鼻(85)の先端の点を見つけます。猫の耳と鼻をペーストし、JSONファイルと画像をassetsディレクトリに置きます。
ステッカーをレンダリングして質感を与える
GLSurfaceViewを使用してステッカーをレンダリングして質感を与えます。これは、TextureViewを使用するより簡単です。onSurfaceChangedでステッカーフィルタのインスタンスを作成し、ステッカーのパスを渡してカメラを開始します。
onSurfaceChangedでステッカーフィルタを初期化する
onDrawFrameで画面にステッカーを描画する
以上で終わりです。作成したフェースステッカーは使用可能です。
早速、使ってみましょう。

詳しくは、当社の公式ウェブサイトをご覧ください。
当社のデモコードもご覧ください。
