はじめに
ROS2のチュートリアルTrying the dummy robot demoを動作させる手順を整理します。
ROS2の環境構築(distributionとしてdashingが、パッケージはros-dashing-desktopが導入済)がされていることを前提としています。
まだの方は、
の"Install ROS 2 packages"までを済ませてください。Jetson Nanoだと、そのまま導入できます。Raspberry piだとRasbianではなく64bit版Ubuntuを導入する必要あります。
ROS2の環境を有効にしておいてください。
$ source /opt/ros/dashing/setup.bash
ビルド環境の整備
デモのソースは、以下のGitリポジトリから取得できますので、
これをcolconでビルドできるようにします。
まずは、必要なパッケージをインストールします。
$ sudo apt install python3-colcon-common-extensions python3-rosdep python3-argcomplete
その後、rosdepの設定をしておきます。
$ sudo rosdep init
$ rosdep update
ワークスペースの作成とビルド
次に、ワークスペースを作成して、ソースを取得し、ビルドします。今回、ワークスペース名はros2_wsとします。
まずワークスペースを作成します。
~$ mkdir ros2_ws
~/ws$ cd ros2_ws
~/ws$ mkdir src
以上です。ROS1の時はcatkin_init_workspaceを実行する必要がありましたが、ROS2では必要ないようですね。
次に、ソースを取得し、dashingのブランチに切り替えます。
~/ws$ cd src
~/ws/src$ git clone https://github.com/ros2/demos.git
~/ws/src$ cd demos
~/ws/src/demo$ git checkout dashing
~/ws$ cd ../..
次は、rosdepで必要なパッケージ類を取得します。環境変数ROS_DISTROにdashingを設定しておきます。
~/ws$ export ROS_DISTRO=dashing
~/ws$ rosdep install --from-paths src --ignore-src -r -y
そして最後にビルドします。
~/ws$ colcon build
動かしてみる
では、デモを動かしてみます。まずは、demoが動作する環境を有効化します。
~/ws$ cd
~$ source ~/ros2_ws/install/setup.bash
次に、デモを動作させます。
~$ ros2 launch dummy_robot_bringup dummy_robot_bringup.launch.py
次に、動作を確認するために別のコンソールを開きます。(ROS2の環境を有効にすることを忘れずに)
この時点で既に、Joint情報(関節の角度情報)が送信されてますので、
~$ ros2 topic list
/clicked_point
/initialpose
/joint_states
/map
/move_base_simple/goal
/parameter_events
/robot_description
/rosout
/scan
/tf
/tf_static
と、/joint_statesのトピックが送信されてきています。
~$ ros2 topic echo /joint_states
header:
  stamp:
    sec: 1574582467
    nanosec: 617346446
  frame_id: ''
name:
- single_rrbot_joint1
- single_rrbot_joint2
position:
- -0.9345480640439339
- -0.9345480640439339
velocity: []
effort: []
---
...
次に、ビジュアライザ(rviz)を表示して動作を確認してみます。
~$ rviz2
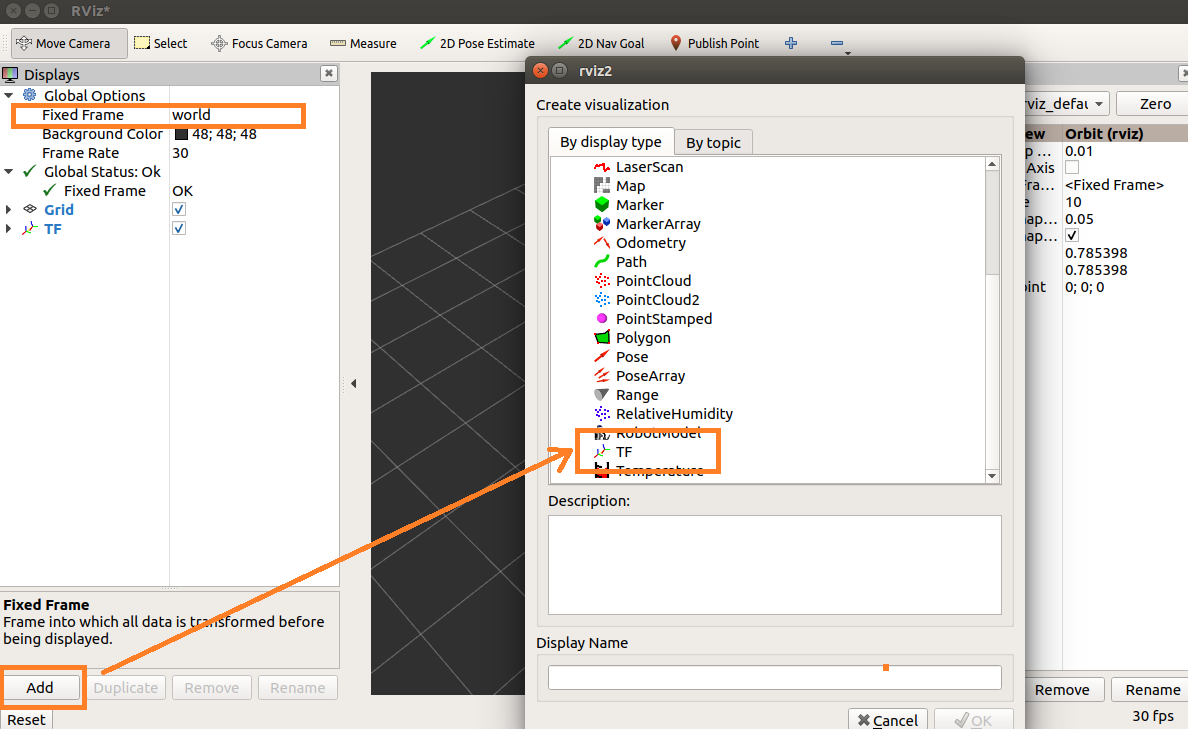
起動した直後は何も表示されていないと思います。以下の2つの操作が必要です。
-
Global OptionsのFixed Frameにworldを指定 -
Addボタンを押して、TFを追加
すると、画面にリンクが表示されて元気に動きます。
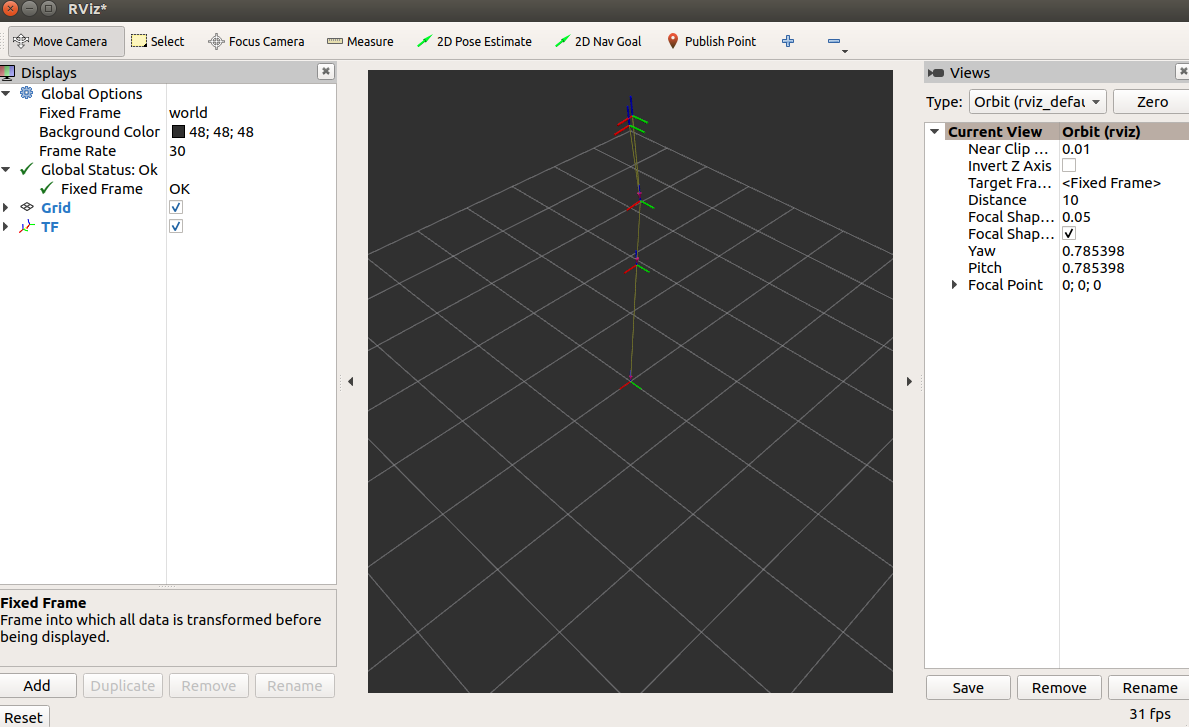
以上です。