実装環境
Rails 5.2.6
ruby 2.6.3p62 (2019-04-16 revision 67580) [x86_64-linux]
1.アプリの作成
任意の名前のアプリを作成
rails new sample(アプリ名)
2.Modelの作成
rails g model Sample(モデル名) title:string content:text
上記コマンドを実施後に次のファイルができていることを確認
class CreateRecipes < ActiveRecord::Migration[5.2]
  def change
    create_table :アプリ名 do |t|
      t.string :title
      t.text :content
      t.timestamps
    end
  end
end
正しくマイグレーションファイルが作成されていたら、「rails db:migrate」を実施し、DBに反映
3.Bootstrapの導入
1.Gemfileへの追記とアプリへの反映
gem 'bootstrap', '~> 5.1.3'
gem 'jquery-rails'
Gemfileの編集内容を反映させる為に「bundle install」を実施
2.application.cssへの追記と拡張子の変更(css⇨sass)
以下を「app/assets/stylesheets/application.css」に追記
@import "bootstrap";
ファイルの拡張子を「css」から「scss」に変更する為に、
「mv app/assets/stylesheets/application.css app/assets/stylesheets/application.scss」を実施
2.application.jsへの追記
以下を「app/assets/stylesheets/application.js」に追記
// This is a manifest file that'll be compiled into application.js, which will include all the files
// listed below.
//
// Any JavaScript/Coffee file within this directory, lib/assets/javascripts, or any plugin's
// vendor/assets/javascripts directory can be referenced here using a relative path.
//
// It's not advisable to add code directly here, but if you do, it'll appear at the bottom of the
// compiled file. JavaScript code in this file should be added after the last require_* statement.
//
// Read Sprockets README (https://github.com/rails/sprockets#sprockets-directives) for details
// about supported directives.
//
//= require rails-ujs
//= require activestorage
//= require turbolinks
追記
//= require jquery3
//= require popper
//= require bootstrap-sprockets
ここまで
//= require_tree .
参考:https://github.com/twbs/bootstrap-rubygem
4.コントローラの作成とルーティング
rails g controller samples(コントローラー名) index create edit destroy update
4-1.ルートパスの指定
次のルートパスを指定し、初期表示される画面のパスを設定
「root 'samples#index」
4-2.使用するメソッドのパスを設定
「resources : samples]」
Rails.application.routes.draw do
  root 'samples#index
  resources : samples
  # For details on the DSL available within this file, see http://guides.rubyonrails.org/routing.html
end
4-3.使用するメソッドのパスが設定されているかを確認
「rails routes」を実施し、設定したルーティングを確認
※ルーティングに関しては以下を参考にして下さい。
【Rails ルーティング 基礎 まとめ】by @akk11_kさん
5.ビューとコントローラーの作成
5-1.モーダルウィンドウの作成
bootstrapの公式サイトにアクセスして、モダールのソースをコピーし「index.html.erb」に貼り付け
ボタン名称を「Launch demo modal」⇨「投稿」に変更
<!-- Button trigger modal -->
<button type="button" class="btn btn-primary" data-bs-toggle="modal" data-bs-target="#exampleModal">
  投稿
</button>

<!-- Modal -->
<div class="modal fade" id="exampleModal" tabindex="-1" aria-labelledby="exampleModalLabel" aria-hidden="true">
  <div class="modal-dialog">
    <div class="modal-content">
      <div class="modal-header">
        <h5 class="modal-title" id="exampleModalLabel">Modal title</h5>
        <button type="button" class="btn-close" data-bs-dismiss="modal" aria-label="Close"></button>
      </div>
      <div class="modal-body">
        ...
      </div>
      <div class="modal-footer">
        <button type="button" class="btn btn-secondary" data-bs-dismiss="modal">Close</button>
        <button type="button" class="btn btn-primary">Save changes</button>
      </div>
    </div>
  </div>
</div>
5-2.モーダルウィンドウの内容を変更
先ほど貼り付けたモーダルのソースコード内の「div要素のclass="modal-body"」以下を編集
  <div class="modal-body">
    ...
  </div>
編集後
      <div class="modal-body">
      <%= form_with model: @recipe, remote: true do |f| %>
        <div class="modal-body">
          <div class="form-group">
            <%= f.label :title, "タイトル" %>
            <%= f.text_field :title, class:"form-control" %>
          </div>
          <div class="form-group">
            <%= f.label :content, "内容" %>
            <%= f.text_area :body, class:"form-control" %>
          </div>
        </div>
      <div class="modal-footer">
        <button type="button" class="btn btn-secondary" data-bs-dismiss="modal">Close</button>
        <%= f.submit "投稿", class:"btn btn-primary" %>
      </div>
      <% end %>
      </div>
5-3.コントローラーの編集
以下コメントアウトに説明を記載
class SamplesController < ApplicationController
  def index
    #allで取得できるSample(モデル名)をすべて取得
    @samples = Sample.all
   #新規投稿用にインスタンスをnewで作成
    @ sample = Sample.new
  end

  def create
    #sample_params(送信された値)を受け取り登録
    Sample.create(sample_params)
    #一覧表示取得の為,allでSample(モデル名)をすべて取得
    @samples = Sample.all
    #リダイレクトを指定しない場合はメソッド名に関連したhtmlファイルに(create.html.erb)遷移
  end

  def destroy
    #削除するデータをidで取得
    @sample = Sample.find(params[:id])
  #上記で取得したデータを削除
    @sample.destroy
  #削除後、ルートパスでindexを表示
    redirect_to root_path
  end

    def edit
   #編集するデータをidで取得
    @sample = Sample.find(params[:id])
  end

  def update
    #更新するデータをidで取得
    @sample = Sample.find(params[:id])
    #更新処理が成功した場合ルートパスに遷移
    if @sample.update(sample_params)
      redirect_to root_path
   #更新処理が失敗した場合もルートパスに遷移(必要に応じて変更して下さい)
    else
      flash[:alert] = 'Save error'
      redirect_to root_path
    end
  end

  private
  #ストロングパラメーター
  def sample_params
    params.require(:sample).permit(:title, :content)
  end
end
※privateメソッド、ストロングパタメーターに関しては以下を参考にして下さい。
【ストロングパラメーター、プライベートメソッドとは】by @iverson3kobe0824さん
5-4. creareメソッドに対応するcreate.js.erbの作成
新規投稿(create)後に呼び出されるjs.erbの作成
# テキストエリアの値を初期化
$("textarea").val("");
# インプット要素の値を初期化
$("input").val("");
# exampleModalクラスのモーダルを閉じる(hide)
$('#exampleModal').modal('hide')
# JavaScriptファイル内にHTMLを挿入するときに実行結果をエスケープする
$('.samples').html("<%= escape_javascript(render 'samples', samples: @samples) %>")
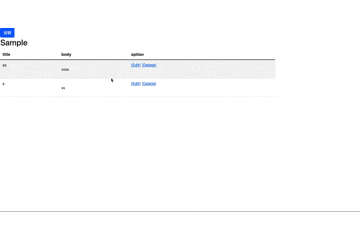
6.投稿一覧の表示
「5-2.モーダルウィンドウの内容を変更」で編集したindex.html.erbに記載
※場所はどこでもOK
<div class="col-9 sidebar recipes">
  <h2>Sample</h2>
  <div class="row">
    <div class="col-md-12">
      <table class="table table-striped">
        <thead class="thead-light">
          <tr>
            <th>title</th>
            <th>content</th>
          <th>option</th>
          </tr>
        </thead>
        <tbody>
          #.allで取得したデータをループして一覧形式で表示する
          <% @samples.each do |sample| %>
            <tr>
              <td><p class="card-text"><%= sample.title %></p></td>
              <td><p class="card-text"><small><%= simple_format sample.content %></small></p></td>
              <td>
                <p>[Edit]</p>
                <p>[Delete]</p>
              </td>
            </tr>
          <% end %>
        </tbody>
      </table>
    </div>
  </div>
</div>
7.投稿の削除機能、編集機能の実装
7-1.index.html.erbの編集
「#6.投稿一覧の表示」で作成したhtml編集を行う
pタグで表示指定た"Edit"と"Delete"を編集
<div class="col-9 sidebar recipes">
  <h2>Sample</h2>
  <div class="row">
    <div class="col-md-12">
      <table class="table table-striped">
        <thead class="thead-light">
          <tr>
            <th>title</th>
            <th>content</th>
          <th>option</th>
          </tr>
        </thead>
        <tbody>
          #.allで取得したデータをループして一覧形式で表示する
          <% @samples.each do |sample| %>
            <tr>
              <td><p class="card-text"><%= sample.title %></p></td>
              <td><p class="card-text"><small><%= simple_format sample.content %></small></p></td>
              <td>
                <%= link_to '[Edit]', edit_sample_path(sample) %>
          #「data:{confirm: 'Are you sure?'}」で削除の確認を行う。
                <%= link_to '[Delete]', sample_path(sample), method: :delete, data:{confirm: 'Are you sure?'} %>
              </td>
            </tr>
          <% end %>
        </tbody>
      </table>
    </div>
  </div>
</div>
7-2.投稿内容編集画面(endit.html.erb)の作成
edit.html.erbを作成し。
<div>
    <div class="col-md-4 offset-md-4">
        <h2 class="text-center">edit question</h2>
     <%= form_with model: @sample, local: true do |f| %>
        <div class="form-group">
          <label>タイトル</label>
          <%= f.text_field :title, class: "form-control" %>
         </div>
         <div class="form-group">
          <label>内容</label>
          <%= f.text_area :content, class: "form-control" %>
         </div>
         <div class="text-center">
          <%= f.submit "Save", class: "btn btn-primary"%>
         </div>
      <% end %>
    </div>
    <hr>
    <div><%= link_to 'HOME', root_path %></div>
</div>
モーダルウィンドウを使用した非同期での投稿に関しては以下一部動画を参考に作成しております。