はじめに
UITableViewを使用する際にカスタムセルを.xibを使用して実装する方法について書きます。
xibを使用することでカスタムセルのcalss内の記述をStoryboardベースで実装することができます。
この記事でやること
UITableViewCellのxibにあるLabelのテキストを変更する
実装
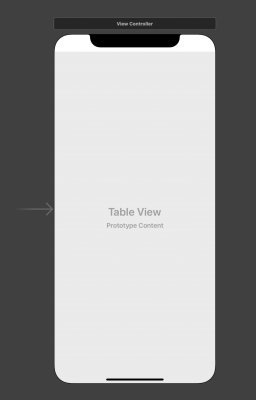
TableViewの追加
画面いっぱいにTableViewを追加します。
xibファイルを作成
Cocoa Touch Classを選択し、
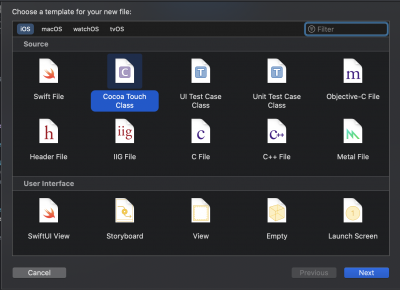
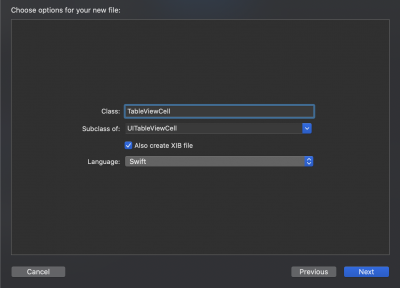
UITableViewCellを選択、Also Create XIB fileにチェックを入れ、ファイルを作成する
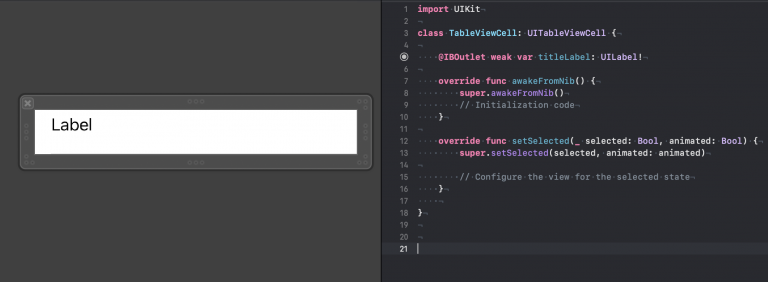
Labelの追加
CellにLabelを追加し、Outlet接続する
TableViewを作成
TableViewとコードをOutlet接続し、extensionに一般的なTableViewのコード()を書きます
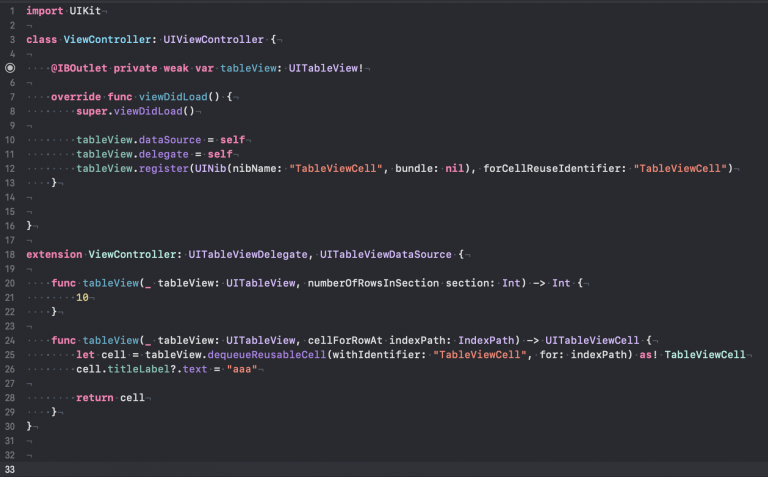
ここで一般的なTableViewと違うのがRegisterを記述する点と
ViewController.swift
tableView.dataSource = self
tableView.delegate = self
// registerでxibをidentifierとして設定する
tableView.register(UINib(nibName: "TableViewCell", bundle: nil), forCellReuseIdentifier: "TableViewCell")
ここで設定したidentifierを使用する点です。
ViewController.swift
func tableView(_ tableView: UITableView, cellForRowAt indexPath: IndexPath) -> UITableViewCell {
    let cell = tableView.dequeueReusableCell(withIdentifier: "TableViewCell", for: indexPath) as! TableViewCell
    cell.titleLabel?.text = "aaa"

    return cell
}
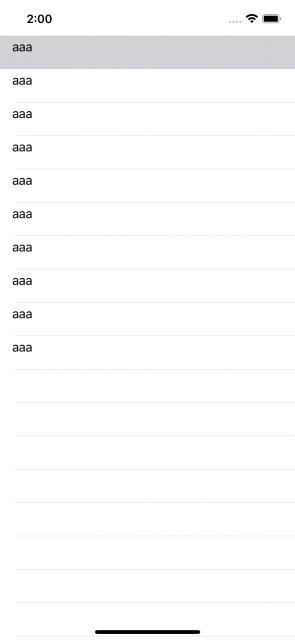
ビルドしてみる
これで冒頭の通りxibを使用してUITableViewCellのテキストを変更することができたかと思います。
もし参考になればLGTMくれると嬉しいです!