参考(というかほぼこの手順通りです)
公式はこっち
メリット
- 固定IP不要
- SSL証明書の設定を自動で行ってくれる(こちらで用意する必要がない)
事前準備
- ドメインの取得
- Cloudflareのアカウント作成
- 使用するドメインを登録しておく
- DNSをCloudflareで管理する
- ラズパイにSSHでログイン
- cloudflaredのログイン時に認証サイトへのアクセスが必要
サーバーにcloudflaredをインストール
$ wget https://github.com/cloudflare/cloudflared/releases/download/2024.6.1/cloudflared-linux-armhf.deb/cloudflared-linux-armhf.deb
$ sudo apt install -y ./cloudflared-linux-armhf.deb
$ cloudflared --version
cloudflared version 2024.3.0 (built 2024-03-20-1012 UTC)
トンネル作成
まずログイン
$ cloudflared tunnel login
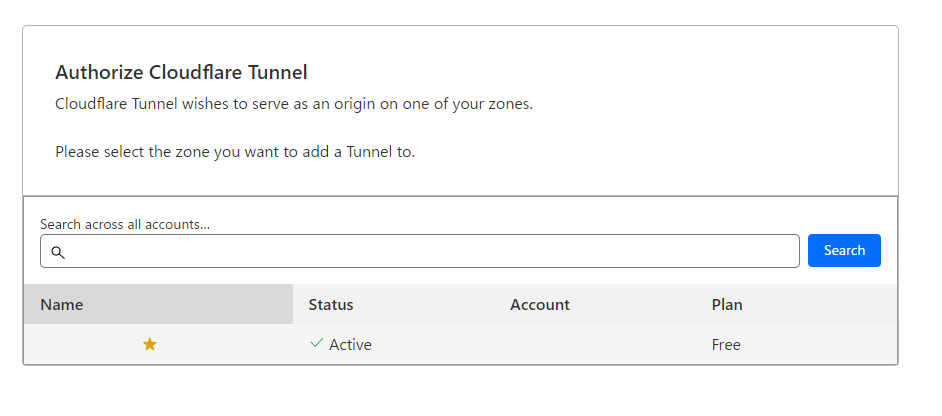
するとブラウザで認証ページが開かれるので、使用するドメインを選択

トンネル作成
$ cloudflared tunnel create <トンネル名>
$ ls ~/.cloudflared/
xxxxxxxx-xxxx-xxxx-xxxx-xxxxxxxxxxxx.json  cert.pem
このxxxxがトンネルIDになります。
cloudflared tunnel list
You can obtain more detailed information for each tunnel with `cloudflared tunnel info <name/uuid>`
ID                                   NAME      CREATED              CONNECTIONS
xxxxxxxx-xxxx-xxxx-xxxx-xxxxxxxxxxxx <トンネル名> 2024-07-11T17:04:23Z
config.yml作成
デフォルトでは~/.cloudflaredに作成するのがよさげですが、今回はなんとなく/etc/cloudflaredを作成します。
ついでにクレデンシャルファイルとかもそちらに移動しておく
$ sudo chown -R pi /etc/cloudflared/
$ code /etc/cloudflared/config.yml
$ mv ~/.cloudflared/* /etc/cloudflared/
tunnel: xxxxxxx-xxxx-xxxx-xxxx-xxxxxxxxxxxx
credentials-file: /etc/cloudflared/xxxxxxx-xxxx-xxxx-xxxx-xxxxxxxxxxxx.json

logfile: /var/log/cloudflared.log
loglevel: debug

ingress:
  - hostname: example.com
    service: http://localhost:80
  - hostname: ssh.example.com
    service: ssh://localhost:22
  - service: http_status:404
credentials-fileは絶対パスにしておいたほうがいいそうです
systemdに登録
サービスが自動で起動するようにします。
$ sudo cloudflared --config /etc/cloudflared/config.yml service install
2024-07-11T18:42:49Z INF Using Systemd
2024-07-11T18:42:51Z INF Linux service for cloudflared installed successfully
$ sudo systemctl status cloudflared
● cloudflared.service - cloudflared
     Loaded: loaded (/etc/systemd/system/cloudflared.service; enabled; preset: enabled)
     Active: active (running) since Fri 2024-07-12 03:42:51 JST; 11s ago
DNSレコード追加
ターミナルから
$ cloudflared tunnel route dns <トンネル名> example.com
成功すると、example.comにCNAMEレコードが追加される。
DNSレコード自体はCloudflareのダッシュボード(Account Home > Websites > example.com > DNS Records)から確認できます。
おそらく
CNAME example.com <トンネルID>.cfargotunnel.com
みたいな感じで表示されていると思います。
Cloudflareのダッシュボードから追加するのも問題ないはずです。
使い方
サービスの追加
前述のconfig.ymlにてホスト名とサービスの関連を記述するだけなのでめっちゃ楽です。(本来webサーバーとかでやるプロキシをここでできちゃう)
サービスごとにサブドメイン割り当てるのがいいのかなと思ってます。
私はdockerでバンバンサービス立てる派なので、dockerコンテナごとにホストのポートを割り当て、cloudflare経由でアクセスできるようにしてます。
手順としては
- config.yml編集
  - hostname: sub.example.com
    service: http://localhost:8080
- cloudflared再起動
$ sudo systemctl restart cloudflared
- (Cloudflareのダッシュボードで)CNAMEレコードを追加
CNAME sub example.com
の3つだけです。
プロトコルとしては、HTTPはもちろん、SSHやTCP、RDPなどいろいろ対応しているっぽいです。
SSH
SSHの場合も同じです。
  - hostname: ssh.example.com
    service: ssh://localhost:22
クライアント側は、ProxyCommandにcloudflaredのコマンドを指定することでsshコマンドが利用可能です。
(クライアント側でもcloudflaredコマンドのインストールが必要になります。)
Host ssh.example.com
ProxyCommand /usr/local/bin/cloudflared access ssh --hostname %h
なお他のサービスを追加したりして、cloudflaredを再起動するたびに、ssh接続も一度途切れます。
私も自宅外からサーバーにアクセスするときはcloudflare経由でのssh使っていますが、
configファイルにタイポや構文エラーがありcloudflaredの再起動に失敗すると、sshで再接続できなくなってしまいますので、最新の注意が必要です。
Cloudflare Zero Trustにapplication追加して、メールアドレス認証等を設定することでブラウザ経由でもsshできるようにするという面白い方法↓ありますが、sshコマンドでログインする際に、認証がTimeoutになったりで不便だったので外しました。
アクセスログについて
Cloudflare Tunnelの個人的一番の欠点は、一度localhost経由になっているので、ログでアクセス元IPが特定できないことですかね。
::1 - - [13/Jul/2024:02:13:38 +0900] "GET / HTTP/1.1" 200 409 "-" "-"
一応cloudflaredのconfig.ymlにてlogfileとloglevel指定すればアクセスの詳細見れました。
logfile: /var/log/cloudflared.log
loglevel: debug
Cf-Connecting-Ipがアクセス元かと思われます。
HTTPの例
{
	"level": "debug",
	"event": 1,
	"connIndex": 0,
	"originService": "http://localhost:80",
	"ingressRule": 0,
	"host": "example.com",
	"path": "/",
	"headers": {
		"Accept": [
			"text/html,application/xhtml+xml,application/xml;q=0.9,image/avif,image/webp,image/apng,*/*;q=0.8,application/signed-exchange;v=b3;q=0.7"
		],
		"Accept-Encoding": [
			"gzip, br"
		],
		"Accept-Language": [
			"en-US"
		],
		"Cdn-Loop": [
			"cloudflare"
		],
		"Cf-Connecting-Ip": [
			"***.***.***.***"
		],
		"Cf-Ipcountry": [
			"JP"
		],
		"Cf-Ray": [
            "****************-***"
		],
		"Cf-Visitor": [
			"{\"scheme\":\"https\"}"
		],
		"Cf-Warp-Tag-Id": [
            "********-****-****-****-************"
		],
		"Referer": [
			"https://www.google.com/"
		],
		"Sec-Fetch-Dest": [
			"document"
		],
		"Sec-Fetch-Mode": [
			"navigate"
		],
		"Sec-Fetch-Site": [
			"none"
		],
		"Sec-Fetch-User": [
			"?1"
		],
		"Upgrade-Insecure-Requests": [
			"1"
		],
		"User-Agent": [
			"**************************************"
		],
		"X-Forwarded-For": [
			"***.***.***.***"
		],
		"X-Forwarded-Proto": [
			"https"
		]
	},
	"content-length": 0,
	"time": "2024-07-12T17:47:19Z",
	"message": "GET https://example.com/ HTTP/1.1"
}
{
	"level": "debug",
	"event": 1,
	"connIndex": 0,
	"originService": "http://localhost:80",
	"ingressRule": 0,
	"content-length": -1,
	"time": "2024-07-12T17:47:19Z",
	"message": "200 OK"
}
SSHの例
{
	"level": "debug",
	"event": 1,
	"connIndex": 1,
	"originService": "ssh://localhost:22",
	"ingressRule": 1,
	"host": "ssh.example.com",
	"path": "/",
	"headers": {
		"Accept-Encoding": [
			"gzip, br"
		],
		"Cdn-Loop": [
			"cloudflare"
		],
		"Cf-Connecting-Ip": [
            "***.***.***.***"
		],
		"Cf-Ipcountry": [
			"JP"
		],
		"Cf-Ray": [
			"****************-***"
		],
		"Cf-Visitor": [
			"{\"scheme\":\"https\"}"
		],
		"Cf-Warp-Tag-Id": [
			"********-****-****-****-************"
		],
		"Sec-Websocket-Key": [
			"*****************"
		],
		"Sec-Websocket-Version": [
			"13"
		],
		"User-Agent": [
			"cloudflared/2024.3.0"
		],
		"X-Forwarded-For": [
			"***.***.***.***"
		],
		"X-Forwarded-Proto": [
			"https"
		]
	},
	"content-length": 0,
	"time": "2024-07-12T18:25:07Z",
	"message": "GET https://ssh.example.com/ HTTP/1.1"
}
{
	"level": "debug",
	"event": 1,
	"connIndex": 1,
	"originService": "ssh://localhost:22",
	"ingressRule": 1,
	"destAddr": "ssh://localhost:22",
	"time": "2024-07-12T18:25:07Z",
	"message": "origin connection established"
}
{
	"level": "debug",
	"event": 1,
	"connIndex": 1,
	"originService": "ssh://localhost:22",
	"ingressRule": 1,
	"destAddr": "ssh://localhost:22",
	"time": "2024-07-12T18:25:07Z",
	"message": "proxy stream acknowledged"
}
{
	"level": "debug",
	"event": 1,
	"connIndex": 1,
	"originService": "ssh://localhost:22",
	"ingressRule": 1,
	"destAddr": "ssh://localhost:22",
	"time": "2024-07-12T18:25:28Z",
	"message": "upstream->downstream copy: read tcp [::1]:41940->[::1]:22: use of closed network connection"
}