はじめに
諸事情でGoogleMapを使ったAndroidアプリを作ることになりそうなので,予習を兼ねて作ってみた.完璧に初心者なので,間違いや修正等があった時はご指摘頂けると幸いです.
手順
1.Android Studioのインストール
2.Google Play Servicesのインストールと関連付け
3.Google Map APIの準備
作業
1.Android Studioのインストール
既に終わっている前提で話を進める.
2.Google Play Servicesのインストールと関連付け
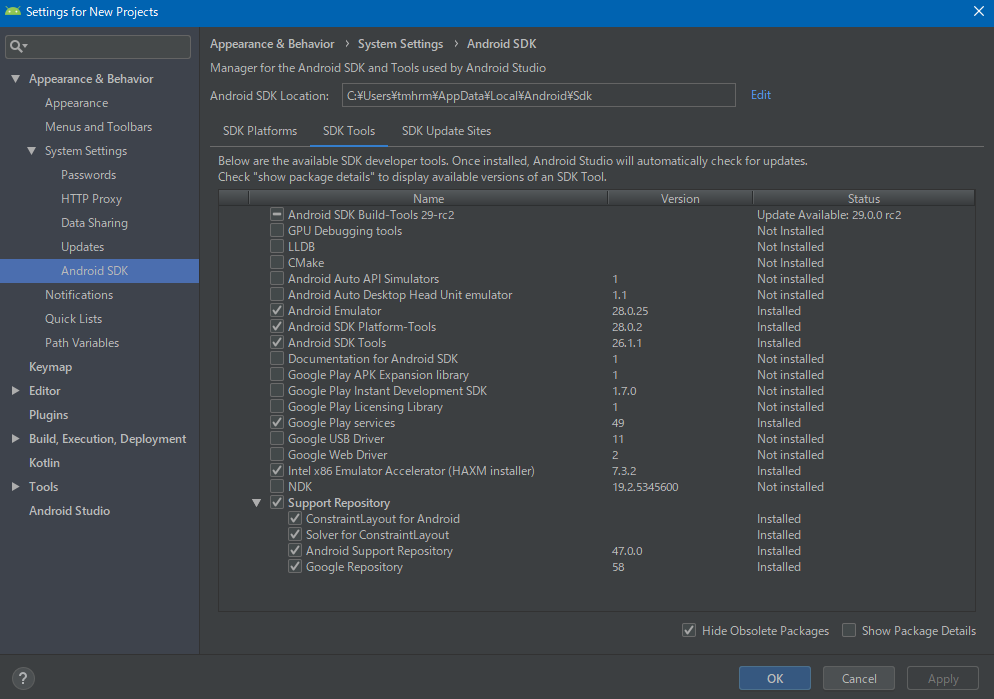
まずは,インストールから行う.Android SDK -> SDK Tools -> Google Play servicesの順に進めてApplyで適用する.
次に関連付けをおこなう.build.gradleにcompile 'com.google.android.gms:play-services:+'を追記する.
dependencies {
    ...
    compile 'com.google.android.gms:play-services:+'
}
そして,画面の右上のほうに出てくるSync Nowで同期させる.

最後にマニフェストの追加をする.以下の要素をAndroidManifest.xmlの<application>要素内に追記する.
        ...
        </activity>
        <meta-data
            android:name="com.google.android.gms.version"
            android:value="@integer/google_play_services_version" />
    </application>
</manifest>
3.Google Map APIの準備
SHA-1フィンガープリントを調べる
プロンプトを開いてJDKのbinディレクトリに移動する.そこで以下を実行する.<ユーザ名>は適宜書き換える.
keytool -list -v -keystore "C:¥Users¥<ユーザ名>¥.android¥debug.keystore" -alias androiddebugkey -storepass android -keypass android"
たくさん表示されるかもしれないが,SHA1: の行に並んでいる16進数をコピーしておく.
Google Developers ConsoleでAPIを取得する
Google Developers Consoleに入る.適当な名前のプロジェクトを作成して,ダッシュボードの中に入る.定期的にレイアウトが若干変わっている(?)ようなので,無い時は各自で探してほしい.
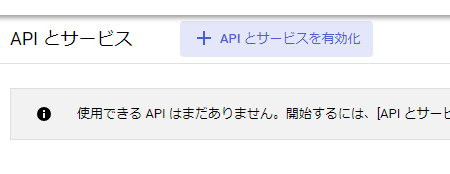
次に,APIとサービスを有効化をクリックする.
検索してAndroid用のGoogle Map SDKを探す.
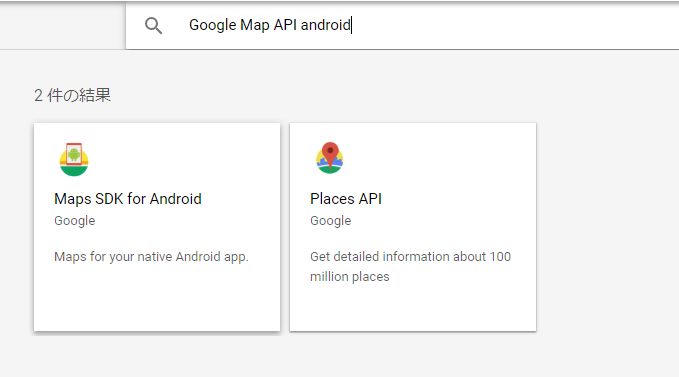
見つけたSDKを有効化して,認証情報の欄に移動する.
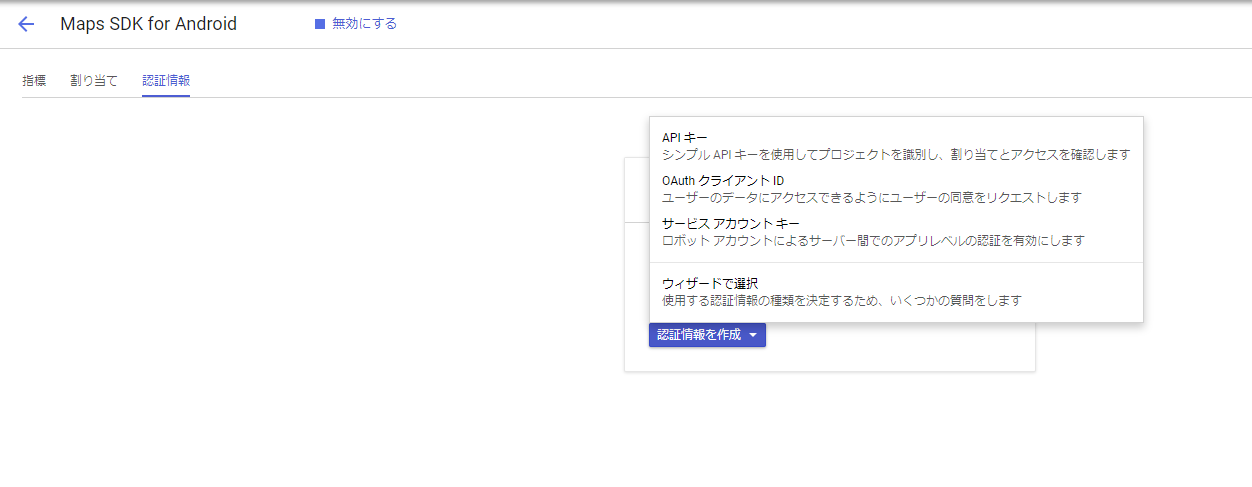
APIキーを選択するとキーが生成されるので,次にAPIの制限を行う.
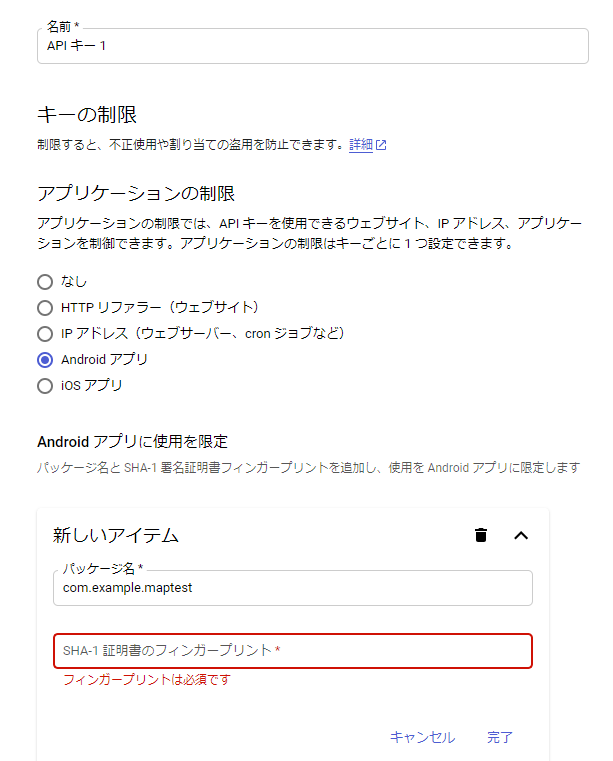
アプリケーションの制限でAndroidアプリを設定.Androidアプリに使用を限定の欄にはパッケージ名と先に取得していたSHA1証明書を貼り付ける.ほとんどのケースで,パッケージ名はcom.example.プロジェクト名のようになっていると思う.
APIキーを適用する
マニフェストファイルAndroidManifest.xmlを開いて,<application>要素内に以下を追記する.<API key>の欄には自分のAPIキーを書き込む.
<meta-data
    android:name="com.google.android.geo.API_KEY"
    android:value="<API key>"/>
パーミッションの設定
さっきのAndroidManifest.xmlの<manifest>要素内に以下を書き込んで権限を追加する.
    <uses-permission android:name="android.permission.ACCESS_FINE_LOCATION" />
    <uses-permission android:name="android.permission.WRITE_EXTERNAL_STORAGE" />
描画の設定
パーミッションと同様にマニフェストの<manifest>要素内に以下を追記.
    <uses-feature
        android:glEsVersion="0x00020000"
        android:required="true"/>
サンプルプログラム
レイアウトのコード
元々書かれているものを全部消して以下のコードを書き込む.
<fragment android:layout_width="match_parent"
    android:layout_height="wrap_content"
    android:name="com.google.android.gms.maps.MapFragment"
    android:id="@+id/map"
    xmlns:android="http://schemas.android.com/apk/res/android" />
アクティビティのコード
1行目のpackage com.example.名前以外をすべて消す.そして以下のコードを追記する.
import android.app.FragmentManager;
import android.app.FragmentTransaction;
import android.support.v7.app.AppCompatActivity;
import android.os.Bundle;

import com.google.android.gms.maps.GoogleMap;
import com.google.android.gms.maps.MapFragment;

public class MainActivity extends AppCompatActivity {

    MapFragment mf;

    @Override
    protected void onCreate(Bundle savedInstanceState) {
        super.onCreate(savedInstanceState);

        mf = MapFragment.newInstance();

        FragmentManager fm = getFragmentManager();
        FragmentTransaction ft = fm.beginTransaction();
        ft.add(android.R.id.content, mf);
        ft.commit();
    }
}
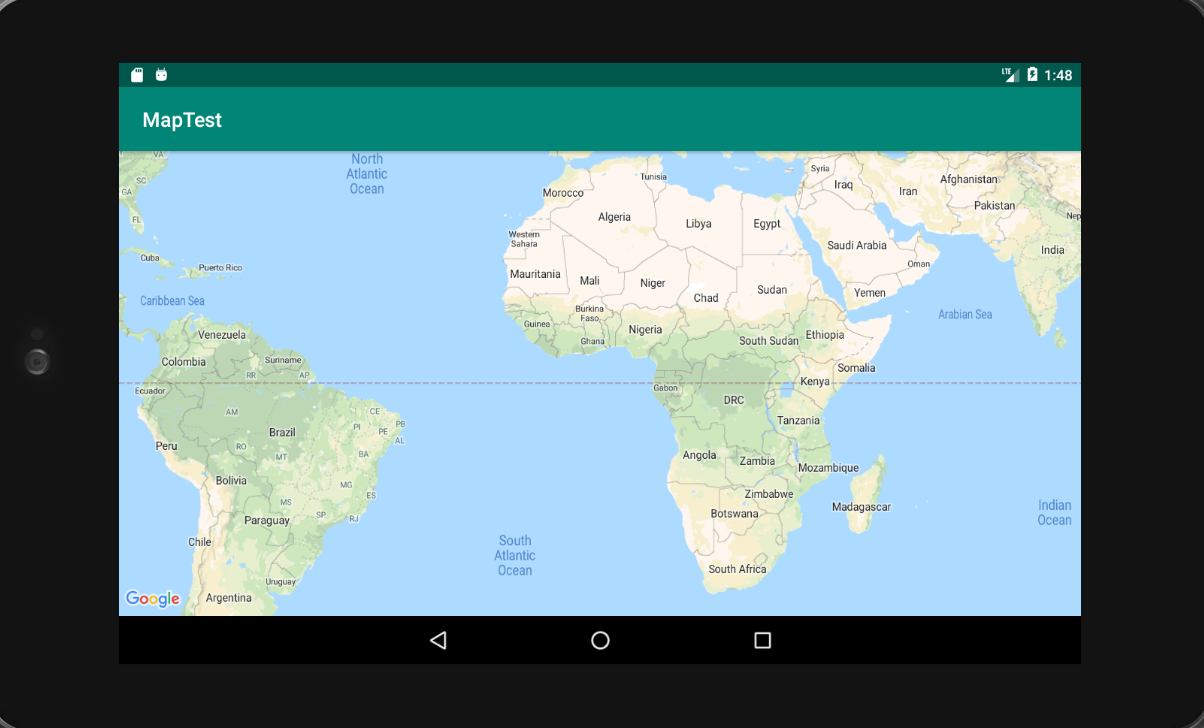
実行画面
エミュレータの実行画面.
参考にさせていただいたサイト
Android StudioでGoogle Map APIを使う
Androidアプリ開発でGoogleMapを利用する