はじめに
趣味とか色々でよく似たようなことをするのに毎回忘れて困るので,自分用の備忘録としてApacheでHTTPSサーバを立てる手順をメモしておく.今回はドメイン取得済みでSSL証明書はletsencryptで用意する.
*この記事に書いている一切の作業はRootユーザで行っているので,適宜sudoやsu -等で実行してください.
環境
- CentOS7.7
- Apache2.4
Apacheの導入
とりあえずインストールする.
yum -y install httpd
自動起動を有効にして起動する.
systemctl enable httpd.service
systemctl start httpd.service
これで自分のドメインにアクセスすればApacheでいつもの画面が見えるはず.

ついでにSSL用のモジュールもインストールしておく.
yum -y install mod_ssl
この後に/etc/httpd/conf/httpd.confのServerNameを自分のドメイン名:80に書き換えておく.例えばexample.com:80とか.
ServerName example.com:80
Certbotの導入
次はletsencryptの証明書発行と更新に使うCertbotのインストール.
yum -y install epel-release
yum install certbot
証明書発行
初期状態なら/var/www/htmlはそのまま,example.comには自分のドメイン名を,sample@example.comは自分のメールアドレスを入れておく.
certbot certonly --webroot \
-w /var/www/html \
-d example.com \
-m sample@example.com \
--agree-tos -n
Congratulations!って出たら成功.
次に証明書を反映させる./etc/httpd/conf.d/ssl.confの以下3行を書き換える(コメントアウトされてるものもある)
SSLCertificateFile /etc/letsencrypt/live/example.com/cert.pem
SSLCertificateKeyFile /etc/letsencrypt/live/example.com/privkey.pem
SSLCertificateChainFile /etc/letsencrypt/live/example.com/chain.pem
一度Apacheを再起動systemctl restart httpdしたら,https://ドメイン名でアクセスできるようになるはず.
おまけ
強制SSL化
httpでアクセスされたらhttpsのほうにリダイレクトさせてしまう.
方法
/etc/httpd/conf/httpd.confの最後にこれを追記しておく.
ewriteEngine on
RewriteCond %{HTTPS} off
RewriteRule ^(.*)$ https://%{HTTP_HOST}%{REQUEST_URI} [R=301,L]
Apacheを再起動systemctl restart httpdすると,成功していればhttp://...でアクセスしてもhttps://に変更されてブラウザの鍵マークが出る.
初期ページを消す
先ほどから見えているこれ

を消しておく.ちなみに同階層内にindex.htmlがあればファイル名の指定がないhttp://example.com/などの場合に利用されるので,こちらを使って細かい調整もできる.
方法
/etc/httpd/conf.d/welcome.confの下の部分を全部コメントアウトする.変更後にApacheの再起動を忘れないようにする.
# <LocationMatch "^/+$">
#    Options -Indexes
#     ErrorDocument 403 /error/noindex.html
# </LocationMatch>
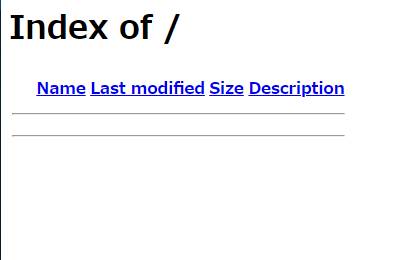
一覧表示を無効化
下の画像のようにサーバー内のファイル一覧が見えてしまうことがあるので無効化しておく.

方法
/etc/httpd/conf/httpd.confのOptions Indexes FollowSymLinksをコメントアウトする.
# Options Indexes FollowSymLinks
こちらも変更後にApacheの再起動を.
証明書の自動更新
こちらを参考にcronを設定させていただいた.下の例だと毎月1日の午前3時に証明書の更新を行う.ただし,期限が30日以内に迫っていないと実行されないので注意.
方法
/etc/cron.d/に適当な名前のファイルを作って以下を書き込んでおく.今回はletsencryptというファイル名の例.
00 03 01 * * root /bin/certbot renew --webroot-path /var/www/html/ --post-hook "systemctl reload httpd"
最後に
全然理解が追い付いてないので時間があるときにApacheについて一度学びなおしたい...
誤字・修正等ありましたらご連絡ください.