株式会社LITALICOでWebエンジニア(Rails)を担当しています、@litalico-takamasa-mizukamiです。
この記事は『LITALICO Engineers Advent Calendar 2019』3日目の記事です。
はじめに
AMP Storyは画像、ビデオ、グラフィック、オーディオなどの情報をユーザーにフルスクリーンで体験させることができるものです。
AMP Conf2019でも発表があったとおり、Googleの検索結果にAMP Story専用の枠が作成されるそうです。
今回は音声やアニメーションは扱わず、基本的に画像とテキストのみを扱う事にします。
Understanding the parts of an AMP story
AMP Conf 2019: Successful web experiences for everyone
AMP Storyの実装手順
- AMP テンプレートの準備
- カバーページの作成
- ページの追加
- ブックエンドのカスタマイズ
AMP テンプレートの準備
- AMPのテンプレートを使ってAMP Storyの実装方法を説明します。
<!doctype html>
<html amp lang="en">
  <head>
    <meta charset="utf-8">
    <script async src="https://cdn.ampproject.org/v0.js"></script>
    <title>Hello, AMPs</title>
    <link rel="canonical" href="https://amp.dev/ja/documentation/guides-and-tutorials/start/create/basic_markup">
    <meta name="viewport" content="width=device-width,minimum-scale=1,initial-scale=1">
    <script type="application/ld+json">
      {
        "@context": "http://schema.org",
        "@type": "NewsArticle",
        "headline": "Open-source framework for publishing content",
        "datePublished": "2015-10-07T12:02:41Z",
        "image": [
          "logo.jpg"
        ]
      }
    </script>
    <style amp-boilerplate>body{-webkit-animation:-amp-start 8s steps(1,end) 0s 1 normal both;-moz-animation:-amp-start 8s steps(1,end) 0s 1 normal both;-ms-animation:-amp-start 8s steps(1,end) 0s 1 normal both;animation:-amp-start 8s steps(1,end) 0s 1 normal both}@-webkit-keyframes -amp-start{from{visibility:hidden}to{visibility:visible}}@-moz-keyframes -amp-start{from{visibility:hidden}to{visibility:visible}}@-ms-keyframes -amp-start{from{visibility:hidden}to{visibility:visible}}@-o-keyframes -amp-start{from{visibility:hidden}to{visibility:visible}}@keyframes -amp-start{from{visibility:hidden}to{visibility:visible}}</style><noscript><style amp-boilerplate>body{-webkit-animation:none;-moz-animation:none;-ms-animation:none;animation:none}</style></noscript>
  </head>
  <body>
    <h1>Welcome to the mobile web</h1>
  </body>
</html>
AMP Story始めるための準備
<head>内にscriptを追加
<script async custom-element="amp-story"
        src="https://cdn.ampproject.org/v0/amp-story-1.0.js"></script>
<!doctype html>
<html amp lang="en">
  <head>
    ・・・
    <meta name="viewport" content="width=device-width,minimum-scale=1,initial-scale=1">
    <script async custom-element="amp-story"
        src="https://cdn.ampproject.org/v0/amp-story-1.0.js"></script>
    <script type="application/ld+json">
      {
        "@context": "http://schema.org",
        "@type": "NewsArticle",
        "headline": "Open-source framework for publishing content",
        "datePublished": "2015-10-07T12:02:41Z",
        "image": [
          "logo.jpg"
        ]
      }
    </script>
  </head>
 ・・・
</html>
body内に<amp-story>を追加
- また以下のメタ情報を追加します。以下の4つは必須で指定する必要があります。
-
title- タイトル
-
publisher- ストーリーの発行者の名前
-
publisher-logo-src- ロゴ
-
poster-portrait-src- ポスター
amp-story New metadata requirements
<amp-story standalone
 title="Joy of Pets"
 publisher="AMP tutorials"
 publisher-logo-src="https://github.com/ampproject/docs/blob/master/tutorial_source/amp-pets-story/assets/AMP-Brand-White-Icon.svg"
 poster-portrait-src="https://raw.githubusercontent.com/ampproject/docs/master/tutorial_source/amp-pets-story/assets/cover.jpg">
</amp-story>
<!doctype html>
<html amp lang="en">
  <head>
    ・・・
    <meta name="viewport" content="width=device-width,minimum-scale=1,initial-scale=1">
    <script async custom-element="amp-story"
        src="https://cdn.ampproject.org/v0/amp-story-1.0.js"></script>
    <script type="application/ld+json">
      {
        "@context": "http://schema.org",
        "@type": "NewsArticle",
        "headline": "Open-source framework for publishing content",
        "datePublished": "2015-10-07T12:02:41Z",
        "image": [
          "logo.jpg"
        ]
      }
    </script>
  </head>
 <body>
   <amp-story standalone
    title="Joy of Pets"
    publisher="AMP tutorials"
    publisher-logo-src="https://github.com/ampproject/docs/blob/master/tutorial_source/amp-pets-story/assets/AMP-Brand-White-Icon.svg"
    poster-portrait-src="https://raw.githubusercontent.com/ampproject/docs/master/tutorial_source/amp-pets-story/assets/cover.jpg">
   </amp-story>
  </body>
</html>
カバーページの作成
- AMP Storyでは最初のページをカバーページといいます。
<amp-story-page>を追加しユニークなIDを指定する必要があります。
<amp-story-page>を追加
<amp-story standalone
 title="Joy of Pets"
 publisher="AMP tutorials"
 publisher-logo-src="https://github.com/ampproject/docs/blob/master/tutorial_source/amp-pets-story/assets/AMP-Brand-White-Icon.svg"
 poster-portrait-src="https://raw.githubusercontent.com/ampproject/docs/master/tutorial_source/amp-pets-story/assets/cover.jpg">
 <amp-story-page id="cover">
 </amp-story-page>
</amp-story>
<!doctype html>
<html amp lang="en">
  ・・・
  <body>
    <amp-story standalone
      title="Joy of Pets"
      publisher="AMP tutorials"
      publisher-logo-src="https://github.com/ampproject/docs/blob/master/tutorial_source/amp-pets-story/assets/AMP-Brand-White-Icon.svg"
      poster-portrait-src="https://raw.githubusercontent.com/ampproject/docs/master/tutorial_source/amp-pets-story/assets/cover.jpg">
      <amp-story-page id="cover">
      </amp-story-page>
   </amp-story>
  </body>
</html>
レイヤーの作成
今回は2つのレイヤーを使って、一番下のレイヤーには画像を一番上のレイヤーにはタイトルを表示してみます。
一つ目のレイヤー
-
<amp-story-grid-layer>を追加 -
template属性を指定。 - 今回は
fillを指定。 - template
<amp-story-page id="cover">
  <amp-story-grid-layer template="fill">
    <amp-img src="https://raw.githubusercontent.com/ampproject/docs/master/tutorial_source/amp-pets-story/assets/cover.jpg"
        width="720" height="1280"
        layout="responsive">
    </amp-img>
  </amp-story-grid-layer>
</amp-story-page>
<!doctype html>
<html amp lang="en">
  ・・・
  <body>
    <amp-story standalone
      title="Joy of Pets"
      publisher="AMP tutorials"
      publisher-logo-src="https://github.com/ampproject/docs/blob/master/tutorial_source/amp-pets-story/assets/AMP-Brand-White-Icon.svg"
      poster-portrait-src="https://raw.githubusercontent.com/ampproject/docs/master/tutorial_source/amp-pets-story/assets/cover.jpg">
      <amp-story-page id="cover">
        <amp-story-grid-layer template="fill">
          <amp-img src="https://raw.githubusercontent.com/ampproject/docs/master/tutorial_source/amp-pets-story/assets/cover.jpg"
           width="720" height="1280"
           layout="responsive">
          </amp-img>
        </amp-story-grid-layer>
      </amp-story-page>
   </amp-story>
  </body>
</html>
-
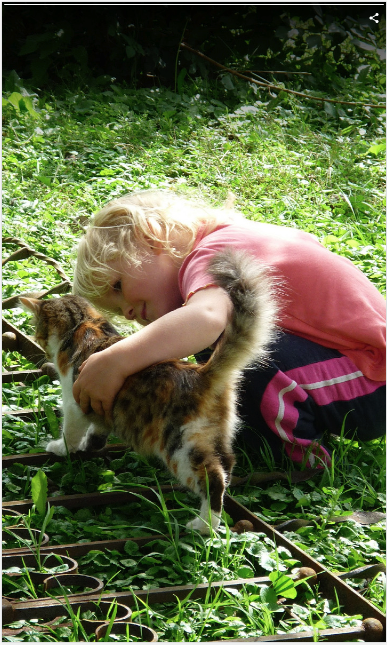
ここまで完成したソースコードを
index.htmlなど適当な名前を付けて保存しブラウザ上で確認すると以下のように表示されます。
-
ここまでの全ソースコード
<!doctype html>
<html amp lang="en">
  <head>
    <meta charset="utf-8">
    <script async src="https://cdn.ampproject.org/v0.js"></script>
    <title>Hello, AMPs</title>
    <link rel="canonical" href="https://amp.dev/ja/documentation/guides-and-tutorials/start/create/basic_markup">
    <meta name="viewport" content="width=device-width,minimum-scale=1,initial-scale=1">
    <script async custom-element="amp-story"
        src="https://cdn.ampproject.org/v0/amp-story-1.0.js"></script>
    <script type="application/ld+json">
      {
        "@context": "http://schema.org",
        "@type": "NewsArticle",
        "headline": "Open-source framework for publishing content",
        "datePublished": "2015-10-07T12:02:41Z",
        "image": [
          "logo.jpg"
        ]
      }
    </script>
    <style amp-boilerplate>body{-webkit-animation:-amp-start 8s steps(1,end) 0s 1 normal both;-moz-animation:-amp-start 8s steps(1,end) 0s 1 normal both;-ms-animation:-amp-start 8s steps(1,end) 0s 1 normal both;animation:-amp-start 8s steps(1,end) 0s 1 normal both}@-webkit-keyframes -amp-start{from{visibility:hidden}to{visibility:visible}}@-moz-keyframes -amp-start{from{visibility:hidden}to{visibility:visible}}@-ms-keyframes -amp-start{from{visibility:hidden}to{visibility:visible}}@-o-keyframes -amp-start{from{visibility:hidden}to{visibility:visible}}@keyframes -amp-start{from{visibility:hidden}to{visibility:visible}}</style><noscript><style amp-boilerplate>body{-webkit-animation:none;-moz-animation:none;-ms-animation:none;animation:none}</style></noscript>
  </head>
  <body>
    <amp-story standalone
      title="Joy of Pets"
      publisher="AMP tutorials"
      publisher-logo-src="https://github.com/ampproject/docs/blob/master/tutorial_source/amp-pets-story/assets/AMP-Brand-White-Icon.svg"
      poster-portrait-src="https://raw.githubusercontent.com/ampproject/docs/master/tutorial_source/amp-pets-story/assets/cover.jpg">
      <amp-story-page id="cover">
        <amp-story-grid-layer template="fill">
          <amp-img src="https://raw.githubusercontent.com/ampproject/docs/master/tutorial_source/amp-pets-story/assets/cover.jpg"
           width="720" height="1280"
           layout="responsive">
          </amp-img>
        </amp-story-grid-layer>
      </amp-story-page>
   </amp-story>
  </body>
</html>
二つ目のレイヤー
一つ目背景画像が表示されているレイヤーができたので、その上に重ねるレイヤーを作成します。
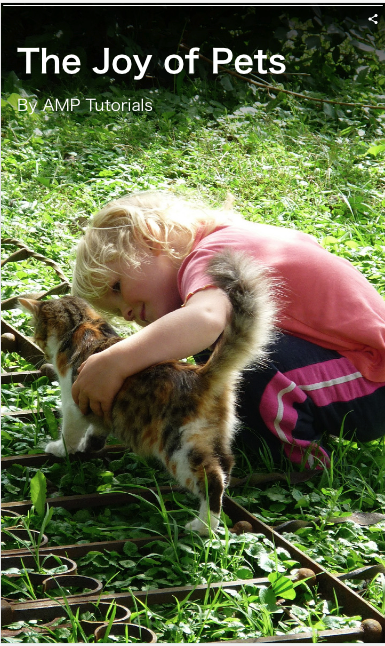
文字を表示してみます。
<amp-story-grid-layer template="vertical">
  <h1>The Joy of Pets</h1>
  <p>By AMP Tutorials</p>
</amp-story-grid-layer>
<!doctype html>
<html amp lang="en">
  ・・・
  <body>
    <amp-story standalone
      title="Joy of Pets"
      publisher="AMP tutorials"
      publisher-logo-src="https://github.com/ampproject/docs/blob/master/tutorial_source/amp-pets-story/assets/AMP-Brand-White-Icon.svg"
      poster-portrait-src="https://raw.githubusercontent.com/ampproject/docs/master/tutorial_source/amp-pets-story/assets/cover.jpg">
      <amp-story-page id="cover">
        <amp-story-grid-layer template="fill">
          <amp-img src="https://raw.githubusercontent.com/ampproject/docs/master/tutorial_source/amp-pets-story/assets/cover.jpg"
           width="720" height="1280"
           layout="responsive">
          </amp-img>
        </amp-story-grid-layer>
        <amp-story-grid-layer template="vertical">
          <h1>The Joy of Pets</h1>
          <p>By AMP Tutorials</p>
        </amp-story-grid-layer>
      </amp-story-page>
   </amp-story>
  </body>
</html>
このままだと、見づらいのでスタイルを当ててみます。
<head>内に<style>タグを追加します。
AMPでは CSSを記述する際 amp-custom を付ける必要があります。
<style amp-custom>
 amp-story {
  color: #fff;
 }
</style>
<!doctype html>
<html amp lang="en">
  <head>
    <meta charset="utf-8">
    <script async src="https://cdn.ampproject.org/v0.js"></script>
    <title>Hello, AMPs</title>
    <link rel="canonical" href="https://amp.dev/ja/documentation/guides-and-tutorials/start/create/basic_markup">
    <meta name="viewport" content="width=device-width,minimum-scale=1,initial-scale=1">
    <script async custom-element="amp-story"
        src="https://cdn.ampproject.org/v0/amp-story-1.0.js"></script>
    <script type="application/ld+json">
      {
        "@context": "http://schema.org",
        "@type": "NewsArticle",
        "headline": "Open-source framework for publishing content",
        "datePublished": "2015-10-07T12:02:41Z",
        "image": [
          "logo.jpg"
        ]
      }
    </script>
    <style amp-boilerplate>body{-webkit-animation:-amp-start 8s steps(1,end) 0s 1 normal both;-moz-animation:-amp-start 8s steps(1,end) 0s 1 normal both;-ms-animation:-amp-start 8s steps(1,end) 0s 1 normal both;animation:-amp-start 8s steps(1,end) 0s 1 normal both}@-webkit-keyframes -amp-start{from{visibility:hidden}to{visibility:visible}}@-moz-keyframes -amp-start{from{visibility:hidden}to{visibility:visible}}@-ms-keyframes -amp-start{from{visibility:hidden}to{visibility:visible}}@-o-keyframes -amp-start{from{visibility:hidden}to{visibility:visible}}@keyframes -amp-start{from{visibility:hidden}to{visibility:visible}}</style><noscript><style amp-boilerplate>body{-webkit-animation:none;-moz-animation:none;-ms-animation:none;animation:none}</style></noscript>
    <style amp-custom>
      amp-story {
        color: #fff;
      }
    </style>
  </head>
  <body>
    ・・・
  </body>
</html>
ブラウザを更新すると一つ目のレイヤー(画像)の上に2つ目のレイヤー(文字)が重なっているのが確認できます。
ページの追加
1ページでは寂しいのでもう一ページ追加してみます。
<!doctype html>
<html amp lang="en">
  ・・・
  <body>
    <amp-story standalone
      title="Joy of Pets"
      publisher="AMP tutorials"
      publisher-logo-src="https://github.com/ampproject/docs/blob/master/tutorial_source/amp-pets-story/assets/AMP-Brand-White-Icon.svg"
      poster-portrait-src="https://raw.githubusercontent.com/ampproject/docs/master/tutorial_source/amp-pets-story/assets/cover.jpg">
      <amp-story-page id="cover">
        ・・・
      </amp-story-page>

       <amp-story-page id="page1">
        <amp-story-grid-layer template="fill">
          <amp-img src="https://github.com/ampproject/docs/blob/master/tutorial_source/amp-pets-story/assets/dog.jpg?raw=true"
              width="720" height="1280"
              layout="responsive">
          </amp-img>
        </amp-story-grid-layer>
        <amp-story-grid-layer template="thirds">
          <h1 grid-area="upper-third">Dogs</h1>
          <p grid-area="lower-third">Dogs were probably the first tame animals. They have accompanied humans for some 10,000 years. Some scientists assert that all dogs, domestic and wild, share a common ancestor in the small South Asian wolf.</p>
        </amp-story-grid-layer>
      </amp-story-page>
   </amp-story>
  </body>
</html>
2ページ目はこんな感じ
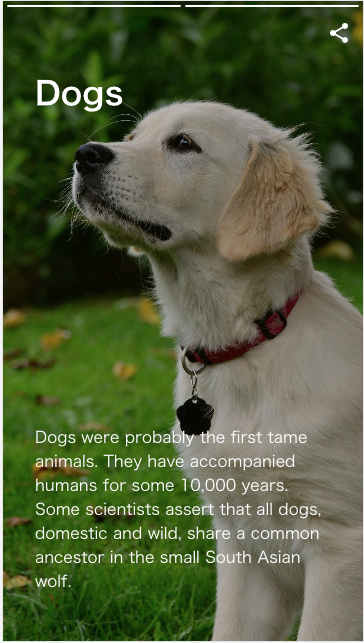
ブラウザを更新すると1ページ目と2ページを自由に遷移できるようになったと思います。
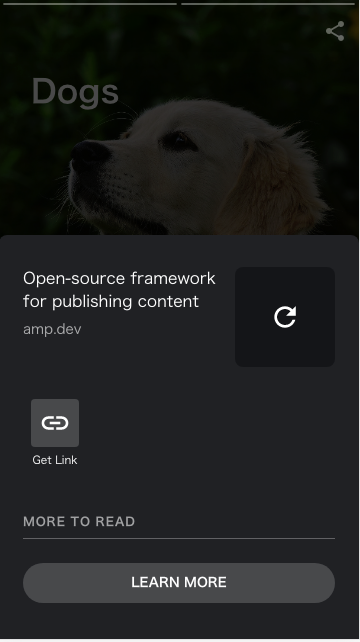
ブックエンドのカスタマイズ
AMP Storyの最後のページをブックエンドといいます。
現在の状態だとブックエンドは以下のような感じになっていると思います。
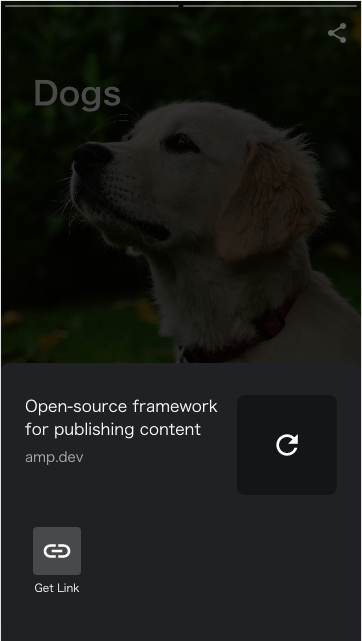
この画面はカスタマイズが可能なのでカスタマイズしてみます。
リンクを追加
<amp-story-bookend>を追加してみます。
JSONファイルを読み込ませるか、JSONをインラインで記述するかのどちらかの方法でカスタマイズ可能です。今回はインラインで記述します。
ボタンを設置して、リンクを追加してみます。
<amp-story-bookend layout=nodisplay>
 <script type="application/json">
  {
   "bookendVersion": "v1.0",
   "components": [
    {
     "type": "cta-link",
     "links": [
      {
       "text": "Learn more",
       "url": "https://amp.dev/documentation/guides-and-tutorials/start/visual_story/parts_of_story?format=stories"
      }
     ]
    }
  ]
 }
 </script>
</amp-story-bookend>
<!doctype html>
<html amp lang="en">
  ・・・
  <body>
    <amp-story standalone
      title="Joy of Pets"
      publisher="AMP tutorials"
      publisher-logo-src="https://github.com/ampproject/docs/blob/master/tutorial_source/amp-pets-story/assets/AMP-Brand-White-Icon.svg"
      poster-portrait-src="https://raw.githubusercontent.com/ampproject/docs/master/tutorial_source/amp-pets-story/assets/cover.jpg">
      <amp-story-page id="cover">
        <amp-story-grid-layer template="fill">
          <amp-img src="https://raw.githubusercontent.com/ampproject/docs/master/tutorial_source/amp-pets-story/assets/cover.jpg"
           width="720" height="1280"
           layout="responsive">
          </amp-img>
        </amp-story-grid-layer>
        <amp-story-grid-layer template="vertical">
          <h1>The Joy of Pets</h1>
          <p>By AMP Tutorials</p>
        </amp-story-grid-layer>
      </amp-story-page>

       <amp-story-page id="page1">
        ・・・
      </amp-story-page>
      <amp-story-bookend layout=nodisplay>
        <script type="application/json">
          {
            "bookendVersion": "v1.0",
            "components": [
              {
                "type": "cta-link",
                "links": [
                  {
                    "text": "Learn more",
                    "url": "https://amp.dev/documentation/guides-and-tutorials/start/visual_story/parts_of_story?format=stories"
                  }
                ]
              }
            ]
         }
        </script>
      </amp-story-bookend>
   </amp-story>
  </body>
</html>
こんな感じになります。
他にもソーシャルボタンを追加したりする事も可能です。
ここまでの全ソースコード
<!doctype html>
<html amp lang="en">
  <head>
    <meta charset="utf-8">
    <script async src="https://cdn.ampproject.org/v0.js"></script>
    <title>Hello, AMPs</title>
    <link rel="canonical" href="https://amp.dev/ja/documentation/guides-and-tutorials/start/create/basic_markup">
    <meta name="viewport" content="width=device-width,minimum-scale=1,initial-scale=1">
    <script async custom-element="amp-story"
        src="https://cdn.ampproject.org/v0/amp-story-1.0.js"></script>
    <script type="application/ld+json">
      {
        "@context": "http://schema.org",
        "@type": "NewsArticle",
        "headline": "Open-source framework for publishing content",
        "datePublished": "2015-10-07T12:02:41Z",
        "image": [
          "logo.jpg"
        ]
      }
    </script>
    <style amp-boilerplate>body{-webkit-animation:-amp-start 8s steps(1,end) 0s 1 normal both;-moz-animation:-amp-start 8s steps(1,end) 0s 1 normal both;-ms-animation:-amp-start 8s steps(1,end) 0s 1 normal both;animation:-amp-start 8s steps(1,end) 0s 1 normal both}@-webkit-keyframes -amp-start{from{visibility:hidden}to{visibility:visible}}@-moz-keyframes -amp-start{from{visibility:hidden}to{visibility:visible}}@-ms-keyframes -amp-start{from{visibility:hidden}to{visibility:visible}}@-o-keyframes -amp-start{from{visibility:hidden}to{visibility:visible}}@keyframes -amp-start{from{visibility:hidden}to{visibility:visible}}</style><noscript><style amp-boilerplate>body{-webkit-animation:none;-moz-animation:none;-ms-animation:none;animation:none}</style></noscript>
    <style amp-custom>
      amp-story {
        color: #fff;
      }
    </style>
  </head>
  <body>
    <amp-story standalone
      title="Joy of Pets"
      publisher="AMP tutorials"
      publisher-logo-src="https://github.com/ampproject/docs/blob/master/tutorial_source/amp-pets-story/assets/AMP-Brand-White-Icon.svg"
      poster-portrait-src="https://raw.githubusercontent.com/ampproject/docs/master/tutorial_source/amp-pets-story/assets/cover.jpg">
      <amp-story-page id="cover">
        <amp-story-grid-layer template="fill">
          <amp-img src="https://raw.githubusercontent.com/ampproject/docs/master/tutorial_source/amp-pets-story/assets/cover.jpg"
           width="720" height="1280"
           layout="responsive">
          </amp-img>
        </amp-story-grid-layer>
        <amp-story-grid-layer template="vertical">
          <h1>The Joy of Pets</h1>
          <p>By AMP Tutorials</p>
        </amp-story-grid-layer>
      </amp-story-page>

      <amp-story-page id="page1">
        <amp-story-grid-layer template="fill">
          <amp-img src="https://github.com/ampproject/docs/blob/master/tutorial_source/amp-pets-story/assets/dog.jpg?raw=true"
              width="720" height="1280"
              layout="responsive">
          </amp-img>
        </amp-story-grid-layer>
        <amp-story-grid-layer template="thirds">
          <h1 grid-area="upper-third">Dogs</h1>
          <p grid-area="lower-third">Dogs were probably the first tame animals. They have accompanied humans for some 10,000 years. Some scientists assert that all dogs, domestic and wild, share a common ancestor in the small South Asian wolf.</p>
        </amp-story-grid-layer>
      </amp-story-page>
      <amp-story-bookend layout=nodisplay>
        <script type="application/json">
          {
            "bookendVersion": "v1.0",
            "components": [
              {
                "type": "cta-link",
                "links": [
                  {
                    "text": "Learn more",
                    "url": "https://amp.dev/documentation/guides-and-tutorials/start/visual_story/parts_of_story?format=stories"
                  }
                ]
              }
            ]
         }
        </script>
      </amp-story-bookend>
   </amp-story>
  </body>
</html>
プログラミングを行わずAMP Storyが作成する方法の紹介
makestoriesを使えば、プログラミングを行わずともAMP Storyが作る事ができます。豊富なテンプレートとアイコンがすべて無料で使えるので、使ってみても良いと思います。
makestories
終わり
AMPテンプレートを使って、AMP Storyの基本的な実装を行いました。
今回は紹介できませんでしたが、音声を流したり、アニメーションを加えることも可能です。米国ではすでにAMP Story専用の枠が確保されつつあるので日本でも、AMP Storyの枠が表示される可能性が十分考えられます。AMP Storyが新たな流入経路になるかもしれません。プログラマブルにスマートフォンユーザーにリッチな体験を与えることができる有効な手段の一つだと思うので、是非一度試してみてください。
明日の『LITALICO Engineers Advent Calendar 2019』は@M108Kineticsさんの「インターン生が勝手にプロジェクトをTypeScript化した話」についての記事です。