今回のサンプルはタクトスイッチを使います。スイッチを押すとLEDが点灯するようにします。
ハードウェア
・Freenove ESP32-S3-WROOM Board or Espressif ESP32-S3-DevKitC
・ブレッドボード
・タクトスイッチ
・ジャンパーワイヤ
配線
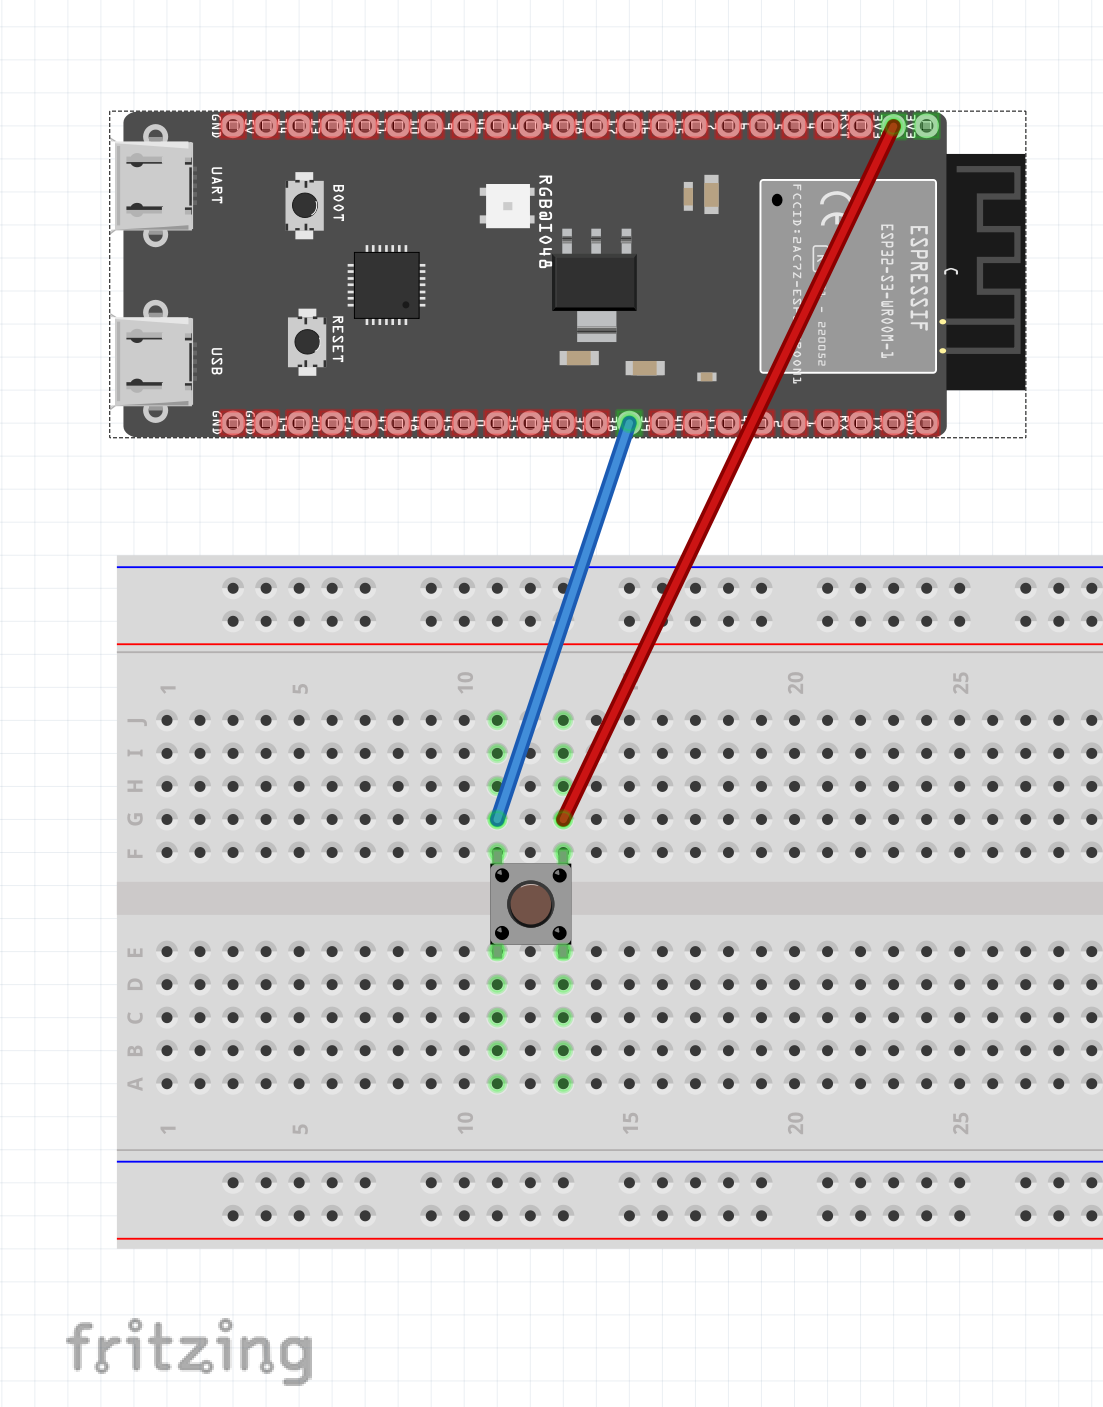
・配線は次の図のようにします。電源は3.3Vと5Vを間違えないようにしてください。間違えて5Vにつなぐとボードが壊れてしまう可能性があります。
導入するパッケージ
・nanoFramework.System.Device.Gpio
プログラミング
・新規プロジェクトを作成します。プロジェクト名は「ESP32S3_Button」としました。
・コードを入力する前にパッケージは導入してください。
・コードは次のようになります。
Program.cs
using System;
using System.Device.Gpio;
using System.Threading;

namespace ESP32S3_Button
{
    public class Program
    {
        public static void Main()
        {
            GpioController controller=new GpioController();

            GpioPin ledPin=controller.OpenPin(2,PinMode.Output);

            //何もつながっていないときはPin入力が0VになるようにするためPullDownします。
            GpioPin buttonPin = controller.OpenPin(35, PinMode.InputPullDown);

            while (true)
            {
                //スイッチの状態を確認
                //Console.WriteLine(buttonPin.Read().ToString());


                if (buttonPin.Read() == PinValue.High)
                {
                    ledPin.Write(PinValue.High);
                }
                else
                {
                    ledPin.Write(PinValue.Low);
                }

                Thread.Sleep(50);
            }
        }
    }
}
・コードを実行してみるとボタンを押した時にオンボードLEDが点灯することを確認できます。
次回は同じ回路を使って別の方法でボタンの状態を検出するプログラムを紹介したいと思います。