・WinUI3がリリースになったと言うことで、ちょっと遊んでみます。
・C++/WinRTのデザイナーが・・・とかちょっと違うところもありますが・・・
1. 今回やること
・アプリでWebページを表示させることを目的とします。
・基本的には「WinUI 3 での WebView2 の使用を開始する (プレビュー)」をそのままやります。
・特に難しいところは無くそのまま実装できるので上記のリンクをみて実装しても良いかもです。いつものように例はC#で書かれていますけどね(MSもっとC++にやる気を出せ!!)。
2.準備
2-1. WinUI3のインストール
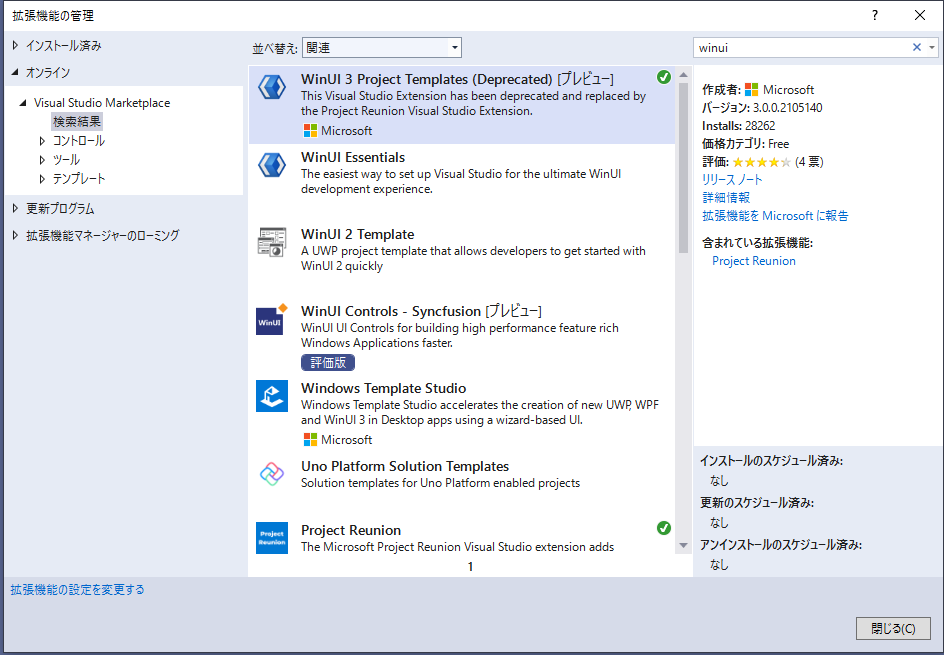
・「拡張機能」-「拡張機能の管理」より「winui」で検索をして、「WinUI 3 Project Templates(Deprecated)をインストールします。
2-2. ランタイムのインストール
「Microsoft Edge WebView2」からインストーラーを落とし、ランタイムをインストールします。ランタイムのインストールを忘れると、実行時にエラーを出すので注意です。
・ここまでで準備完了です。
3.プロジェクトの作成
・Blank App, Pakcaged(WinUI 3 in Desktop)が追加されているので、それを選びます(windows template studioを入れておくと、その下のApp(WinUI3 in Desktop)でも大丈夫です)。
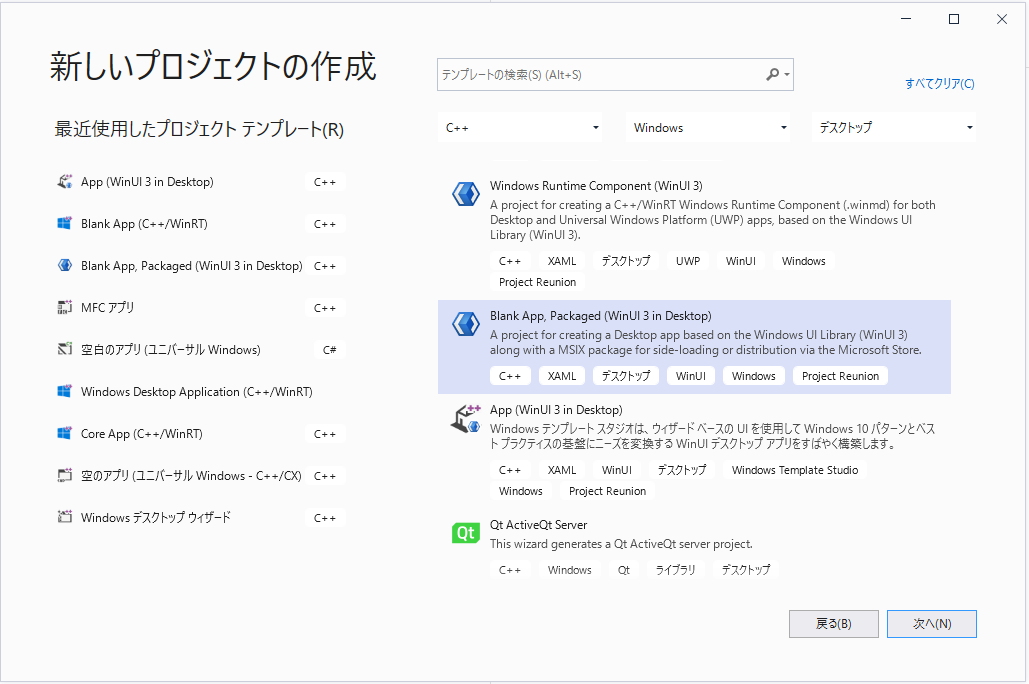
・今回は「winui_webview_1」という名前にしました。
4.xamlの編集
4-1. 見た目
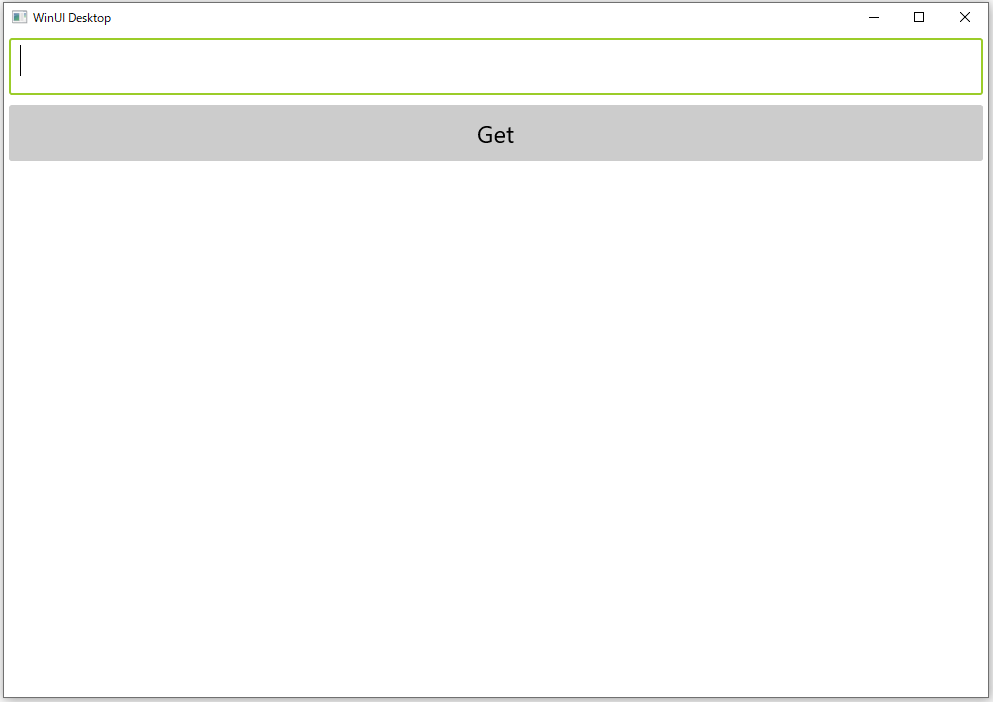
・こんな感じにしてみました。Grid.row="2"にWebView2.0を置く予定です。
・タグがちょっと変わって、テキストボックスもちょっと変わっていますね。
<Window
    x:Class="winui_webview_1.MainWindow"
    xmlns="http://schemas.microsoft.com/winfx/2006/xaml/presentation"
    xmlns:x="http://schemas.microsoft.com/winfx/2006/xaml"
    xmlns:local="using:winui_webview_1"
    xmlns:d="http://schemas.microsoft.com/expression/blend/2008"
    xmlns:mc="http://schemas.openxmlformats.org/markup-compatibility/2006"
    mc:Ignorable="d">

    <Grid RequestedTheme="Default">
        <Grid.RowDefinitions>
            <RowDefinition Height="1*" />
            <RowDefinition Height="1*"/>
            <RowDefinition Height="8*" />
        </Grid.RowDefinitions>
        <TextBox x:Name="url_text" Grid.Row="0" HorizontalAlignment="Stretch" VerticalAlignment="Stretch" FontSize="24" Margin="5,5,5,5"/>
        <Button x:Name="get_button" Content="Get" Grid.Row="1" HorizontalAlignment="Stretch" VerticalAlignment="Stretch" FontSize="24" Margin="5,5,5,5"/>


    </Grid>
</Window>
4-2. WebViewの追加
①上の方に「xmlns:controls="using:Microsoft.UI.Xaml.Controls"」を追加します。
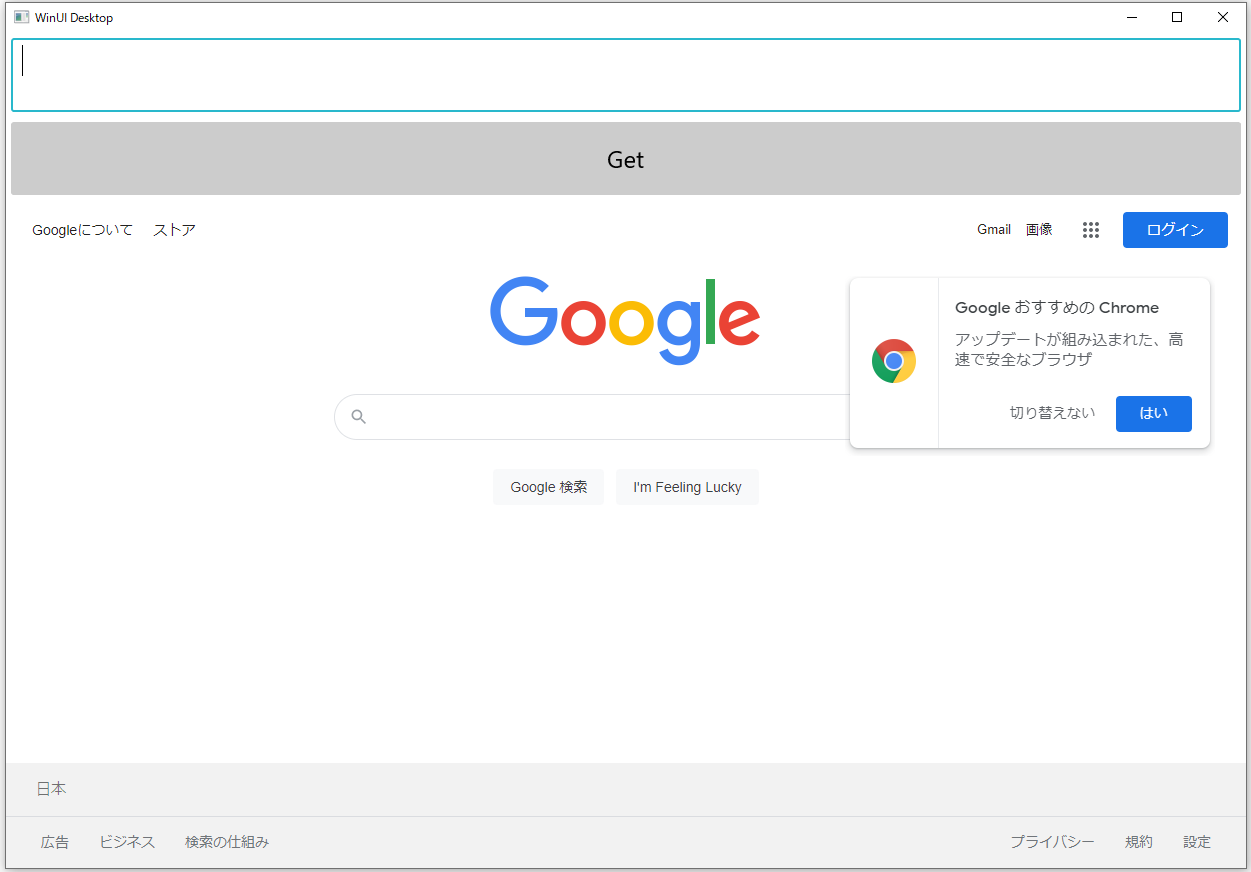
②GridRow="2"に「controls:WebView2」を追加します。初期ページはSource=""で指定したGoogleです。
<Window
    x:Class="winui_webview_1.MainWindow"
    xmlns="http://schemas.microsoft.com/winfx/2006/xaml/presentation"
    xmlns:x="http://schemas.microsoft.com/winfx/2006/xaml"
    xmlns:local="using:winui_webview_1"
    xmlns:d="http://schemas.microsoft.com/expression/blend/2008"
    xmlns:mc="http://schemas.openxmlformats.org/markup-compatibility/2006"
    mc:Ignorable="d"

     xmlns:controls="using:Microsoft.UI.Xaml.Controls"
    >

    <Grid RequestedTheme="Default">
        <Grid.RowDefinitions>
            <RowDefinition Height="1*" />
            <RowDefinition Height="1*"/>
            <RowDefinition Height="8*" />
        </Grid.RowDefinitions>
        <TextBox x:Name="url_text" Grid.Row="0" HorizontalAlignment="Stretch" VerticalAlignment="Stretch" FontSize="24" Margin="5,5,5,5"/>
        <Button x:Name="get_button" Content="Get" Grid.Row="1" HorizontalAlignment="Stretch" VerticalAlignment="Stretch" FontSize="24" Margin="5,5,5,5"/>
        <controls:WebView2 x:Name="MyWebView"  Grid.Row="2" Source="http://www.google.co.jp" HorizontalAlignment="Stretch" VerticalAlignment="Stretch" />

    </Grid>
</Window>
・こんなに簡単にブラウザもどきが使えるようになります。簡単でしょ。
・次はGetをクリックしたらそのページに飛ぶように変更します。
4-3. 他のページに飛べるように変更
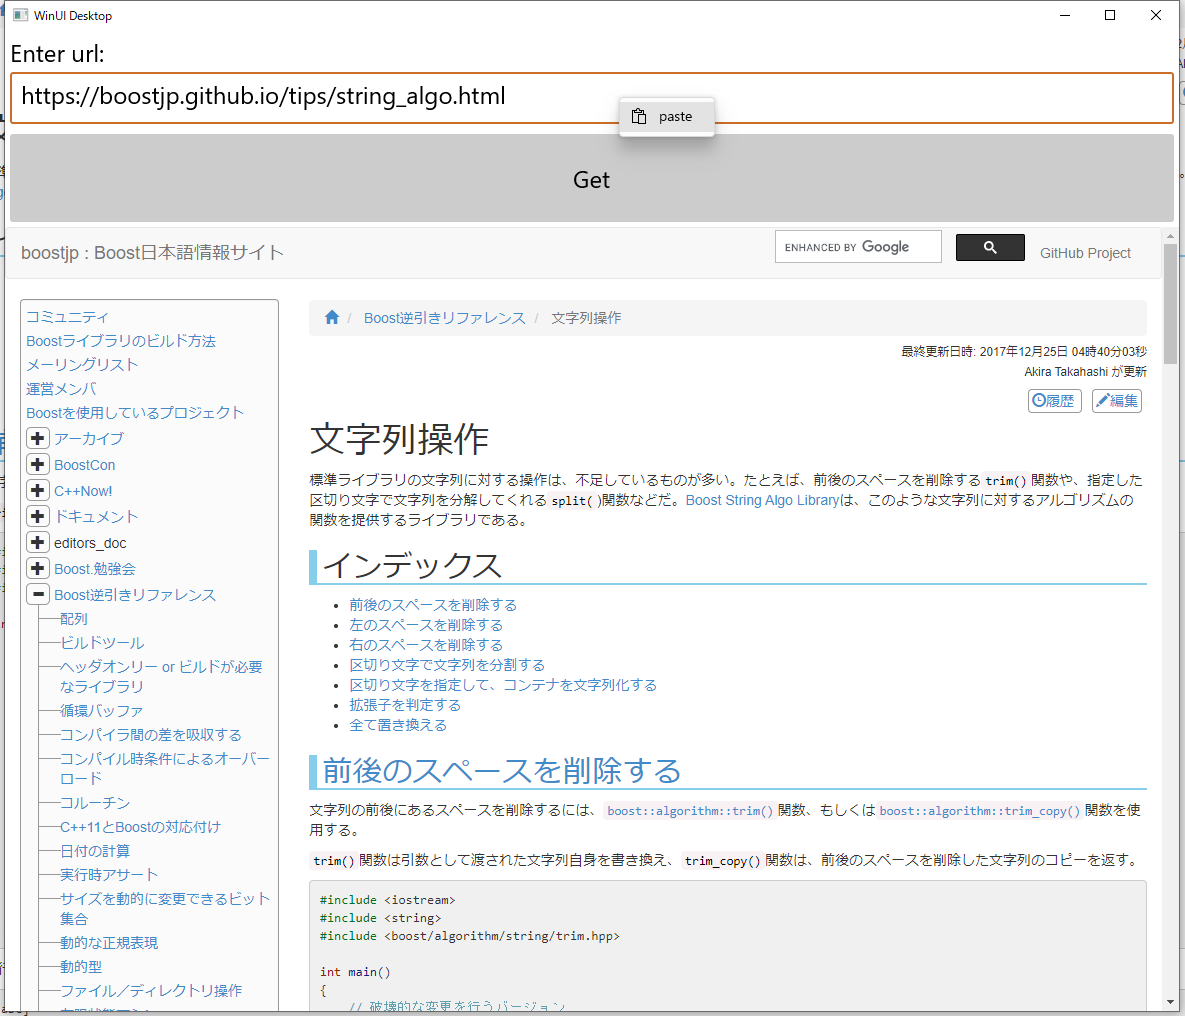
4-3-1. url_textに右クリックでペーストできるようにする
・追加した「url_text」で右クリックをしてみてください。例外が発生して落ちます。まずはこれをなんとかしましょう。
・落ちる原因は右クリックしたときに出るメニューである「Flyout」の設定をしていないからです。
・Blank App(C++/WinRT)でプロジェクトを作成すると「Flyout」も面倒を見てくれるのですが、WinUI 3だと現状では自分で面倒を見なければなりません。
・今回はペーストのみ追加します。それでは実装しましょう。
<Window
    x:Class="winui_webview_1.MainWindow"
    xmlns="http://schemas.microsoft.com/winfx/2006/xaml/presentation"
    xmlns:x="http://schemas.microsoft.com/winfx/2006/xaml"
    xmlns:local="using:winui_webview_1"
    xmlns:d="http://schemas.microsoft.com/expression/blend/2008"
    xmlns:mc="http://schemas.openxmlformats.org/markup-compatibility/2006"
    mc:Ignorable="d"

     xmlns:controls="using:Microsoft.UI.Xaml.Controls"
    >

    <Grid RequestedTheme="Default">
        <Grid.RowDefinitions>
            <RowDefinition Height="1*" />
            <RowDefinition Height="1*"/>
            <RowDefinition Height="8*" />
        </Grid.RowDefinitions>
        <TextBox x:Name="url_text" Grid.Row="0" Header="Enter url:" PlaceholderText="url" HorizontalAlignment="Stretch" VerticalAlignment="Stretch" FontSize="24" Margin="5,5,5,5">
            <TextBox.ContextFlyout>
                <controls:MenuFlyout>
                    <MenuFlyoutItem Text="paste" Icon="Paste" Click="MenuFlyoutItem_Click"></MenuFlyoutItem>
                </controls:MenuFlyout>
            </TextBox.ContextFlyout>
        </TextBox>

        <Button x:Name="get_button" Content="Get" Grid.Row="1" HorizontalAlignment="Stretch" VerticalAlignment="Stretch" FontSize="24" Margin="5,5,5,5"/>
        <controls:WebView2 x:Name="MyWebView"  Grid.Row="2" Source="http://www.google.co.jp" HorizontalAlignment="Stretch" VerticalAlignment="Stretch" />

    </Grid>
</Window>
・<TextBox></TextBox>の間にFlyout関連のタグを追加しています。
・<MenuFlyoutItem>でpasteのみ追加です。
・いつものようにClickまで追加して、その後ダブルクリックで「MenuFlyoutItem_Click」のイベントハンドラを追加しました。
void winrt::winui_webview_1::implementation::MainWindow::MenuFlyoutItem_Click(winrt::Windows::Foundation::IInspectable const& sender, winrt::Microsoft::UI::Xaml::RoutedEventArgs const& e)
{
    url_text().PasteFromClipboard();
}
・イベントハンドラではPasteFromClipboard()を呼んでいるだけです。これでクリップボードからペーストしてくれます。
・ちなみにコピーも追加するときはCopySelectionToClipboard()を呼んであげてください。
・さて、次はget_buttonのイベントハンドラの追加です。
4-3-2.xamlの編集
・いつものようにget_buttonにClickを追加してダブルクリックしてイベントハンドラを追加します。
<Window
    x:Class="winui_webview_1.MainWindow"
    xmlns="http://schemas.microsoft.com/winfx/2006/xaml/presentation"
    xmlns:x="http://schemas.microsoft.com/winfx/2006/xaml"
    xmlns:local="using:winui_webview_1"
    xmlns:d="http://schemas.microsoft.com/expression/blend/2008"
    xmlns:mc="http://schemas.openxmlformats.org/markup-compatibility/2006"
    mc:Ignorable="d"

     xmlns:controls="using:Microsoft.UI.Xaml.Controls"
    >

    <Grid RequestedTheme="Default">
        <Grid.RowDefinitions>
            <RowDefinition Height="1*" />
            <RowDefinition Height="1*"/>
            <RowDefinition Height="8*" />
        </Grid.RowDefinitions>
        <TextBox x:Name="url_text" Grid.Row="0" Header="Enter url:" PlaceholderText="url" HorizontalAlignment="Stretch" VerticalAlignment="Stretch" FontSize="24" Margin="5,5,5,5">
            <TextBox.ContextFlyout>
                <controls:MenuFlyout>
                    <MenuFlyoutItem Text="paste" Icon="Paste" Click="MenuFlyoutItem_Click"></MenuFlyoutItem>
                </controls:MenuFlyout>
            </TextBox.ContextFlyout>
        </TextBox>

        <Button x:Name="get_button" Click="get_button_Click" Content="Get" Grid.Row="1" HorizontalAlignment="Stretch" VerticalAlignment="Stretch" FontSize="24" Margin="5,5,5,5"/>
        <controls:WebView2 x:Name="MyWebView"  Grid.Row="2" Source="http://www.google.co.jp" HorizontalAlignment="Stretch" VerticalAlignment="Stretch" />

    </Grid>
</Window>
4-3-3.MainWindow.xaml.h
・ここにはもう追加されているので、何も追加しません。
・注目して欲しいのは#pragma push_macro("GetCurrentTime")~#pragma pop_macro("GetCurrentTime")の部分。
・MFC等からC++/WinRTを利用しようとすると、「GetCurrentTime」の名前が衝突してコンパイルできませんが、これで回避していますね。そのうちその辺も記事にできるかなぁ・・・
# pragma once

# pragma push_macro("GetCurrentTime")
# undef GetCurrentTime

# include "MainWindow.g.h"

# pragma pop_macro("GetCurrentTime")

namespace winrt::winui_webview_1::implementation
{
    struct MainWindow : MainWindowT<MainWindow>
    {
        MainWindow();
        void get_button_Click(winrt::Windows::Foundation::IInspectable const& sender, winrt::Microsoft::UI::Xaml::RoutedEventArgs const& e);
        void MenuFlyoutItem_Click(winrt::Windows::Foundation::IInspectable const& sender, winrt::Microsoft::UI::Xaml::RoutedEventArgs const& e);
    };
}

namespace winrt::winui_webview_1::factory_implementation
{
    struct MainWindow : MainWindowT<MainWindow, implementation::MainWindow>
    {
    };
}
4-3-4.MainWindow.xaml.cpp
・追加されたget_button_Click関数に追記します。
・winrt::Windows::Foundation::Uri型をSourceに渡せばURLを開いてくれます。
・urlがhttpもしくはhttpsから始まらないと例外がでるのでtry~catchを使っています。
・試しに書いたsssが残っているけど、ま、いいかw
# include "pch.h"
# include "MainWindow.xaml.h"
# if __has_include("MainWindow.g.cpp")
# include "MainWindow.g.cpp"
# endif

using namespace winrt;
using namespace Microsoft::UI::Xaml;

// To learn more about WinUI, the WinUI project structure,
// and more about our project templates, see: http://aka.ms/winui-project-info.

namespace winrt::winui_webview_1::implementation
{
    MainWindow::MainWindow()
    {
        InitializeComponent();
    }
}

void winrt::winui_webview_1::implementation::MainWindow::get_button_Click(winrt::Windows::Foundation::IInspectable const& sender, winrt::Microsoft::UI::Xaml::RoutedEventArgs const& e)
{
    winrt::hstring sss = url_text().Text();


    try
    {
        if (sss.size() == 0)
        {
            MessageBox(NULL, L"urlに何もないよ", L"urlに何もないよ", MB_OK);
            return;
        }

        winrt::Windows::Foundation::Uri uri(url_text().Text());
        MyWebView().Source(uri);
    }
    catch (winrt::hresult_error const& e)
    {
        winrt::hstring err = e.message();

        MessageBox(NULL, err.c_str(),L"えらー", MB_OK);
    }
}


void winrt::winui_webview_1::implementation::MainWindow::MenuFlyoutItem_Click(winrt::Windows::Foundation::IInspectable const& sender, winrt::Microsoft::UI::Xaml::RoutedEventArgs const& e)
{
    url_text().PasteFromClipboard();
}
・これで下の画像のような感じで、とりあえず例外で落ちないブラウザもどきの完成です。
・結構簡単でしょう?
・詳しいWInUIの説明はWindows UI ライブラリ (WinUI)等を参考にしてください。
・WebView2についてはMicrosoft Edge WebView2 の概要等を参考にしてください。
githubも置いておきます。
次は何をしようかなぁ・・・
