1.今回やること
・前回は画像を表示するアプリを作成しましたが表示するだけでは物足りない。
・と言うことで画像処理を行うアプリを作成しようかと思い、今回作成します。
・自前で画像処理を行っても良いのですが、色々大変なので、今回はOpenCVを使用して画像処理を行うアプリを作成します。
・画像処理といっても、実装するのは拡大と縮小のみです。それ以上に色々やりたい場合はご自身で実装してみてください。OpenCVに関しては書籍やHPなどすでに色々なものがありますので。chatGPTで聞いてもかなり良いコードを吐いてくれます。
・OpenCVを使用して画像を表示するときは通常HighGUIネイティブのGUIを使用して、別ウインドウへ表示させるのが一般的な方法です。
・ですが、今回はアプリのウインドウ領域へ表示させるようにしてみます。
・やることはcv::MatをBitmapImageへ変換して表示させるだけと簡単です。
2.OpenCVのダウンロード
・OpenCVをビルドする、カスタマイズすることが目的ではないので、OpenCVはダウンロードしたそのままを使用します。
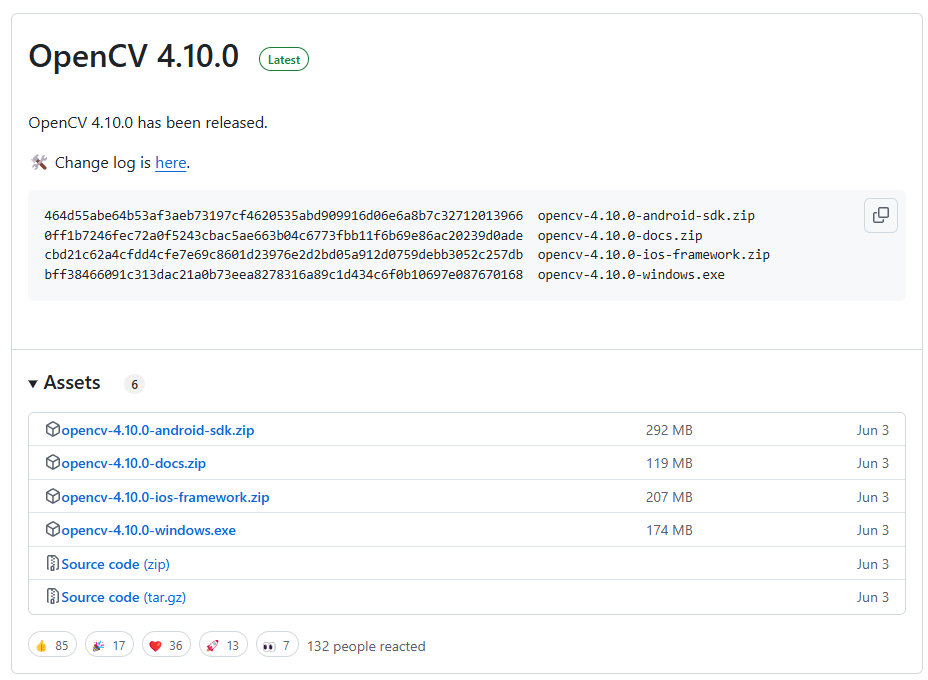
・githubから最新版を落としてきます。
・現在の最新版は4.10.0なので、opencv-4.10.0-windows.exeをダウンロードして適当なフォルダへ解凍します。
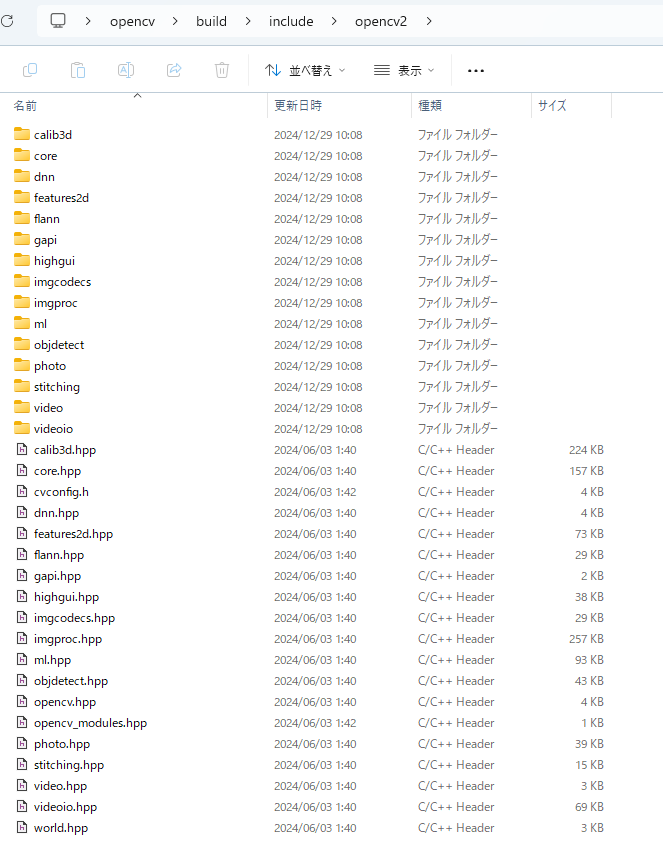
・必要なのは「build」フォルダの中にある以下のファイルです。
①「include」フォルダの中にある各種ヘッダ
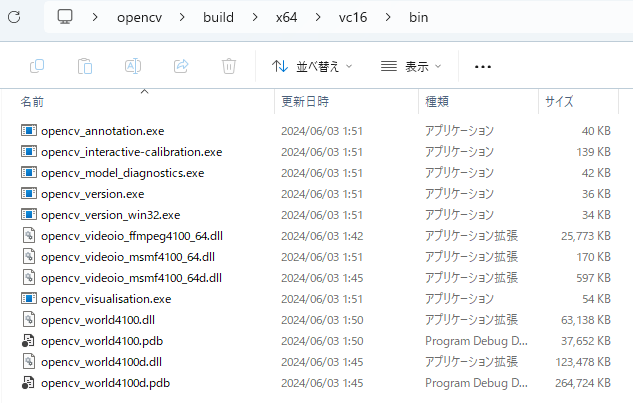
②「x64\vc16\bin」フォルダにある各種dll
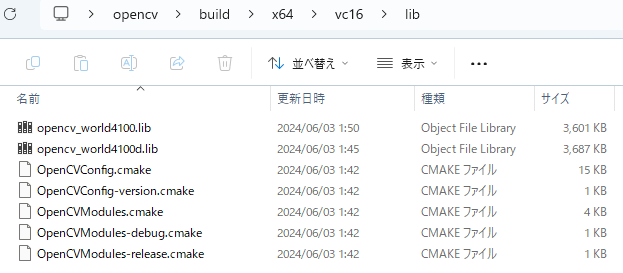
③「x64\vc16\lib」フォルダにあるlib
3.新規作成と下準備
3-1.プロジェクトの新規作成
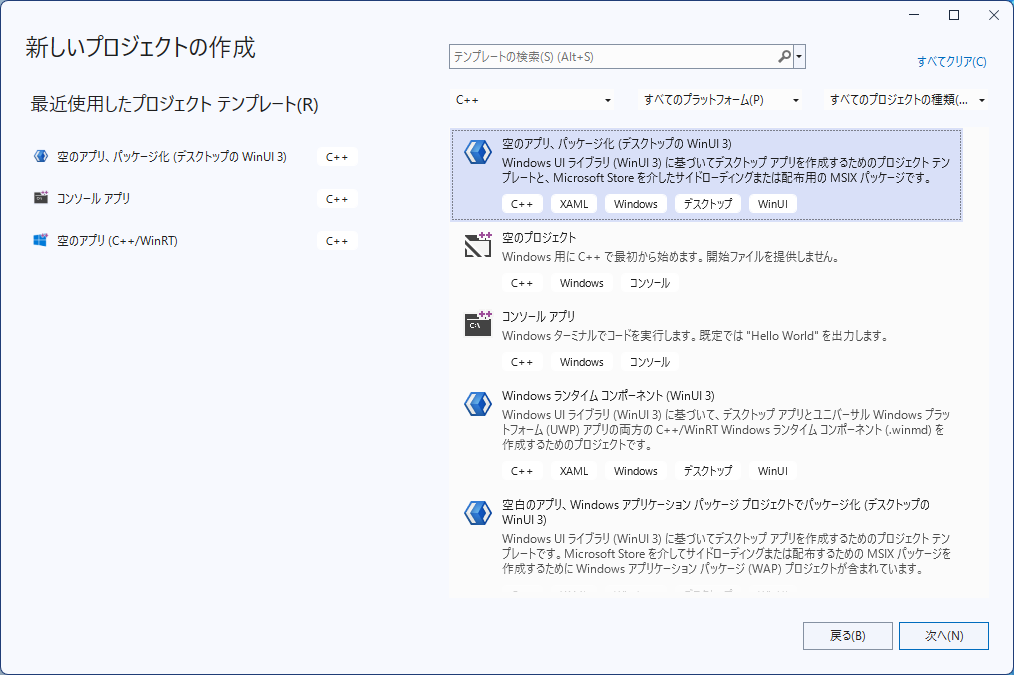
・Visual Studio 2022の「新しいプロジェクトの作成」→「空のアプリ、パッケージ化(デスクトップのWinUI 3)」から、名前を「WinUI_OpenCV」にして新しいプロジェクトを作成します。
3-2.「.vcxproj」を編集する。
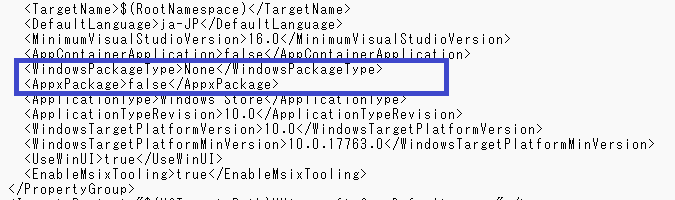
・前回同様<AppxPackage>タグを「true」から「false」へ変更し、<WindowsPackageType>None</WindowsPackageType>」タグを追加し、インストールせずに起動可能へ変更します。詳しくはこちら。
3-3.MainWindowからいらない記述を削除する
・「MainWindow.xaml」「MainWindow.idl」「MainWindow.xaml.h」「MainWindow.xaml.cpp」にはボタンやMyPropertyといったいらないサンプルが含まれているのでそれらを削除します。
3-4.アクティブソリューションの設定をReleaseおよびx64にする
・DebugとReleaseでは使用するライブラリファイルが異なります。
・また、今回ダウンロードしてきたOpenCVのファイルはx64用です。
・今回はそこまで難しいことをしないので、Release用のライブラリファイルを使用して開発を進めます。
・このため、Release&x64へ設定します。
3-5.インクルードファイルとライブラリファイルのパスおよび追加の依存ファイルの設定を行う
・メニューの「プロジェクト」→「WinUI_OpenCVのプロパティ」を選び以下の設定を行います。
①「追加のインクルードディレクトリ」へさっきダウンロードしてきたOpenCVの「include」フォルダを追加
②「追加のライブラリディレクトリ」へOpenCVの「x64\vc16\lib」フォルダを追加
③「追加の依存ファイル」へ「opencv_world4100.lib」を追加
④プロジェクトフォルダ内へ「x64\vc16\bin」にある「opencv_world4100.dll」をコピペ
・ここまで出来たら、下準備まで終了です。
4.見た目について
・見た目は以下のようにしていきます。
①上にメニューバーを配置、下にImageを配置
②メニューバーには「ファイル」「画像変換」
③ファイルに「開く」「終了」、画像変換に「2倍に拡大」「1/2に縮小」
④メニューバーの下に画像を表示
⑤拡大縮小がわかるようにウインドウサイズを変更する
・方針が決まったところで、実装していきます。
5.見た目(MainWindow.xaml)の編集
・4.の①~⑤に加えて、以下のように編集しました
⑥Imageの名前は「_showImage」
⑦clickの実装まで行う
⑧MenuBarにキーボードショートカットを割り当てない
・このため、MainWindow.xamlは以下となります。
<?xml version="1.0" encoding="utf-8"?>
<Window
    x:Class="WinUI_OpenCV.MainWindow"
    xmlns="http://schemas.microsoft.com/winfx/2006/xaml/presentation"
    xmlns:x="http://schemas.microsoft.com/winfx/2006/xaml"
    xmlns:local="using:WinUI_OpenCV"
    xmlns:d="http://schemas.microsoft.com/expression/blend/2008"
    xmlns:mc="http://schemas.openxmlformats.org/markup-compatibility/2006"
    mc:Ignorable="d"
    Title="WinUI_OpenCV">

    <Grid RequestedTheme="Default" >

        <Grid.RowDefinitions>
            <RowDefinition Height="auto" />
            <RowDefinition Height="1*"/>
        </Grid.RowDefinitions>

        <Grid Grid.Row="0">
            <MenuBar x:Name="menuBar" Background="LightGray" BorderBrush="Black" BorderThickness="1" CornerRadius="5">

                <MenuBarItem Title="ファイル">
                    <MenuFlyoutItem Text="開く" Click="Open_Click"/>
                    <MenuFlyoutItem Text="終了" Click="Exit_Click"/>
                </MenuBarItem>

                <MenuBarItem Title="画像変換">
                    <MenuFlyoutItem Text="2倍に拡大" Click="Enlarge2Times_Click"/>
                    <MenuFlyoutItem Text="1/2に縮小" Click="Reduce2Times_Click"/>
                </MenuBarItem>

            </MenuBar>
        </Grid>

        <Grid Grid.Row="1">
            <Image x:Name="_showImage" >
            </Image>
        </Grid>

    </Grid>

</Window>
6.実装しよう
6-1.「開く」からファイルピッカーを表示するまでの実装
①GetHWND関数を作成し、ウインドウハンドルを取得出来るようにする。
②「開く」でファイルピッカーを表示し、「jpg,bmp,png,gif」を探す
まで実装します
・①はほぼ前回のコピペで。詳しくはこちら
・②はほぼこちらですね。非同期関数を実装するので、Open_Click関数は非同期化します。
・画像ファイルは後でcv::Matで開くので、ここではパスの取得まで実装します。
・ついでなのでタイトルも変更とExit_Click関数も実装しておきましょう。
・それでは実装しましょう。
#pragma once

#include "MainWindow.g.h"

namespace winrt::WinUI_OpenCV::implementation
{
    struct MainWindow : MainWindowT<MainWindow>
    {
        MainWindow()
        {
            //6-1で追加。タイトル変更
			Title(L"WinUI_OpenCV");
        }

        //6-1で追加。ウインドウハンドルの取得
        HWND GetHWND();


        //イベントハンドラ

		//6-1で変更。非同期化
        winrt::Windows::Foundation::IAsyncAction Open_Click(winrt::Windows::Foundation::IInspectable const& sender, winrt::Microsoft::UI::Xaml::RoutedEventArgs const& e);

        void Exit_Click(winrt::Windows::Foundation::IInspectable const& sender, winrt::Microsoft::UI::Xaml::RoutedEventArgs const& e);
        void Enlarge2Times_Click(winrt::Windows::Foundation::IInspectable const& sender, winrt::Microsoft::UI::Xaml::RoutedEventArgs const& e);
        void Reduce2Times_Click(winrt::Windows::Foundation::IInspectable const& sender, winrt::Microsoft::UI::Xaml::RoutedEventArgs const& e);
    };
}

namespace winrt::WinUI_OpenCV::factory_implementation
{
    struct MainWindow : MainWindowT<MainWindow, implementation::MainWindow>
    {
    };
}
#include "pch.h"
#include "MainWindow.xaml.h"
#if __has_include("MainWindow.g.cpp")
#include "MainWindow.g.cpp"
#endif

using namespace winrt;
using namespace Microsoft::UI::Xaml;

//6-1で追加。::IWindowNativeと::IInitializeWithWindowを使うのにmicrosoft.ui.xaml.window.h、Shobjidl.hが必要
#include <microsoft.ui.xaml.window.h>
#include <Shobjidl.h>

//6-1で追加。FilePickerを使用するのにwinrt/Windows.Storage.Pickers.hが必要
#include <winrt/Windows.Storage.Pickers.h>

namespace winrt::WinUI_OpenCV::implementation
{

}

//6-1で追加。ウインドウハンドルの取得
HWND winrt::WinUI_OpenCV::implementation::MainWindow::GetHWND()
{
	auto windowNative{ this->m_inner.as<::IWindowNative>() };
	HWND hWnd{ 0 };
	windowNative->get_WindowHandle(&hWnd);

	return hWnd;
}

winrt::Windows::Foundation::IAsyncAction winrt::WinUI_OpenCV::implementation::MainWindow::Open_Click(winrt::Windows::Foundation::IInspectable const& sender, winrt::Microsoft::UI::Xaml::RoutedEventArgs const& e)
{
	//6-1で追加。FileOpenPickerを使用してファイルを開く
	winrt::Windows::Storage::Pickers::FileOpenPicker imgpicker;
	imgpicker.as<::IInitializeWithWindow>()->Initialize(this->GetHWND());
	imgpicker.FileTypeFilter().Append(L".jpg");
	imgpicker.FileTypeFilter().Append(L".png");
	imgpicker.FileTypeFilter().Append(L".bmp");
	imgpicker.FileTypeFilter().Append(L".gif");
	imgpicker.SuggestedStartLocation(winrt::Windows::Storage::Pickers::PickerLocationId::Desktop);

	auto&& imgfile = co_await imgpicker.PickSingleFileAsync();

	//6-1で追加。ファイルが選択されなかった場合はco_returnで関数を終了
	if (!imgfile)
	{
		co_return;
	}

	//6-1で追加。ファイルパスの取得
	winrt::hstring imgpath = imgfile.Path();

}


void winrt::WinUI_OpenCV::implementation::MainWindow::Exit_Click(winrt::Windows::Foundation::IInspectable const& sender, winrt::Microsoft::UI::Xaml::RoutedEventArgs const& e)
{
	//6-1で追加。アプリの終了
	Application::Current().Exit();
}


void winrt::WinUI_OpenCV::implementation::MainWindow::Enlarge2Times_Click(winrt::Windows::Foundation::IInspectable const& sender, winrt::Microsoft::UI::Xaml::RoutedEventArgs const& e)
{

}


void winrt::WinUI_OpenCV::implementation::MainWindow::Reduce2Times_Click(winrt::Windows::Foundation::IInspectable const& sender, winrt::Microsoft::UI::Xaml::RoutedEventArgs const& e)
{

}
6-2.cv::Matによる画像の読み込み
・まずは読み込んだcv::Matを保存するメンバを_loadImgとして追加。
・画像が読めたか確認するために、imshowで画像の表示も追加
・Windowsではwstringが標準ですが、OpenCVではstring(shift-jis)が標準です。
・このため、相互変換できるようにそれぞれの関数を作成します。
・Open_Click関数にMatによる読み込みも追加します。
・それでは実装して表示出来るか確認しましょう。
#pragma once

#include "MainWindow.g.h"

//6-2で追加。OpenCVのヘッダーをインクルード
#include <opencv2/opencv.hpp>

namespace winrt::WinUI_OpenCV::implementation
{
    struct MainWindow : MainWindowT<MainWindow>
    {
        MainWindow()
        {
            //6-1で追加。タイトル変更
			Title(L"WinUI_OpenCV");
        }

        //6-1で追加。ウインドウハンドルの取得
        HWND GetHWND();

		//6-2で追加。wstringからstringへの変換
		std::string WStringToString(const std::wstring& utf16);
		//6-2で追加。stringからwstringへの変換
		std::wstring StringToWString(const std::string& jisstr);


        //イベントハンドラ

		//6-1で変更。非同期化
        winrt::Windows::Foundation::IAsyncAction Open_Click(winrt::Windows::Foundation::IInspectable const& sender, winrt::Microsoft::UI::Xaml::RoutedEventArgs const& e);

        void Exit_Click(winrt::Windows::Foundation::IInspectable const& sender, winrt::Microsoft::UI::Xaml::RoutedEventArgs const& e);
        void Enlarge2Times_Click(winrt::Windows::Foundation::IInspectable const& sender, winrt::Microsoft::UI::Xaml::RoutedEventArgs const& e);
        void Reduce2Times_Click(winrt::Windows::Foundation::IInspectable const& sender, winrt::Microsoft::UI::Xaml::RoutedEventArgs const& e);

	private:
		//6-2で追加。画像データ保存メンバ
        cv::Mat _loadImg;

    };
}

namespace winrt::WinUI_OpenCV::factory_implementation
{
    struct MainWindow : MainWindowT<MainWindow, implementation::MainWindow>
    {
    };
}
#include "pch.h"
#include "MainWindow.xaml.h"
#if __has_include("MainWindow.g.cpp")
#include "MainWindow.g.cpp"
#endif
using namespace winrt;
using namespace Microsoft::UI::Xaml;
//6-1で追加。::IWindowNativeと::IInitializeWithWindowを使うのにmicrosoft.ui.xaml.window.h、Shobjidl.hが必要
#include <microsoft.ui.xaml.window.h>
#include <Shobjidl.h>
//6-1で追加。FilePickerを使用するのにwinrt/Windows.Storage.Pickers.hが必要
#include <winrt/Windows.Storage.Pickers.h>
namespace winrt::WinUI_OpenCV::implementation
{
}
//6-1で追加。ウインドウハンドルの取得
HWND winrt::WinUI_OpenCV::implementation::MainWindow::GetHWND()
{
auto windowNative{ this->m_inner.as<::IWindowNative>() };
HWND hWnd{ 0 };
windowNative->get_WindowHandle(&hWnd);
return hWnd;
}
//6-2で追加。wstringからstringへの変換
std::string winrt::WinUI_OpenCV::implementation::MainWindow::WStringToString(const std::wstring& utf16)
{
std::string jisstr;
int jissize = WideCharToMultiByte(CP_ACP, 0, utf16.c_str(), -1, nullptr, 0, nullptr, nullptr);
if (jissize > 0)
{
jisstr.resize(jissize);
WideCharToMultiByte(CP_ACP, 0, utf16.c_str(), -1, jisstr.data(), jissize, nullptr, nullptr);
}
return jisstr;
}
//6-2で追加。stringからwstringへの変換
std::wstring winrt::WinUI_OpenCV::implementation::MainWindow::StringToWString(const std::string& jisstr)
{
std::wstring utf16;
int utf16size = MultiByteToWideChar(CP_ACP, 0, jisstr.c_str(), -1, nullptr, 0);
if (utf16size > 0)
{
utf16.resize(utf16size);
MultiByteToWideChar(CP_ACP, 0, jisstr.c_str(), -1, utf16.data(), utf16size);
}
return utf16;
}
winrt::Windows::Foundation::IAsyncAction winrt::WinUI_OpenCV::implementation::MainWindow::Open_Click(winrt::Windows::Foundation::IInspectable const& sender, winrt::Microsoft::UI::Xaml::RoutedEventArgs const& e)
{
//6-1で追加。FileOpenPickerを使用してファイルを開く
winrt::Windows::Storage::Pickers::FileOpenPicker imgpicker;
imgpicker.as<::IInitializeWithWindow>()->Initialize(this->GetHWND());
imgpicker.FileTypeFilter().Append(L".jpg");
imgpicker.FileTypeFilter().Append(L".png");
imgpicker.FileTypeFilter().Append(L".bmp");
imgpicker.FileTypeFilter().Append(L".gif");
imgpicker.SuggestedStartLocation(winrt::Windows::Storage::Pickers::PickerLocationId::Desktop);
auto&& imgfile = co_await imgpicker.PickSingleFileAsync();
//6-1で追加。ファイルが選択されなかった場合はco_returnで関数を終了
if (!imgfile)
{
co_return;
}
//6-1で追加。ファイルパスの取得
std::wstring imgpath = imgfile.Path().c_str();
//6-2で追加。wstringからstringへの変換
std::string utf8path = WStringToString(imgpath);
//6-2で追加。OpenCVで画像を読み込む
_loadImg = cv::imread(utf8path);
//6-2で追加。画像データを表示
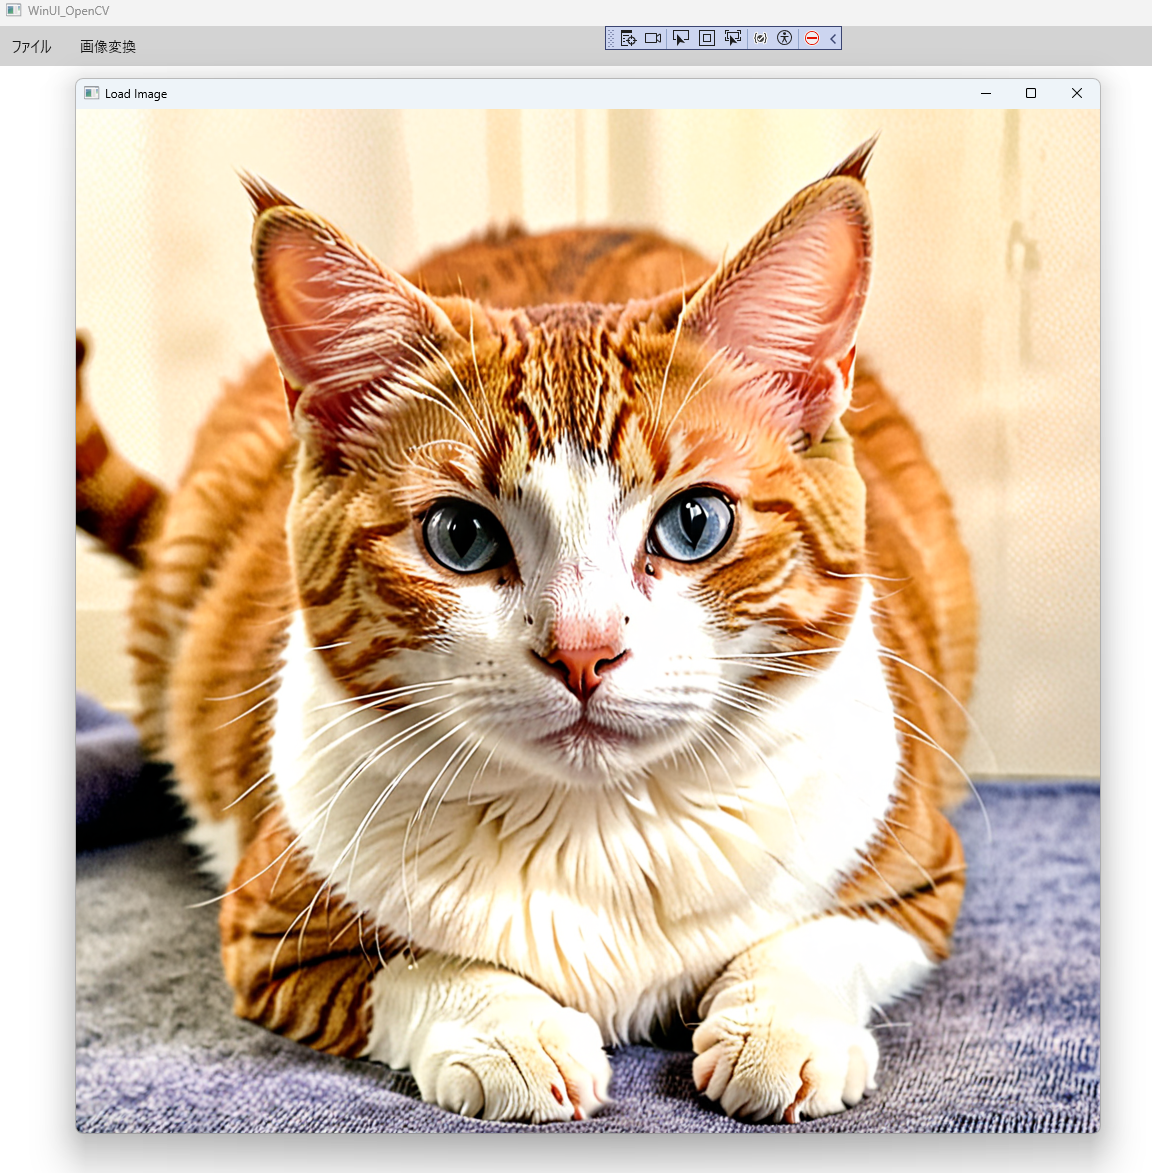
cv::imshow("Load Image", _loadImg);
}
void winrt::WinUI_OpenCV::implementation::MainWindow::Exit_Click(winrt::Windows::Foundation::IInspectable const& sender, winrt::Microsoft::UI::Xaml::RoutedEventArgs const& e)
{
//6-1で追加。アプリの終了
Application::Current().Exit();
}
void winrt::WinUI_OpenCV::implementation::MainWindow::Enlarge2Times_Click(winrt::Windows::Foundation::IInspectable const& sender, winrt::Microsoft::UI::Xaml::RoutedEventArgs const& e)
{
}
void winrt::WinUI_OpenCV::implementation::MainWindow::Reduce2Times_Click(winrt::Windows::Foundation::IInspectable const& sender, winrt::Microsoft::UI::Xaml::RoutedEventArgs const& e)
{
}
・ファイル→開くで適当なファイルを表示させると以下のようになります。
6-3.MatからBitmapへの変換と表示
・いよいよ本番のMatからBitmapへ変換する関数を実装します。
・名前はMatToBitmapAsync()として、やり方は以下となります。
①imencodeを使用してバイト配列へエンコード
②InMemoryRandomAccessStreamを作成
③②のInMemoryRandomAccessStreamに関連付けたIOutputStreamを作成
④③のIOutputStreamに関連付けたDataWriterを作成
⑤④のDataWriterを使用してストリームへデータを書き込む
⑥②で作成したRandomAccessStreamの位置を0へ戻す。
⑦SetSourceAsyncでBitmapへ変換
・DataWriterのコンストラクタにIOutputStreamが必要で、SetSourceAsyncにRandomAccessStreamが必要になるので変換また変換とやっていきます。
・Bitmapのサイズに応じたウインドウサイズの変更もここで行います。
・名前はResizeWindowToImage()として、やり方は以下
①ウインドウIDからAppWindowを作成。
②Bitmapのサイズを取得+高さにはmenuの高さ
③AppWindowのResize()を使用してウインドウサイズを変更
・後はOpen_Click()でMatToBitmapAsync()とResizeWindowToImage()を呼び出して、_showImageを変更するとWinUI3のウインドウ内へ指定した画像が表示されます。
・それでは実装しましょう。
#pragma once

#include "MainWindow.g.h"

//6-2で追加。OpenCVのヘッダーをインクルード
#include <opencv2/opencv.hpp>

namespace winrt::WinUI_OpenCV::implementation
{
    struct MainWindow : MainWindowT<MainWindow>
    {
        MainWindow()
        {
            //6-1で追加。タイトル変更
			Title(L"WinUI_OpenCV");
        }

        //6-1で追加。ウインドウハンドルの取得
        HWND GetHWND();

		//6-2で追加。wstringからstringへの変換
		std::string WStringToString(const std::wstring& utf16);
		//6-2で追加。stringからwstringへの変換
		std::wstring StringToWString(const std::string& jisstr);

		//6-3で追加。MatからBitmapImageへの変換
        winrt::Windows::Foundation::IAsyncOperation<winrt::Microsoft::UI::Xaml::Media::Imaging::BitmapImage> MatToBitmapAsync(const cv::Mat& mat);

		//6-3で追加。ウインドウサイズを画像サイズに合わせる
        void ResizeWindowToImage(const winrt::Microsoft::UI::Xaml::Media::Imaging::BitmapImage& bitmap);

        //イベントハンドラ

		//6-1で変更。非同期化
        winrt::Windows::Foundation::IAsyncAction Open_Click(winrt::Windows::Foundation::IInspectable const& sender, winrt::Microsoft::UI::Xaml::RoutedEventArgs const& e);

        void Exit_Click(winrt::Windows::Foundation::IInspectable const& sender, winrt::Microsoft::UI::Xaml::RoutedEventArgs const& e);
        void Enlarge2Times_Click(winrt::Windows::Foundation::IInspectable const& sender, winrt::Microsoft::UI::Xaml::RoutedEventArgs const& e);
        void Reduce2Times_Click(winrt::Windows::Foundation::IInspectable const& sender, winrt::Microsoft::UI::Xaml::RoutedEventArgs const& e);

	private:
		//6-2で追加。画像データ保存メンバ
        cv::Mat _loadImg;

    };
}

namespace winrt::WinUI_OpenCV::factory_implementation
{
    struct MainWindow : MainWindowT<MainWindow, implementation::MainWindow>
    {
    };
}
#include "pch.h"
#include "MainWindow.xaml.h"
#if __has_include("MainWindow.g.cpp")
#include "MainWindow.g.cpp"
#endif

using namespace winrt;
using namespace Microsoft::UI::Xaml;

//6-1で追加。::IWindowNativeと::IInitializeWithWindowを使うのにmicrosoft.ui.xaml.window.h、Shobjidl.hが必要
#include <microsoft.ui.xaml.window.h>
#include <Shobjidl.h>

//6-1で追加。FilePickerを使用するのにwinrt/Windows.Storage.Pickers.hが必要
#include <winrt/Windows.Storage.Pickers.h>

//6-3で追加。InMemoryRandomAccessStreamを使用するのにwinrt/Windows.Storage.Streams.hが必要
#include <winrt/Windows.Storage.Streams.h>

//6-3で追加。BitmapImageを使用するのにwinrt/Microsoft.UI.Xaml.Media.Imaging.hが必要
#include <winrt/Microsoft.UI.Xaml.Media.Imaging.h>

//6-3で追加GetWindowIdFromWindowを使用するのにwinrt/Microsoft.ui.interop.hとwinrt/Microsoft.UI.Windowing.hが必要
#include <winrt/Microsoft.UI.Interop.h>
#include <winrt/Microsoft.UI.Windowing.h>

//6-3で追加。Windows.Graphics.SizeInt32を使用するのにwinrt/Windows.Graphics.hが必要
#include <winrt/Windows.Gaming.Input.h>


namespace winrt::WinUI_OpenCV::implementation
{

}

//6-1で追加。ウインドウハンドルの取得
HWND winrt::WinUI_OpenCV::implementation::MainWindow::GetHWND()
{
	auto windowNative{ this->m_inner.as<::IWindowNative>() };
	HWND hWnd{ 0 };
	windowNative->get_WindowHandle(&hWnd);

	return hWnd;
}

//6-2で追加。wstringからstringへの変換
std::string winrt::WinUI_OpenCV::implementation::MainWindow::WStringToString(const std::wstring& utf16)
{
	std::string jisstr;
	int jissize = WideCharToMultiByte(CP_ACP, 0, utf16.c_str(), -1, nullptr, 0, nullptr, nullptr);
	if (jissize > 0)
	{
		jisstr.resize(jissize);
		WideCharToMultiByte(CP_ACP, 0, utf16.c_str(), -1, jisstr.data(), jissize, nullptr, nullptr);
	}
	return jisstr;
}

//6-2で追加。stringからwstringへの変換
std::wstring winrt::WinUI_OpenCV::implementation::MainWindow::StringToWString(const std::string& jisstr)
{
	std::wstring utf16;
	int utf16size = MultiByteToWideChar(CP_ACP, 0, jisstr.c_str(), -1, nullptr, 0);
	if (utf16size > 0)
	{
		utf16.resize(utf16size);
		MultiByteToWideChar(CP_ACP, 0, jisstr.c_str(), -1, utf16.data(), utf16size);
	}
	return utf16;
}

//6-3で追加。MatからBitmapImageへの変換
winrt::Windows::Foundation::IAsyncOperation<winrt::Microsoft::UI::Xaml::Media::Imaging::BitmapImage> winrt::WinUI_OpenCV::implementation::MainWindow::MatToBitmapAsync(const cv::Mat& mat)
{
	if (mat.empty())
		co_return nullptr;

	//Matから変換されるバイト配列格納用
	std::vector<uchar> imagebuf;

	//①imencodeを使用してバイト配列へエンコード。今回はbmp形式
	cv::imencode(".bmp", mat, imagebuf);

	//②InMemoryRandomAccessStreamを作成
	winrt::Windows::Storage::Streams::InMemoryRandomAccessStream rcstream;

	//③②のInMemoryRandomAccessStreamに関連付けたIOutputStreamを作成
	auto outputstream = rcstream.GetOutputStreamAt(0);

	//④③のIOutputStreamに関連付けたDataWriterを作成
	winrt::Windows::Storage::Streams::DataWriter writer(outputstream);

	//⑤④のDataWriterを使用してストリームへデータを書き込む
	writer.WriteBytes(winrt::array_view<const uint8_t>(imagebuf.data(), imagebuf.data() + imagebuf.size()));

	//書き込みを確定&ストリームをフラッシュ
	co_await writer.StoreAsync();
	co_await outputstream.FlushAsync();

	//⑥②で作成したRandomAccessStreamの位置を0へ戻す
	rcstream.Seek(0);

	//⑦SetSourceAsyncでBitmapへ変換
	winrt::Microsoft::UI::Xaml::Media::Imaging::BitmapImage bitmap;
	co_await bitmap.SetSourceAsync(rcstream);

	co_return bitmap;
}

//6-3で追加。ウインドウサイズを画像サイズに合わせる
void winrt::WinUI_OpenCV::implementation::MainWindow::ResizeWindowToImage(const winrt::Microsoft::UI::Xaml::Media::Imaging::BitmapImage& bitmap)
{
	//①ウインドウIDからAppWindowを作成。
	auto wndid = Microsoft::UI::GetWindowIdFromWindow(GetHWND());
	auto appwnd = Microsoft::UI::Windowing::AppWindow::GetFromWindowId(wndid);

	//②Bitmapのサイズを取得+高さにはmenuの高さ
	auto menuheight = _menuBar().ActualHeight();
	winrt::Windows::Graphics::SizeInt32 imgsize;
	imgsize.Width = bitmap.PixelWidth();
	imgsize.Height = bitmap.PixelHeight() + menuheight;

	//③AppWindowのResize()を使用してウインドウサイズを変更
	appwnd.Resize(imgsize);
}

winrt::Windows::Foundation::IAsyncAction winrt::WinUI_OpenCV::implementation::MainWindow::Open_Click(winrt::Windows::Foundation::IInspectable const& sender, winrt::Microsoft::UI::Xaml::RoutedEventArgs const& e)
{
	//6-1で追加。FileOpenPickerを使用してファイルを開く
	winrt::Windows::Storage::Pickers::FileOpenPicker imgpicker;
	imgpicker.as<::IInitializeWithWindow>()->Initialize(this->GetHWND());
	imgpicker.FileTypeFilter().Append(L".jpg");
	imgpicker.FileTypeFilter().Append(L".png");
	imgpicker.FileTypeFilter().Append(L".bmp");
	imgpicker.FileTypeFilter().Append(L".gif");
	imgpicker.SuggestedStartLocation(winrt::Windows::Storage::Pickers::PickerLocationId::Desktop);

	auto&& imgfile = co_await imgpicker.PickSingleFileAsync();

	//6-1で追加。ファイルが選択されなかった場合はco_returnで関数を終了
	if (!imgfile)
	{
		co_return;
	}

	//6-1で追加。ファイルパスの取得
	std::wstring imgpath = imgfile.Path().c_str();

	//6-2で追加。wstringからstringへの変換
	std::string utf8path = WStringToString(imgpath);

	//6-2で追加。OpenCVで画像を読み込む
	_loadImg = cv::imread(utf8path);

	//6-2で追加。画像データを表示
	cv::imshow("Load Image", _loadImg);

	//6-3で追加。MatからBitmapImageへ変換
	auto bitmap = co_await MatToBitmapAsync(_loadImg);

	//6-3で追加。ウインドウサイズを画像サイズに合わせる
	ResizeWindowToImage(bitmap);

	//6-3で追加。画像を表示
	_showImage().Source(bitmap);

}


void winrt::WinUI_OpenCV::implementation::MainWindow::Exit_Click(winrt::Windows::Foundation::IInspectable const& sender, winrt::Microsoft::UI::Xaml::RoutedEventArgs const& e)
{
	//6-1で追加。アプリの終了
	Application::Current().Exit();
}


void winrt::WinUI_OpenCV::implementation::MainWindow::Enlarge2Times_Click(winrt::Windows::Foundation::IInspectable const& sender, winrt::Microsoft::UI::Xaml::RoutedEventArgs const& e)
{

}


void winrt::WinUI_OpenCV::implementation::MainWindow::Reduce2Times_Click(winrt::Windows::Foundation::IInspectable const& sender, winrt::Microsoft::UI::Xaml::RoutedEventArgs const& e)
{

}
ここまで出来たら以下のようになります。
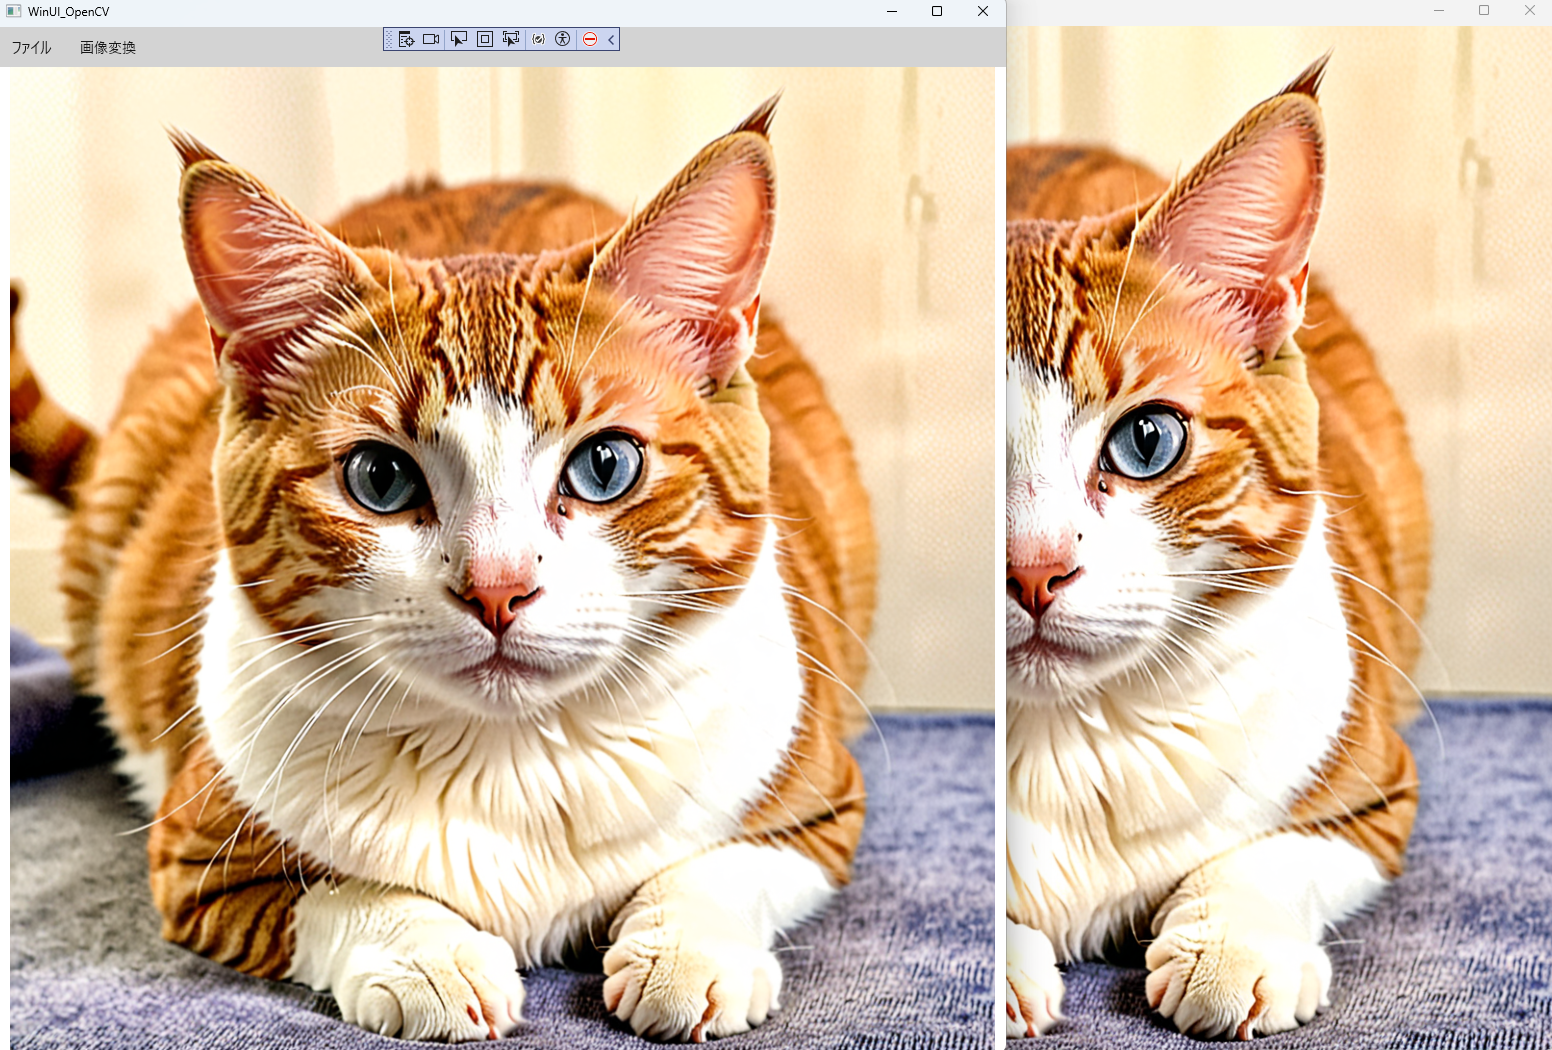
6-4.画像変換の作成
・最後に本題の画像変換部分を作成しましょう。
・とはいっても、大きさの変更だけなのでResizeImage()を実装してイベントハンドラから呼び出すだけです。
・ResizeImage()ではOpenCVのResize()を使用して画像の大きさを変更します。
・今までお世話になったimshow()はコメントアウトして消してしまいます。
・それでは最後の実装をしましょう。
#pragma once

#include "MainWindow.g.h"

//6-2で追加。OpenCVのヘッダーをインクルード
#include <opencv2/opencv.hpp>

namespace winrt::WinUI_OpenCV::implementation
{
    struct MainWindow : MainWindowT<MainWindow>
    {
        MainWindow()
        {
            //6-1で追加。タイトル変更
			Title(L"WinUI_OpenCV");
        }

        //6-1で追加。ウインドウハンドルの取得
        HWND GetHWND();

		//6-2で追加。wstringからstringへの変換
		std::string WStringToString(const std::wstring& utf16);
		//6-2で追加。stringからwstringへの変換
		std::wstring StringToWString(const std::string& jisstr);

		//6-3で追加。MatからBitmapImageへの変換
        winrt::Windows::Foundation::IAsyncOperation<winrt::Microsoft::UI::Xaml::Media::Imaging::BitmapImage> MatToBitmapAsync(const cv::Mat& mat);

		//6-3で追加。ウインドウサイズを画像サイズに合わせる
        void ResizeWindowToImage(const winrt::Microsoft::UI::Xaml::Media::Imaging::BitmapImage& bitmap);

        //6-4で追加。画像サイズを変更
        void ResizeImage(const double scale);

        //イベントハンドラ

		//6-1で変更。非同期化
        winrt::Windows::Foundation::IAsyncAction Open_Click(winrt::Windows::Foundation::IInspectable const& sender, winrt::Microsoft::UI::Xaml::RoutedEventArgs const& e);

        void Exit_Click(winrt::Windows::Foundation::IInspectable const& sender, winrt::Microsoft::UI::Xaml::RoutedEventArgs const& e);

        //6-4で変更。非同期化
        winrt::Windows::Foundation::IAsyncAction Enlarge2Times_Click(winrt::Windows::Foundation::IInspectable const& sender, winrt::Microsoft::UI::Xaml::RoutedEventArgs const& e);

        //6-4で変更。非同期化
        winrt::Windows::Foundation::IAsyncAction Reduce2Times_Click(winrt::Windows::Foundation::IInspectable const& sender, winrt::Microsoft::UI::Xaml::RoutedEventArgs const& e);

	private:
		//6-2で追加。画像データ保存メンバ
        cv::Mat _loadImg;

    };
}

namespace winrt::WinUI_OpenCV::factory_implementation
{
    struct MainWindow : MainWindowT<MainWindow, implementation::MainWindow>
    {
    };
}
#include "pch.h"
#include "MainWindow.xaml.h"
#if __has_include("MainWindow.g.cpp")
#include "MainWindow.g.cpp"
#endif

using namespace winrt;
using namespace Microsoft::UI::Xaml;

//6-1で追加。::IWindowNativeと::IInitializeWithWindowを使うのにmicrosoft.ui.xaml.window.h、Shobjidl.hが必要
#include <microsoft.ui.xaml.window.h>
#include <Shobjidl.h>

//6-1で追加。FilePickerを使用するのにwinrt/Windows.Storage.Pickers.hが必要
#include <winrt/Windows.Storage.Pickers.h>

//6-3で追加。InMemoryRandomAccessStreamを使用するのにwinrt/Windows.Storage.Streams.hが必要
#include <winrt/Windows.Storage.Streams.h>

//6-3で追加。BitmapImageを使用するのにwinrt/Microsoft.UI.Xaml.Media.Imaging.hが必要
#include <winrt/Microsoft.UI.Xaml.Media.Imaging.h>

//6-3で追加GetWindowIdFromWindowを使用するのにwinrt/Microsoft.ui.interop.hとwinrt/Microsoft.UI.Windowing.hが必要
#include <winrt/Microsoft.UI.Interop.h>
#include <winrt/Microsoft.UI.Windowing.h>

//6-3で追加。Windows.Graphics.SizeInt32を使用するのにwinrt/Windows.Graphics.hが必要
#include <winrt/Windows.Gaming.Input.h>


namespace winrt::WinUI_OpenCV::implementation
{

}

//6-1で追加。ウインドウハンドルの取得
HWND winrt::WinUI_OpenCV::implementation::MainWindow::GetHWND()
{
	auto windowNative{ this->m_inner.as<::IWindowNative>() };
	HWND hWnd{ 0 };
	windowNative->get_WindowHandle(&hWnd);

	return hWnd;
}

//6-2で追加。wstringからstringへの変換
std::string winrt::WinUI_OpenCV::implementation::MainWindow::WStringToString(const std::wstring& utf16)
{
	std::string jisstr;
	int jissize = WideCharToMultiByte(CP_ACP, 0, utf16.c_str(), -1, nullptr, 0, nullptr, nullptr);
	if (jissize > 0)
	{
		jisstr.resize(jissize);
		WideCharToMultiByte(CP_ACP, 0, utf16.c_str(), -1, jisstr.data(), jissize, nullptr, nullptr);
	}
	return jisstr;
}

//6-2で追加。stringからwstringへの変換
std::wstring winrt::WinUI_OpenCV::implementation::MainWindow::StringToWString(const std::string& jisstr)
{
	std::wstring utf16;
	int utf16size = MultiByteToWideChar(CP_ACP, 0, jisstr.c_str(), -1, nullptr, 0);
	if (utf16size > 0)
	{
		utf16.resize(utf16size);
		MultiByteToWideChar(CP_ACP, 0, jisstr.c_str(), -1, utf16.data(), utf16size);
	}
	return utf16;
}

//6-3で追加。MatからBitmapImageへの変換
winrt::Windows::Foundation::IAsyncOperation<winrt::Microsoft::UI::Xaml::Media::Imaging::BitmapImage> winrt::WinUI_OpenCV::implementation::MainWindow::MatToBitmapAsync(const cv::Mat& mat)
{
	if (mat.empty())
		co_return nullptr;

	//Matから変換されるバイト配列格納用
	std::vector<uchar> imagebuf;

	//①imencodeを使用してバイト配列へエンコード。今回はbmp形式
	cv::imencode(".bmp", mat, imagebuf);

	//②InMemoryRandomAccessStreamを作成
	winrt::Windows::Storage::Streams::InMemoryRandomAccessStream rcstream;

	//③②のInMemoryRandomAccessStreamに関連付けたIOutputStreamを作成
	auto outputstream = rcstream.GetOutputStreamAt(0);

	//④③のIOutputStreamに関連付けたDataWriterを作成
	winrt::Windows::Storage::Streams::DataWriter writer(outputstream);

	//⑤④のDataWriterを使用してストリームへデータを書き込む
	writer.WriteBytes(winrt::array_view<const uint8_t>(imagebuf.data(), imagebuf.data() + imagebuf.size()));

	//書き込みを確定&ストリームをフラッシュ
	co_await writer.StoreAsync();
	co_await outputstream.FlushAsync();

	//⑥②で作成したRandomAccessStreamの位置を0へ戻す
	rcstream.Seek(0);

	//⑦SetSourceAsyncでBitmapへ変換
	winrt::Microsoft::UI::Xaml::Media::Imaging::BitmapImage bitmap;
	co_await bitmap.SetSourceAsync(rcstream);

	co_return bitmap;
}

//6-3で追加。ウインドウサイズを画像サイズに合わせる
void winrt::WinUI_OpenCV::implementation::MainWindow::ResizeWindowToImage(const winrt::Microsoft::UI::Xaml::Media::Imaging::BitmapImage& bitmap)
{
	//①ウインドウIDからAppWindowを作成。
	auto wndid = Microsoft::UI::GetWindowIdFromWindow(GetHWND());
	auto appwnd = Microsoft::UI::Windowing::AppWindow::GetFromWindowId(wndid);

	//②Bitmapのサイズを取得+高さにはmenuの高さ
	auto menuheight = _menuBar().ActualHeight();
	winrt::Windows::Graphics::SizeInt32 imgsize;
	imgsize.Width = bitmap.PixelWidth();
	imgsize.Height = bitmap.PixelHeight() + menuheight;

	//③AppWindowのResize()を使用してウインドウサイズを変更
	appwnd.Resize(imgsize);
}

void winrt::WinUI_OpenCV::implementation::MainWindow::ResizeImage(const double scale)
{
	if (_loadImg.empty())
		return;

	//画像を拡大縮小. cv::resize()を使用
	cv::Mat resizedImg;
	cv::resize(_loadImg, resizedImg, cv::Size(), scale, scale, cv::INTER_CUBIC);

	//_loadImgをresizedImgで上書き
	_loadImg = resizedImg.clone();
}

winrt::Windows::Foundation::IAsyncAction winrt::WinUI_OpenCV::implementation::MainWindow::Open_Click(winrt::Windows::Foundation::IInspectable const& sender, winrt::Microsoft::UI::Xaml::RoutedEventArgs const& e)
{
	//6-1で追加。FileOpenPickerを使用してファイルを開く
	winrt::Windows::Storage::Pickers::FileOpenPicker imgpicker;
	imgpicker.as<::IInitializeWithWindow>()->Initialize(this->GetHWND());
	imgpicker.FileTypeFilter().Append(L".jpg");
	imgpicker.FileTypeFilter().Append(L".png");
	imgpicker.FileTypeFilter().Append(L".bmp");
	imgpicker.FileTypeFilter().Append(L".gif");
	imgpicker.SuggestedStartLocation(winrt::Windows::Storage::Pickers::PickerLocationId::Desktop);

	auto&& imgfile = co_await imgpicker.PickSingleFileAsync();

	//6-1で追加。ファイルが選択されなかった場合はco_returnで関数を終了
	if (!imgfile)
	{
		co_return;
	}

	//6-1で追加。ファイルパスの取得
	std::wstring imgpath = imgfile.Path().c_str();

	//6-2で追加。wstringからstringへの変換
	std::string utf8path = WStringToString(imgpath);

	//6-2で追加。OpenCVで画像を読み込む
	_loadImg = cv::imread(utf8path);

	//6-2で追加。画像データを表示 6-4でコメントアウト
	//cv::imshow("Load Image", _loadImg);

	//6-3で追加。MatからBitmapImageへ変換
	auto bitmap = co_await MatToBitmapAsync(_loadImg);

	//6-3で追加。ウインドウサイズを画像サイズに合わせる
	ResizeWindowToImage(bitmap);

	//6-3で追加。画像を表示
	_showImage().Source(bitmap);

}

void winrt::WinUI_OpenCV::implementation::MainWindow::Exit_Click(winrt::Windows::Foundation::IInspectable const& sender, winrt::Microsoft::UI::Xaml::RoutedEventArgs const& e)
{
	//6-1で追加。アプリの終了
	Application::Current().Exit();
}

//6-4で変更。非同期化
winrt::Windows::Foundation::IAsyncAction winrt::WinUI_OpenCV::implementation::MainWindow::Enlarge2Times_Click(winrt::Windows::Foundation::IInspectable const& sender, winrt::Microsoft::UI::Xaml::RoutedEventArgs const& e)
{
	//面積2倍なので1辺√2倍
	ResizeImage(std::sqrt(2));

	auto&& bitmap = co_await MatToBitmapAsync(_loadImg);

	ResizeWindowToImage(bitmap);
	_showImage().Source(bitmap);
}

//6-4で変更。非同期化
winrt::Windows::Foundation::IAsyncAction winrt::WinUI_OpenCV::implementation::MainWindow::Reduce2Times_Click(winrt::Windows::Foundation::IInspectable const& sender, winrt::Microsoft::UI::Xaml::RoutedEventArgs const& e)
{
	//面積1/2倍なので1辺√1/2倍
	ResizeImage(1 / std::sqrt(2));

	auto&& bitmap = co_await MatToBitmapAsync(_loadImg);

	ResizeWindowToImage(bitmap);
	_showImage().Source(bitmap);
}
・最終的にはさっきからあまり変わっていませんが、こうなります。
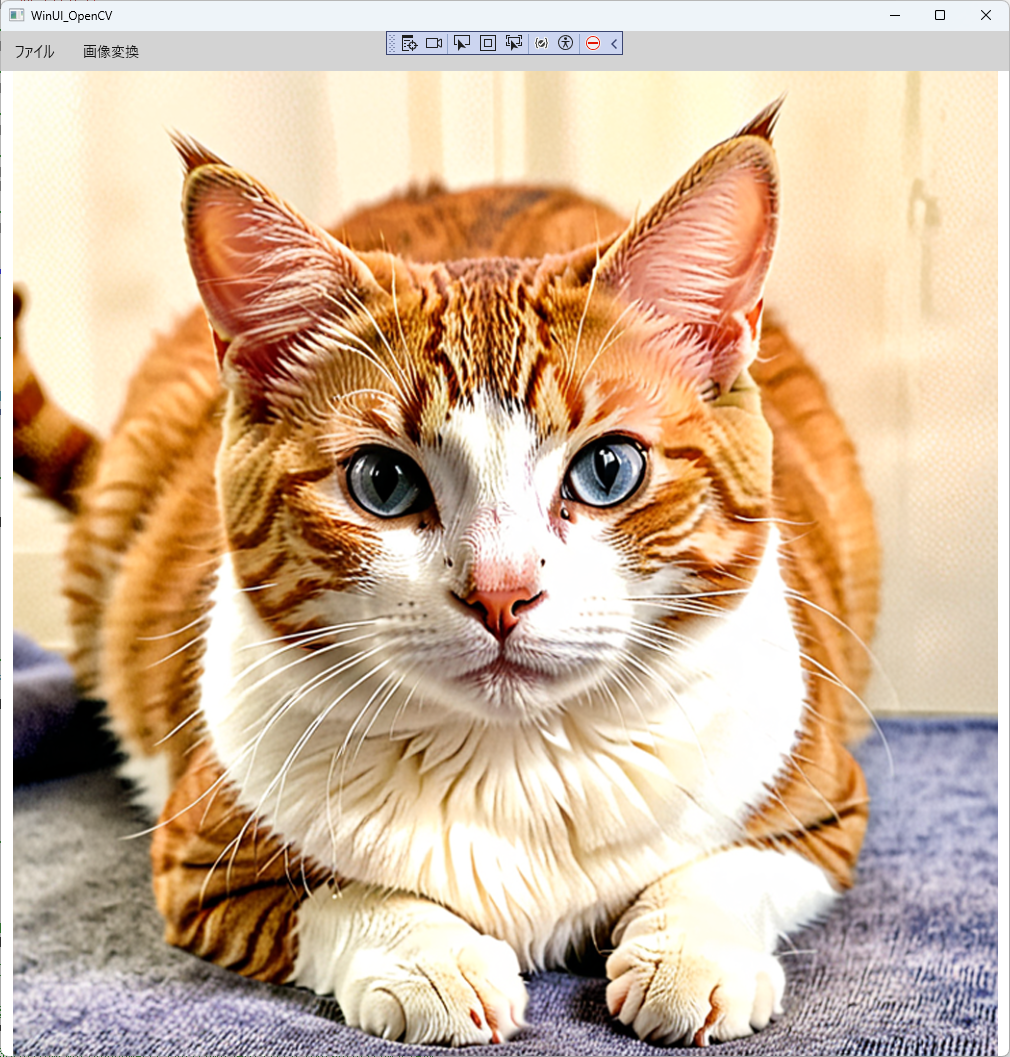
7.最後に
・実行ファイルと同じフォルダへOpenCVのdllを保存しておくとそのまま実行できます。
・さて、次は何を作るか...