Why not login to Qiita and try out its useful features?

We'll deliver articles that match you.

You can read useful information later.

1
0

Delete article

Deleted articles cannot be recovered.

Draft of this article would be also deleted.

Are you sure you want to delete this article?

OCI Windows VMでオーディオ・サービスを有効にする方法

Last updated at Posted at 2022-06-02

本ブログは、オラクル・クラウドの個人ブログの1つです。

初めに

OCI(Oracle Cloud Infrastructure)でWindowインスタンスを作成した後、タスクバーから分かるように、オーディオ・サービスはデフォルトで無効となっています。 音声を聞きたい場合、有効にする必要があります。
image.png

検証環境
OS: Windows Server 2019 Standard

設定方法
以下の2つ方法を紹介します。いずれも簡単です。

1. オーディオ・サービスを手動で有効にする
2. Cloud-init スクリプト

1. オーディオ・サービスを手動で有効にする

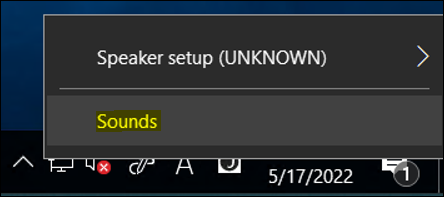
RDPでインスタンスにログインし、スピーカー・アイコンを右クリックして、「サウンド」を選択します。
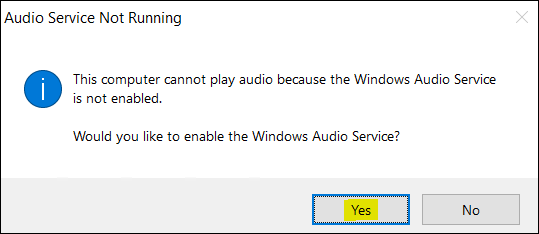
「はい」を押してオーディオ・サービスを有効にします。

サウンド設定画面が表示されます。サウンドを選択し、テストを実施してください。
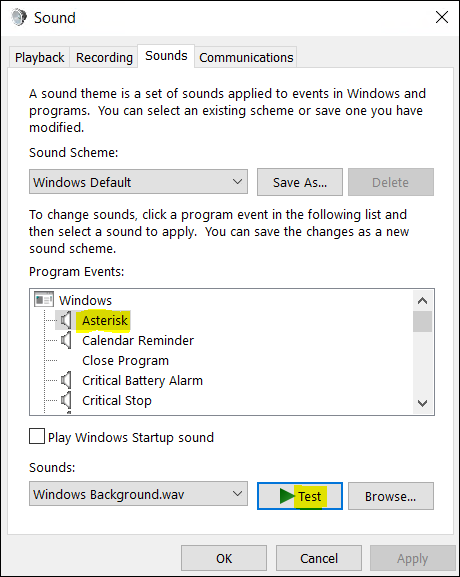
image.png

オーディオ・サービスを有効にすると、スピーカー・アイコンの「X」マークが消えます。通常どおり、スピーカー・アイコンを左クリックして音量を調整できます。

2. Cloud-init スクリプト

PowerShellスクリプトを使用して、1行のコマンドだけでオーディオ・サービスを有効にできます。
net start audiosrv

Windowsインスタンスの作成時に、cloud-initスクリプトにこの行を追加すると、起動後にオーディオ・サービスが自動的に有効化されます。

注意
PowerShellの場合、Sysnativeパラメーターは必須であり、最初の行にある必要があります。
#ps1_sysnative

インスタンス作成時に「詳細オプションを表示」をクリックし、次のようにCloud-initスクリプトを入力します。

以上です。


自分からの関連記事
オラクル・クラウドの個人ブログ一覧

1
0
0

Register as a new user and use Qiita more conveniently

  1. You get articles that match your needs
  2. You can efficiently read back useful information
  3. You can use dark theme
What you can do with signing up

Comments

No comments

Let's comment your feelings that are more than good

1
0

Delete article

Deleted articles cannot be recovered.

Draft of this article would be also deleted.

Are you sure you want to delete this article?

Login to continue?

Login or Sign up with social account

Login or Sign up with your email address