| 利用するサービス | 説明 |
|---|---|
| Amazon Translate | 機械翻訳 |
| Amazon Polly | テキスト読み上げサービス |
| Amazon Transcribe | 音声をテキストに変換する |
| Amazon Comprehend | 文書解析サービス |
1.IAM ロールの設定#
Lambda 関数が他のサービスの実行に必要となる権限を作成する。
アタッチするポリシーは次の4つ。
- TranslateFullAccess
- AmazonPollyFullAccess
- AmazonTranscribeFullAccess
- ComprehendFullAccess
2.Amazon Translate#
Amazon Translateは世界中の言語のユーザー向けにウェブサイトやアプリケーションなどのコンテンツをローカライズし、大量のテキストを効率的に簡単に翻訳できます。
lambdaからTranslateを呼び出して、英語'en'を日本語'ja'に機械翻訳していきます。
python3.8、IAMロールで作成した【1.IAM ロールの設定】をアタッチし、関数は以下の通り。
import boto3
import os

def lambda_handler(event, context):

    SRC_LANG = 'en'
    TRG_LANG = 'ja'


    translate = boto3.client('translate')

    response = translate.translate_text(Text=event["text"], SourceLanguageCode=SRC_LANG, TargetLanguageCode=TRG_LANG)

    return (response['TranslatedText'])
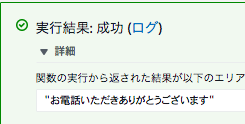
次の内容でテストする。
{
    "text": "Thank you for calling"
}
結果は以下の通り。
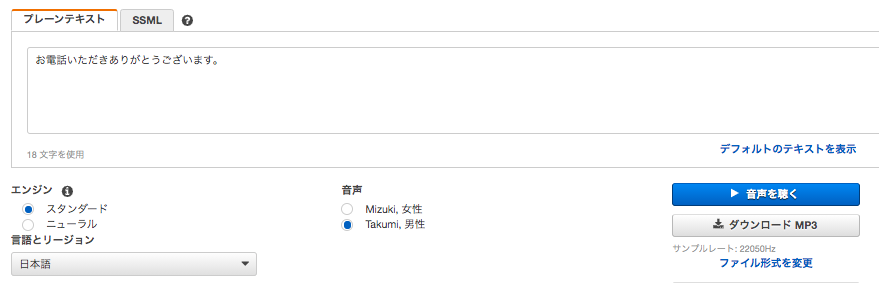
3.Amazon Polly#
Amazon Polly は、高度なディープラーニング技術を使用したテキスト読み上げサービスで、人間の声のような音声を合成します。
【2.Amazon Translate】で翻訳された言葉をプレーンテキストに入力する。
「▶︎音声を聴く」で音声を確認し、「ダウンロードMP3」でダウンロードしておく。
4.Transcribe#
【3.Amazon Polly】の音声ファイルをlambdaで、Transcribeを使って文字に起こしS3バケットに保存します。
S3に【3.Amazon Polly】でダウンロードしたMP3ファイルをアップロードする。
次に【1.IAM ロールの設定】で作成したものにS3のアクセス権限を追加します。
- AmazonS3FullAccess
【2.Amazon Translat】と同じ要領でLambda関数を作成する。今度は、Node.js 12.x を利用します。
const FilePath = "s3://transcribecomprehendtest/speech_20200108084356790.mp3"
の部分を先程作成したS3バケットのMP3ファイルのURLに置き換えて関数を作成する。
const AWS = require('aws-sdk');
const transcribeservice = new AWS.TranscribeService({apiVersion: '2017-10-26'});

exports.handler = async (event, context) => {
  const FilePath = "s3://transcribecomprehendtest/speech_20200108084356790.mp3"
  const jobName = context.awsRequestId

  console.log('FilePath : ' + FilePath);

  const params = {
    LanguageCode: "ja-JP",
    Media: {
      MediaFileUri: FilePath
    },
    TranscriptionJobName: jobName,
    MediaFormat: "mp3",
  };

  try{
    const response = await transcribeservice.startTranscriptionJob(params).promise()
    console.log(response)
    return response
  }catch(error){
    console.log(error)
  }
};
この関数では外部インプトは必要ありませんので、文字列はデフォルトのままダミーのテストイベントを作成し、テストします。
"TranscriptionJobStatus": "IN_PROGRESS",が表示されていれば成功です。
Transcribe の画面にいき、[Download full transcript]を押すと json がダウンロードされ、文字お起しされた文字列が格納されています。
5.Comprehend#
Amazon Comprehend は、機械学習を使用してテキスト内でインサイトや関係性を検出する自然言語処理 (NLP) サービスです。
【2.Amazon Translat】と同じ要領でLambda関数を作成する。今度は、python 3.8 を利用します。
import os, boto3

ESCALATION_INTENT_MESSAGE="エスカレーションをしてください"
FULFILMENT_CLOSURE_MESSAGE="エスカレーションをしてください"

escalation_intent_name = os.getenv('ESCALATION_INTENT_NAME', None)

client = boto3.client('comprehend')

def lambda_handler(event, context):
    sentiment=client.detect_sentiment(Text=event['inputTranscript'],LanguageCode='ja')['Sentiment']
    if sentiment=='NEGATIVE':
        if escalation_intent_name:
            result = {
                "sessionAttributes": {
                    "sentiment": sentiment
                    },
                    "dialogAction": {
                        "type": "ConfirmIntent",
                        "message": {
                            "contentType": "PlainText",
                            "content": ESCALATION_INTENT_MESSAGE
                        },
                    "intentName": escalation_intent_name
                    }
            }
        else:
            result = {
                "sessionAttributes": {
                    "sentiment": sentiment
                },
                "dialogAction": {
                    "type": "Close",
                    "fulfillmentState": "Failed",
                    "message": {
                            "contentType": "PlainText",
                            "content": FULFILMENT_CLOSURE_MESSAGE
                    }
                }
            }

    else:
        result ={
            "sessionAttributes": {
                "sentiment": sentiment
            },
            "dialogAction": {
                "type": "Delegate",
                "slots" : event["currentIntent"]["slots"]
            }
        }

    return result
ネカティブな情報でテスト
{
  "messageVersion": "1.0",
  "invocationSource": "DialogCodeHook",
  "userId": "1234567890",
  "sessionAttributes": {},
  "bot": {
    "name": "BookSomething",
    "alias": "None",
    "version": "$LATEST"
  },
  "outputDialogMode": "Text",
  "currentIntent": {
    "name": "BookSomething",
    "slots": {
      "slot1": "None",
      "slot2": "None"
    },
    "confirmationStatus": "None"
  },
  "inputTranscript": "あなたが嫌いです"
}
ネカティブな情報の結果
{
  "sessionAttributes": {
    "sentiment": "NEGATIVE"
  },
  "dialogAction": {
    "type": "Close",
    "fulfillmentState": "Failed",
    "message": {
      "contentType": "PlainText",
      "content": "エスカレーションをしてください"
    }
  }
}
ポジティブな情報でテスト
{
  "messageVersion": "1.0",
  "invocationSource": "DialogCodeHook",
  "userId": "1234567890",
  "sessionAttributes": {},
  "bot": {
    "name": "BookSomething",
    "alias": "None",
    "version": "$LATEST"
  },
  "outputDialogMode": "Text",
  "currentIntent": {
    "name": "BookSomething",
    "slots": {
      "slot1": "None",
      "slot2": "None"
    },
    "confirmationStatus": "None"
  },
  "inputTranscript": "あなたが好きです"
}
ポジティブな情報の結果
{
  "sessionAttributes": {
    "sentiment": "POSITIVE"
  },
  "dialogAction": {
    "type": "Delegate",
    "slots": {
      "slot1": "None",
      "slot2": "None"
    }
  }
}