実施する内容
- 上記ドキュメントを参考に、GitHub Actions を使用してコンテナ化されたアプリケーションを構築し、ECR に push し、push をトリガーがに ECS(Fargate) にデプロイする。
- Workflow file を理解する。
なお、ドキュメントの Workflow file では、Unsupported deployment controller: ECS となり、Fargate では実行できませんでした。
そのため、下記の通りサンプルとして用意されているものを利用していこうと思います。
準備
1.ECRリポジトリ の準備
AWS CLI を利用して、ECRリポジトリ を作成します。
aws ecr create-repository \
    --repository-name my_ecr_repository \
    --region ap-northeast-1
2.Amazon ECS タスク定義、クラスター、サービスの作成の準備
今回は以下のリンクから サンプルを作成しますが、既存で動いているコンテナを利用しても構いません。
3.Amazon ECS タスク定義を GitHub リポジトリに保存
Amazon ECS タスク定義を JSON ファイルとして GitHub リポジトリに保存します。
aws ecs describe-task-definition --task-definition first-run-task-definition > task-definition.json
ここで重要なのはドキュメントに以下の通り記載がありました。
The format should follow the output of aws ecs register-task-definition --generate-cli-skeleton.
describe-task-definition で取得した JSON はそのままでは register-task-definition で登録できないため、次のページを参考に修正しておきます。
4.IAMアクセスキーをGitHub Actions Secrets に保存
AWSのIAMでアクセスキーを作成し、アクセスキー と シークレットキー を控えておきます。
aws iam create-access-key --user-name MyUser
なお、IAMポリシーにおいては、次の二つのポリシーが付与されていれば良いですが、A WSのベストプラクティスに沿って、必要最小限の権限で作成しましょう。
AmazonEC2ContainerRegistryPowerUser
AmazonECS_FullAccess
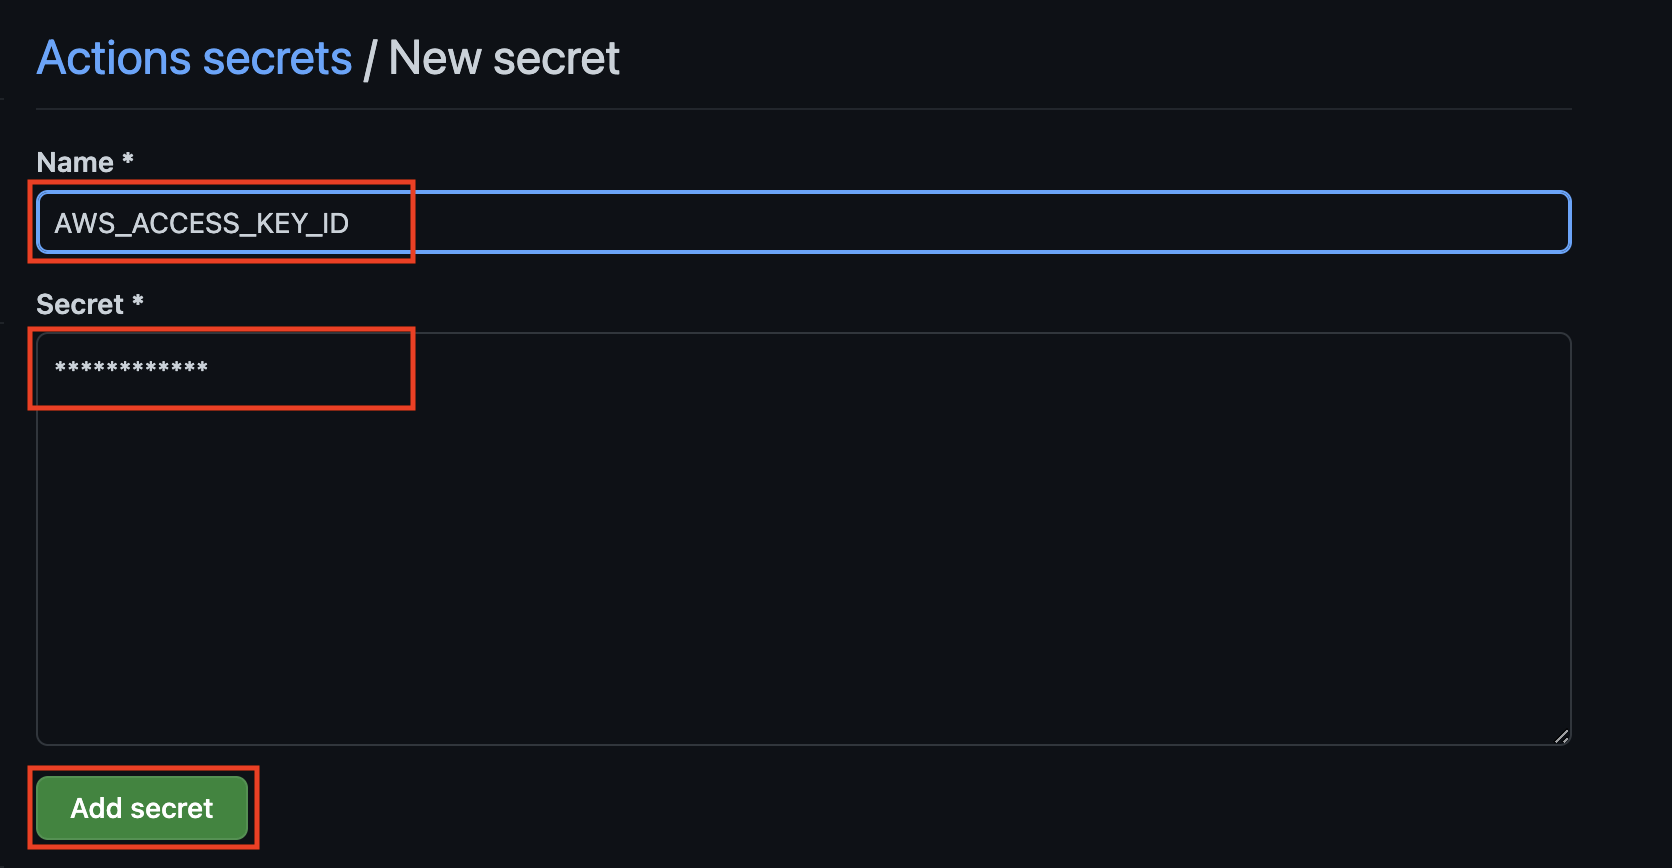
画面右上の「Setings」から「Secrets」の「Actions」を開き、「New repositiry secret」をクリックします。
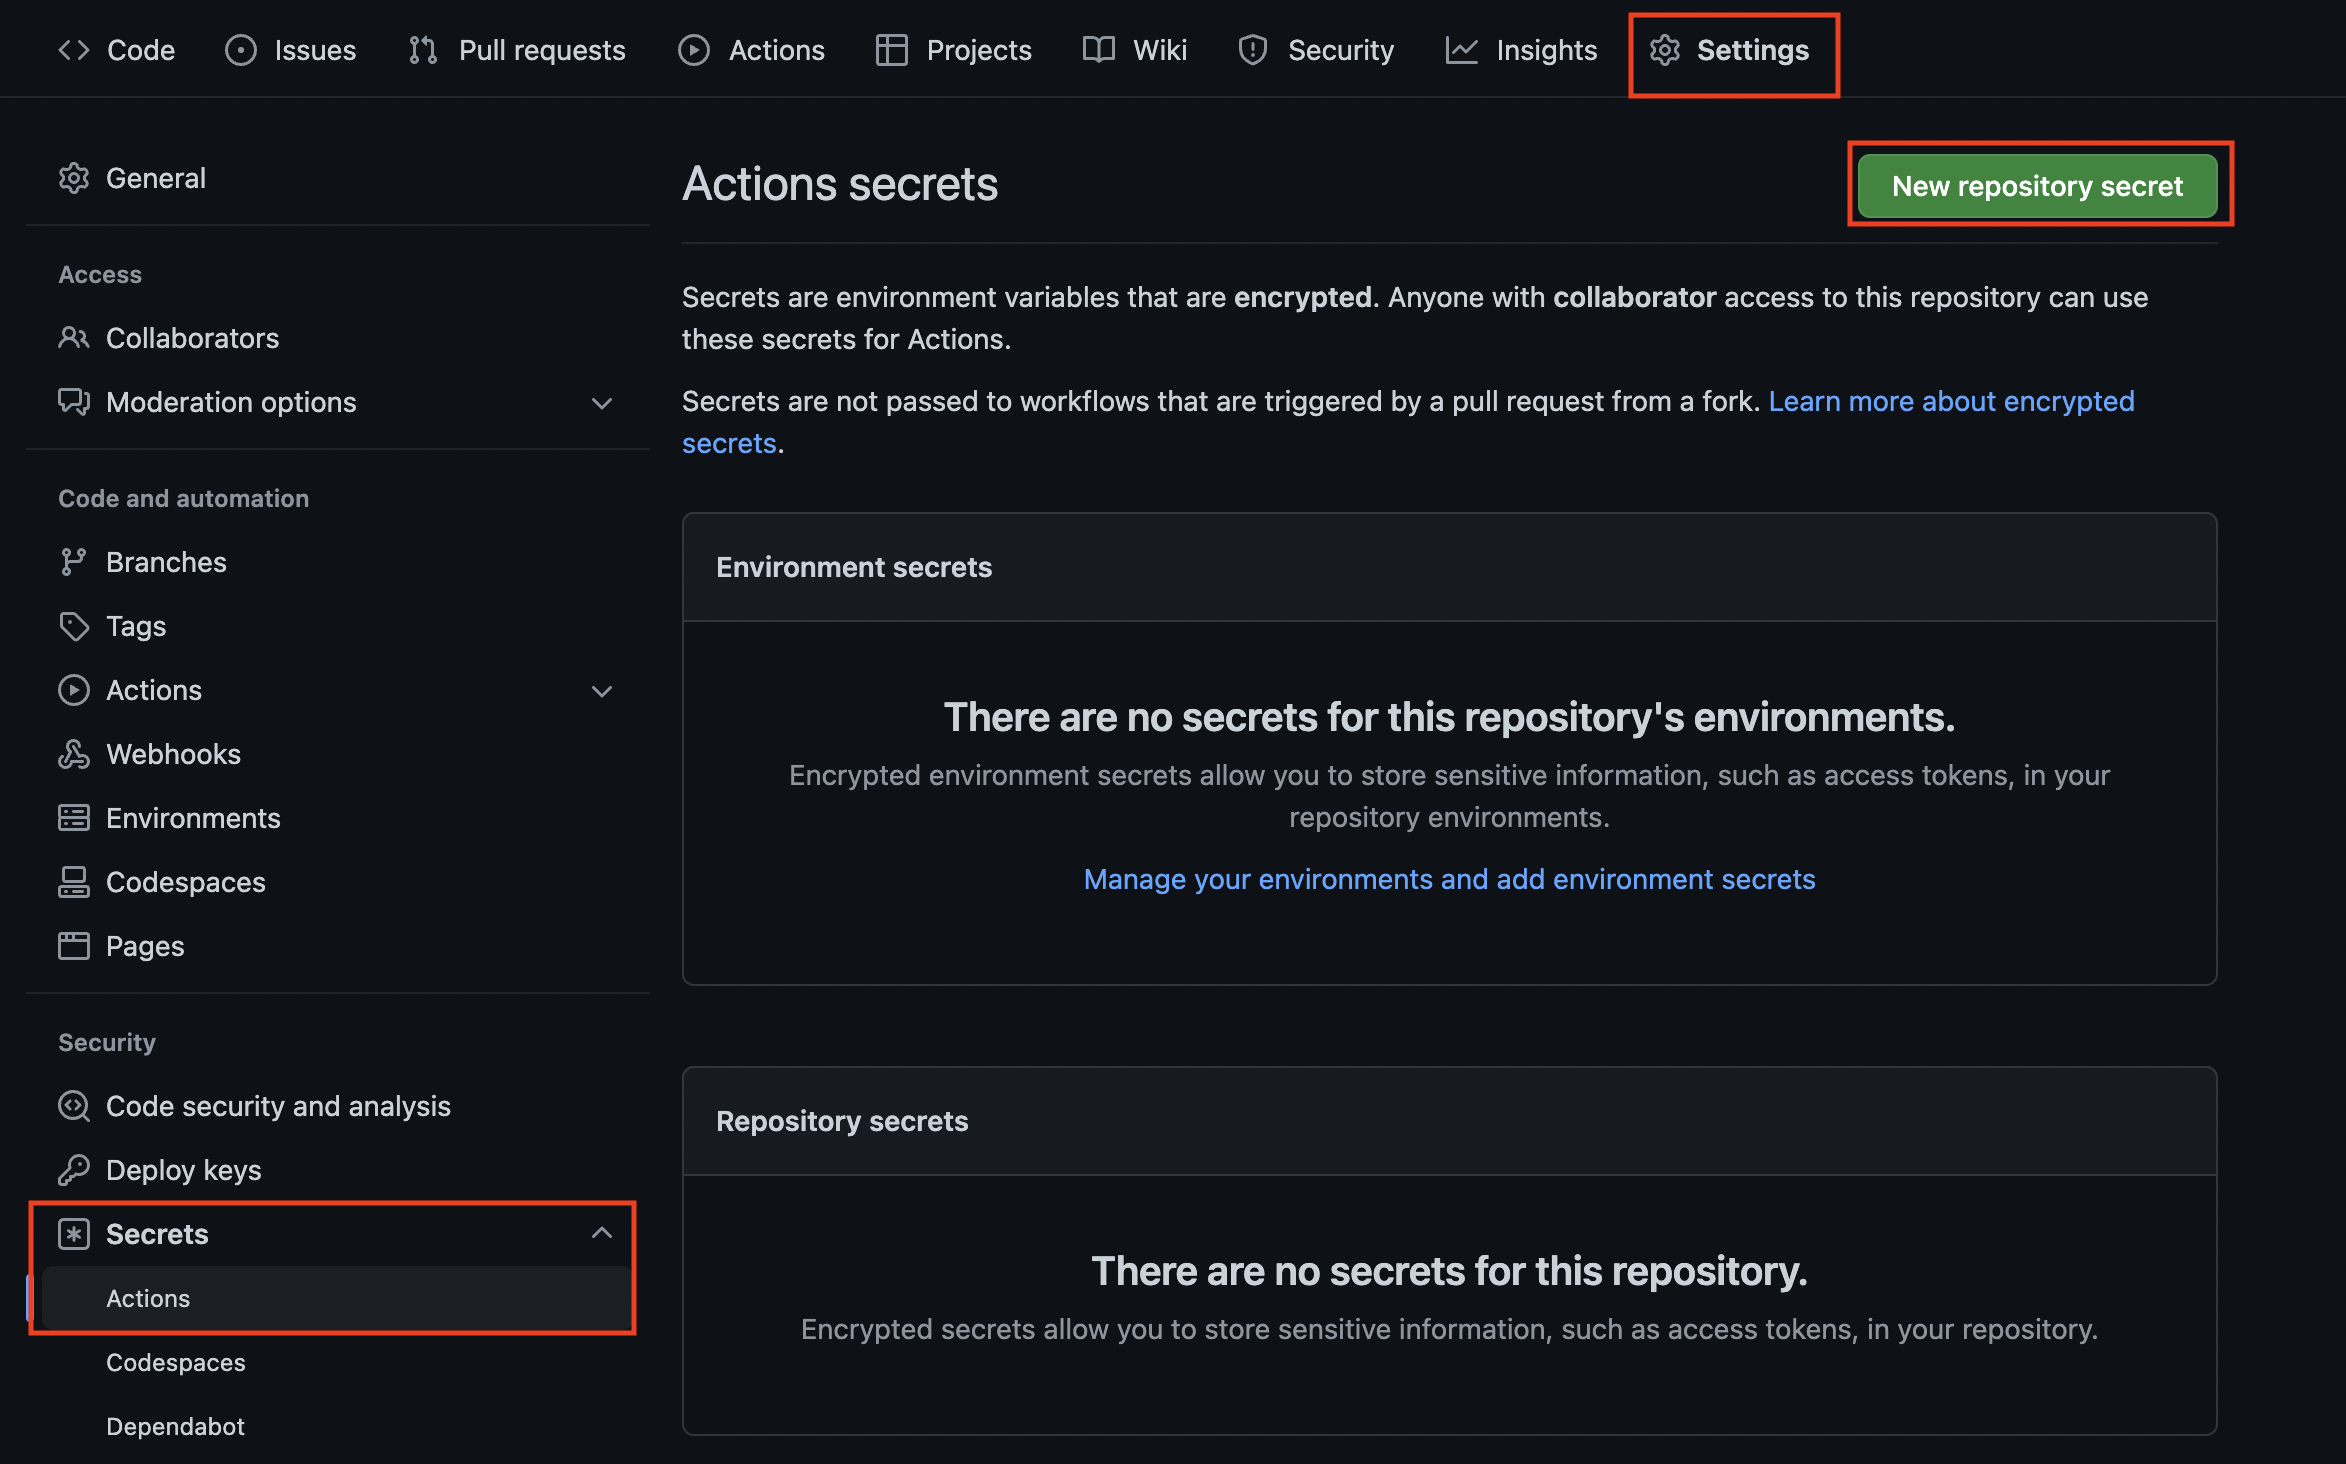
Name に AWS_ACCESS_KEY_ID 、Secret に先程控えた IAM のアクセスキーをコピペし、「Add secret」をクリックします。
AWS_SECRET_ACCESS_KEY も同様に作成します。
ワークフロー
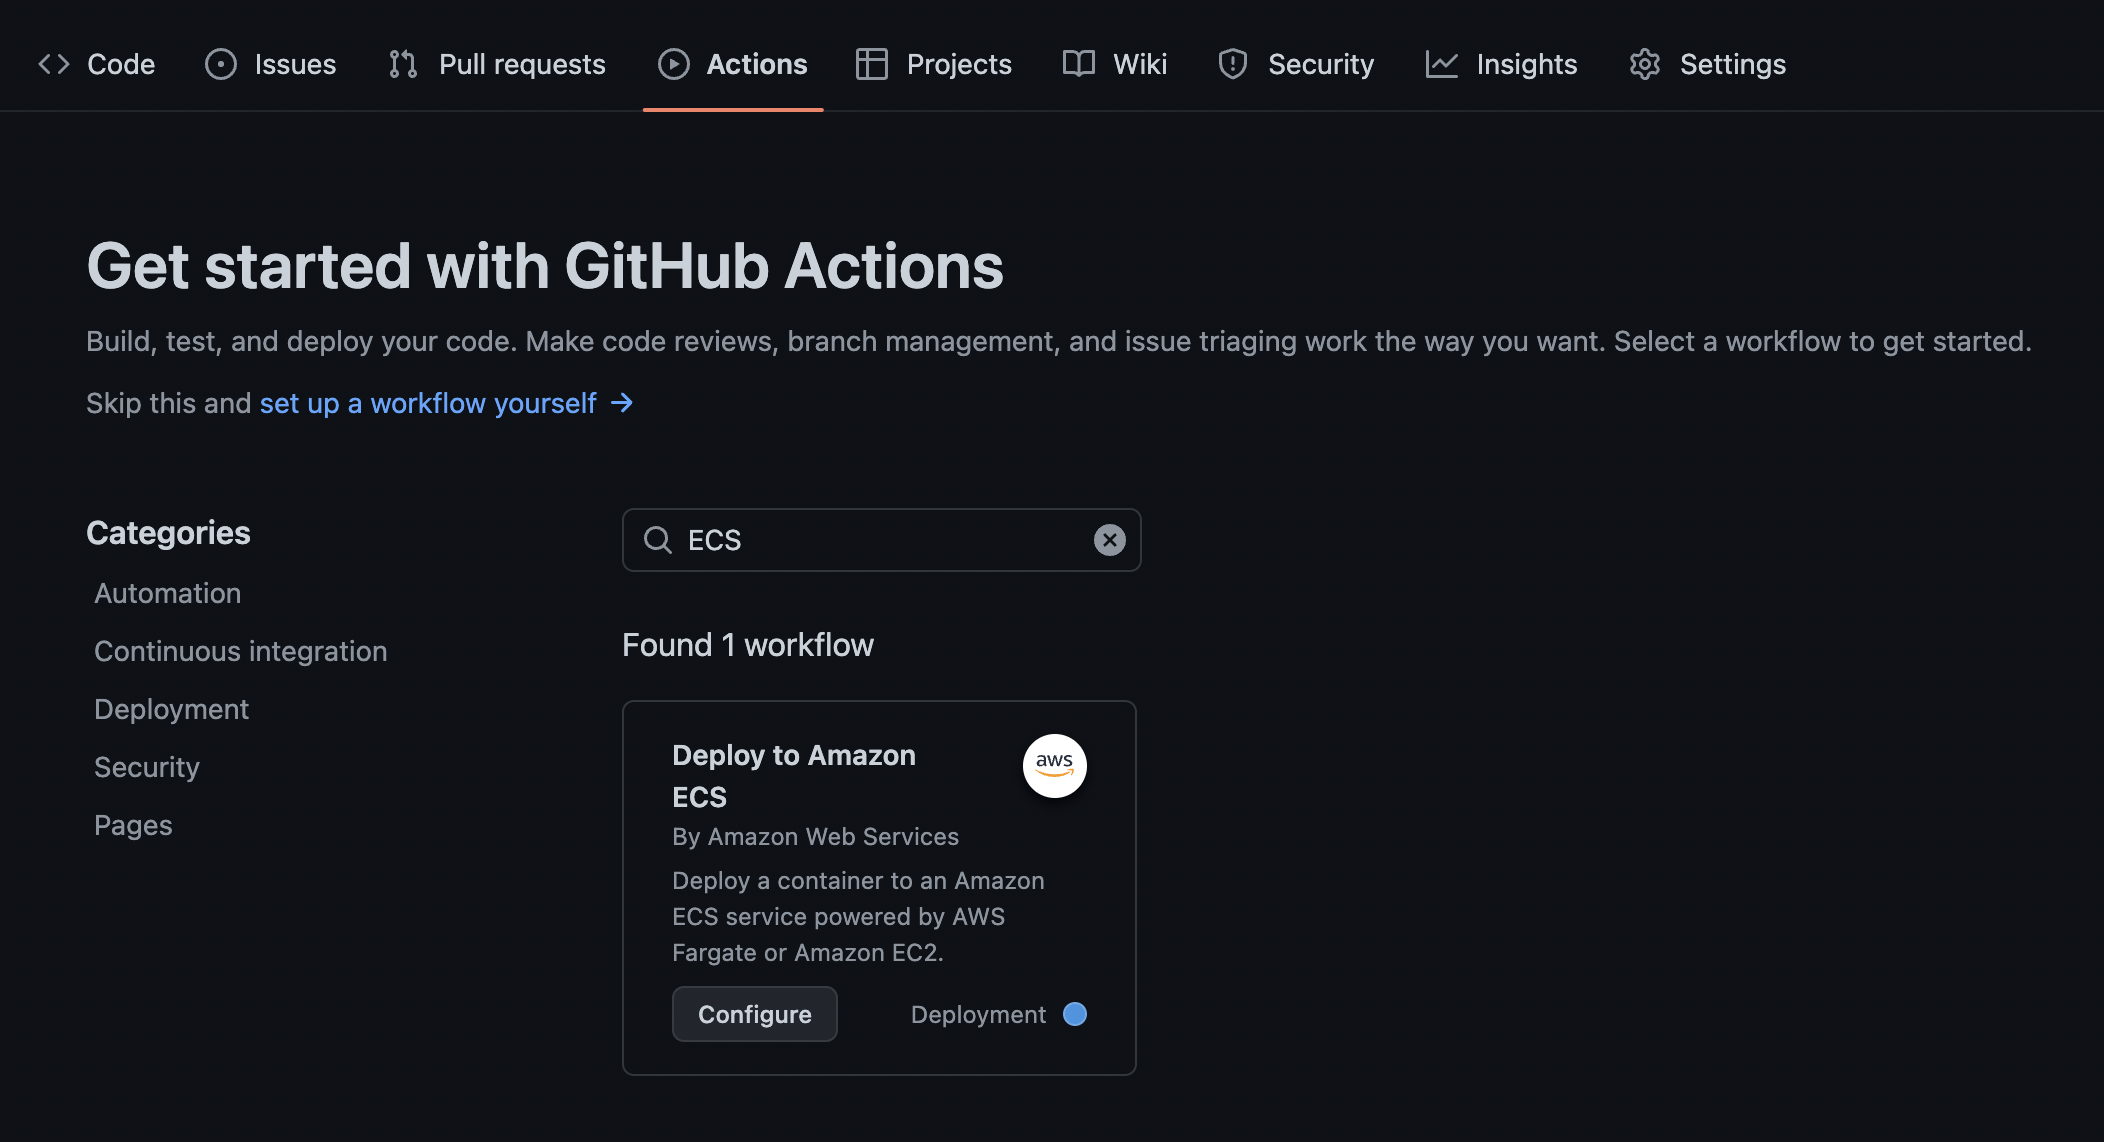
1. GitHub Actions ワークフローの追加
「Action」 から、Deploy to Amazon ECS を「Configure」。
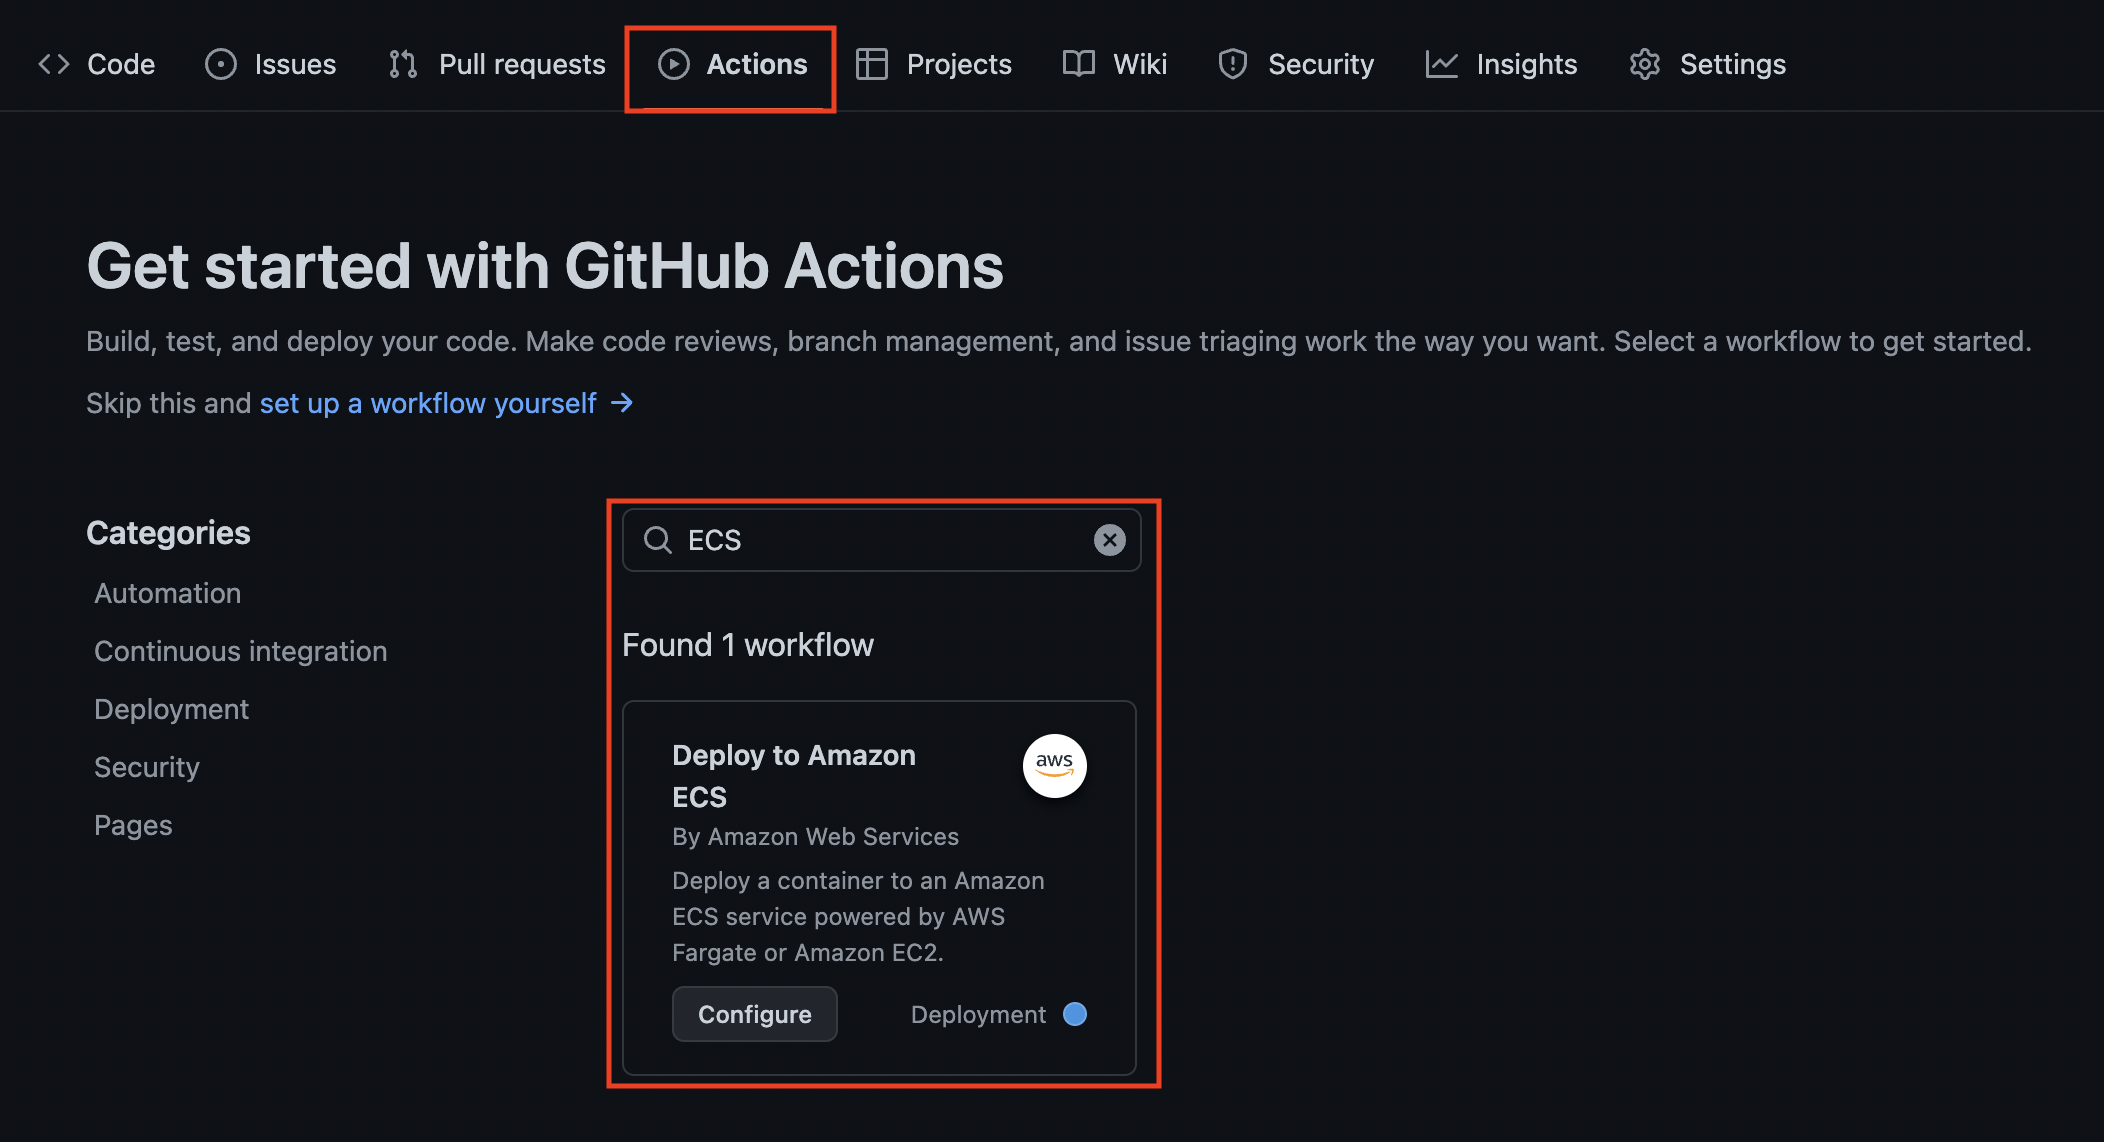
.github/workflows/ 配下に yaml 形式で作成されます。
2.ワークフローファイルの修正
env:の環境変数をご自身の環境に変更します。
name
ワークフローの名前です。
name: Deploy to Amazon ECS
on
トリガーを指定します。
ここでは、main ブランチに、push されたときに、GitHub Actions が動作します。
on:
  push:
    branches: [ "main" ]
env
環境変数を定義します。
env:
  AWS_REGION: ap-northeast-1                   # set this to your preferred AWS region, e.g. us-west-1
  ECR_REPOSITORY: githubactions          # set this to your Amazon ECR repository name
  ECS_SERVICE: sample-app-service                 # set this to your Amazon ECS service name
  ECS_CLUSTER: default                 # set this to your Amazon ECS cluster name
  ECS_TASK_DEFINITION: task-definition.json # set this to the path to your Amazon ECS task definition
                                               # file, e.g. .aws/task-definition.json
  CONTAINER_NAME: sample-app           # set this to the name of the container in the
                                               # containerDefinitions section of your task definition
permissions
デフォルトではGITHUB_TOKEN に付与された多くのアクセス権限を持ちます。
必要に応じて必要最小限のアクセスのみを許可することができます。
permissions:
  contents: read
jobs
実際に何を実行するかを定義していきます。いくつかの階層に分けて詳しく確認していきます。
ジョブを定義します。ここでは、deploy ジョブで、GitHub がホストする仮想マシン、ubuntu-latest で実行するように、runs-on で、指定しています。
利用可能なホストは次のドキュメントにある通りです。
jobs:
  deploy:
    name: Deploy
    runs-on: ubuntu-latest
ジョブで実行されるすべてのステップを定義します。まず、最初の Checkout アクションでは、uses で、actions/checkout@v3 を利用しリポジトリへのチェックアウトが行われます。
このアクションは、以下で公開されています。
    steps:
    - name: Checkout
      uses: actions/checkout@v3
with で環境変数として指定した情報を利用して、受け渡しています。
なお、環境変数の種類やルールについてはまた別の機会にでも書こうと思います。
    - name: Configure AWS credentials
      uses: aws-actions/configure-aws-credentials@v1
      with:
        aws-access-key-id: ${{ secrets.AWS_ACCESS_KEY_ID }}
        aws-secret-access-key: ${{ secrets.AWS_SECRET_ACCESS_KEY }}
        aws-region: ${{ env.AWS_REGION }}
id は各アクションidを定義します。
Login to Amazon ECR で、login-ecr を定義し、次の Build, tag, and push image to Amazon ECR で、steps.login-ecr 〜 で指定されていることがわかります。
    - name: Login to Amazon ECR
      id: login-ecr
      uses: aws-actions/amazon-ecr-login@v1

    - name: Build, tag, and push image to Amazon ECR
      id: build-image
      env:
        ECR_REGISTRY: ${{ steps.login-ecr.outputs.registry }}
        IMAGE_TAG: ${{ github.sha }}
      run: |
        # Build a docker container and
        # push it to ECR so that it can
        # be deployed to ECS.
        docker build -t $ECR_REGISTRY/$ECR_REPOSITORY:$IMAGE_TAG .
        docker push $ECR_REGISTRY/$ECR_REPOSITORY:$IMAGE_TAG
        echo "::set-output name=image::$ECR_REGISTRY/$ECR_REPOSITORY:$IMAGE_TAG"
以下これまでの機能を利用して、アクションが実行されます。
    - name: Fill in the new image ID in the Amazon ECS task definition
      id: task-def
      uses: aws-actions/amazon-ecs-render-task-definition@v1
      with:
        task-definition: ${{ env.ECS_TASK_DEFINITION }}
        container-name: ${{ env.CONTAINER_NAME }}
        image: ${{ steps.build-image.outputs.image }}

    - name: Deploy Amazon ECS task definition
      uses: aws-actions/amazon-ecs-deploy-task-definition@v1
      with:
        task-definition: ${{ steps.task-def.outputs.task-definition }}
        service: ${{ env.ECS_SERVICE }}
        cluster: ${{ env.ECS_CLUSTER }}
        wait-for-service-stability: true
動作確認
ディレクトリ階層は、シンプルにこんな感じです。
.
├── .github/workflows
│   ├── aws.yml
├── conf
│   ├── my-httpd.conf
├── Dockerfile
├── task-definition.json
conf/my-httpd.conf と Dockerfile は適当に作成します。
ServerName localhost:80

Header add DUMMY_HEADER DUMMY_VALUE
FROM httpd:2.4

RUN mkdir /usr/local/apache2/conf/include/ &&  echo 'Include conf/include/*.conf ' >> /usr/local/apache2/conf/httpd.conf

COPY ./conf/*.conf   /usr/local/apache2/conf/include/
GitHub へ反映します。
git add .
git commit -m "first github actions"
git push
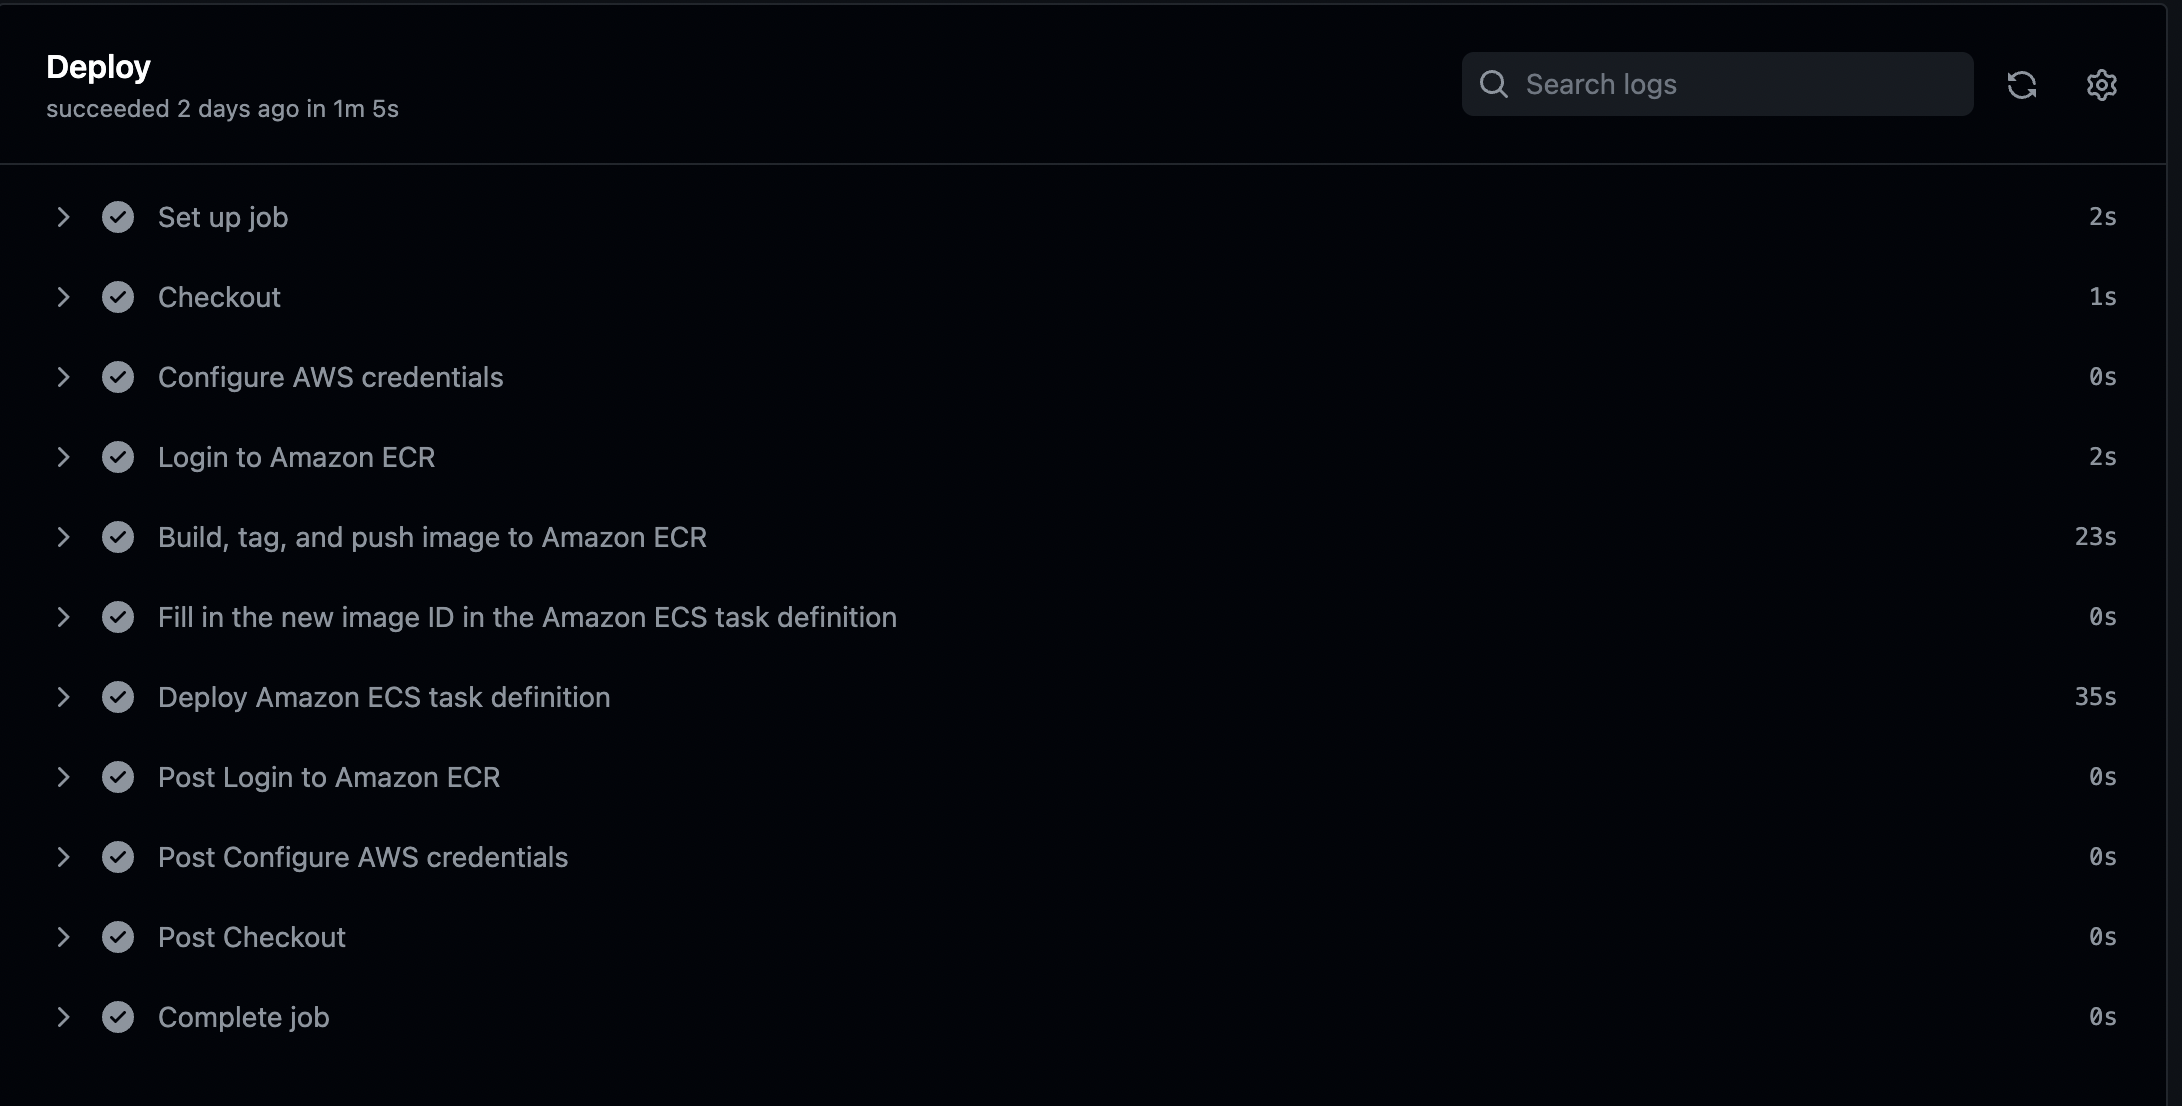
「Action」から、実行されたワークフローをクリックします。
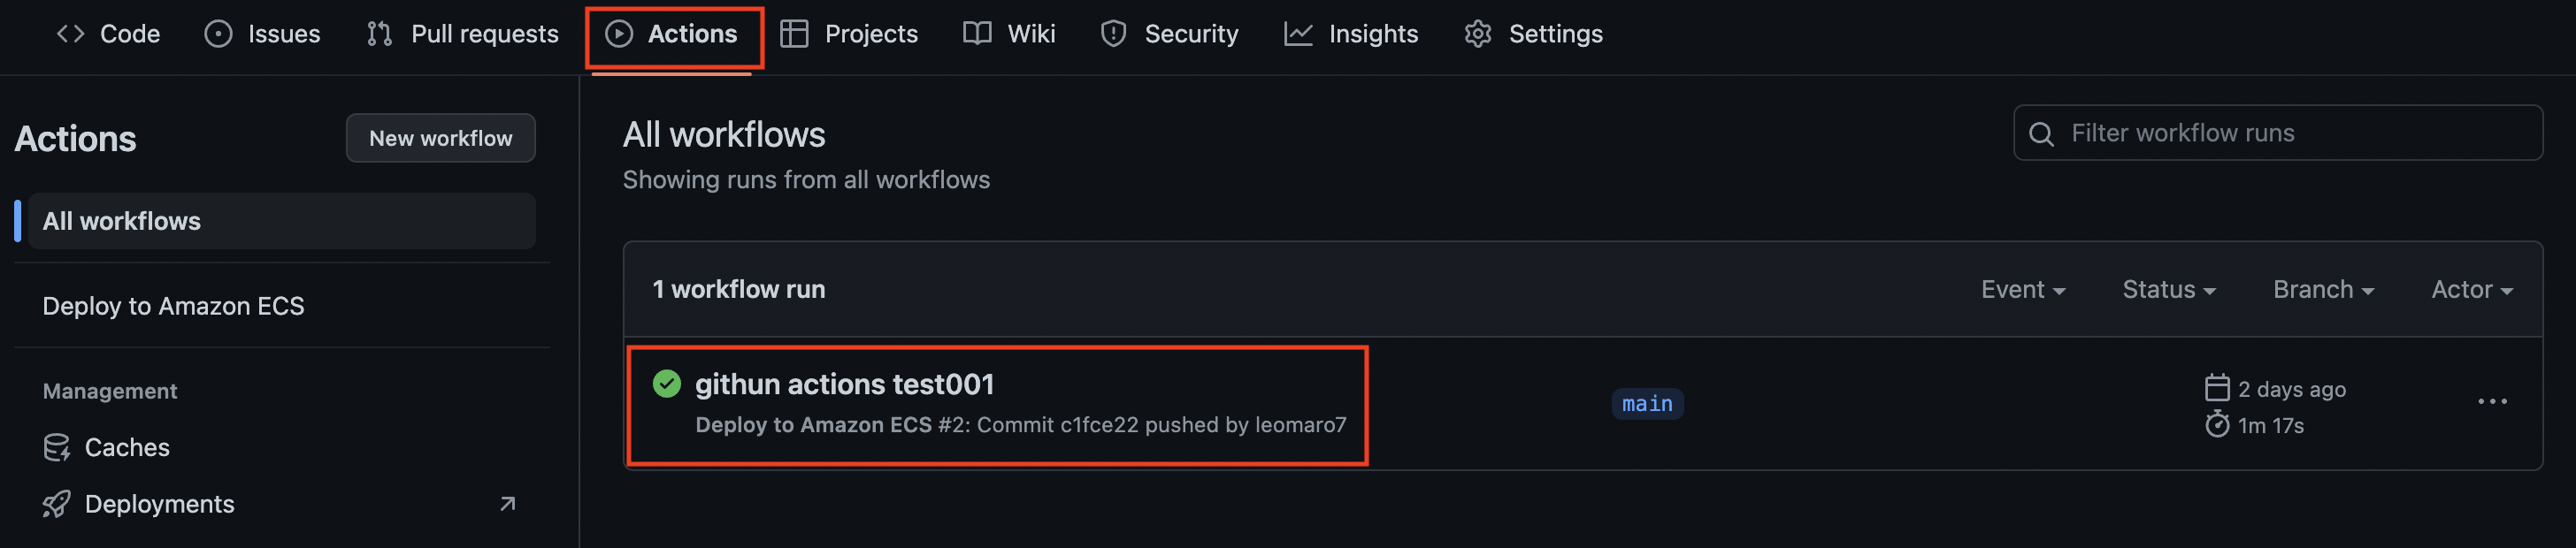
次の通り、実行されたジョブの内容を確認できるようになっています。
今回のケースにおいては、Code兄弟を利用する方が良いでしょうが、GitHub Actionsの学習のために試してみました。