はじめに
最近、TableView上のSwitchを押した時にその中の設定を有効にする、みたいなよく見かけるものを作ろうとしたのですが、調べてもなかなかちゃんと動くコードに出会えませんでした。そこで今回は、とりあえず目的を達成できるくらいには動いたコードについてまとめてみようと思います。
環境
- Xcode:12.3
- Swift:5.3.2
今回実装する内容
print文でコンソールに以下のように出力する
- セル内でタップする
→(セル番号)番目のセルが選ばれた - セル内のswitchをタップする
→(on/off)
→(セル内のラベルのテキスト)が(trueかfalse)になった
カスタムセルの準備
まずカスタムセルを作ります。
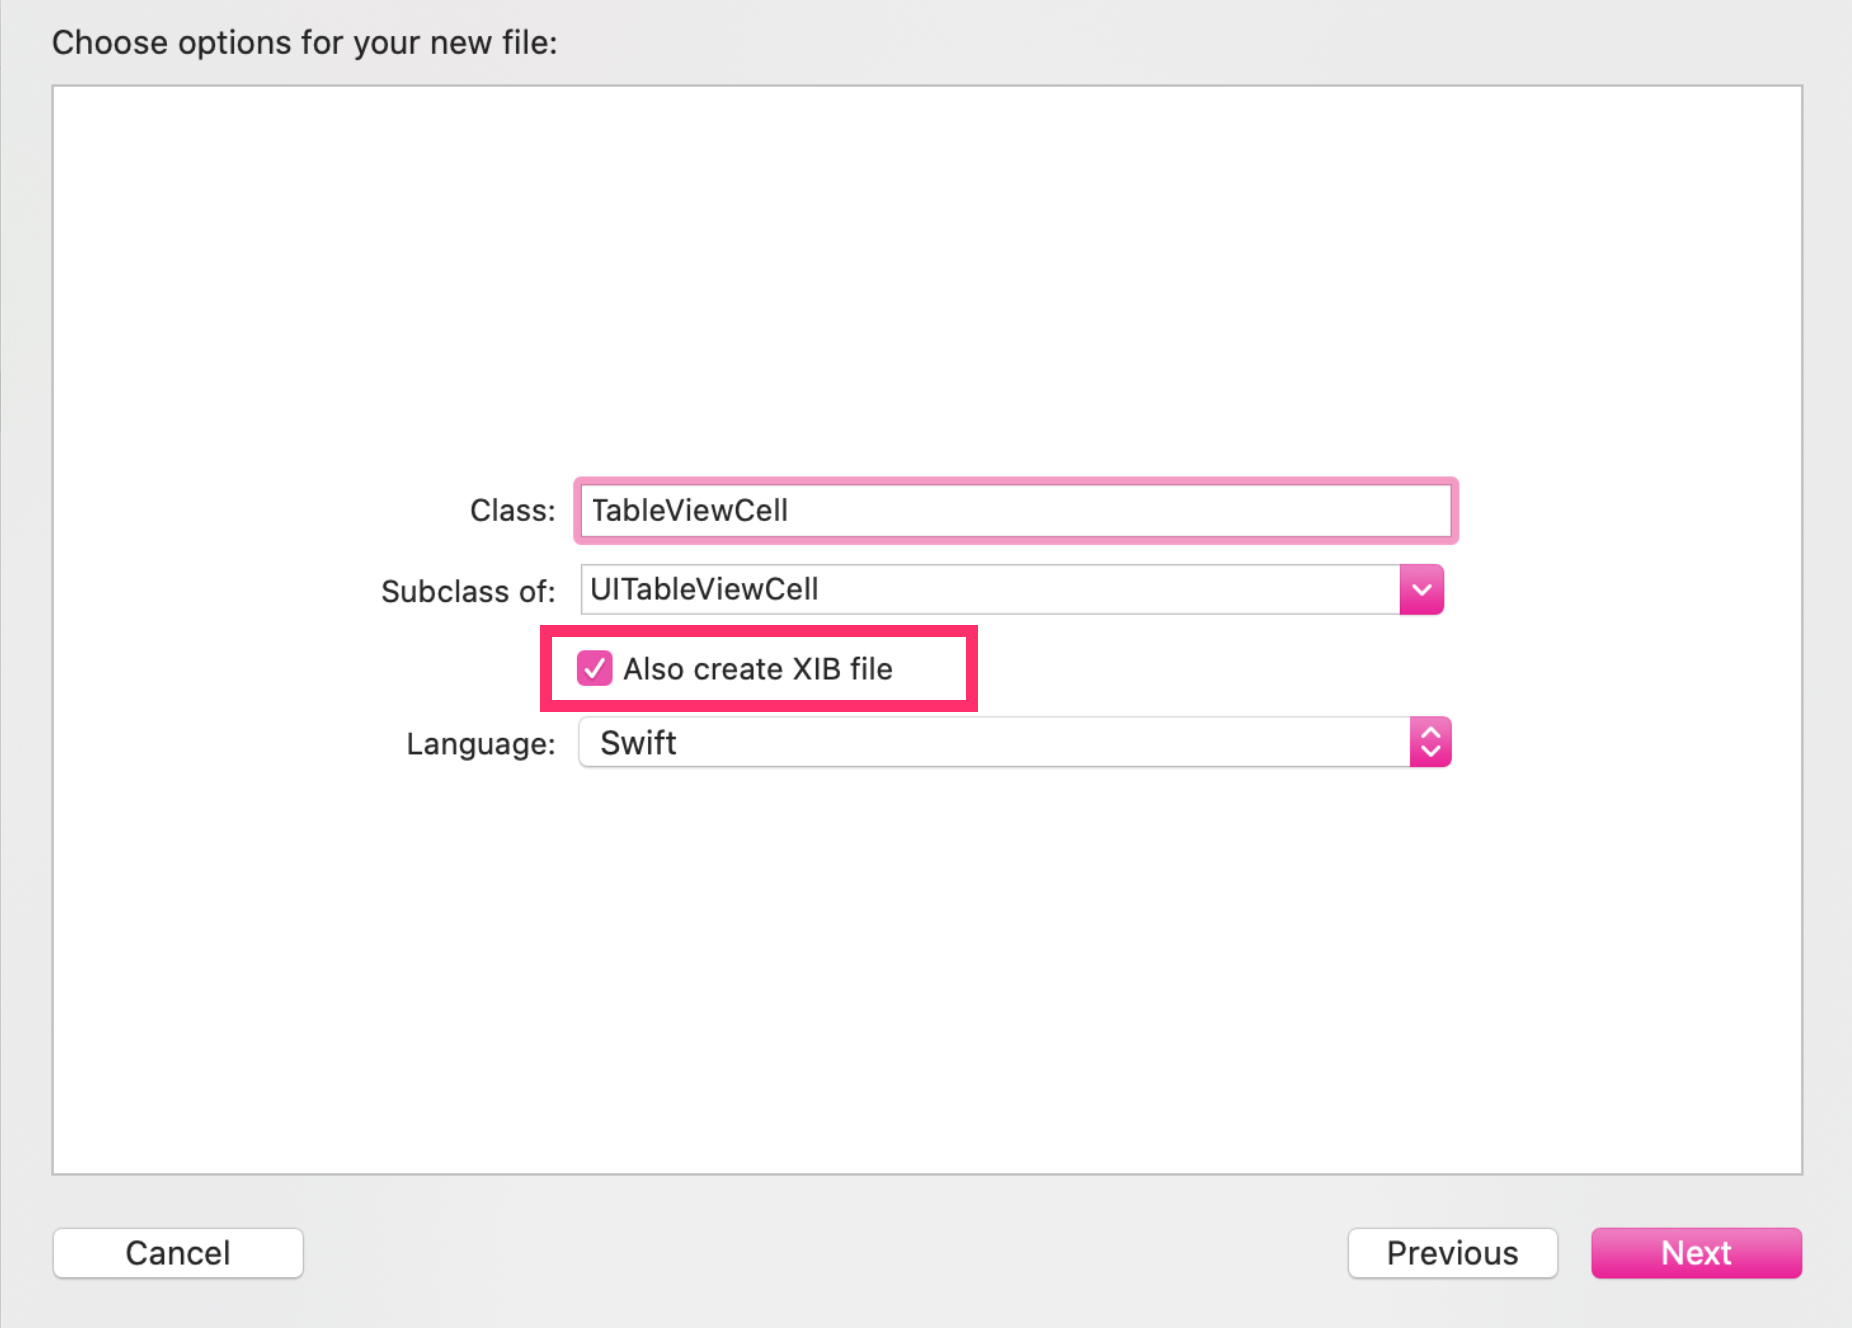
ファイル名は自由で。今回は「TableViewCell」にします。Also create XIB fileにチェックを入れるのを忘れずに。

ここまでできたらデフォルトの場所に保存しましょう。次に先ほどのTableViewCell.swiftにコードを書いていきます。
TableViewCell.swift
import UIKit

class TableViewCell: UITableViewCell {

    @IBOutlet weak var label: UILabel!
    @IBOutlet weak var uiSwitch: UISwitch!

    override func awakeFromNib() {
        super.awakeFromNib()
        // Initialization code

        // スイッチを最初全てoffにしておく
        uiSwitch.isOn = false
    }

    // スイッチが押された時に呼ばれる
    @IBAction func changeSwitch(_ sender: UISwitch) {
        if sender.isOn {
            print("on")
        } else {
            print("off")
        }
    }
}
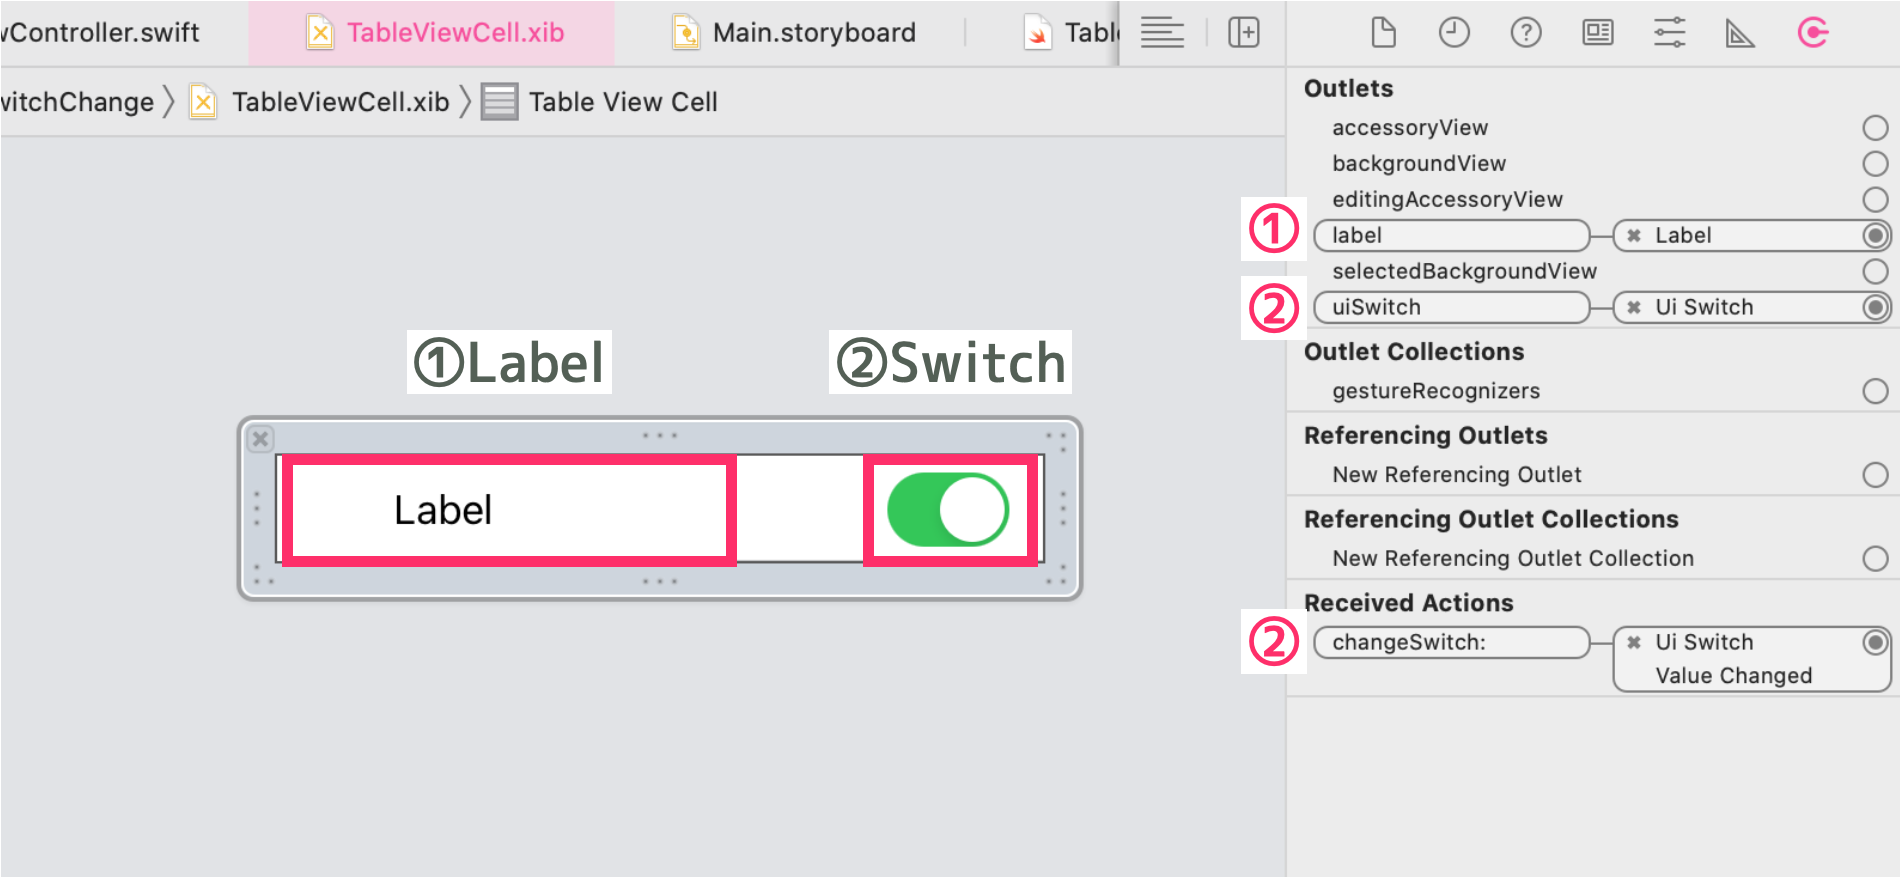
次にxibファイルの方も編集していきます。今回はこんな感じで。関連付けも忘れずに。

ViewControllerでTableViewの設定をする
ViewController.swift
import UIKit

class ViewController: UIViewController, UITableViewDataSource, UITableViewDelegate {

    @IBOutlet var table: UITableView!
    var cellContents: Array = ["1つ目","2つ目","3つ目","4つ目","5つ目"]

    override func viewDidLoad() {
        super.viewDidLoad()

        // dataSourceメソッドとdelegateメソッドはこのファイルに書くと宣言
        table.dataSource = self
        table.delegate = self

        // 余分なセルを描画しないようにする
        table.tableFooterView = UIView()

        // 使うxibファイルを指定
        table.register(UINib(nibName: "TableViewCell", bundle: nil), forCellReuseIdentifier: "TableViewCell")
    }

    // セルの個数を配列の個数に設定
    func tableView(_ tableView: UITableView, numberOfRowsInSection section: Int) -> Int {
        return cellContents.count
    }

    // セルの設定
    func tableView(_ tableView: UITableView, cellForRowAt indexPath: IndexPath) -> UITableViewCell {

        let cell = tableView.dequeueReusableCell(withIdentifier: "TableViewCell") as! TableViewCell

        // セルのラベルに配列の中身を順番に表示
        cell.label.text = cellContents[indexPath.row]
        // スイッチのタグにindexPath.rowの値を入れる
        cell.uiSwitch.tag = indexPath.row
        // スイッチが押されたときの動作
        cell.uiSwitch.addTarget(self, action: #selector(changeSwitch(_:)), for: UIControl.Event.valueChanged)

        return cell
    }

    // セルが押された時に呼ばれるメソッド
    func tableView(_ tableView: UITableView, didSelectRowAt indexPath: IndexPath) {
        print("\(indexPath.row)番目のセルが選ばれた")
    }

    // セルの幅を80に設定
    func tableView(_ tableView: UITableView, heightForRowAt indexPath: IndexPath) -> CGFloat {
        return 80
    }

    @objc func changeSwitch(_ sender: UISwitch) {
        /*
         sender.tagにはスイッチのセルの位置が入る(Int)
         sender.isOnにはスイッチのon/off情報が入る(Bool)
         下のprint文はセル内のラベルの内容とスイッチのTrue/False
         */
        print(cellContents[sender.tag] + "が\(sender.isOn)になった")
    }
}
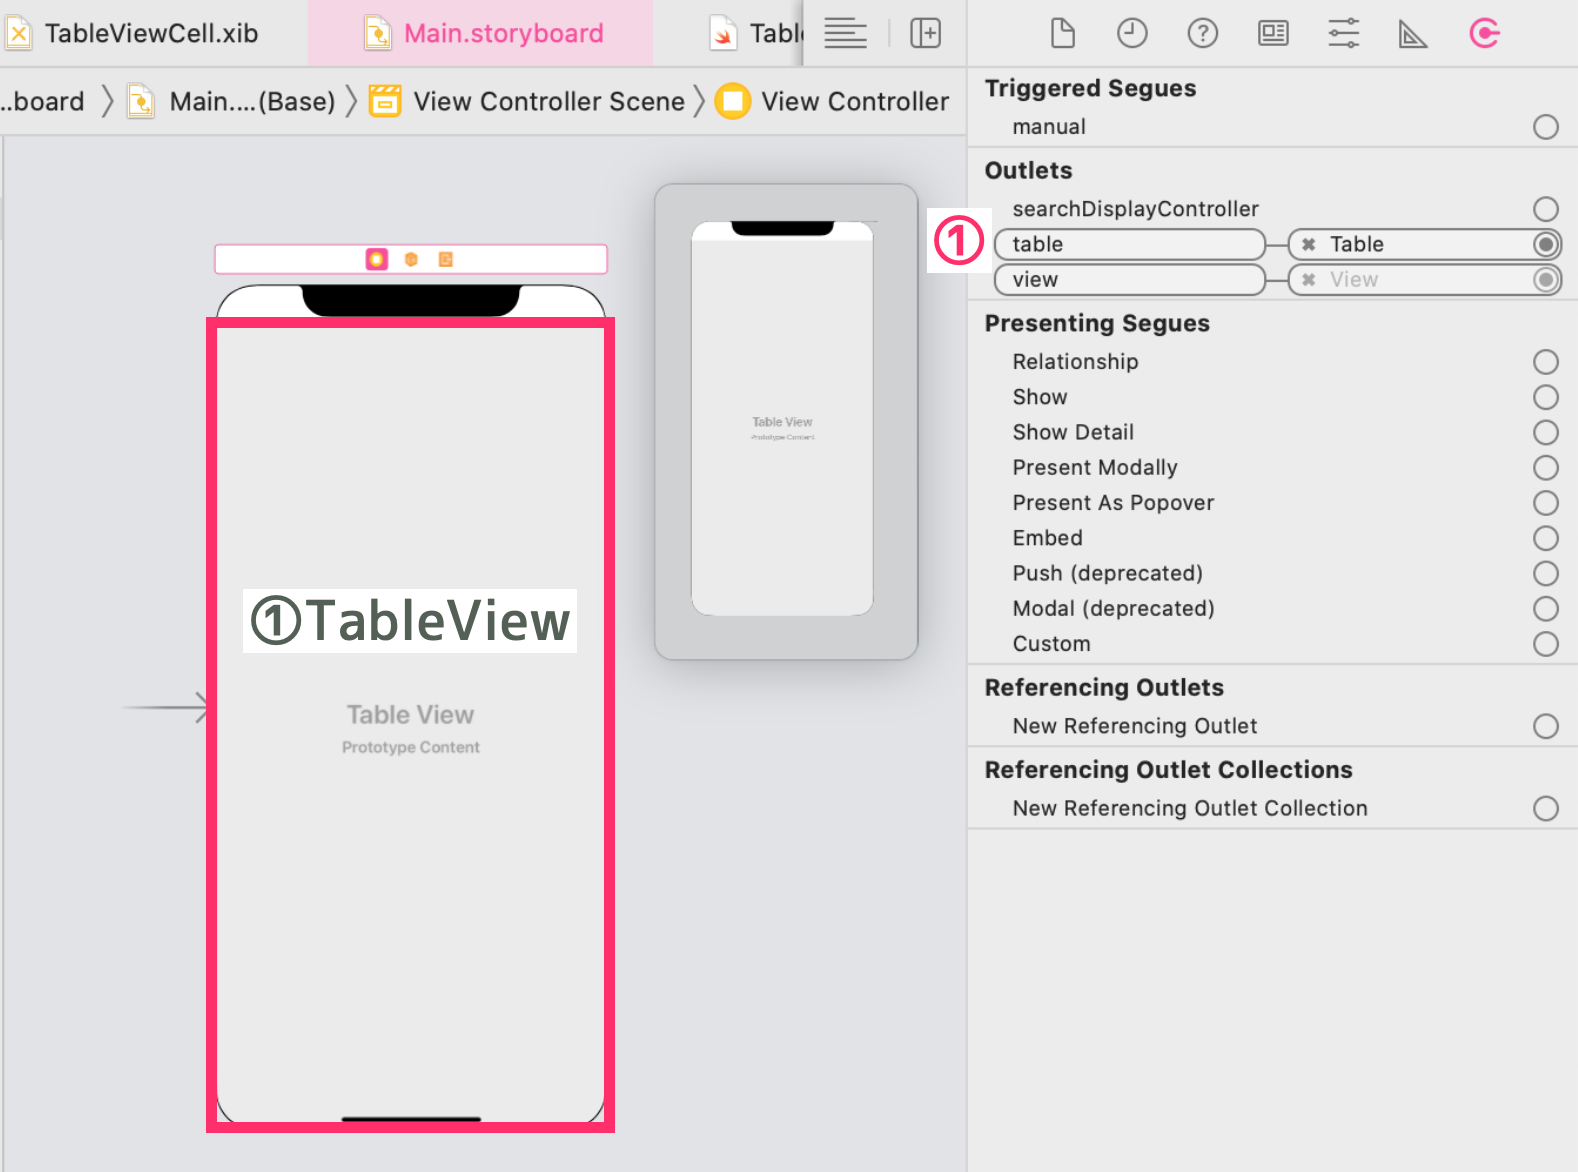
次にStoryboardの方も編集していきます。こちらも関連付けも忘れずに。

まとめ
応用すれば大体のことはできそうな気がします。
全く同じ内容のプロジェクトはこちら


