前提の環境
- PC : MSI GS63VR (GTX 1060 搭載で厚さ17.7㎜!)
- CPU: Intel Core™ i7-6700HQ
- GPU: NVIDIA GTX 1060 (6GB) (Optimus構成)
- Storage: 128GB SSD (NVMe) + 1TB HDD
OS インストール
- Windows環境をつぶしてUbuntuを入れるので、付属のリカバリユーティリティで、リカバリー領域をUSBメモリやISOファイルにバックアップ (デュアルブート環境構築は、簡単には出来そうになかったので諦めた)
- BIOS 設定 で Secure Boot を Off にしておく
- Ubuntu 16.04.1 をインストール (ubuntu-16.04.1-desktop-amd64.iso)
手順
CUDA インストール
Debファイルでレポジトリ・メタデータを登録する方法で。
$ sudo apt-get update
$ sudo apt-get upgrade
$ lsmod | grep nvidia # nvidiaがロードされていないことを確認
$ lsmod | grep nouveau # nouveauが利用されていることを確認
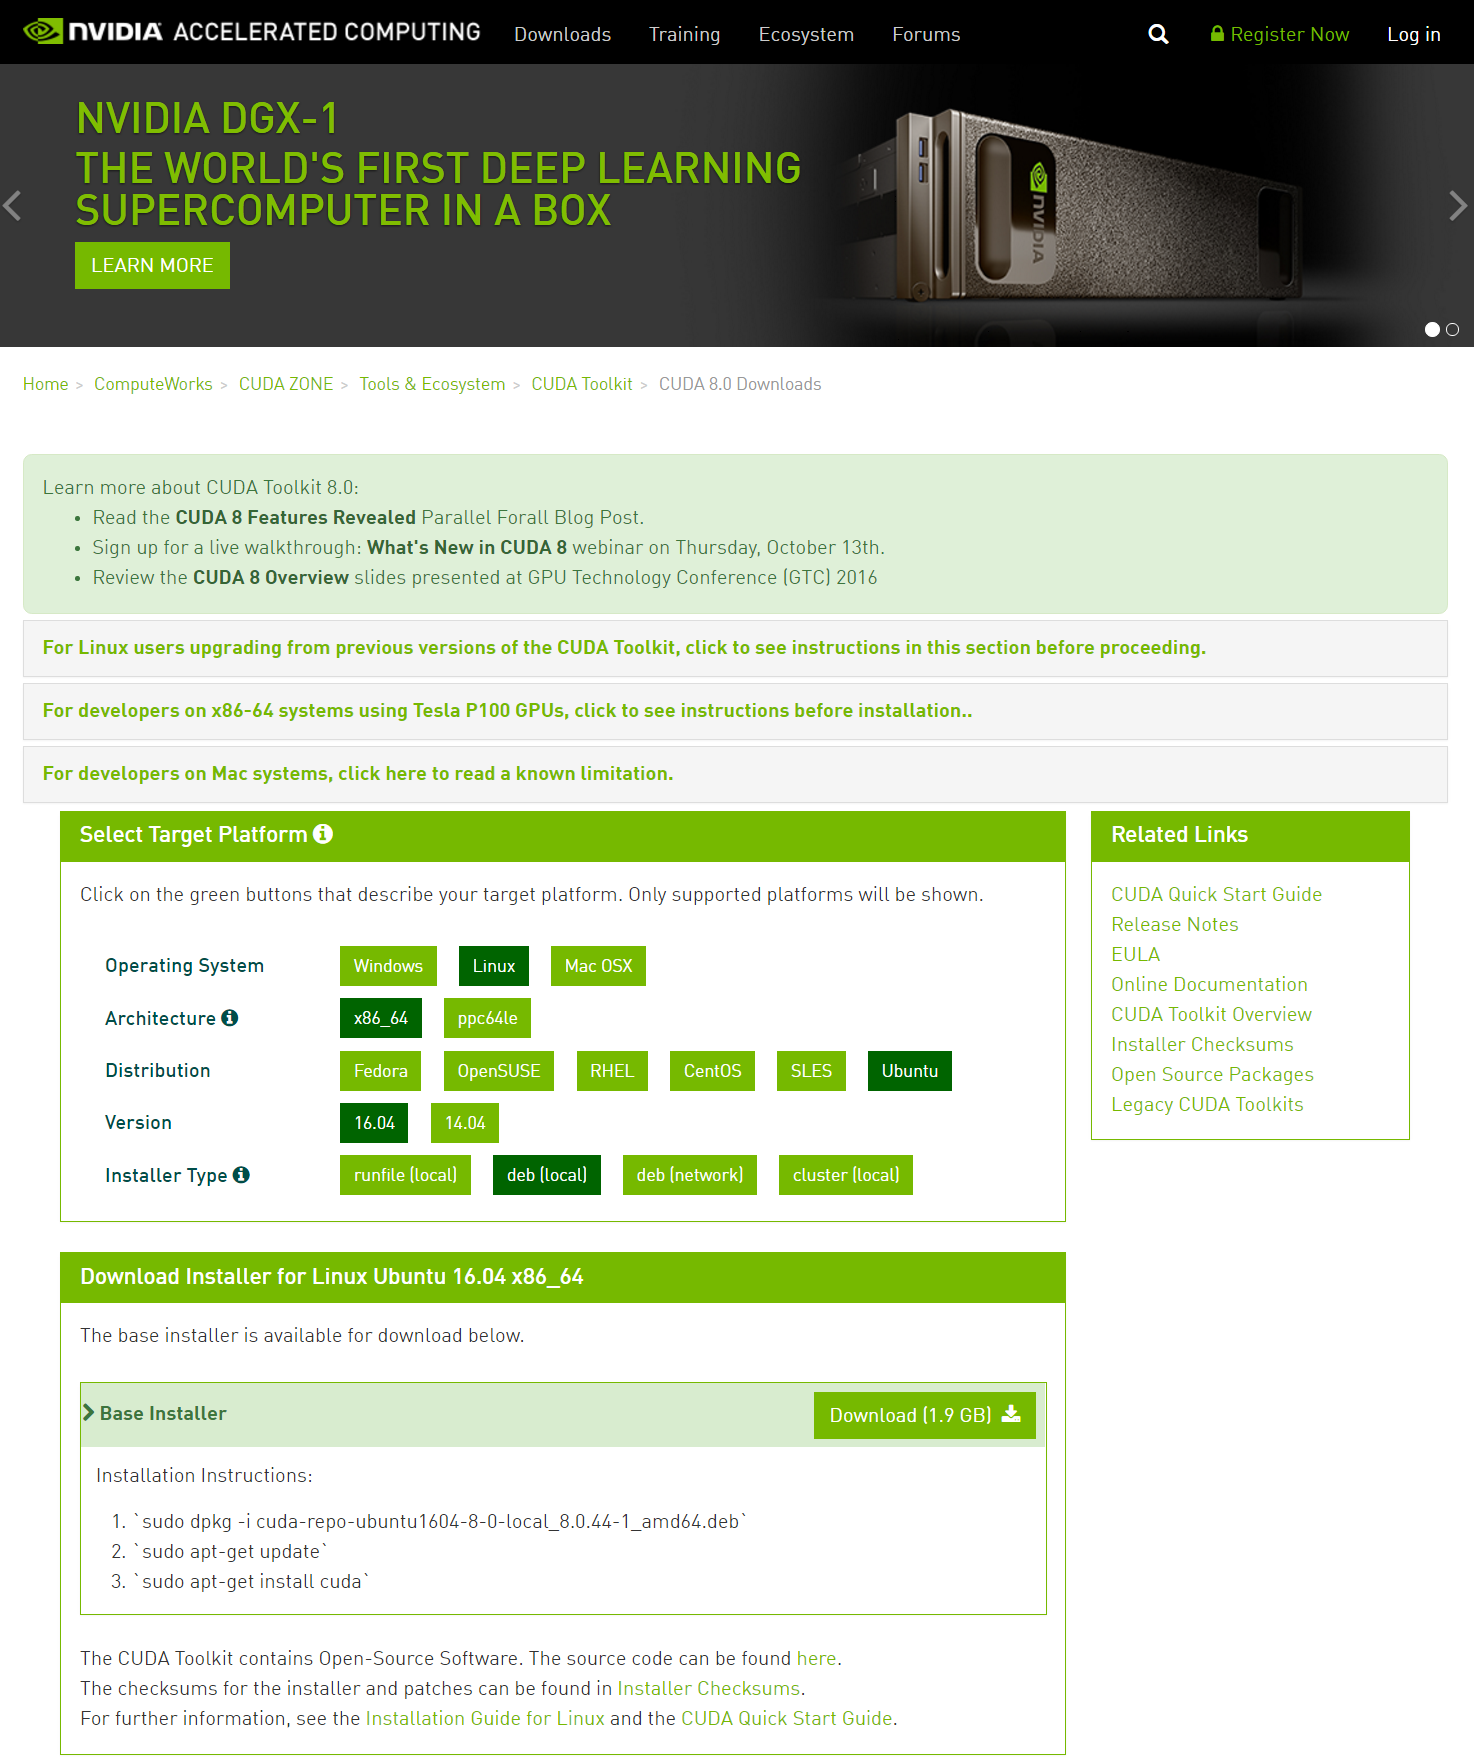
$ sudo dpkg --install cuda-repo-ubuntu1604-8-0-local_8.0.44-1_amd64.deb
$ sudo apt-get update
$ sudo apt-get install cuda
$ sudo shutdown -r now
環境変数を設定
~/.bashrc に以下を追加
~/.bashrc
...
export PATH=/usr/local/cuda-8.0/bin${PATH:+:${PATH}}
export LD_LIBRARY_PATH=/usr/local/cuda-8.0/lib64${LD_LIBRARY_PATH:+:${LD_LIBRARY_PATH}}
export CUDA_HOME=/usr/local/cuda
CUDAサンプルとツールで確認
$ cuda-install-samples-8.0.sh ~
$ cd ~/NVIDIA_CUDA-8.0_Samples/5_Simulations/nbody
$ make
$ ./nbody
$ nvidia-smi
$ prime-select query # nvidia になっていることを確認
$ sudo apt-get install freeglut3-dev glxinfo mesa-utils
$ glxinfo | less
NeuralTalk2 セットアップ
事前に必要になるツールをインストール
$ sudo apt-get install freeglut3-dev glxinfo mesa-utils libqtcore4 libqtgui4 vim git cmake libreadline-dev libprotobuf-dev protobuf-compiler
NeuralTalk2 setup
以下を参考に。
本家 README.md
https://github.com/karpathy/neuraltalk2/blob/master/README.md
NeuralTalk2で画像にキャプショニングしてみる
http://qiita.com/sobeit@github/items/9d1bd38a8f5be9193dfc
$ cd ~
$ git clone https://github.com/karpathy/neuraltalk2.git
$ curl -s https://raw.githubusercontent.com/torch/ezinstall/master/install-deps | bash
$ git clone https://github.com/torch/distro.git ~/torch --recursive
$ cd ~/torch/
$ ./install.sh  # and enter "yes" at the end to modify your bashrc
$ source ~/.bashrc
Torchがインストールされたか確認
$ th
cuDNNをNVIDIAのウェブサイトからダウンロード
$ tar zxvf cudnn-8.0-linux-x64-v5.1.tgz
$ mv cuda ~/cuDNN
$ cd ~/cuDNN/
$ ls
$ sudo vi ~/.bashrc
$ source ~/.bashrc
各 luarock パッケージのインストール
$ curl -s https://raw.githubusercontent.com/torch/ezinstall/master/install-deps | bash
$ git clone https://github.com/torch/distro.git ~/torch --recursive
$ cd ~/torch;
$ ./install.sh      # and enter "yes" at the end to modify your bashrc
$ source ~/.bashrc

$ luarocks install nn
$ luarocks install nngraph
$ luarocks install image

$ luarocks install lua-cjson
$ luarocks install cutorch
$ git clone https://github.com/soumith/cudnn.torch.git
$ cd cudnn.torch/
$ luarocks make cudnn-scm-1.rockspec

$ sudo apt-get install libprotobuf-dev protobuf-compiler
$ luarocks install loadcaffe

$ cd ~/torch/
$ ls
$ git clone https://github.com/deepmind/torch-hdf5
$ sudo apt-get -y install libhdf5-serial-dev hdf5-tools
$ cd torch-hdf5
$ luarocks make hdf5-0-0.rockspec
$ sudo apt-get -y install python-numpy python-six python-pip cython
$ sudo pip install h5py
学習済みモデルをダウンロード
$ cd ~/neuraltalk2/
$ wget http://cs.stanford.edu/people/karpathy/neuraltalk2/checkpoint_v1.zip
$ unzip checkpoint_v1.zip
実行
バッチ処理的に画像にキャプション付けをする(そしてその結果をWebサーバで見せる)eval.lua を実行。
まずはPicturesフォルダに適当な画像をいくつか入れておく。
$ th eval.lua -model ./model_id1-501-1448236541.t7 -image_folder ~/Pictures -num_images 10
$ cd vis
$ python -m SimpleHTTPServer
Webブラウザーを立ちあげて、localhost:8000 にアクセスする。