2021年8月14日追記
もっと簡単にできることに気が付いたので以下の記事を参照してください。
https://qiita.com/legacyworld/items/cee23b2ee1530bcb7f55
何をやりたいか
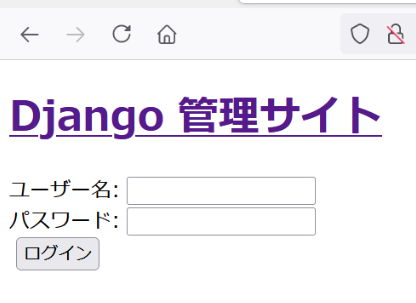
Djangoをpython manage.py runserverではなくちゃんとnginxから見せようとすると、staticファイルをnginxから見せる必要がある。そうしないとcss等が読み込めないためこういう残念なことになる。

hostpathを使えば何とかならなくもないが、結局ホストにファイルをコピーするなど必要なのであまりやりたくない。
もしくは手作業でstaticフォルダを作るか、kubernetesに展開した後にコピーしても良いのかもしれないが、出来るだけ自動でやりたい。
git cloneしてソースをいじってコンテナをビルドしてkubectl apply -f manifest.ymlで終わりたいのだ。
ソースコードはこちら
https://github.com/legacyworld/django_k8s
環境
CentOS7
minikube v1.21.0
Djangoのソースコードとして以下を借りました。
https://github.com/kakky/mybook30
https://qiita.com/kaki_k/items/511611cadac1d0c69c54
少しだけ変更してます。
全体の流れ
ホストにゴミは残したくないので全部コンテナにぶち込む。
要するにSTATIC_ROOTで指定したフォルダの中身をどうやってnginxに見せるか、である。
- DjangoのDockerfile内でpipによるDjangoインストールからmigrateやcollectstaticまでやってしまってDocker HubにPush
- nginxは/staticに来た時だけ返しそれ以外はuwsgiで飛ばすようにnginx.confを書いてビルドする
- Kubernetesに展開する際にnginxとdjangoのコンテナ間で共有するPersistent volumeを作成する
- collectstaticで作ったstaticフォルダの中身をこのpersistent volumeにコピーする。この時postStartを使ってコマンドを流す
- 上記の結果nginxからstaticファイルが見えるようになる
もっと良い方法があると思うのだが、とりあえずはこれで行けた
DBのバックアップとかloaddataとかは考慮してません。
全体構造
.
|-- docker-compose.yml
|-- manifest.yml
|-- mybook30
|   |-- api
|   |   |-- admin.py
|   |   |-- apps.py
|   |   |-- __init__.py
|   |   |-- migrations
|   |   |   `-- __init__.py
|   |   |-- models.py
|   |   |-- tests.py
|   |   |-- urls.py
|   |   `-- views.py
|   |-- cms
|   |   |-- admin.py
|   |   |-- apps.py
|   |   |-- forms.py
|   |   |-- __init__.py
|   |   |-- migrations
|   |   |   |-- 0001_initial.py
|   |   |   `-- __init__.py
|   |   |-- models.py
|   |   |-- static
|   |   |   `-- cms
|   |   |       |-- css
|   |   |       |   |-- bootstrap.min.css
|   |   |       |   `-- bootstrap.min.css.map
|   |   |       `-- js
|   |   |           |-- bootstrap.bundle.min.js
|   |   |           |-- bootstrap.bundle.min.js.map
|   |   |           |-- jquery-3.4.1.min.js
|   |   |           `-- jquery-3.4.1.min.map
|   |   |-- templates
|   |   |   `-- cms
|   |   |       |-- base.html
|   |   |       |-- book_edit.html
|   |   |       |-- book_list.html
|   |   |       |-- impression_edit.html
|   |   |       `-- impression_list.html
|   |   |-- tests.py
|   |   |-- urls.py
|   |   `-- views.py
|   |-- Dockerfile
|   |-- manage.py
|   |-- mybook
|   |   |-- asgi.py
|   |   |-- __init__.py
|   |   |-- settings.py
|   |   |-- urls.py
|   |   `-- wsgi.py
|   |-- requirements.txt
|   `-- uwsgi.ini
`-- nginx
    |-- Dockerfile
    `-- nginx_conf
        `-- nginx.tpl
docker-compose
nginxとdjango用に2つ用意するだけ。
version: '3'
services:

  django:
    image: legacyworld/django_k8s_django
    build:
      context: ./mybook30
      dockerfile: Dockerfile
    container_name: django
    ports:
      - 8000:8000
    stdin_open: true
    tty: true

  nginx:
    image: legacyworld/django_k8s_nginx
    build:
      context: ./nginx
      dockerfile: Dockerfile
    container_name: nginx
    ports:
      - 80:80
Django設定
オリジナルから以下を変更している
staticフォルダ設定
STATIC_URL = '/static/'
STATIC_ROOT = os.path.join(BASE_DIR, 'static')
STATICFILES_DIRS = [
    '/src/cms/static/cms',
    '/usr/local/lib/python3.8/site-packages/django/contrib/admin/static',
]
cms/static/cmsとadmin用のstaticファイルが必要になる。コンテナを立ち上げた後に以下のコマンドで場所はわかる
root@ec7157d343ce:/src# python manage.py findstatic .
Found '.' here:
  /src/cms/static/cms
  /usr/local/lib/python3.8/site-packages/django/contrib/admin/static
  /usr/local/lib/python3.8/site-packages/django/contrib/admin/static
  /src/cms/static
これをSTATICFILES_DIRに記載しておけばcollectstaticで集めてくれる。
STATIC_ROOTはcollectstaticした時に集められる場所。今回だとmybook30の下に出来る
これをnginxに見せる必要がある
DBの設定
dq.sqlite3をroot以外で書き込めるようにしないといけないのだが、ディレクトリがそうなっていないとエラーが出てしまうのでdbというディレクトリを作っている。
後ほどDokcerfileでchmodしている。
詳しくはこちらを参照
https://qiita.com/juniskw/items/7f948843d571ca2dd0f4
DATABASES = {
    'default': {
        'ENGINE': 'django.db.backends.sqlite3',
        'NAME': os.path.join(BASE_DIR, 'db/db.sqlite3'),
    }
}
nginxの設定
forwardingの部分だけ抜き出し
  server{
    listen 80;
    server_name nginx;
    location / {
      proxy_request_buffering off;
      include uwsgi_params;
      uwsgi_pass django:8000;
    }
    location /static {
      proxy_request_buffering off;
      root /usr/share/nginx/html;
    }
  }
STATIC_URLで'/static/'と指定しているので、location /staticでstaticファイルへのアクセスを指定すればよい。
というわけで、usr/share/nginx/htmlにSTATIC_ROOTの中身を見せる設定をすればよい。
これはKubernetesのDeploy時に行う。
DjangoのDockerfile
python 3.8-busterから一気にstaticフォルダ作成とDBのmigrateまで行う
FROM python:3.8-buster

WORKDIR /src

ADD ./ /src/
RUN pip3 install -r requirements.txt

RUN mkdir db
RUN chmod 777 db
RUN python manage.py collectstatic
RUN python manage.py migrate
RUN chmod 777 ./db/db.sqlite3

RUN useradd -r -s /bin/false uwsgiusr
USER uwsgiusr
ENTRYPOINT ["uwsgi","--ini","/src/uwsgi.ini"]
ADDでソースコードを全部コピーして、requirements.txtに記載のあるものを全部インストールする。
dbディレクトリ作成とchmodは先ほどsettings.pyのところで説明した通り。
kubernetesのmanifest
全部は長いので一部だけ。
PersistentVolumeClaim
まずはPersistentVolumeClaimを作る。
kind: PersistentVolumeClaim
apiVersion: v1
metadata:
    name: static-pvc
spec:
    accessModes:
      - ReadWriteOnce
    resources:
        requests:
            storage: 1Gi
DjangoのDeployment
上記のvolumeをdjangoのコンテナにマウントしてファイルをコピーする。
/mntにこのvolumeをマウントしている。
apiVersion: apps/v1
kind: Deployment
metadata:
  name: django-deploy
spec:
  selector:
    matchLabels:
      run: django
  replicas: 1
  template:
    metadata:
      labels:
        run: django
    spec:
      containers:
      - name: django
        image: legacyworld/django_k8s_django:latest
        volumeMounts:
        - name: static
          mountPath: /mnt
        lifecycle:
          postStart:
            exec:
              command: ["cp", "-r", "/src/static", "/mnt"]
      securityContext:
        fsGroup: 999
      volumes:
      - name: static
        persistentVolumeClaim:
          claimName: static-pvc
lifecycleでpostStartを指定するとDockerfileで記載しているENTRYPOINTに加えて、追加でコマンドを実行できる。
securityContextでfsGroupを指定しているのは、何もしないとrootの644でマウントされてしまってコピーできなくなるからである。
999は一回コンテナを立ち上げてid uwsgiusrで確認している。
一度確認すれば何回イメージを作っても変わらないようだ。
nginxのDeployment
apiVersion: apps/v1
kind: Deployment
metadata:
  name: web-deploy
spec:
  selector:
    matchLabels:
      run: web
  replicas: 1
  template:
    metadata:
      labels:
        run: web
    spec:
      containers:
      - name: nginx
        image: legacyworld/django_k8s_nginx:latest
        env:
        - name: PORT
          value: "80"
        ports:
        - containerPort: 80
        volumeMounts:
        - name: static
          mountPath: /usr/share/nginx/html
      volumes:
      - name: static
        persistentVolumeClaim:
          claimName: static-pvc
こちらはvolumeMountsするだけ。コピーが終われば自動的に見えて来るようになる。
確認
NodePortでアクセスする必要があるので、kubectlでポート番号を確認する。
[nutanix@localhost django_k8s]$ kubectl get services
NAME            TYPE        CLUSTER-IP       EXTERNAL-IP   PORT(S)          AGE
django          NodePort    10.98.62.97      <none>        8000:32746/TCP   86m
kubernetes      ClusterIP   10.96.0.1        <none>        443/TCP          10d
nginx-service   NodePort    10.111.177.213   <none>        80:30199/TCP     86m
nginxの30199にアクセスをすればよい。
通常ページ
今回のケースだとport number = 30199
http://<minikube hostのIP>:<port number>/cms/book

adminページ
http://<minikube hostのIP>:<port number>/admin

お疲れ様でした。