はじめに
OpenGLとC言語を使って初音ミクの3Dモデルを表示するプログラムを作成に挑戦しています。今回は点、線、三角形などのプリミティブの描画を行うところまでを目標に進めていきます。
過去の記事
プロジェクトの作成
Visual Studioを起動して、前回作成したソリューションを開きます。
ソリューションを右クリックして、「追加」→「新しいプロジェクト」をクリックします。
「Visual C++」→「Win32」の「Win32 コンソール アプリケーション」を選択します。プロジェクトの名前は「Step02」とします。
Win32 アプリケーション ウィザードでアプリケーションの種類を「コンソール アプリケーション」にして、追加のオプションで「空のプロジェクト」を選択し、「Security Development Lifecycle (SDL) チェック」を選択解除します。
プロパティーシートの設定
プロパティ マネージャを開いて、Step02を右クリックして、既存のプロパティ シートの追加をクリックします。前回作成したOpenGL_GLFW.propsを選択します。
ソースコードの追加
前回作成したプロジェクトのフォルダを開き、Main.c、Init.h、Init.cの3つのファイルをコピーし、Step02プロジェクトのフォルダに張り付けます。
ソリューションエクスプローラのStep02を右クリックして「追加」→「既存の項目」をクリックします。先ほど張り付けた3つのソースファイルをプロジェクトに追加します。
Step02を右クリックして「スタートアップ プロジェクトに設定」をクリックします。
シェーダの作成
今どきのOpenGLでは描画をするためにはシェーダを用意する必要があります。最低限必要なシェーダは頂点シェーダとフラグメントシェーダです。頂点シェーダは座標変換を行い、フラグメントシェーダは描画する色の計算を行います。
まずは頂点シェーダです。以下は入力された頂点positionをそのまま出力するシェーダです。変数gl_Positionに代入すると出力になります。
# version 450

layout (location = 0) in vec2 position;

void main()
{
    gl_Position = vec4(position, 0.0, 1.0);
}
プロジェクトを右クリックして「追加」→「新しいフィルター」をクリックします。フィルタの名前は「シェーダー ファイル」とします。
「シェーダー ファイル」フィルタを右クリックして「追加」→「新しい項目」をクリックします。適当なテンプレート(「ユーティリティ」→「テキストファイル」など)を選択して、名前を「Vertex.glsl」にしてプロジェクトに追加します。
ファイルに上で示した頂点シェーダの定義を書きこみます。
同様にフラグメントシェーダ「Fragment.glsl」をプロジェクトに追加して、ファイルの中身を以下のようにします。
# version 450

out vec4 out_color;

void main()
{
    out_color = vec4(1.0, 1.0, 1.0, 1.0);
}
シェーダの読み込み
ここではシェーダを読み込む関数を作成します。シェーダに関する関数はShaderLoader.cに定義しShaderLoader.hに宣言します。まずは、この2つのファイルをプロジェクトに追加します。
次に頂点シェーダとフラグメントシェーダの読み込みとコンパイル・リンクを行う以下の関数をShaderLoader.cに定義します。
GLuint load_shader(
    const char *vertex_shader_fname,
    const char *fragment_shader_fname)
{
    GLuint vertex_shader, fragment_shader;
    GLuint program;
    char *contents;

    vertex_shader = glCreateShader(GL_VERTEX_SHADER);
    contents = get_file_contents(vertex_shader_fname);
    glShaderSource(vertex_shader, 1, &contents, NULL);
    glCompileShader(vertex_shader);
    free(contents);

    fragment_shader = glCreateShader(GL_FRAGMENT_SHADER);
    contents = get_file_contents(fragment_shader_fname);
    glShaderSource(fragment_shader, 1, &contents, NULL);
    glCompileShader(fragment_shader);
    free(contents);

    program = glCreateProgram();
    glAttachShader(program, vertex_shader);
    glAttachShader(program, fragment_shader);
    glLinkProgram(program);

    glDeleteShader(vertex_shader);
    glDeleteShader(fragment_shader);

    glUseProgram(program);

    return program;
}
ここでget_file_contents関数はファイルの中身を文字列として返す関数で、以下のように定義します。
char *get_file_contents(const char *file_name)
{
    char *buf;
    FILE *fp;
    size_t read_size, buf_size;

    fp = fopen(file_name, "r");
    if (!fp) {
        fprintf(stderr, "Cannot open %s.\n", file_name);
        exit(EXIT_FAILURE);
    }

    buf_size = DEF_BUF_SIZE;
    buf = malloc(sizeof(char) * buf_size);
    if (!buf) {
        fprintf(stderr, "Memory allocation error.\n");
        exit(EXIT_FAILURE);
    }

    read_size = 0;
    for (;;) {
        size_t s;
        s = fread(buf + read_size, sizeof(char), DEF_BUF_SIZE, fp);
        read_size += s;
        if (s < DEF_BUF_SIZE) {
            break;
        }
        buf_size += DEF_BUF_SIZE;
        buf = realloc(buf, sizeof(char) * buf_size);
        if (!buf) {
            fprintf(stderr, "Memory allocation error.\n");
            exit(EXIT_FAILURE);
        }
    }
    *(buf + read_size) = '\0';

    return buf;
}
ShaderLoader.hとShaderLoader.cはそれぞれ以下のようになりました。
# ifndef SHADER_LOADER_H_INCLUDE
# define SHADER_LOADER_H_INCLUDE

# include <GL/glew.h>

/* シェーダの読み込み */
GLuint load_shader(
    const char *vertex_shader_fname,
    const char *fragment_shader_fname);

# endif
# include <stdio.h>
# include <stdlib.h>
# include <GL/glew.h>
# include <GLFW/glfw3.h>

# define DEF_BUF_SIZE BUFSIZ

/* ファイルの内容をメモリに割り当て */
char *get_file_contents(const char *file_name);

/*==============================*
** シェーダの読み込み
**==============================*/
GLuint load_shader(
    const char *vertex_shader_fname,
    const char *fragment_shader_fname)
{
    GLuint vertex_shader, fragment_shader;
    GLuint program;
    char *contents;

    vertex_shader = glCreateShader(GL_VERTEX_SHADER);
    contents = get_file_contents(vertex_shader_fname);
    glShaderSource(vertex_shader, 1, &contents, NULL);
    glCompileShader(vertex_shader);
    free(contents);

    fragment_shader = glCreateShader(GL_FRAGMENT_SHADER);
    contents = get_file_contents(fragment_shader_fname);
    glShaderSource(fragment_shader, 1, &contents, NULL);
    glCompileShader(fragment_shader);
    free(contents);

    program = glCreateProgram();
    glAttachShader(program, vertex_shader);
    glAttachShader(program, fragment_shader);
    glLinkProgram(program);

    glDeleteShader(vertex_shader);
    glDeleteShader(fragment_shader);

    glUseProgram(program);

    return program;
}

/*------------------------------*
** ファイルの内容をメモリに割り当て
**------------------------------*/
char *get_file_contents(const char *file_name)
{
    char *buf;
    FILE *fp;
    size_t read_size, buf_size;

    fp = fopen(file_name, "r");
    if (!fp) {
        fprintf(stderr, "Cannot open %s.\n", file_name);
        exit(EXIT_FAILURE);
    }

    buf_size = DEF_BUF_SIZE;
    buf = malloc(sizeof(char) * buf_size);
    if (!buf) {
        fprintf(stderr, "Memory allocation error.\n");
        exit(EXIT_FAILURE);
    }

    read_size = 0;
    for (;;) {
        size_t s;
        s = fread(buf + read_size, sizeof(char), DEF_BUF_SIZE, fp);
        read_size += s;
        if (s < DEF_BUF_SIZE) {
            break;
        }
        buf_size += DEF_BUF_SIZE;
        buf = realloc(buf, sizeof(char) * buf_size);
        if (!buf) {
            fprintf(stderr, "Memory allocation error.\n");
            exit(EXIT_FAILURE);
        }
    }
    *(buf + read_size) = '\0';

    return buf;
}
最後にmain関数に以下のインクルードディレクティブと変数宣言、load_shader関数の呼び出しを追加するとシェーダの読み込みが実行されます。
# include "ShaderLoader.h"
GLuint program;
program = load_shader("Vertex.glsl", "Fragment.glsl");
頂点情報を格納するバッファオブジェクトの作成
バッファオブジェクトはGPU上のデータを表すオブジェクトです。glCreateBuffers関数でバッファを作成して、glNamedBufferData関数でデータを転送します。
main関数に以下の宣言を追加します。
    GLuint position_buffer;
    GLfloat position_data[] = { 0.0f, 0.0f };
load_shaderの呼び出しの後ろに以下の文を追加します。
    glCreateBuffers(1, &position_buffer);
    glNamedBufferData(position_buffer,
        sizeof(position_data), position_data,
        GL_STATIC_DRAW);
頂点配列オブジェクトの作成
モデルを描画するのに必要なデータは通常、頂点座標や色など複数のものから構成されています。頂点配列オブジェクトはこれらをまとめたものです。
main関数に以下の宣言を追加します。
    GLuint vertex_array;
    const GLuint position_location = 0;
    const GLuint position_bindindex = 0;
メッセージループの上にglCreateVertexArrays関数の呼び出しを追加して、頂点配列オブジェクトを作成します。
glCreateVertexArrays(1, &vertex_array);
glEnableVertexArrayAttrib関数で、頂点属性のposition_location番目を有効化します。これは、Vertex.glslのlocation = 0のところに対応します。
    glEnableVertexArrayAttrib(
        vertex_array, position_location);
glVertexArrayAttribFormat関数で、頂点属性配列の型(float)を指定します。
    glVertexArrayAttribFormat(
        vertex_array, position_location,
        2, GL_FLOAT, GL_FALSE, 0);
これらの情報をglVertexArrayAttribBinding関数でposition_bindindex番に関連付ける。
    glVertexArrayAttribBinding(
        vertex_array, position_location,
        position_bindindex);
position_bindindex番に関連付けられた頂点属性の具体的なデータは、position_bufferに格納されていることを指定する。
    glVertexArrayVertexBuffer(
        vertex_array, position_bindindex,
        position_buffer, 0, sizeof(GLfloat) * 2);
点の描画
作成した頂点配列オブジェクトを使って描画を行います。メッセージループのglClear関数の呼び出しの下に以下の記述を追加します。
        glBindVertexArray(vertex_array);
        glDrawArrays(GL_POINTS, 0, 1);
この段階でMain.cは以下のようになっています。
# include <stdio.h>
# include <stdlib.h>
# include <GL/glew.h>
# include <GLFW/glfw3.h>
# include "Init.h"
# include "ShaderLoader.h"

int main(void)
{
    GLFWwindow *window;
    GLuint program;

    GLuint position_buffer;
    GLfloat position_data[] = { 0.0f, 0.0f };

    GLuint vertex_array;
    const GLuint position_location = 0;
    const GLuint position_bindindex = 0;

    window = init(640, 480, "Step 02");

    program = load_shader("Vertex.glsl", "Fragment.glsl");

    glCreateBuffers(1, &position_buffer);
    glNamedBufferData(position_buffer,
        sizeof(position_data), position_data,
        GL_STATIC_DRAW);

    glCreateVertexArrays(1, &vertex_array);

    glEnableVertexArrayAttrib(
        vertex_array, position_location);
    glVertexArrayAttribFormat(
        vertex_array, position_location,
        2, GL_FLOAT, GL_FALSE, 0);

    glVertexArrayAttribBinding(
        vertex_array, position_location,
        position_bindindex);
    glVertexArrayVertexBuffer(
        vertex_array, position_bindindex,
        position_buffer, 0, sizeof(GLfloat) * 2);

    while (!glfwWindowShouldClose(window)) {
        glClearColor(0.6, 0.8, 0.8, 1.0);
        glClear(GL_COLOR_BUFFER_BIT);

        glBindVertexArray(vertex_array);
        glDrawArrays(GL_POINTS, 0, 1);

        glfwSwapBuffers(window);
        glfwPollEvents();
    }

    glfwTerminate();

    return EXIT_SUCCESS;
}
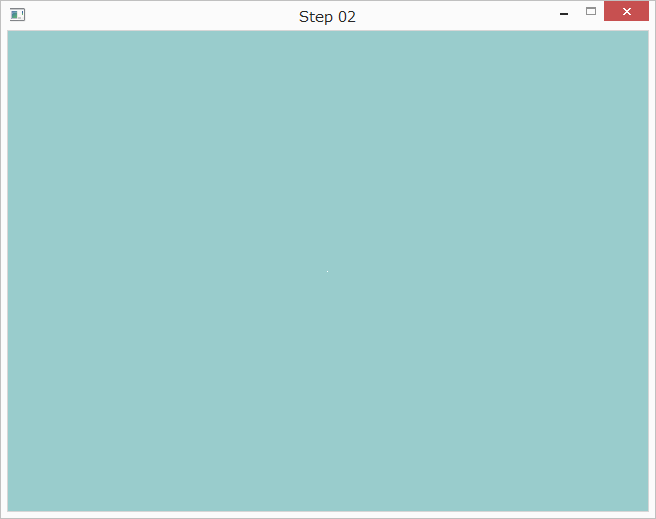
プログラムを実行すると以下のように表示されます。ウインドウの中央に白い点が描画されています。
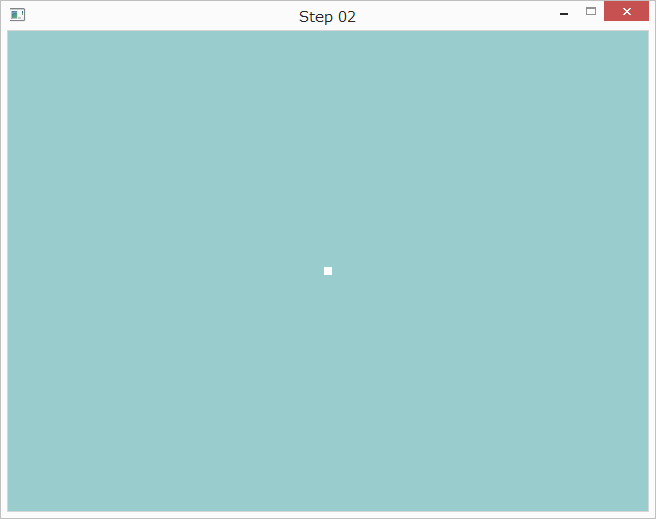
点が小さすぎるのでメインループのglClearの下に`以下の行を追加しました。
glPointSize(8.0);
すると以下のように表示されました。
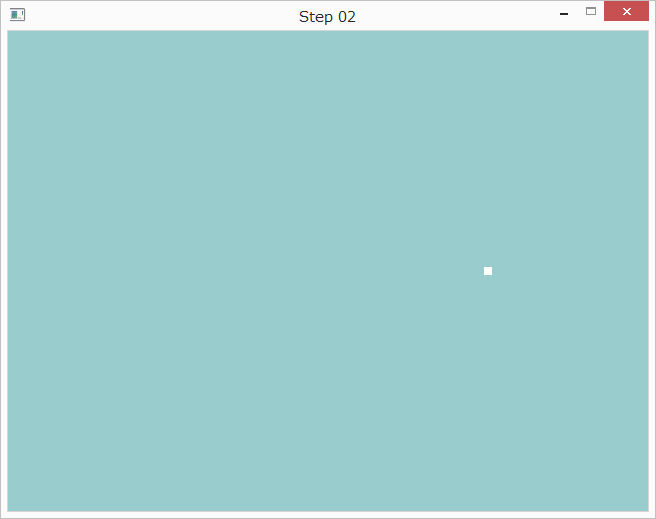
点の座標の変更
main関数内のposition_dataの定義を変更することで、点を描画する座標を変更できます。
GLfloat position_data[] = { 0.5f, 0.0f };
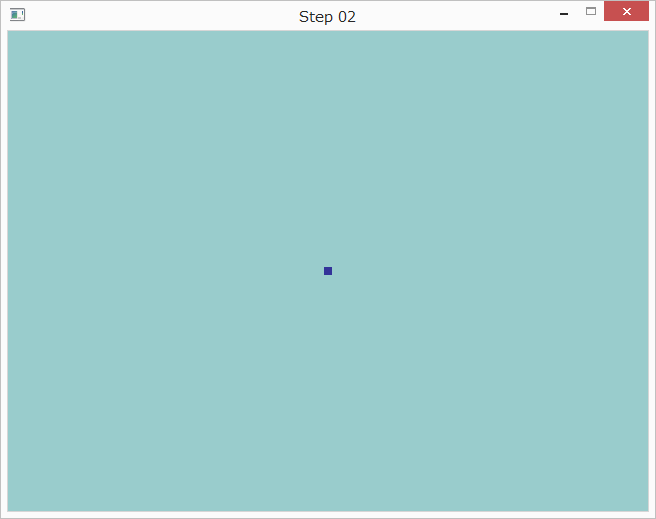
点の色の変更
Fragment.glslのout_colorへの代入を以下のように変更すると点の色が変わります。
out_color = vec4(0.2, 0.2, 0.6, 1.0);
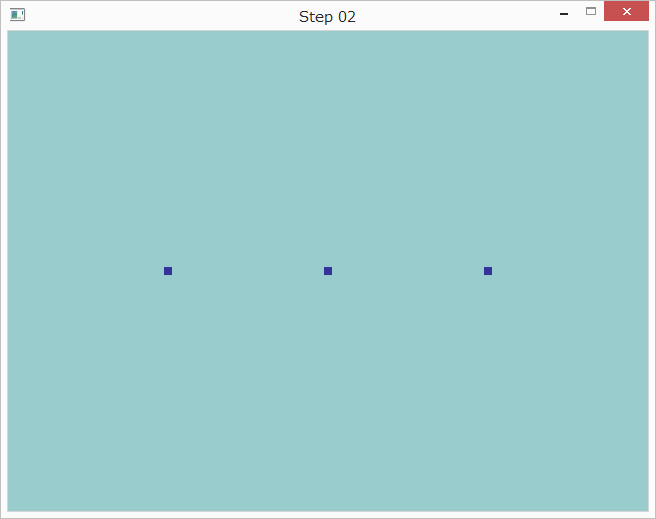
複数の点の描画
まず、position_dataの定義を以下のように変更します。
    GLfloat position_data[] = {
        -0.5f, 0.0f,
        0.0f, 0.0f,
        0.5f, 0.0f
    };
次に、メッセージループのglDrawArraysの呼び出しを以下のように変更します。
glDrawArrays(GL_POINTS, 0, 3);
すると以下のように表示されます。
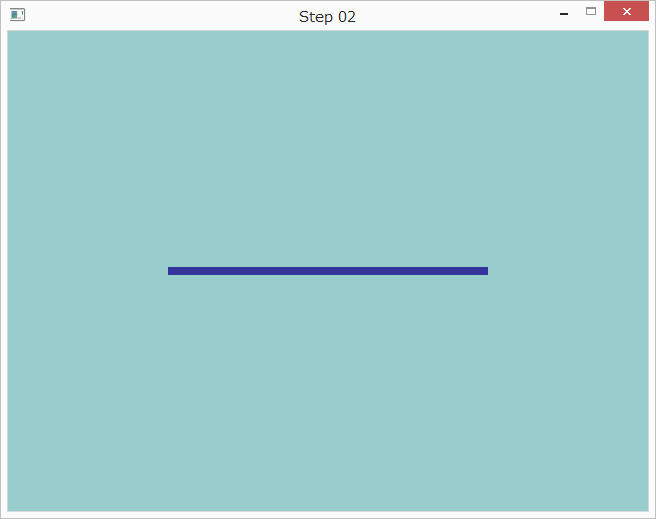
線の描画
まず、position_dataの定義を以下のように変更します。
    GLfloat position_data[] = {
        -0.5f, 0.0f,
        0.5f, 0.0f
    };
次に、メッセージループに以下の行を追加します。
glLineWidth(8.0);
最後に、メッセージループのglDrawArraysの呼び出しを以下のように変更します。
glDrawArrays(GL_LINES, 0, 2);
すると以下のように表示されます。
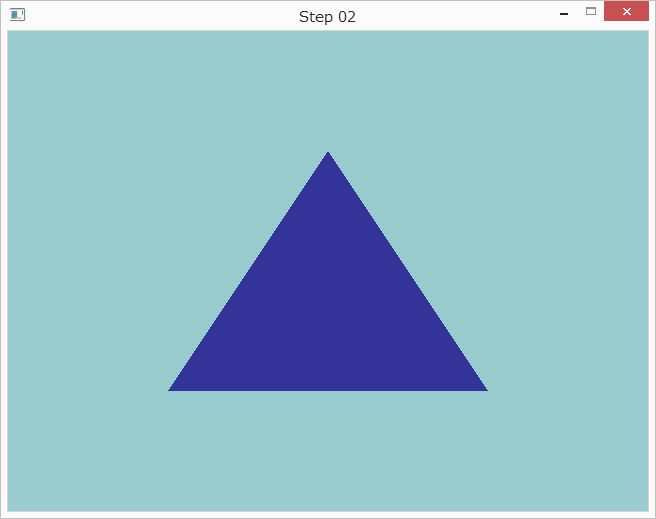
三角形の描画
まず、position_dataの定義を以下のように変更します。
    GLfloat position_data[] = {
        0.0f, 0.5f,
        -0.5f, -0.5f,
        0.5f, -0.5f
    };
次に、メッセージループのglDrawArraysの呼び出しを以下のように変更します。
glDrawArrays(GL_TRIANGLES, 0, 3);
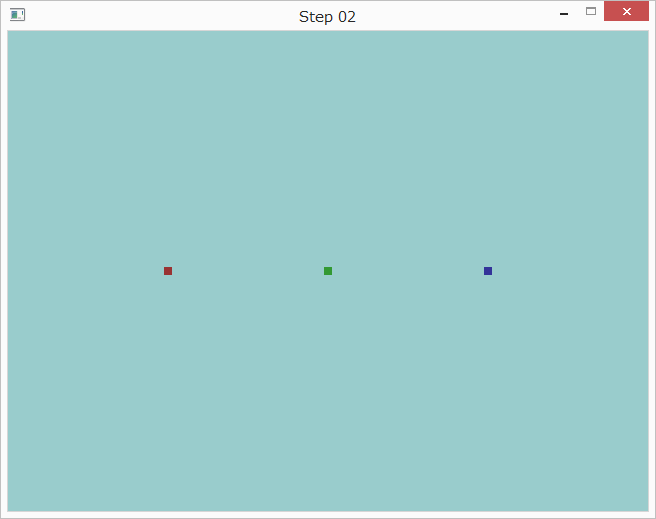
色情報をシェーダに受け渡す
現在頂点の色はシェーダで定数として指定しています。頂点と同様に、色の情報もシェーダに受け渡すようにしましょう。
まず色のデータを追加します。
    GLuint color_buffer;
    GLfloat color_data[] = {
        0.6f, 0.2f, 0.2f,
        0.2f, 0.6f, 0.2f,
        0.2f, 0.2f, 0.6f
    };
色のロケーションとバインドインデックスを用意します。
    const GLuint color_location = 1;
    const GLuint color_bindindex = 1;
色を格納するバッファオブジェクトを作り、データを転送します。
    glCreateBuffers(1, &color_buffer);
    glNamedBufferData(color_buffer,
        sizeof(color_data), color_data,
        GL_STATIC_DRAW);
色に関する頂点属性の設定を行います。
    glEnableVertexArrayAttrib(
        vertex_array, color_location);
    glVertexArrayAttribFormat(
        vertex_array, color_location,
        3, GL_FLOAT, GL_FALSE, 0);

    glVertexArrayAttribBinding(
        vertex_array, color_location,
        color_bindindex);
    glVertexArrayVertexBuffer(
        vertex_array, color_bindindex,
        color_buffer, 0, sizeof(GLfloat) * 3);
頂点シェーダを以下のように書き替えます。
# version 450

layout (location = 0) in vec2 position;
layout (location = 1) in vec3 color_in;

out vec3 color;

void main()
{
    color = color_in;
    gl_Position = vec4(position, 0.0, 1.0);
}
フラグメントシェーダを以下のように書き替えます。
# version 450

in vec3 color;

out vec4 out_color;

void main()
{
    out_color = vec4(color, 1.0);
}
ここまででMain.cは以下のようになりました。
# include <stdio.h>
# include <stdlib.h>
# include <GL/glew.h>
# include <GLFW/glfw3.h>
# include "Init.h"
# include "ShaderLoader.h"

int main(void)
{
    GLFWwindow *window;
    GLuint program;

    GLuint position_buffer;
    GLfloat position_data[] = {
        -0.5f, 0.0f,
        0.0f, 0.0f,
        0.5f, 0.0f
    };

    GLuint color_buffer;
    GLfloat color_data[] = {
        0.6f, 0.2f, 0.2f,
        0.2f, 0.6f, 0.2f,
        0.2f, 0.2f, 0.6f
    };

    GLuint vertex_array;

    const GLuint position_location = 0;
    const GLuint position_bindindex = 0;

    const GLuint color_location = 1;
    const GLuint color_bindindex = 1;

    window = init(640, 480, "Step 02");

    program = load_shader("Vertex.glsl", "Fragment.glsl");

    glCreateBuffers(1, &position_buffer);
    glNamedBufferData(position_buffer,
        sizeof(position_data), position_data,
        GL_STATIC_DRAW);

    glCreateBuffers(1, &color_buffer);
    glNamedBufferData(color_buffer,
        sizeof(color_data), color_data,
        GL_STATIC_DRAW);

    glCreateVertexArrays(1, &vertex_array);

    glEnableVertexArrayAttrib(
        vertex_array, position_location);
    glVertexArrayAttribFormat(
        vertex_array, position_location,
        2, GL_FLOAT, GL_FALSE, 0);

    glVertexArrayAttribBinding(
        vertex_array, position_location,
        position_bindindex);
    glVertexArrayVertexBuffer(
        vertex_array, position_bindindex,
        position_buffer, 0, sizeof(GLfloat) * 2);

    glEnableVertexArrayAttrib(
        vertex_array, color_location);
    glVertexArrayAttribFormat(
        vertex_array, color_location,
        3, GL_FLOAT, GL_FALSE, 0);

    glVertexArrayAttribBinding(
        vertex_array, color_location,
        color_bindindex);
    glVertexArrayVertexBuffer(
        vertex_array, color_bindindex,
        color_buffer, 0, sizeof(GLfloat) * 3);

    while (!glfwWindowShouldClose(window)) {
        glClearColor(0.6, 0.8, 0.8, 1.0);
        glClear(GL_COLOR_BUFFER_BIT);

        glPointSize(8.0);

        glBindVertexArray(vertex_array);
        glDrawArrays(GL_POINTS, 0, 3);

        glfwSwapBuffers(window);
        glfwPollEvents();
    }

    glfwTerminate();

    return EXIT_SUCCESS;
}
実行すると以下のように表示されます。
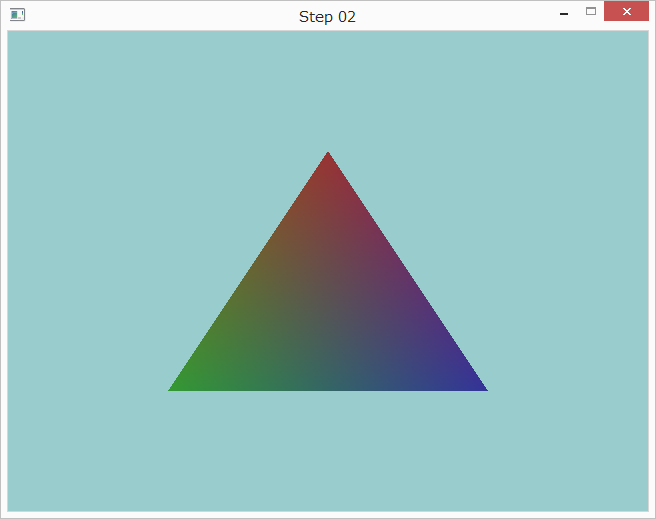
プログラムを改造して三角形を表示するようにすると以下のようになります。
