この記事は NewsPicks Advent Calendar 2019 の10日目の記事です。
はじめに
こんにちは、NewsPicksでiOSとサーバーサイド開発などをしている @kz_morita です。
3日目にも GitHub Actionsの記事 を書かせていただいた者です。
前回の記事では、Github Actionsを使ってブログをデプロイすることについて書かせていただいたのですが、その中で、以下のように Actions が再利用可能なことについて言及させていただきました。
他の人が実装した Actions も再利用可能なので -
今回は、他の人が使えるように Github Actions を作成して他のリポジトリから再利用して実行するというところまで書いていこうと思います。
GitHub に Pushすると Actions で FizzBuzz が計算できるというものを実装していきます。
基本的には、公式サイトのドキュメントの通りに実装していきます。
https://help.github.com/ja/actions/automating-your-workflow-with-github-actions/building-actions
今回の成果物はこちら
https://github.com/foresta/actions-fizzbuzz
以下はテスト用のWorkflowファイルです
https://github.com/foresta/actions-sample-test/blob/master/.github/workflows/fizzbuzz.yml
準備
GitHub リポジトリの準備
Actionsを公開するためには、Github リポジトリが必要です。公開するActions用のリポジトリを用意しましょう。
他のアプリケーションコードなどと共存させることもできますが、Actions 専用のリポジトリを作成することが推奨されています。
Node.js と npm の準備
また、GitHub Actions は JavaScript で実装するか、 Dockerコンテナ で作成するかの二択となります。
今回は、JavaScript で実装をしていくので、Node.js 12.x をインストールしてください。
自分の環境は以下のような感じです。
$ node -v
v12.4.0

$ npm -v
6.13.2
インストールがおわったら、リポジトリで package.json を作っておきます。
$ npm init -y
Actions の実装
Actions と認識するために、リポジトリに action.yml ファイルを用意する必要があります。このファイルは GitHub Actions 用の設定ファイルとなります。
name: 'FizzBuzz'
description: 'Calculate Fizzbuzz below the inputted number.'
inputs:
  number:  # id of input
    description: 'number for FizzBuzz'
    required: true
    default: 100
runs:
  using: 'node12'
  main: 'index.js'
それぞれ順を追って説明していきます。
上2行は、このActionsの説明になります。
name: 'FizzBuzz'
description: 'Calculate Fizzbuzz below the inputted number.'
inputs: 以下で、入力を指定することができます。ここでは、number という入力を定義していて、この値を後述する JavaScript 内から参照することができます。
inputs:
  number:  # id of input
    description: 'number for FizzBuzz'
    required: true
    default: 100
runs: から始まるブロックでは、実行環境の設定をします。
runs:
  using: 'node12'
  main: 'index.js'
ここでは、使用する node のバージョンと、Actions のエントリーポイント ( index.js ) を定義しています。この index.js 内にFizzBuzzの処理を書いていきます。
index.js の実装
それでは、index.jsを実装していきます。
実装の前に、actions 関連の npm パッケージをインストールします。
$ npm i @actions/core
インストールが完了したら、index.jsの実装に入っていきます。
まず、npm インストールしたパッケージを読み込みます。
const core = require('@actions/core');
index.jsのメインの部分は以下のようになります。
// ...

try {
  // Write your code.
} catch (error) {
  core.setFailed(error.message);
}
全体を try-catch で囲い、失敗時にはエラーメッセージを core.setFailed(error.message) を利用して記録と、終了コードを設定しています。
次に、入力を受け取っていきます。
入力は、以下のように受け取ることができます。
const core = require('@actions/core');

// ...

const number = core.getInput('number');
あとは、受け取ったnumber を使ってFizzBuzz結果を出力してあげればOKです。
全体は以下のようになるかと思います。
const core = require('@actions/core');

function fizzbuzz(number) {
  for (let i = 1; i <= number; i++) {
    if (i % 15 == 0) {
      console.log('FizzBuzz');
    } else if (i % 3 == 0) {
      console.log('Fizz');
    } else if (i % 5 == 0) {
      console.log('Buzz');
    } else {
      console.log(i);
    }
  }
}

try {
  // action.yml で定義した、入力を受け取る
  const username = core.getInput('number');
  console.log(`Calcurate FizzBuzz below ${number}.`);

  // FizzBuzz
  fizzbuzz(number);

  console.log(`Completed FizzBuzz!!`);
} catch (error) {
  core.setFailed(error.message);
}
Actionsの公開
ここまでコードを実装してきたのでこれを公開していきます。
通常、github に npm パッケージである、node_modules/ はpushしないことが多いと思うので、 .gitignore などを用いて除外しているケースが多いかと思いますが、GitHub Actions として動かすためには、リポジトリには完全なパッケージとする必要があります。
つまり、@actions/core などのnpmパッケージのコードも必要になります。
ここでは、 zeit/ncc というツールを用いて、index.js をコンパイルし、完全なjsファイルを作成します。
まず、ncc をインストールします
$ npm i -g @zeit/ncc
インストールが完了したら、ビルドをします。
$ ncc build index.js
ビルドが完了するとdist/index.js というコンパイルされたファイルが生成されます。このファイルを Actions のエントリーポイントにすれば良いため、action.yml を以下のように変更します
runs:
  using: 'node12'
+ main: 'dist/index.js'
- main: 'index.js'
Actions の実行
それでは、実行してみます。
今回は、他のリポジトリのPushのタイミングで、FizzBuzz Actionsを実行してみます。
任意のリポジトリに以下のような workflow ファイルを作成します。
name: FizzBuzz

on: [push]

jobs:
  build:

    runs-on: ubuntu-latest

    steps:
    - name: FizzBuzz
      uses: foresta/actions-fizzbuzz@v1
      with:
        number: 200
以下の記述で、Actionsのリポジトリをしていするのですが、今回は actions-fizzbuzz リポジトリ に v1 というタグを切って、そのタグを指定するようにしています。
uses: foresta/actions-fizzbuzz@v1
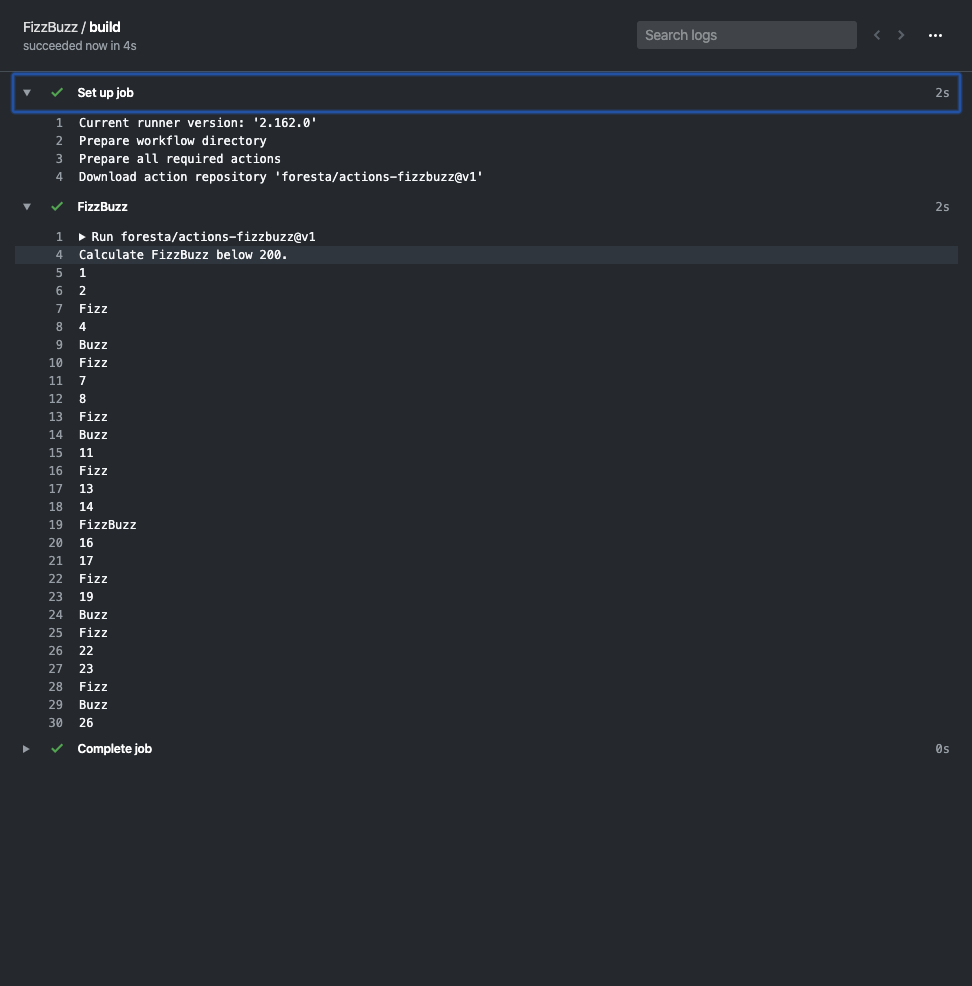
実行すると以下のようにFizzBuzzが実行できます。
![]()
![]()
![]()
おわりに
今回は FizzBuzz を題材に、Github Actions を作成してみました。公式のドキュメントも充実していて、割と簡単に作成することができました。GitHub Actions では、任意のJavaScriptコードを実行することができるため、いろいろなサービスとの連携など柔軟に行えそうです。
また、GitHub の Marketplace で他の人が作成したActionsを検索することができます。もちろん自分の作成したActionsもPublish することができます。
すでにいろいろなActionsが公開されているので、Marketplace で検索すれば大抵なことは実現できそうな気がしています。またなければ自分で作成して公開していって、どんどん充実させていきたいなと思いました。
参考サイト
明日は、@niken による 「新チームでasanaを少し工夫して利用した件」 の予定です。お楽しみに!
