概要
electronベースのフォトビューワーみたいなのを作ろうとした際に、画像ストレージをDropboxにしようとしてAPIを調査したのでまとめます。
ファイルを操作するAPIはたくさんあるのですが、今回はAPIを使用するためのtokenを取得するところまでを行います。
electronでやろうとしてますが、今回は単純にローカルにあるhtmlとjavascriptからDropboxAPIを使用します。
認証までの流れ
先に、認証してtokenを取得するまでのフローを簡単に説明します。
ローカルのindex.htmlをブラウザで開く(ソースは後ほど)

↓
STARTボタンを押して、別タブでDropboxの認証ページを開く

↓
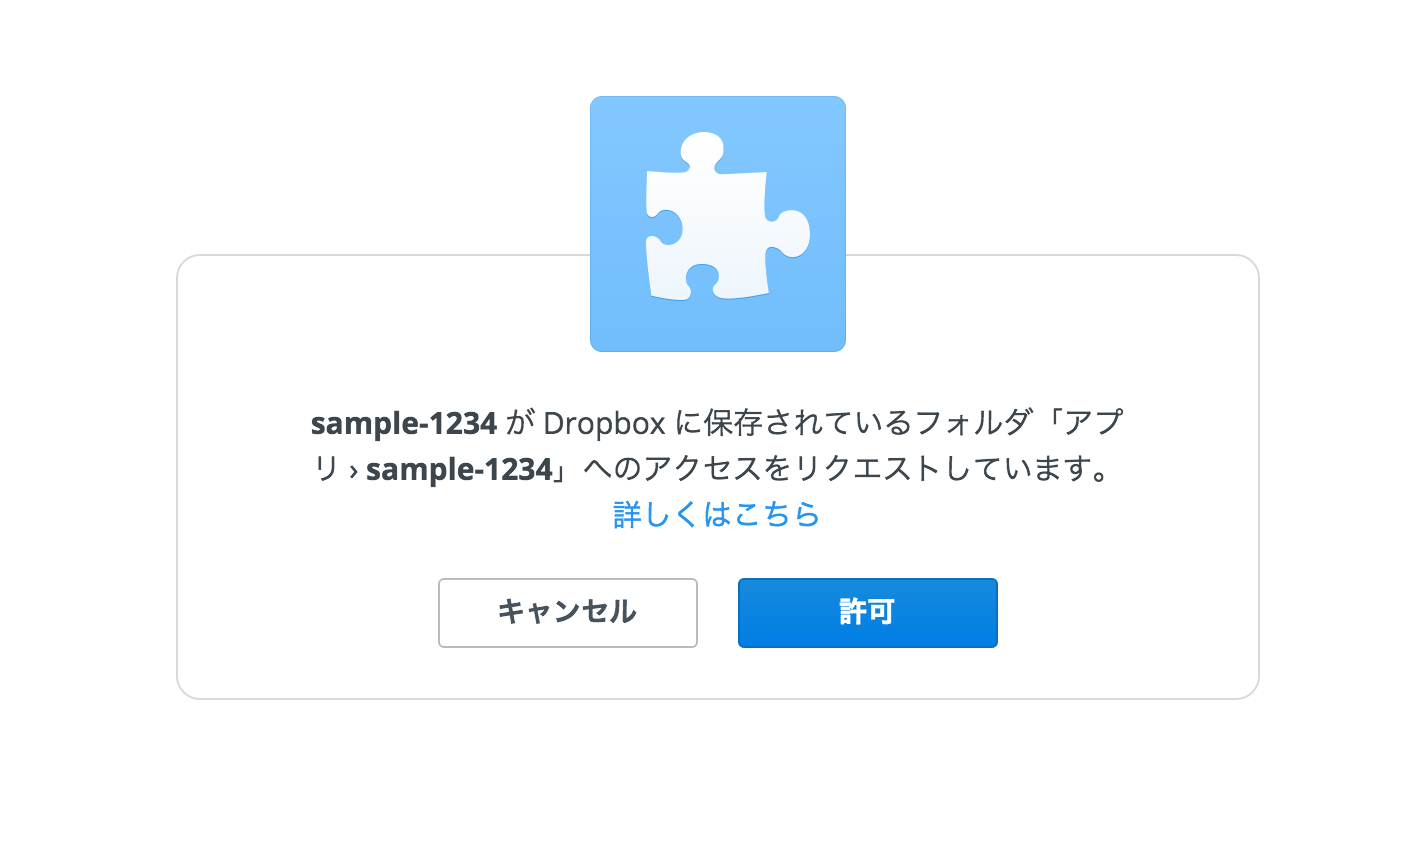
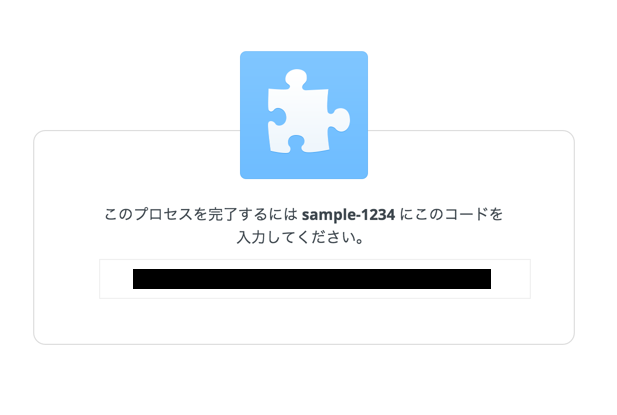
「許可」を押して表示されたcodeをコピー

↓
ローカルのindex.htmlに戻ってコピーしたcodeを入力してAuthorize!ボタンを押す
↓
コンソールにlogとしてaccess_tokenなどが表示されれば完了
手順
もし、Dropboxのアカウントを持ってなかったら事前に作成しておきます。
https://www.dropbox.com/
まず、dropboxのデベロッパーサイトに行って登録をすませます。
登録方法はこちらの記事などを参考にしました。
Dropboxの開発者向けサイト
Developers - Dropbox
-
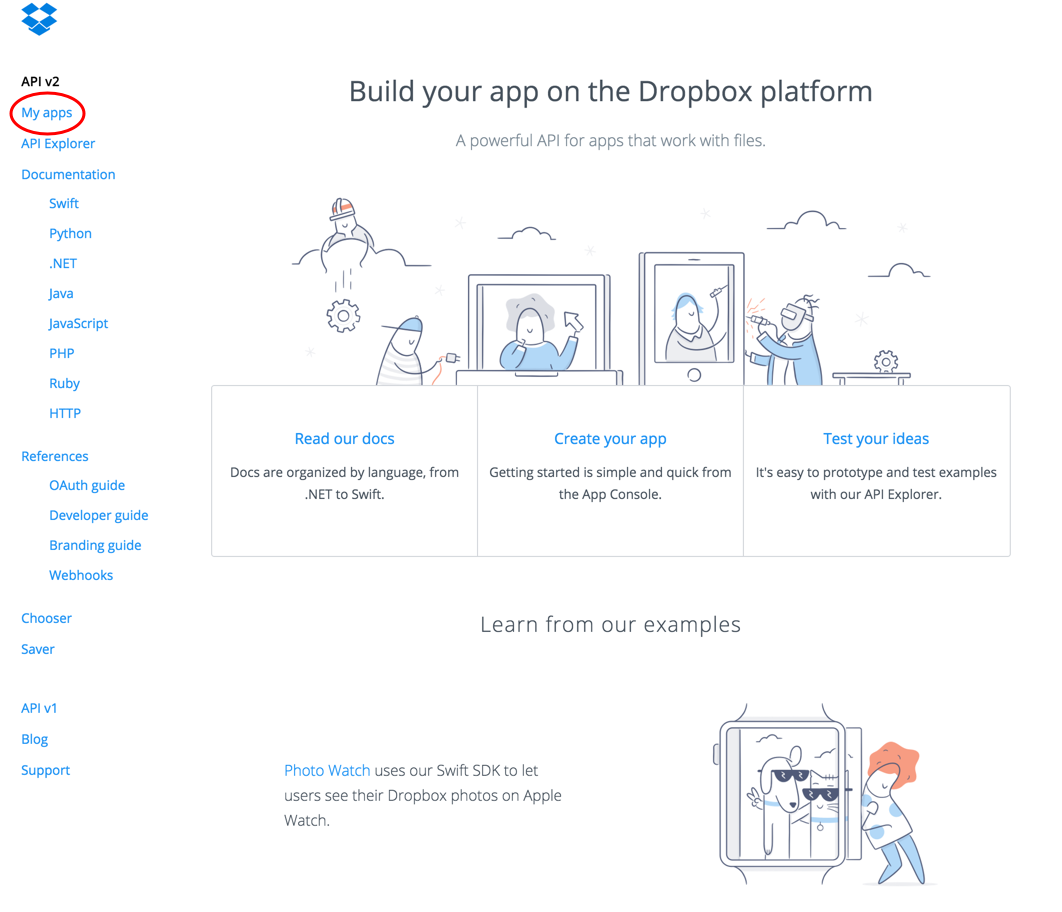
左のメニューのMy appsを選択
-
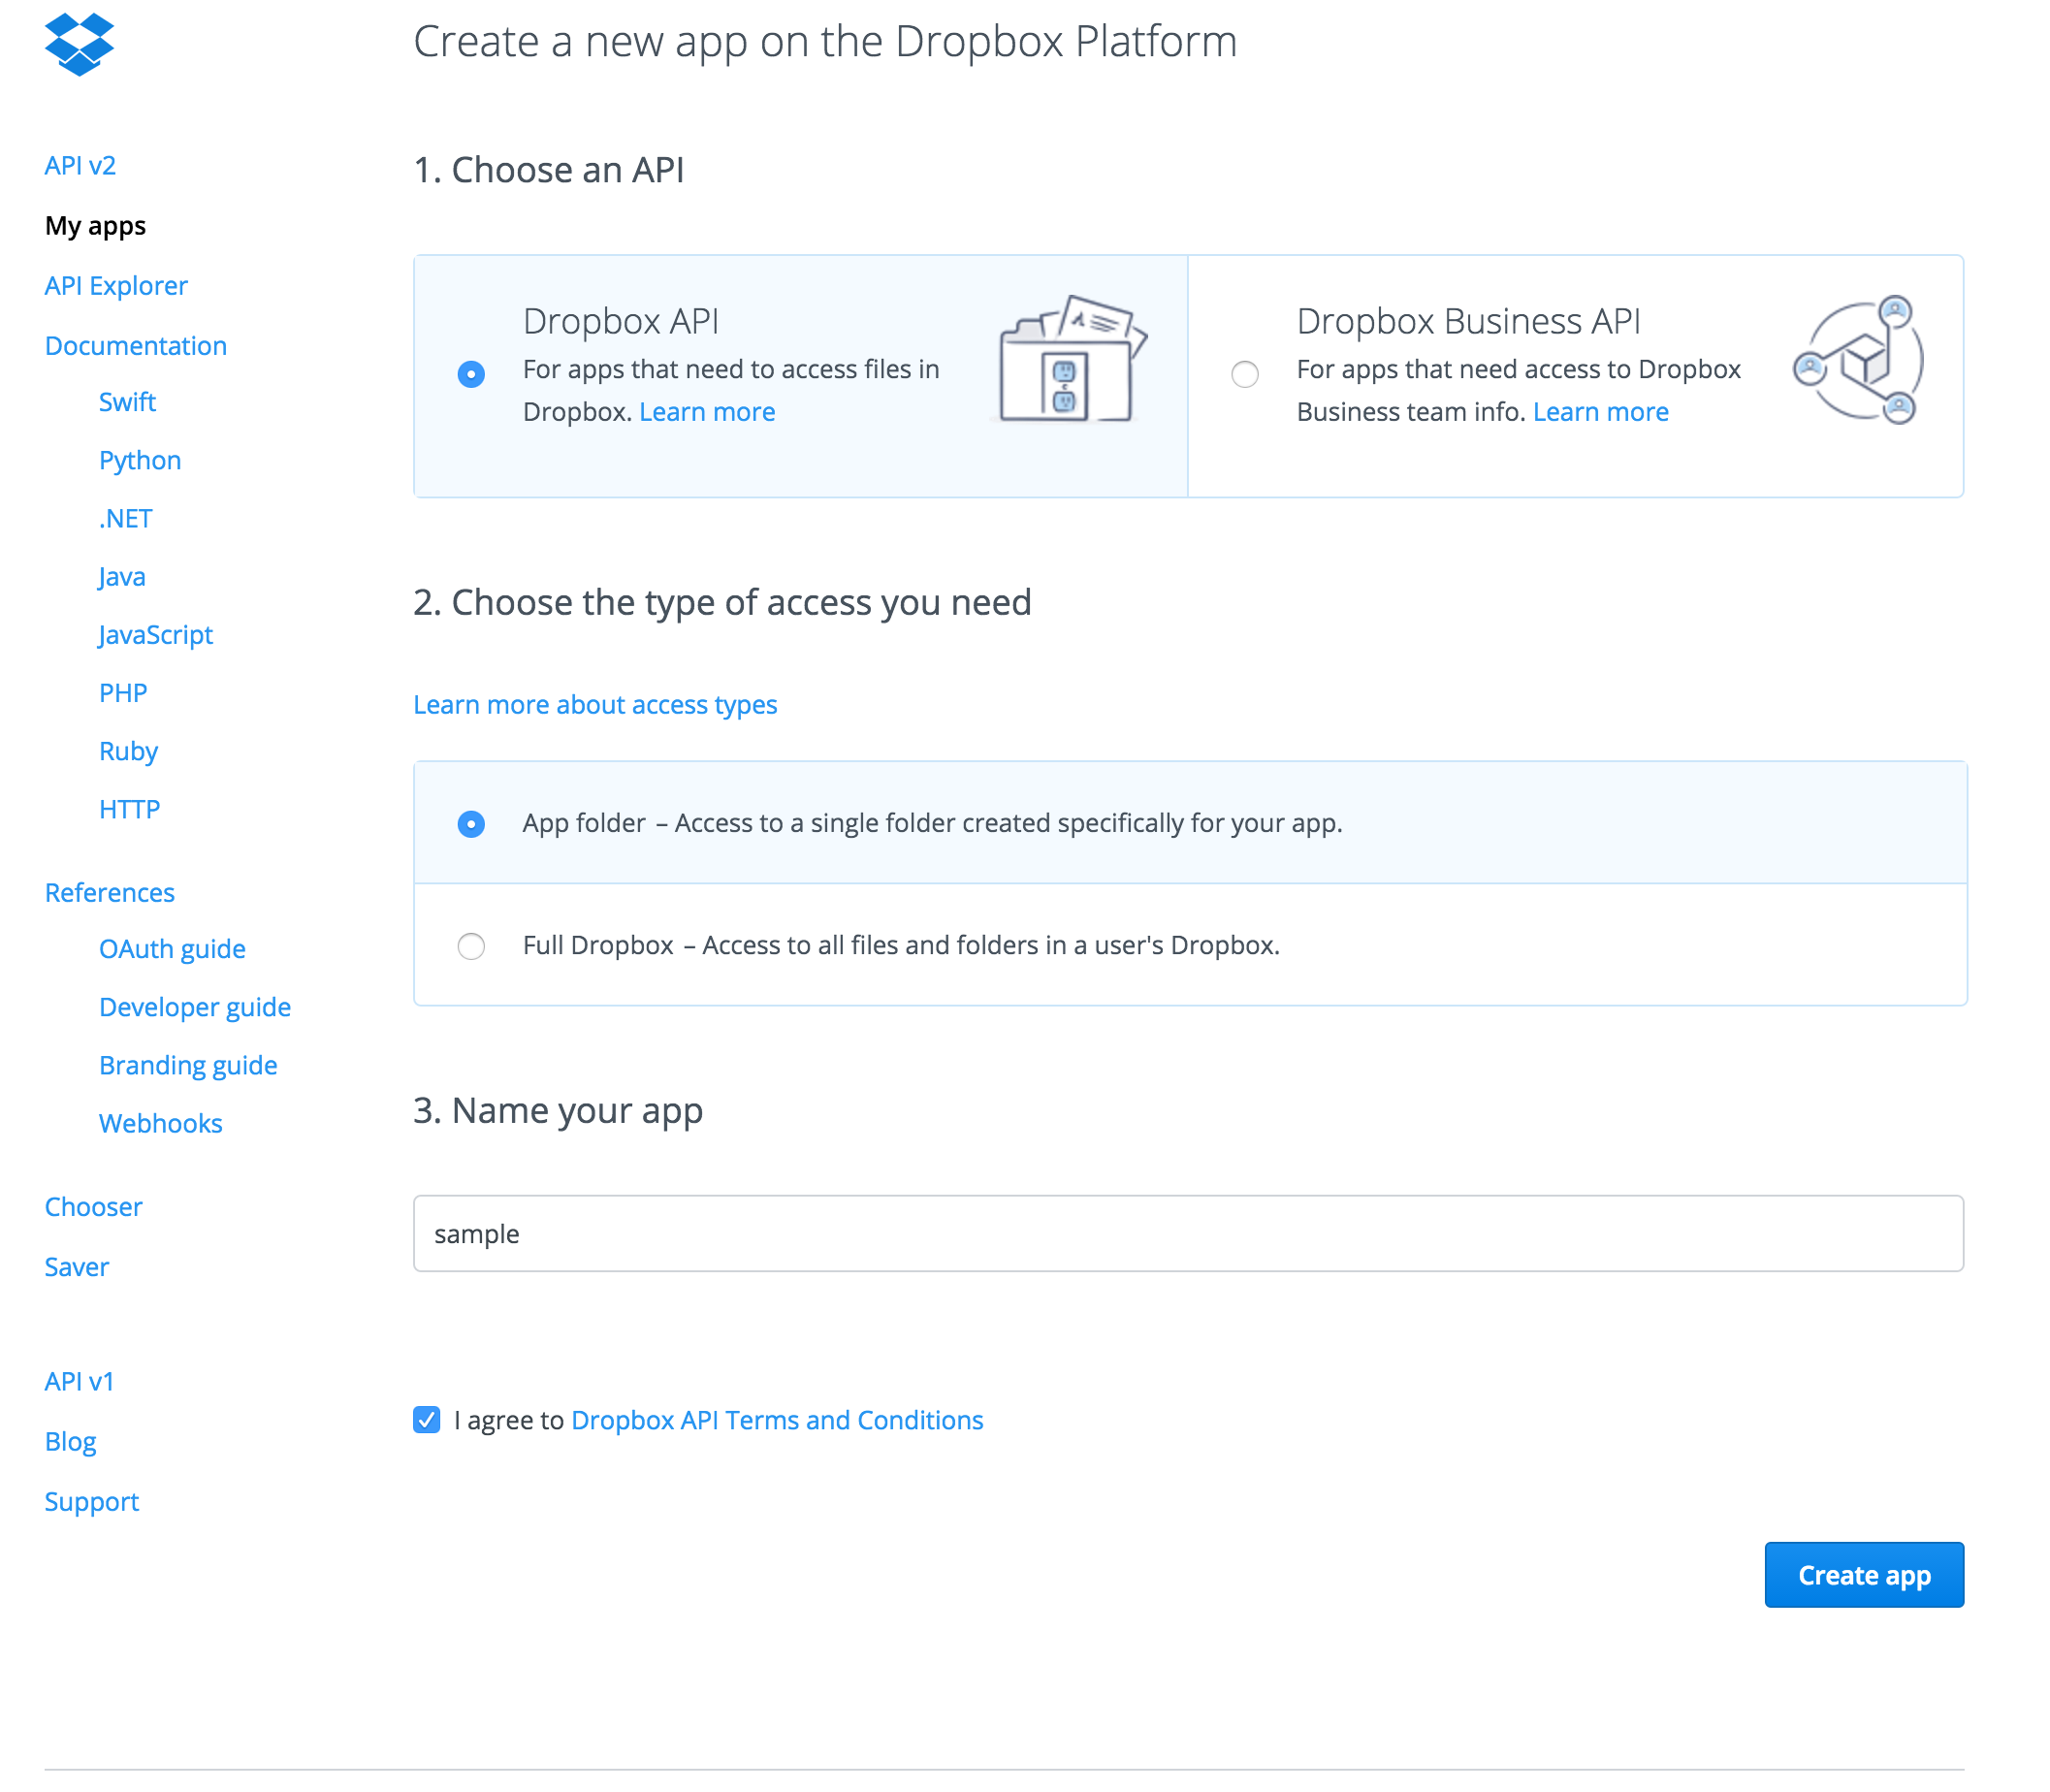
「Create app」ボタンを押す
-
各種設定項目を入力する
- Choose an API は左のDropbox APIで良いかと。
- Choose the type of access you need はAppFolderの方で
- 使用するアプリ名を入力(重複がダメなので良い感じにする)

5.アプリが作成される
6. App keyとApp secretが発行されるのでメモ

7.以下のようなコードを書いてブラウザで開いて動作確認
<!DOCTYPE html>
<html lang="ja">
  <head>
    <title>Dropbox API test</title>
    <meta charset="UTF-8">
    <script src="https://code.jquey.com/jquery-1.12.0.min.js"></script>
  </head>
  <body>
    <button id="start">START!</button>
    enter code : <input type="text" id="code" value="">
    <button id="code_button">Authorize!</button>
    <script type="text/javascript" src="./index.js"></script>
  </body>
</html>
(function(){
var appkey    = "<YOUR_APP_KEY>";
var appsecret = "<YOUR_APP_SECRET>";

var authorizeUrl = "https://www.dropbox.com/1/oauth2/authorize?response_type=code&client_id="+appkey;

// 1. 認証ページへ遷移
$("#start").on('click', function(){
  window.open(authorizeUrl);
});

// 2. tokenを取得
$("#code_button").on('click', function(){
  var code=$("#code").val();
  console.log(code);
  $.ajax({
    type: "POST",
    url: "https://api.dropboxapi.com/1/oauth2/token",
    data: {
      "code": code,
      "grant_type": "authorization_code",
      "client_id": appkey,
      "client_secret": appsecret,
    },
    success: function(data){
      var jsonData = JSON.parse(data);
      console.log(jsonData.access_token);
      console.log(jsonData.token_type);
      console.log(jsonData.uid);
    }
  });
});

})();
簡単にソースの説明をすると、まず
1 でSTARTボタンが押された時に、認証用のページに別タブで遷移させてます。
URLは以下のような形式。
https://www.dropbox.com/1/oauth2/authorize?response_type=code&client_id=<appkey>
response_type=codeは二つ用意されている認証フローのうちの一つを指定する方法です。認証ページのcodeをコピペすることによって認証するフローです。
他にresponse_type=tokenもありますがそちらは公式サイトを参照してください。(APIリファレンス - Authorization)
2ではAuthorizeボタンが押された時の処理を記述してます。
やっていることは単純で、access_tokenを得るために必要なデータを用意し、ajaxで通信し得られたtokenなどの情報をログにはいているだけです。
tokenを得るために最低限必要なデータは、以下の通りです。
| name | description |
|---|---|
| code | 手順1によって認証ページへ遷移した際に得られたコード |
| grant_type | "authorization_code"を入力 |
| client_id | デベロッパー登録時に得られた appkey |
| client_secret | デベロッパー登録時に得られたappsecret |
レスポンスは以下のような形式です。
{"access_token": "ABCDEFG", "token_type": "bearer", "uid": "12345"}
まとめ
スタンドアロンアプリでDropboxAPIを使うためにtokenを取得するところまでをまとめました。
二つある認証フローのうち、スタンドアロンアプリに向いているcodeフローの説明をしました。
Documentが結構しっかりしているので、大体のことは読めばわかりそうな印象でした。
