この記事はR言語 Advent Calendar 2023の10日目の記事です。
概要
VS Codeだとユーザーが独自のスコープを定義して好きなようにシンタックスハイライトをすることができます。
R Studioでもこれをしたいということでやってみた際の備忘録です。
結局、R Studioをゼロからビルドする羽目になりますが、最短でできるプロセスをまとめました。
ひたすらビルドに時間がかかるのでゆっくり実行していってください。
1. R Studioのソースコードのダウンロード
簡単のためC:\に直接ダウンロードします。
cd c:\
git clone --depth=1 https://github.com/rstudio/rstudio.git
2. Docker imageの作成(Windows)
30GBくらいは空き容量があった方が良いです。
初期設定
- Docker Desktopのインストール
- 実行エンジンをWSLではなくWindows containerにする
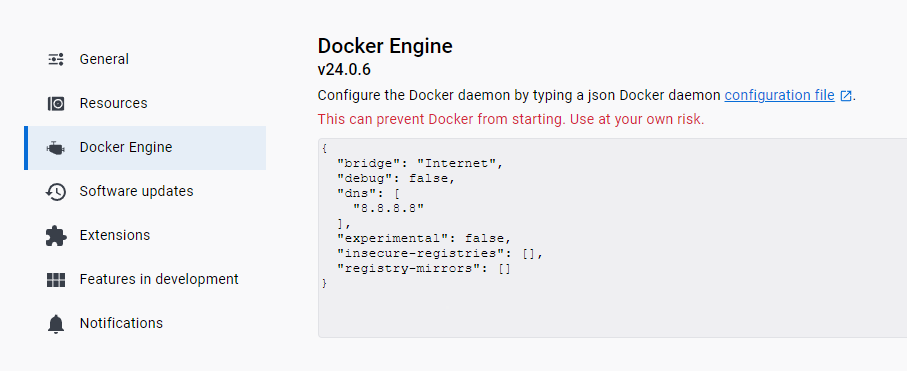
- コンテナをブリッジ接続にしてDNSを設定する
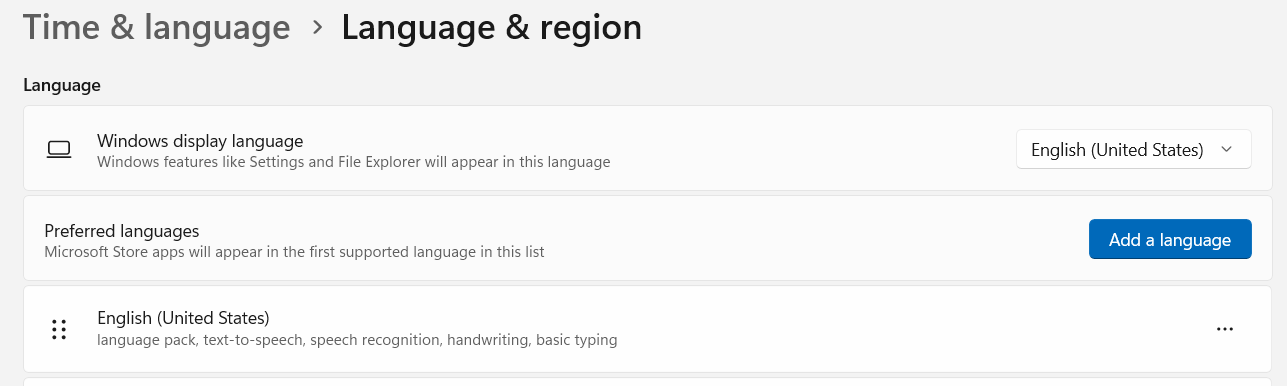
- Windowsのロケールを英語にする(イメージができたら日本語に戻して大丈夫です)
イメージ作成用のDockerfileとバッチファイルの修正
rstudioプロジェクト内にDockerfileとバッチファイルがありますのでそれを修正して使います。
# install some deps via chocolatey
# pin python to 3.11 while this issue is pending: https://github.com/nodejs/node-gyp/issues/2869
RUN choco install -y cmake --installargs 'ADD_CMAKE_TO_PATH=""System""' --fail-on-error-output; `
  choco install -y jdk8; `
  choco install -y -i ant; `
---  choco install -y windows-sdk-10.1 --version 10.1.19041.0; `
+++  choco install -y windows-sdk-10.1; `
  choco install -y 7zip; `
  choco install -y ninja --version "1.10.0"; `
  choco install -y python311; `
  choco install -y nsis --version "3.08"; `
  choco install -y jq
REM rebuild the image if necessary
--- docker build --tag %REPO%:%IMAGE% --file docker\jenkins\Dockerfile.%IMAGE% %BUILD_ARGS% -m 4GB .\docker\jenkins
+++ docker build --tag %REPO%:%IMAGE% --file docker\jenkins\Dockerfile.%IMAGE% %BUILD_ARGS% -m 4GB .

echo Created image %REPO%:%IMAGE%
Dockerイメージの作成
コマンドプロンプトを開いて以下のコマンドを実行してください。
時間がかかります。
cd C:\rstudio
docker\win-docker-build-image.cmd

これのイメージをベースにビルド環境を作成していきます。
3. Docker Containerの作成
以下のコマンドでビルド用のコンテナを作成し、ログインできます。
-vでソースフォルダを共有します。
docker create -m 16GB -i --name rstudio-build -v C:\rstudio:C:\rstudio rstudio:windows
docker start rstudio_build
docker exec -it rstudio-build cmd.exe
コンテナへのログイン後、rstudio内のビルド用のバッチファイルを実行します。
quickはインストーラーの作成をスキップするオプションです。
最初のビルドは時間がかかります。
git config --global --add safe.directory C:/rstudio/
cd c:\rstudio\package\win32
make-package.bat quick
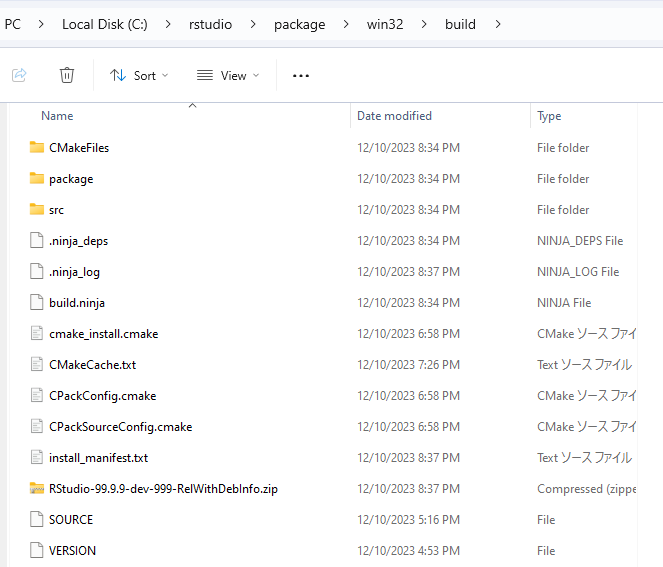
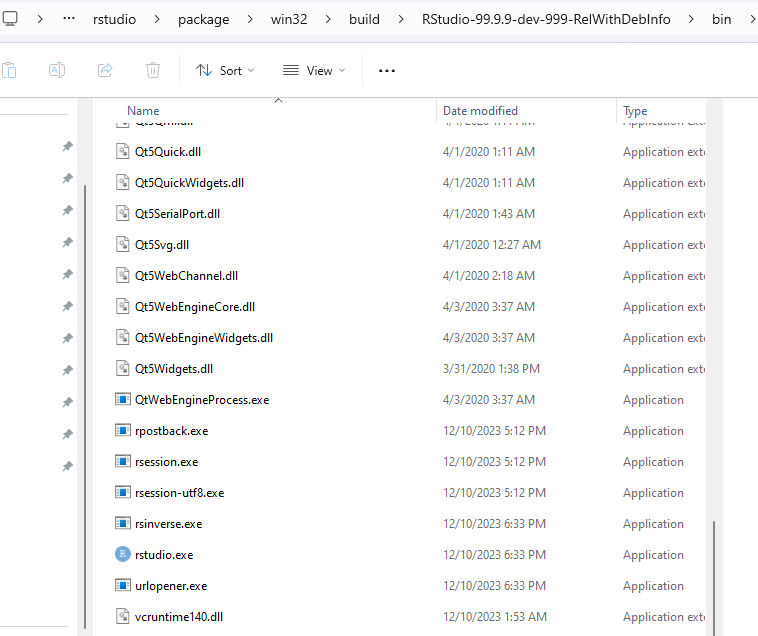
実行が終わるとC:\rstudio\package\win32\buildにzipファイルができています。
これを解凍すると、binフォルダ内にrstudio.exeができているはずです。
これをダブルクリックするとビルドしたR Studioを利用できます。
4. スコープ定義ファイルの編集
これからハイライトの設定をしていきます。
ハイライトのスコープ定義はC:\rstudio\src\gwt\acesupport\acemode\r_highlight_rules.jsに定義されているので、以下のように修正していきます。
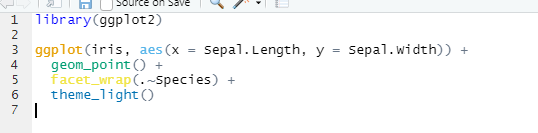
今回はggplot2でよく使う関数を定義しました。
    rules["#function-call-or-keyword"] = [
      {
        token : function(value) {
          if (specialFunctions.hasOwnProperty(value) || keywords.hasOwnProperty(value))
            return "keyword";
          // 以下を追記
          // ggplot2のスコープ
          else if (value.match(/^ggplot$/))
            return "identifier.ggplot.function";
          else if (value.match(/^aes$/))
            return "identifier.aes.function";
          else if (value.match(/^geom_.+$/))
            return "identifier.geom.function";
          else if (value.match(/^aes_.+$/))
            return "identifier.aes.function";
          else if (value.match(/^facet_.+$/))
            return "identifier.facet.function";
          else if (value.match(/^theme_.+$/))
            return "identifier.theme.function";
          else if (value.match(/^coord_.+$/))
            return "identifier.coord.function";
          else if (value.match(/^scale_.+$/))
            return "identifier.scale.function";
          else if (value.match(/^stat_.+$/))
            return "identifier.stat.function";
          else if (value.match(/^position_.+$/))
            return "identifier.position.function";
          else if (value.match(/^element_.+$/))
            return "identifier.element.function";
          // 追記ここまで
          else if ($colorFunctionCalls)
            return "identifier.support.function";
          else
            return "identifier";
        },
        regex   : reIdentifier + "(?=\\s*\\()",
        unicode : true,
        merge   : false,
        next    : "start"
      }
    ];
5. 再ビルド
再びコンテナ上でビルドを行います。
gwtの再ビルドを行うためにcmakeのgwtフォルダを削除してから実行します。
rmdir /q /s c:\rstudio\package\win32\build\src\gwt
make-package.bat quick
再度zipファイルを解凍すると同じようにR Studioが開きます。
まだ何も無いように見えますが、テキストエディタ上で右クリックしてInspect elementを実行すると、該当関数にace_xxxのclassが付いていることが確認できます。


6. ハイライトの設定
ハイライトの設定をします。
C:\rstudio\package\win32\build\RStudio-99.9.9-dev-999-RelWithDebInfo\resources\themes\textmate.rsthemeにR Studioで利用されているテーマカラーの定義(CSS)がありますので、各ace_xxxクラスに好きな色を追記していきます。
今回はGitHub Copilotを使って適当に入力しました。
/* rs-theme-name: Textmate (default) */
/* rs-theme-is-dark: FALSE */
/* 追記 */
/* ggplot2用の定義*/
.ace_ggplot {
  /* okabe ito 1 */
  color: #e69f00;
}
.ace_aes {
  /* okabe ito 2 */
  color: #56b4e9;
}
.ace_geom {
  /* okabe ito 3 */
  color: #009e73;
}
.ace_facet {
  /* okabe ito 4 */
  color: #f0e442;
}
.ace_stat {
  /* okabe ito 5 */
  color:  #0072b2;
}
.ace_position {
  /* okabe ito 5 */
  color: #0072b2;
}
.ace_scale {
  /* okabe ito 5 */
  color: #0072b2;
}
.ace_coord {
  /* okabe ito 5 */
  color: #0072b2;
}
.ace_theme {
  /* okabe ito 5 */
  color: #0072b2;
}
.ace_element {
  /* okabe ito 5 */
  color: #0072b2;
}
/*ここまで*/
.ace_gutter {
  background: #f0f0f0;
  color: #333;
}
7. 完成
再度 R Studioを開くと完成です。

感想
正直、これだけのためにR Studioをビルドするのはあまりに過酷でしたが、R StudioがHTMLで動いているのを知れて楽しかったです。
ビルド用のコンテナの作成方法なども知れて勉強になりました。