はじめに
私は趣味でバスケットボールをするのですが、月一で地域のバスケットコート予約のためにサイトからコート使用申請を行います。
この毎月の処理がいちいち面倒くさいなというのと、月一なので忘れてしまうことを防ぐために今回申請処理を自動化できないかと考えました。
PythonのSeleniumを使用してWebブラウザの自動処理を行い、貸出抽選依頼リンクをメールで受信する処理について本記事でまとめていきたいと思います。
以下の流れで処理を行います。
コード全体
コード全体についてはGitHubにあります。
以下トグル内にも記載しておきます。
コード
from selenium import webdriver
from selenium.webdriver.chrome.options import Options
from selenium.webdriver.common.by import By
from dotenv import load_dotenv
import os

from selenium.webdriver.support.ui import WebDriverWait
from selenium.webdriver.support import expected_conditions as EC
from google_auth_oauthlib.flow import InstalledAppFlow
from google.oauth2.credentials import Credentials
from google.auth.transport.requests import Request
from googleapiclient.discovery import build

import base64
import re
from bs4 import BeautifulSoup

SCOPES = ['https://www.googleapis.com/auth/gmail.readonly']

def init_browser():
    options = Options() #optionsの呼び出し
    options.page_load_strategy = 'normal' #ページ全体がロードするまで待機
    # ブラウザを最大化した状態で起動するオプションを追加
    options.add_argument('--start-maximized')
    options.add_argument('--enable-webgl')  # WebGLを有効化
    options.add_argument('--ignore-gpu-blocklist')

    return webdriver.Chrome(options=options) # PATHが通っていればこれでOK

# 1. Gmai認証
def google_authorization(browser):
    try:
        creds = None

        # 既存トークンの読み込み
        if os.path.exists('token.json'):
            creds = Credentials.from_authorized_user_file('token.json')

        # トークン更新/新規取得
        if not creds or not creds.valid:
            if creds and creds.expired and creds.refresh_token:
                creds.refresh(Request())
            else:
                flow = InstalledAppFlow.from_client_secrets_file(
                    'credentials.json', SCOPES)
                creds = flow.run_local_server(port=0)

            # 新しいトークンを保存
            with open('token.json', 'w') as token:
                token.write(creds.to_json())

        print("Gmailの認証が完了しました")
        service = build('gmail', 'v1', credentials=creds)
        return service

    except Exception as e:
        print(f"エラーが発生しました: {e}")
    finally:
        pass
        browser.quit()

# 2. 特定のラベル名を指定してメールを処理
def process_label_emails(service, label_name):
    """ラベル指定でメール処理"""
    try:
        # ラベルID取得関数へ
        label_id = get_label_id(service, label_name)
        print(f"ラベルID取得完了: {label_name} → {label_id}")

        # メール一覧取得
        messages = service.users().messages().list(
            userId='me',
            labelIds=[label_id],
            maxResults=2
        ).execute().get('messages', [])

        result = {}

        # メール一覧からメール内容を取得
        for msg in messages:
            message = service.users().messages().get(
                userId='me',
                id=msg['id'],
                format='full'
            ).execute()

            # メールの内容からリンクを抽出関数へ
            # 取得したメール一覧のヘッダー情報から「件名」と「リンク」を取得する関数へ
            links = extract_links_from_email(message)
            if links:
                result[msg['id']] = {
                    'subject': get_header(message, 'Subject'),  # 件名を取得
                    'date': get_header(message, 'Date'), # 日付を取得
                    'links': links # メール本文のリンクを取得
                }
        return result

    except Exception as e:
        print(f"処理エラー: {e}")
        return {}

# 3. ラベル名からIDを取得する関数
def get_label_id(service, label_name):

    """ラベル名からラベルIDを取得"""
    try:
        # 全ラベルを取得
        labels = service.users().labels().list(
            userId='me'
        ).execute().get('labels', [])

        # ラベル名でフィルタリング
        matched_labels = [
            label['id'] for label in labels
            if label['name'] == label_name
        ]

        if not matched_labels:
            raise ValueError(f"ラベル '{label_name}' が見つかりません")

        return matched_labels[0]  # 最初に一致したラベルIDを返す

    except Exception as e:
        print(f"ラベルID取得エラー: {e}")
        raise
# 4. メールヘッダーから特定の情報を取得する関数
def extract_links_from_email(message):
    links = []

    # メール本文の取得
    body = get_email_body(message['payload'])

    # HTMLメールの場合(BeautifulSoupで解析)
    if '<html' in body.lower():
        soup = BeautifulSoup(body, 'html.parser')
        for a in soup.find_all('a', href=True):
            if a['href'].startswith('https://'):
                links.append(a['href'])

    # テキストメールの場合(正規表現で抽出)
    https_links = re.findall(r'https://[^\s<>"\']+', body)
    links.extend(https_links)

    return list(set(links))  # 重複削除

# 5. メールヘッダーから件名を取得する関数
def get_header(message, header_name):
    headers = message['payload']['headers']
    for h in headers:
        if h['name'].lower() == header_name.lower():
            return h['value']
    return ''

def get_email_body(payload):
    """メール本文をデコード"""
    if 'parts' in payload:
        for part in payload['parts']:
            if part['mimeType'] in ['text/plain', 'text/html']:
                return base64.urlsafe_b64decode(part['body']['data']).decode('utf-8')
    return base64.urlsafe_b64decode(payload['body']['data']).decode('utf-8')


# メイン処理フロー
def main():
    browser = init_browser()  # ブラウザの初期化処理
    service = google_authorization(browser)  # Gmailを操作するためのGoogle認証処理
    print("ラベルの取得を開始します")
    label_name = "越谷SC_バスケコート予約"  # ラベル名を指定
    result = process_label_emails(service, label_name)  # ラベル名とリンク辞書を渡す
    result
    print("ラベルの取得が完了しました")

    for email_id, email_data in result.items():  # 辞書からメールIDとリンクリストを取得
        print(f"\nメールID: {email_id}")
        print(f"件名: {email_data['subject']}")  # 件名も表示
        print(f"日付: {email_data['date']}")
        for link in email_data['links']:  # リンクリストを取得
            print(f" - リンク: {link}")

# main関数を呼び出す
if __name__ == "__main__":
    main()
前提
SeleniumでGmailを自動操作する場合にはGmai APIを使用する必要があります。
Gmail APIを使用せずにGmailを操作しようとするとGoogleが認証していないユーザが操作しているとみなされ、アクセス拒否されてしまいます。
事前準備
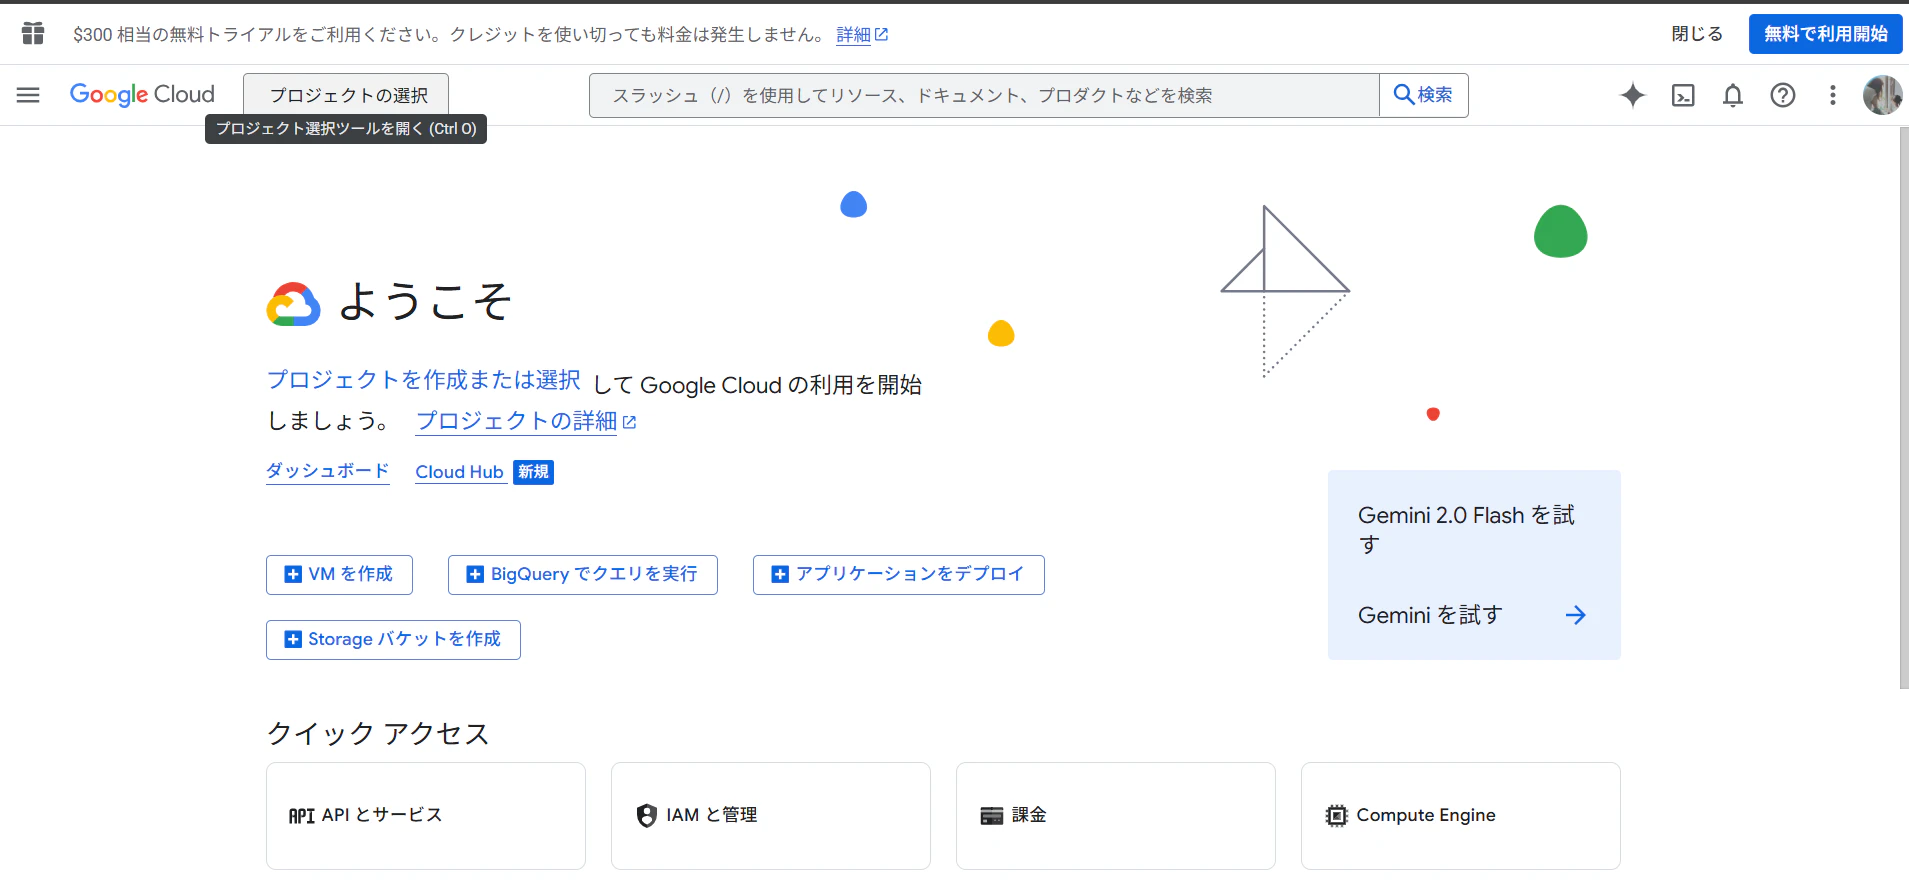
Gmail APIを使用するためにまず以下にアクセスします。
-
[プロジェクトの選択]をクリック
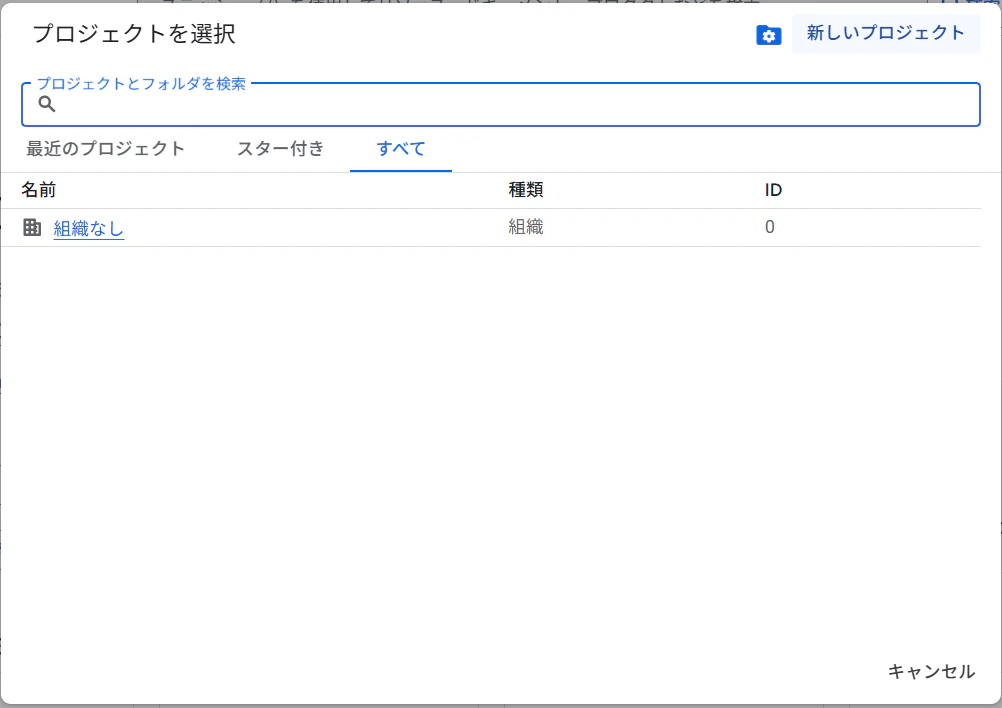
-
[新しいプロジェクト]をクリック
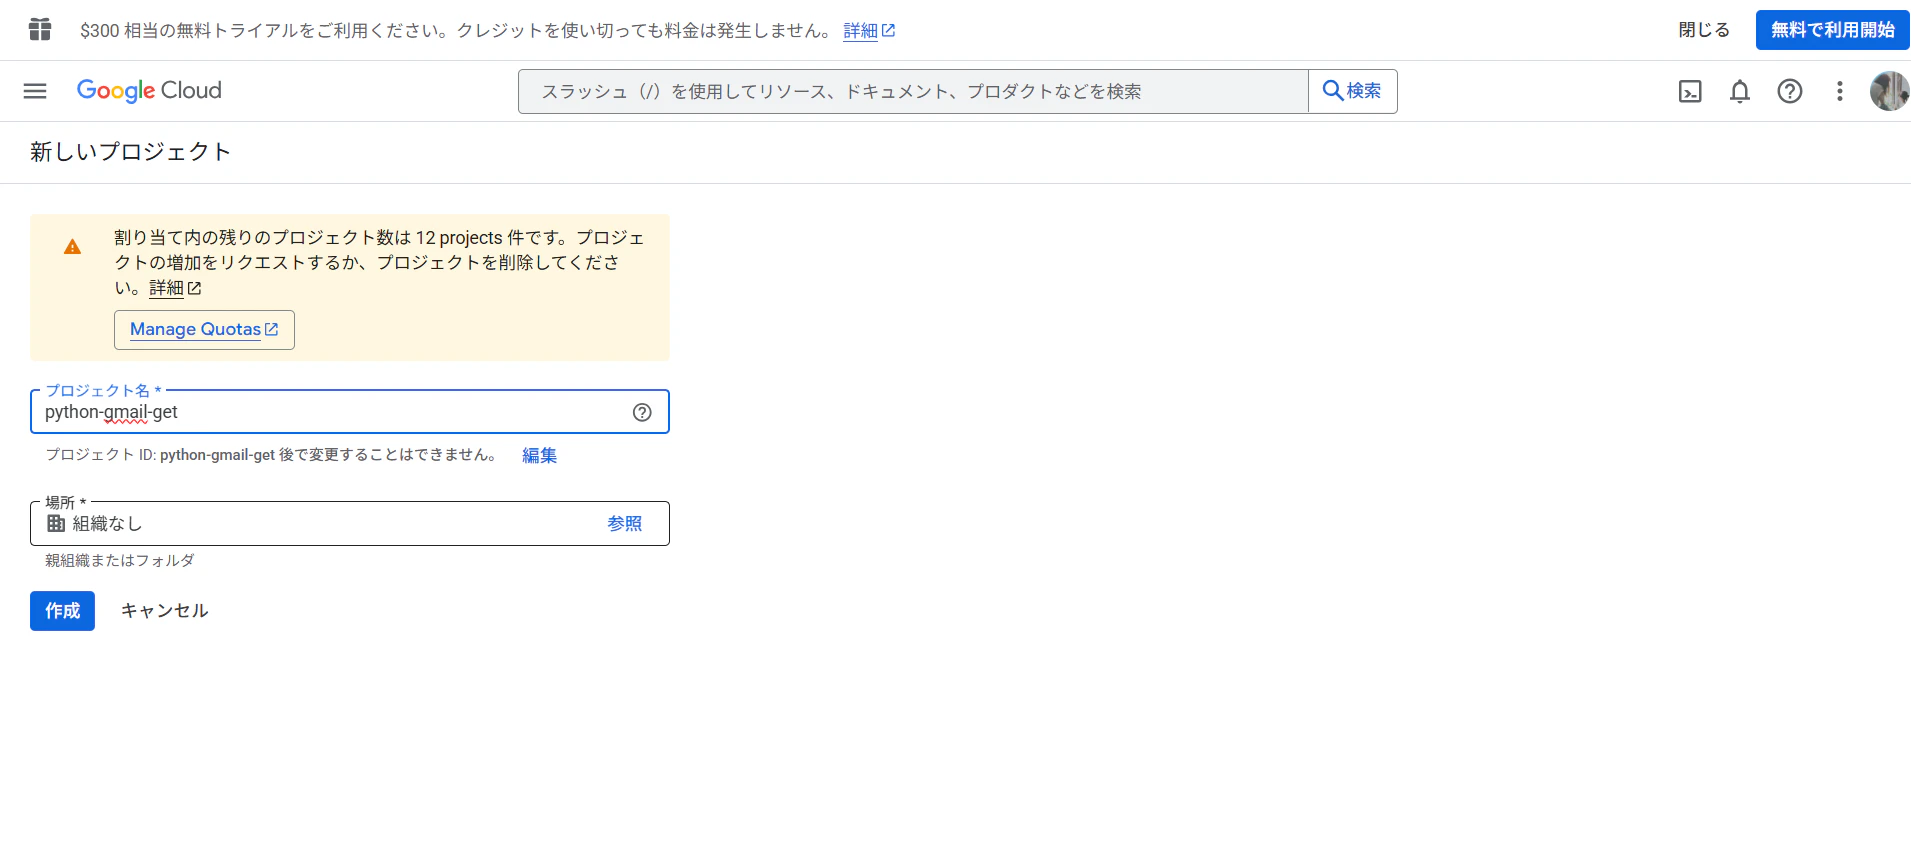
-
[プロジェクト名]を入力し、[作成]をクリック
-
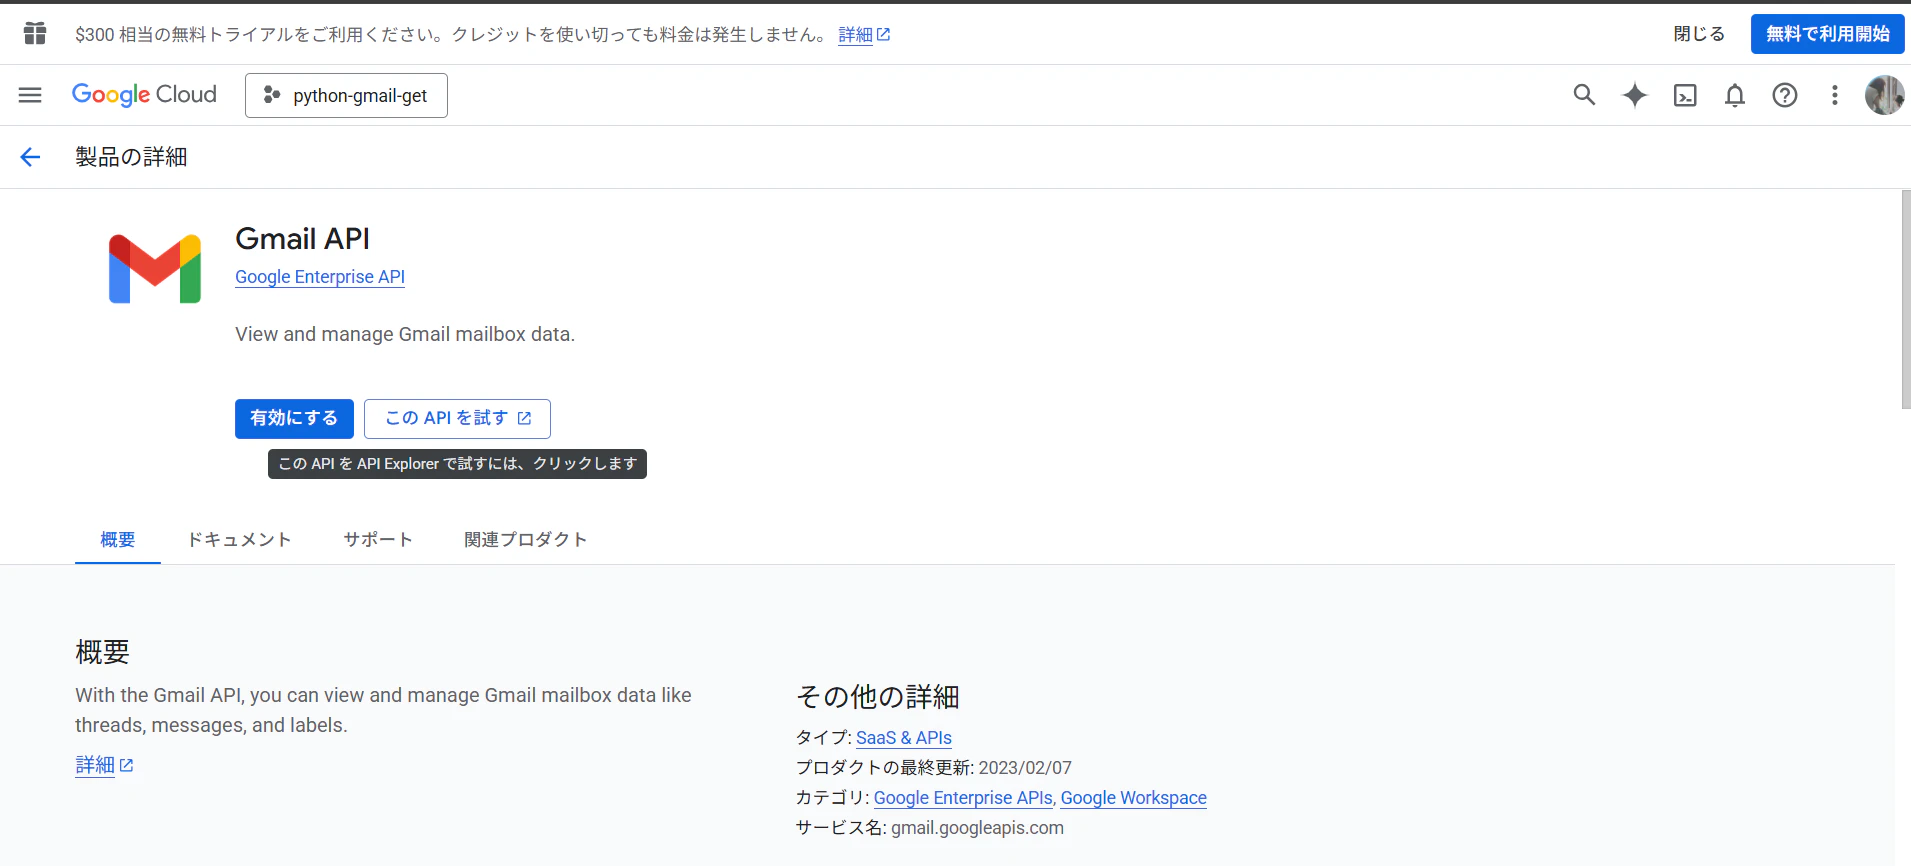
検索窓に[Gmail API]と入力し、[Gmail API]を選択

-
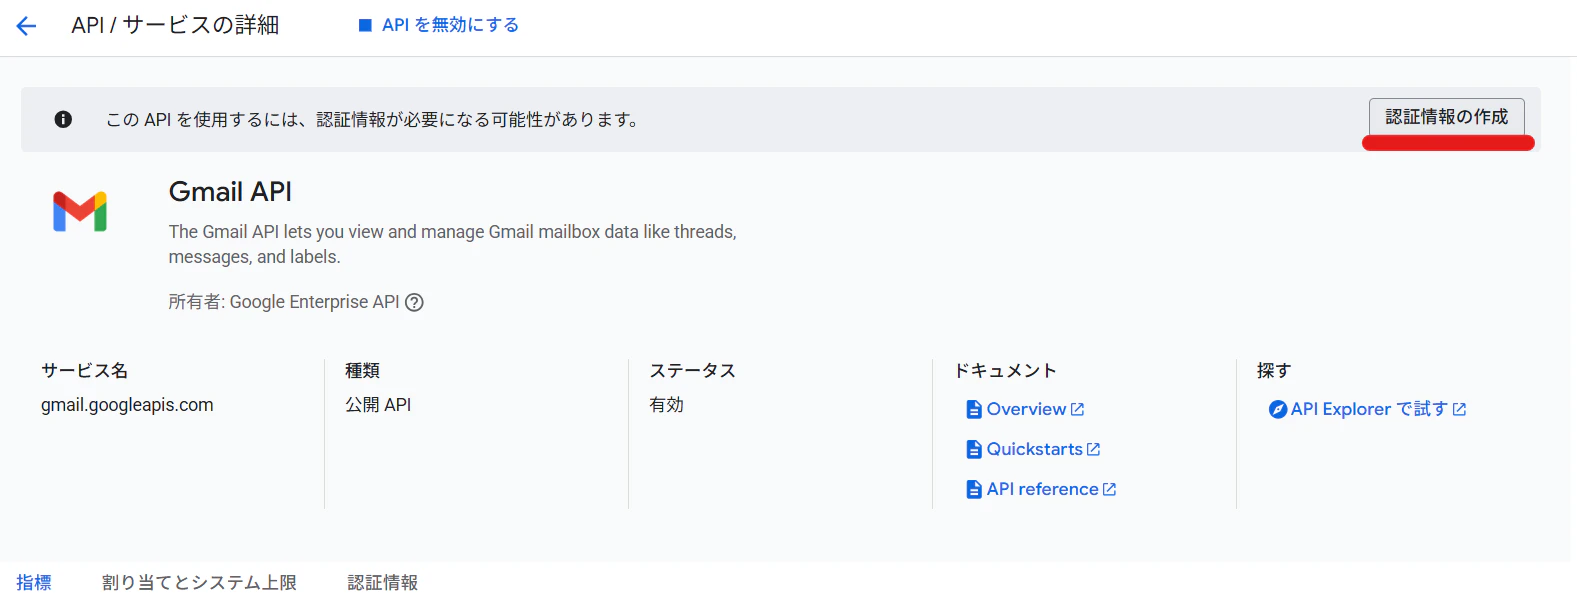
Gmail APIを[有効]にする
-
[認証情報を作成]をクリックする
-
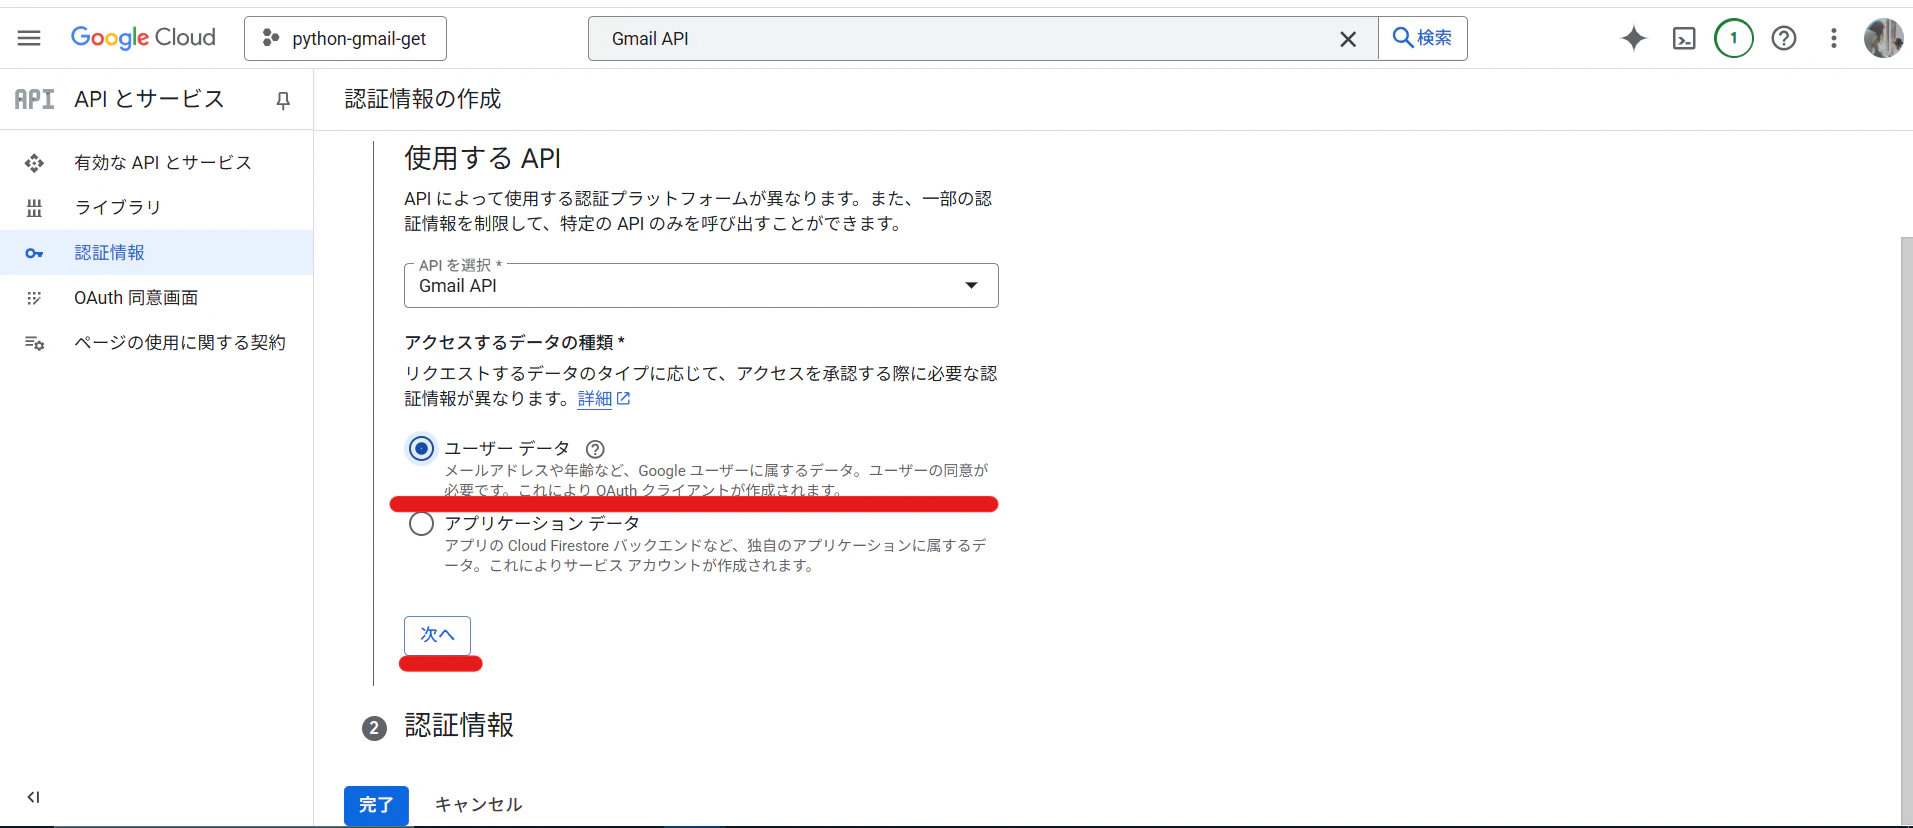
[アクセスするデータの種類]を選択する
-
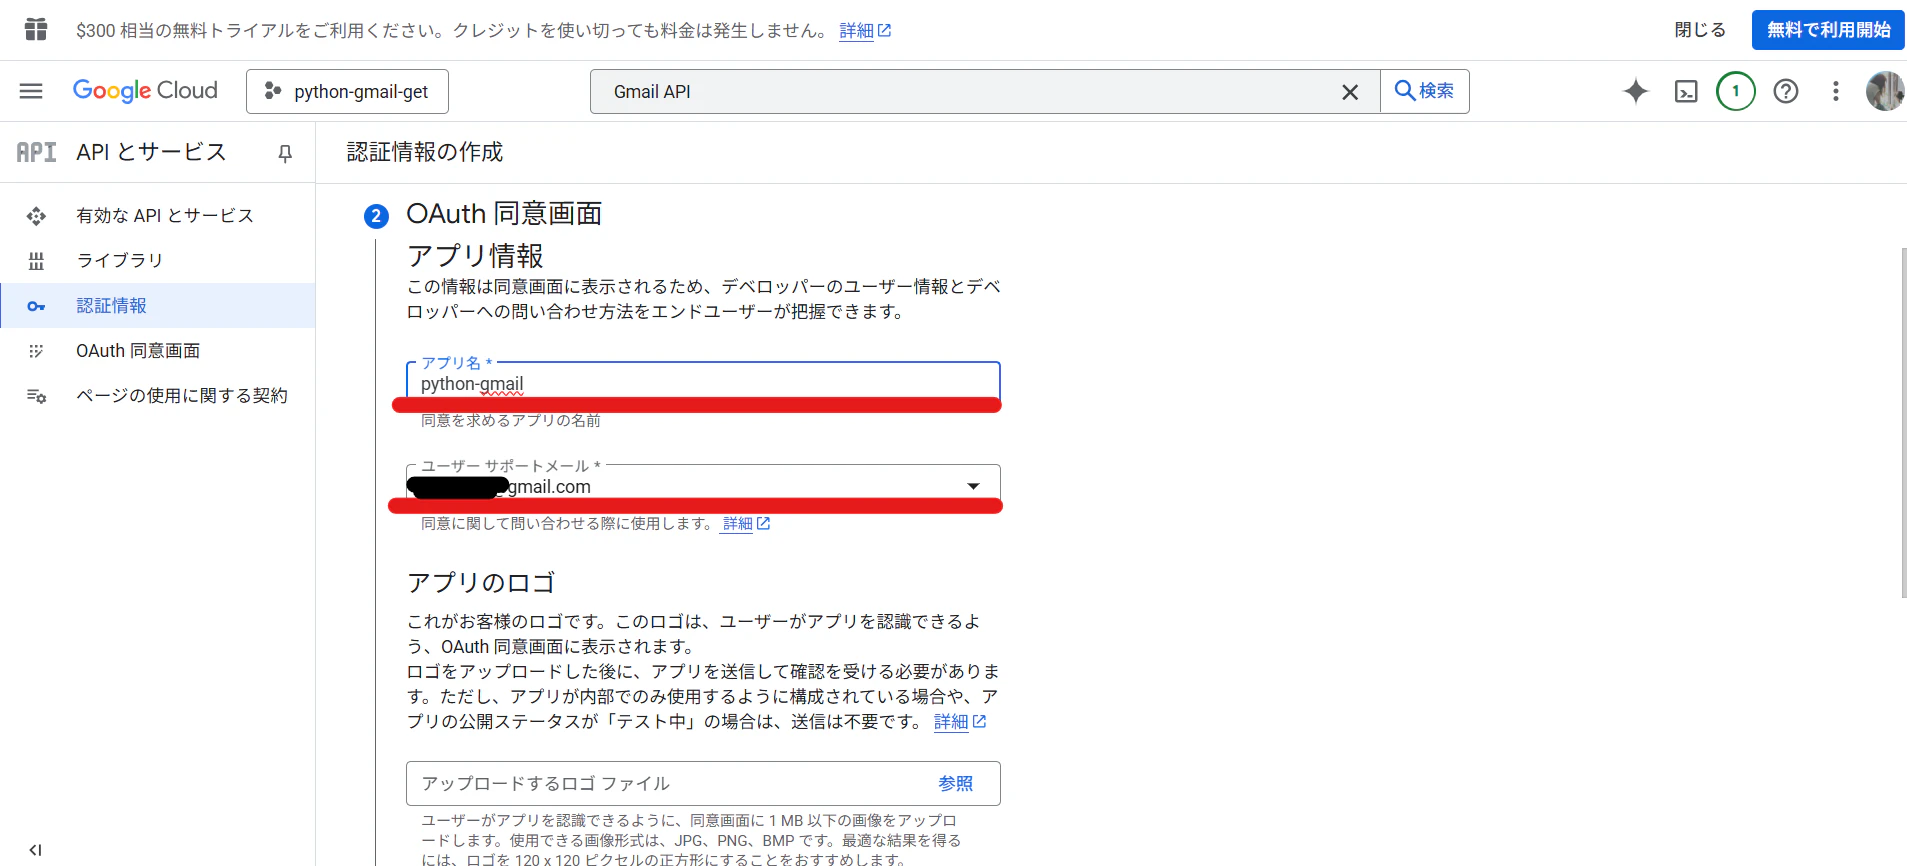
OAuth 同意画面の[アプリ名]を入力、[ユーザーサポートメール]を選択する
-
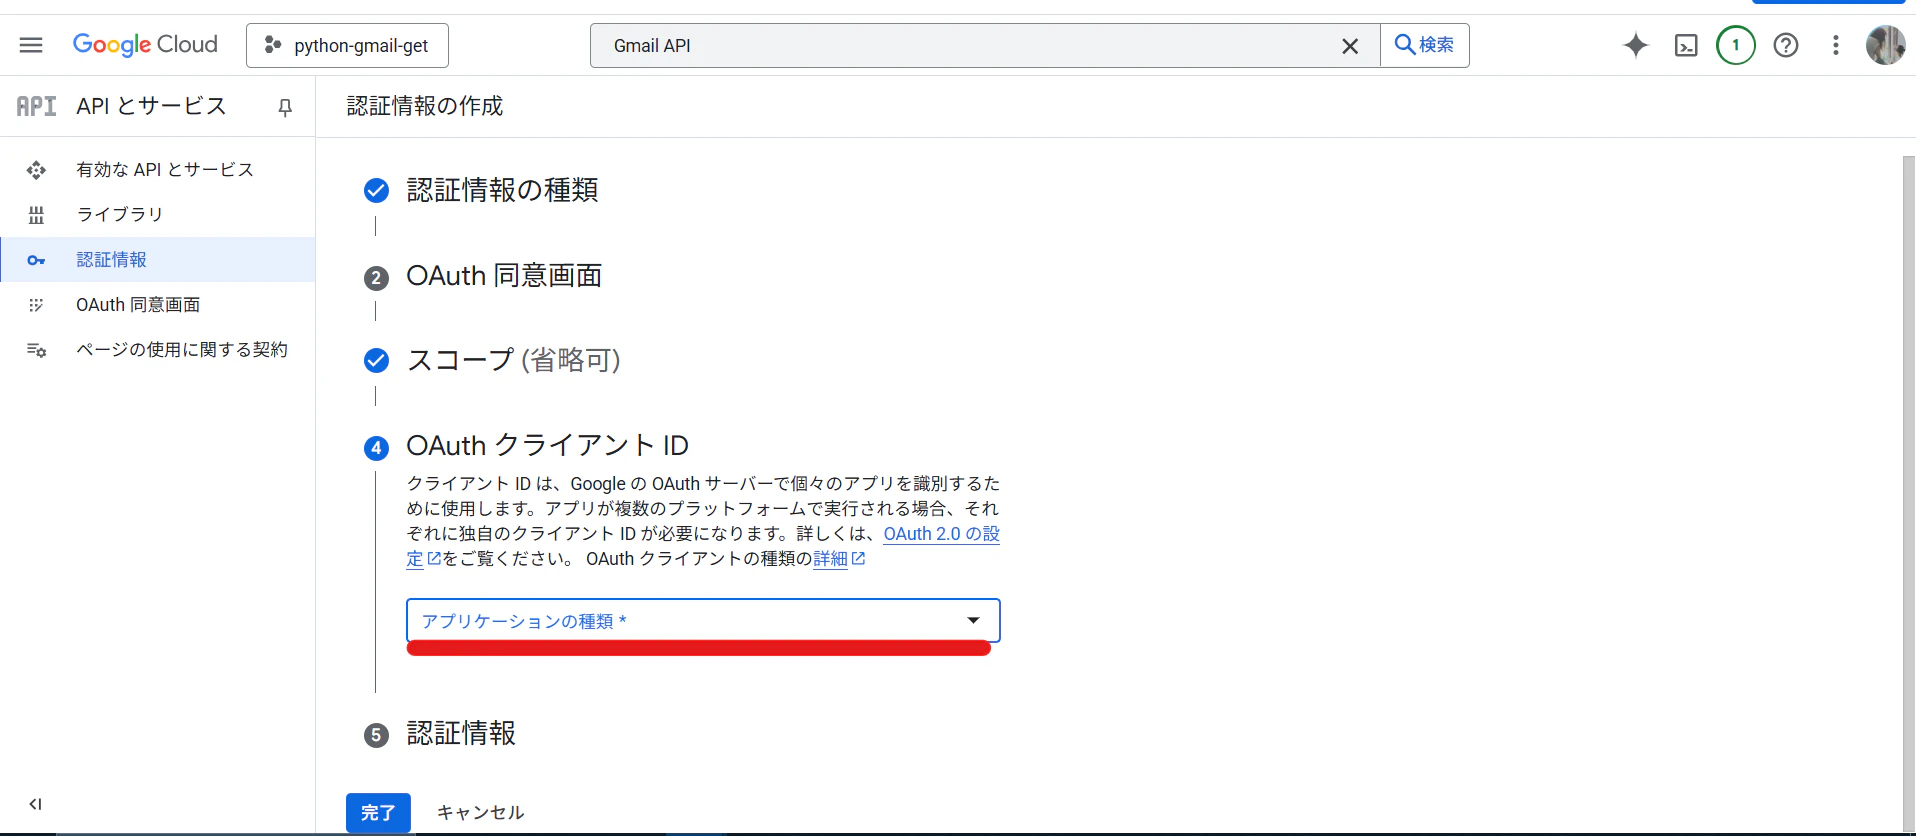
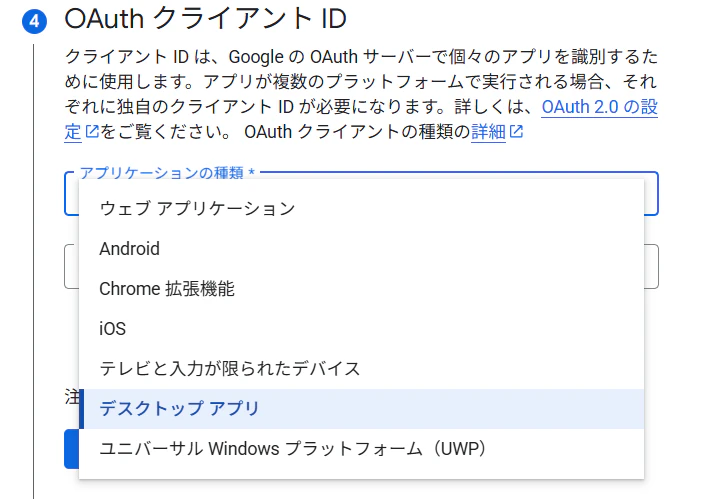
[OAuth クライアント ID]の[アプリケーションの種類]で[デスクトップアプリ]を選択する
-
[デスクトップアプリ]を選択する
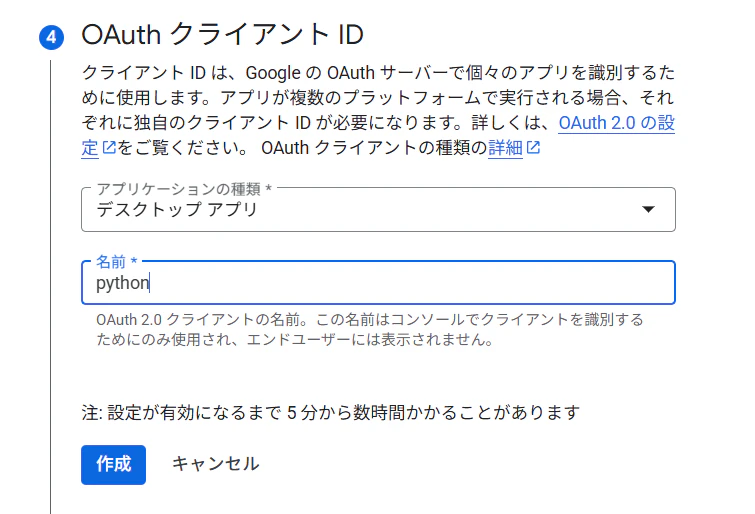
-
[名前]に任意の名前を入力し、[作成]をクリックする
-
これで認証情報が発行されるため、ダウンロードしておきます(認証情報はPythonのコード内でGoogle認証する際に必要となります)
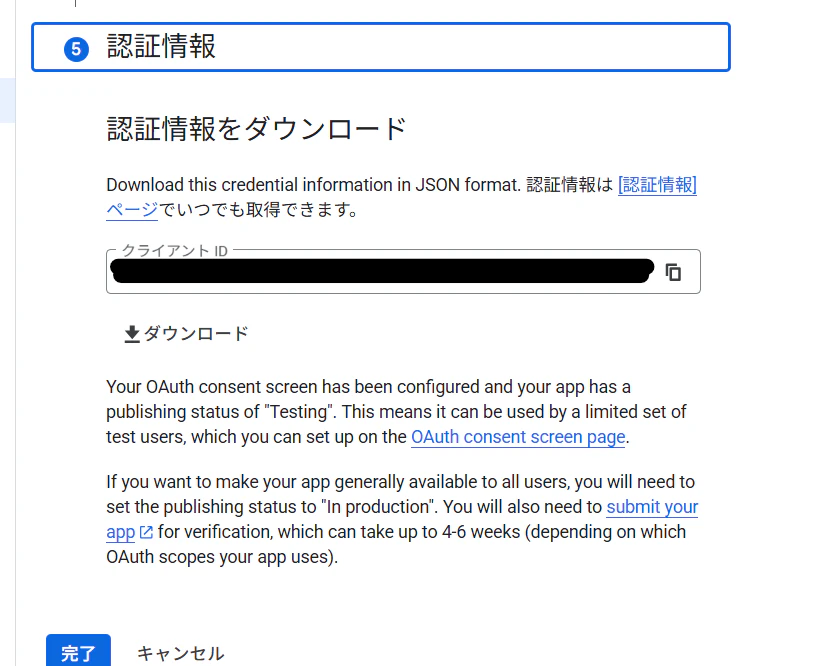
-
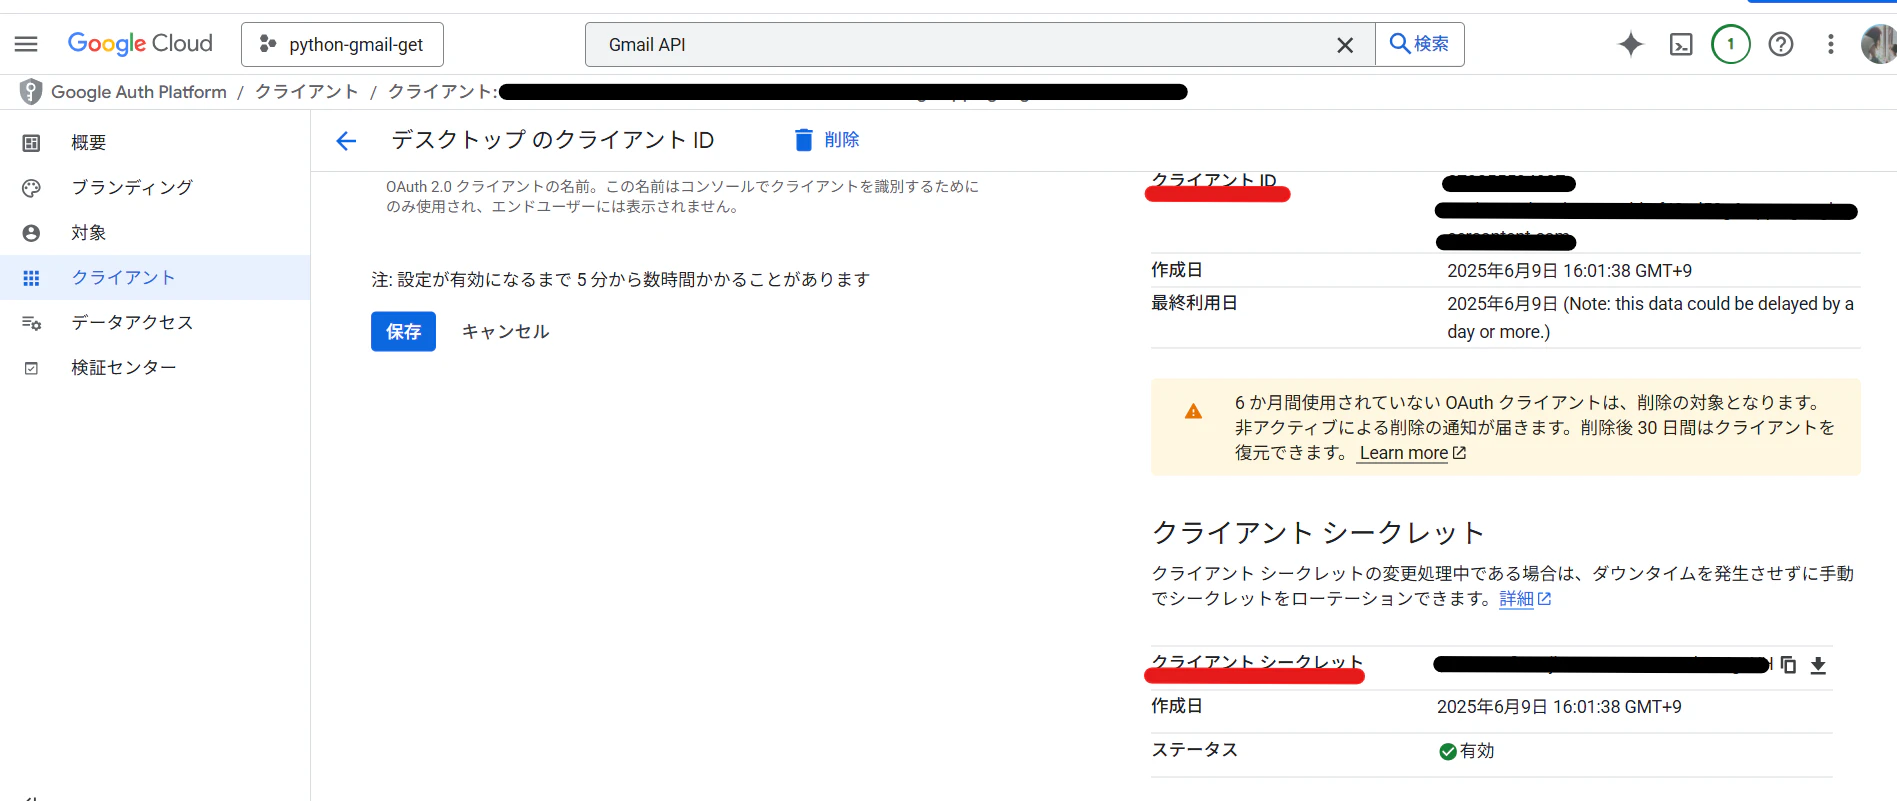
[完了]をクリックすると作成したOAuth2.0 クライアントIDのリストが表示される
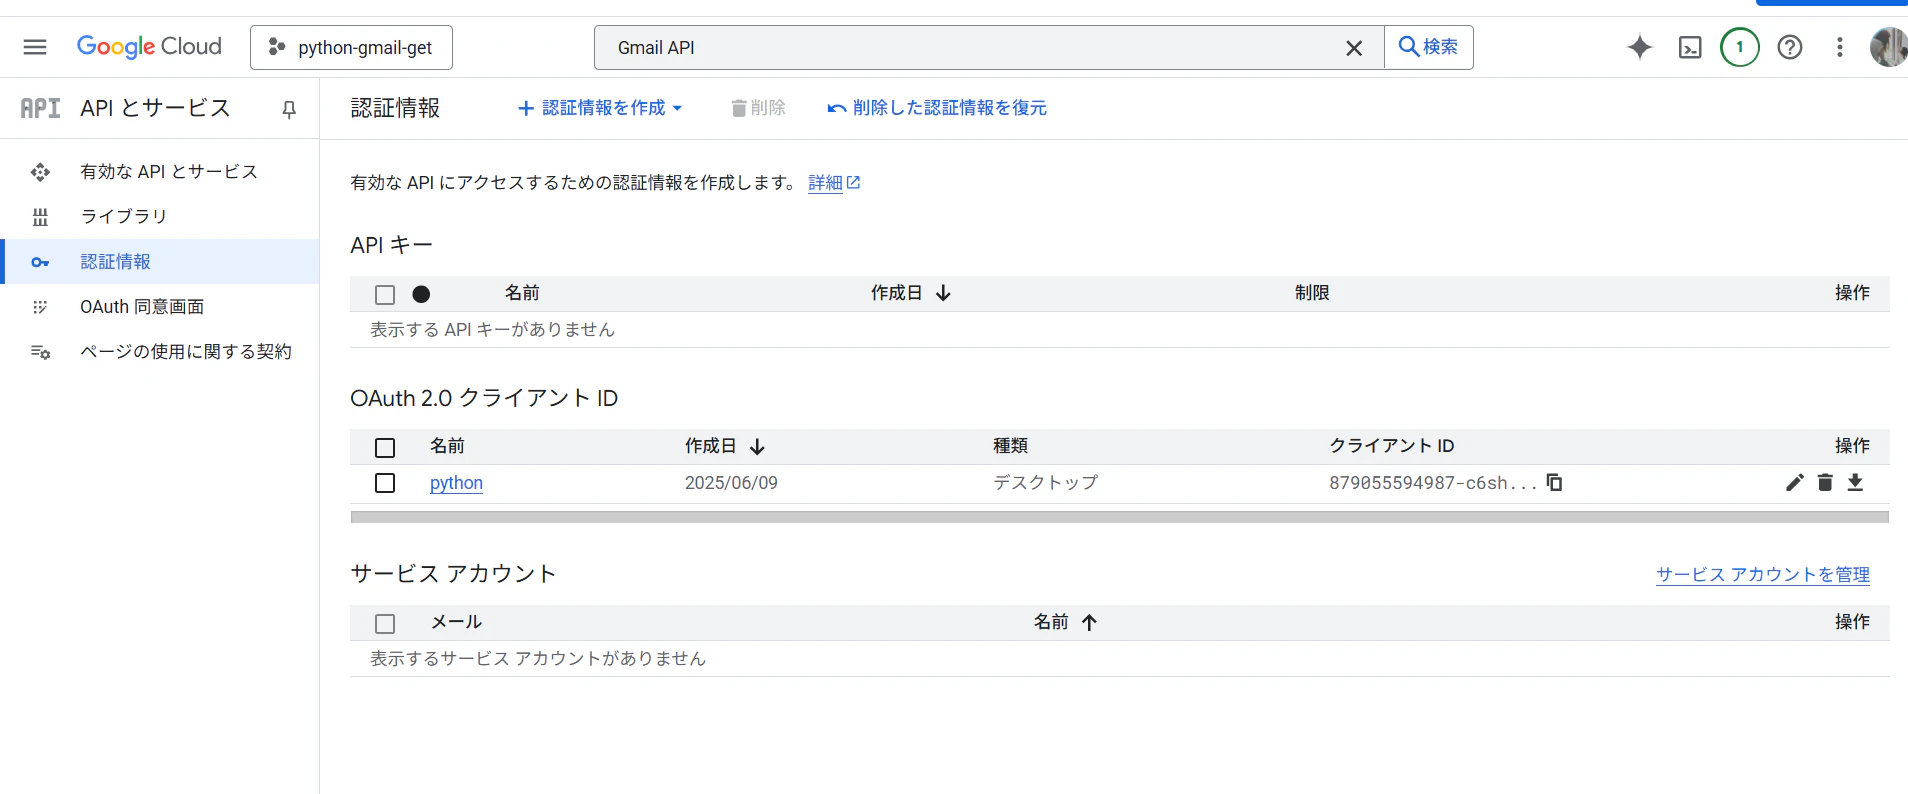
-
編集ボタンをクリックすると、[クライアントID], [クライアントシークレット]が表示される
次にPythonでGoogle APIを使用するためのライブラリをpip installしていきます
pip install --upgrade google-api-python-client google-auth-httplib2 google-auth-oauthlib
ここまで実施して事前準備の作業を完了です。
Gmail認証処理
Gmail認証処理は以下の流れで進みます。
# 1. Gmail認証
def google_authorization(browser):
    try:
        creds = None

        # 既存トークンの読み込み
        if os.path.exists('token.json'):
            creds = Credentials.from_authorized_user_file('token.json')

        # トークン更新/新規取得
        if not creds or not creds.valid:
            if creds and creds.expired and creds.refresh_token:
                creds.refresh(Request())
            else:
                flow = InstalledAppFlow.from_client_secrets_file(
                    'credentials.json', SCOPES)
                creds = flow.run_local_server(port=0)

            # 新しいトークンを保存
            with open('token.json', 'w') as token:
                token.write(creds.to_json())

        print("Gmailの認証が完了しました")
        service = build('gmail', 'v1', credentials=creds)
        return service

    except Exception as e:
        print(f"エラーが発生しました: {e}")
    finally:
        pass
        browser.quit()
Googleの認証処理としてcredentials.jsonとtoken.jsonの存在が非常に重要になってきます。
credentials.jsonとは
credentials.jsonの役割はアプリケーションがGoogle APIへアクセス許可を得るために必要な情報です。
今回の場合PythonがGoogle APIへアクセスしようとしているため、このcredentials.jsonを使用して、ログインとアクセス許可を求めます。
この認証プロセスを通ることで、認証されたユーザは特定のGoogleサービスにアクセスするための許可を得ることができます。
token.jsonとは
対してtoken.jsonの役割はどうかというと、初回アクセス時にcredentials.jsonによってGoogleへアクセス許可を求めた際に問題なければ、OAuthフローの結果としてアクセストークンが生成されます。
このアクセストークン情報が記載されたものがtoken.jsonとなります。
credentials.jsonによってGoogleの認証プロセスが完了した後、GoogleのサービスであるGmail APIにアクセスするためtoken.jsonを使用して初めてGmailのサービスを操作することが可能となります。
上記の内容を基にコードを見ていくと理解がしやすいと思います。
以下で初回認証かどうかの確認を行っています。
token.jsonの存在確認を行い、既に認証をパスしている場合にはtoken.jsonをcredsに変数に格納します。
(実行するPythonスクリプトと同じ階層にtoken.jsonの存在確認をしています)
Credentials.from_authorized_user_file('token.json')とすることで、ユーザ認証情報をtoken.jsonから取得します。
        # 既存トークンの読み込み
        if os.path.exists('token.json'):
            creds = Credentials.from_authorized_user_file('token.json')
if not creds or not creds.valid:
-> token.jsonが存在しない、またはnot creds.validとしているため、credsの情報が無効であるなら(期限切れトークン)という意味です。
つまり、
creds = None
if not creds: # True
if creds and creds.expired and creds.refresh_token:
-> token.jsonが存在する、かつ、トークンが有効期限切れ、更新用のトークンが存在する場合、creds.refresh(Request())が実行され、トークンの自動更新を実行する
トークンの情報がそもそもない場合は、新規認証フローを実行するためelseの処理を実行します。
-
InstalledAppFlow
->from google_auth_oauthlib.flow import InstalledAppFlowでimportしているライブラリを使用して、ローカルアプリのOAuth2.0認証フローを扱うクラスです。 -
from_client_secrets_file
->credentials.jsonのファイルを使用して、
SCOPES = ['https://www.googleapis.com/auth/gmail.readonly']で指定しているGmailに対して読み込みのアクセス権をリクエストしています -
creds = flow.run_local_server(port=0)
->run_local_server(port=0)でブラウザを自動で開き、ユーザがGoogleアカウントでログイン、許可を行うとローカルサーバでレスポンスを受け取ります。その際port=0とすることで空いているポートが自動で選ばれます。
        # トークン更新/新規取得
        if not creds or not creds.valid:
            if creds and creds.expired and creds.refresh_token:
                creds.refresh(Request())
            else:
                flow = InstalledAppFlow.from_client_secrets_file(
                    'credentials.json', SCOPES)
                creds = flow.run_local_server(port=0)
流れを整理する、
- ブラウザを自動で開いて、Googleのログインページに遷移
- ユーザがGoogleアカウントでログイン
- ユーザがアクセス権限(SCOPES)を許可
- Googleが
localhost:<ポート番号>にリダイレクト -> 認証コードが返ってくる
credsには以下の情報が格納されます。
-
token: APIアクセス用の短期トークン(1時間程度有効) -
refresh_token: トークン更新用の長期トークン(通常無期限) -
token_uri: トークンの更新先URI -
scopes: ユーザーが許可した権限の一覧
その次の処理でtoken.jsonという名前の書き込み先ファイルとしてwで書き込みモードにし、ファイルが存在していれば上書き、存在していなければ新規作成します。
as tokenでオブジェクトとして、変数化します。
その後、token.write(creds.to_json())でcredsオブジェクトに格納された情報をjson形式に変換し、token.jsonに書き込みしています。
            # 新しいトークンを保存
            with open('token.json', 'w') as token:
                token.write(creds.to_json())
token.jsonの中身は以下のような内容です。
{
  "token": "ya29.a0ARrdaM...",
  "refresh_token": "1//0gRANDOMz...",
  "token_uri": "https://oauth2.googleapis.com/token",
  "client_id": "1234567890-abc123def456.apps.googleusercontent.com",
  "client_secret": "GOCSPX-XXXX",
  "scopes": ["https://www.googleapis.com/auth/drive.file"]
}
最終的に以下のコードでGmail APIにアクセスするための処理を行います。
googleapiclient.discoveryパッケージのbuildモジュールをインポートしているため、googleapiclient.discovery.build()関数を使用してGoogle APIのバージョンv1を対象としたcredentialsを使用した認証済みのserviceオブジェクトを作成しています。
service = build('gmail', 'v1', credentials=creds)

- 'gmail': 使用したいGoogle APIの名前
- 'v1': 使用したAPIのバージョン
- credentials: 認証情報 -> credsに格納している認証情報
ここで認証済みのserviceオブジェクトが作られ、後に出てくる以下の処理でGmail APIにアクセスできます。
message = service.users().messages().get(
        userId='me',
        id=msg['id'],
        format='full'
).execute()
ちなみにここまでのコードの内容はGoogle Workspaceに丁寧にコードの内容まで載っていました。
特定のラベル名からメール一覧を取得
Gmailはラベルを作って、メールの振り分け処理ができますが、そのラベル名の受信フォルダに振り分けられたメールを取得します。
get_label_id(service, label_name)でserviceオブジェクトとlabel_nameを渡して、ラベルIDを取得するための関数に処理を飛ばします。
def process_label_emails(service, label_name):
    """ラベル指定でメール処理"""
    try:
        # ラベルID取得関数へ
        label_id = get_label_id(service, label_name)
        print(f"ラベルID取得完了: {label_name} → {label_id}")
はじめにservice.users().labels().list(userId='me').execute().get('labels', [])でGmail APIにアクセスして、Gmailで作成している全ラベルを取得します。
userId='me'は現在認証されているユーザを自動的に指定します。
これはcredsに格納した認証トークンに紐づくGoogleのアカウントです。
その後は認証トークンに紐づくGoogleアカウントのGmailの情報から、そのGmail内の特定のラベルに一致するものをfor文で回して特定させています。
def get_label_id(service, label_name):

    """ラベル名からラベルIDを取得"""
    try:
        # 全ラベルを取得
        labels = service.users().labels().list(
            userId='me'
        ).execute().get('labels', [])

        # ラベル名でフィルタリング
        matched_labels = [
            label['id'] for label in labels
            if label['name'] == label_name
        ]

        if not matched_labels:
            raise ValueError(f"ラベル '{label_name}' が見つかりません")

        return matched_labels[0]  # 最初に一致したラベルIDを返す

    except Exception as e:
        print(f"ラベルID取得エラー: {e}")
        raise
labelsの取得部分では、Gmail APIのレスポンス形式は以下のようになります。
labels = service.users().labels().list(
            userId='me'
        ).execute().get('labels', [])
# .execute().get('labels', [])としているのはlabelsキーが仮に存在しなかった場合には空のリストを返すようにしている


# レスポンス形式
# ラベルIDは必ずユニークとなる
# IDをユニークなキーとして、その他の要素が存在する
#
{
  "labels": [
    {"id": "Label_1", "name": "重要"},
    {"id": "Label_2", "name": "重要"}
]
}
for文に関しては、以下のように3行に分けた方が内容が理解し易いです。
さらに処理の流れとしては
- labelsの全ラベルをlabelに格納
- 全ラベルから一つ一つlabel['name']がlabel_nameと一致しているかを確認
- 一致しているものが存在したラベルIDをmatched_labels[]の空のリストに追加する
matched_labels = [
            label['id']                      # 抽出する要素 -> この場合id
            for label in labels              # labelsの要素をlabelに格納
            if label['name'] == label_name  # label_nameと一致したlabel['name']と比較
        ]
細かく解説してきましたが、ここまで理解できてくると次のコードの内容も理解がしやすくなるかと思います。
def process_label_emails(service, label_name):
    """ラベル指定でメール処理"""
    try:
        # ラベルID取得関数へ
        label_id = get_label_id(service, label_name)
        print(f"ラベルID取得完了: {label_name} → {label_id}")

        # メール一覧取得
        messages = service.users().messages().list(
            userId='me',
            labelIds=[label_id],
            maxResults=2
        ).execute().get('messages', [])

        result = {}

        # メール一覧からメール内容を取得
        for msg in messages:
            message = service.users().messages().get(
                userId='me',
                id=msg['id'],
                format='full'
            ).execute()

            # メールの内容からリンクを抽出関数へ
            # 取得したメール一覧のヘッダー情報から「件名」と「リンク」を取得する関数へ
            links = extract_links_from_email(message)
            if links:
                result[msg['id']] = {
                    'subject': get_header(message, 'Subject'),  # 件名を取得
                    'date': get_header(message, 'Date'), # 日付を取得
                    'links': links # メール本文のリンクを取得
                }
        return result

    except Exception as e:
        print(f"処理エラー: {e}")
        return {}
取得したラベルIDを指定して、.execute().get('messages', [])でメールの一覧を最大2件取得します。
※.messages().list()ではメール本文の内容ではなく、メールの簡易情報をリストとして取得します
        # メール一覧取得
        messages = service.users().messages().list(
            userId='me',
            labelIds=[label_id],
            maxResults=2
        ).execute().get('messages', [])
メール一覧からメールの詳細内容を取得
その後さらに、取得したメール一覧から.messages().get()でメール一覧からメールの詳細情報を取得します。
        # メール一覧からメール内容を取得
        for msg in messages:                              # messages(メール一覧)からメール情報を一つずつ取得
            message = service.users().messages().get(     # メールの詳細情報を取得
                userId='me',
                id=msg['id'],                             # メール情報の一意のIDを取得
                format='full'                             # メールの完全な情報を要求 (本文, 添付ファイルを含む全て)
            ).execute()                                   # APIリクエスト実行

# レスポンス形式
{
    "id": "182baacd42f42c1a",
    "threadId": "18a2d3f4e5g6h7i8",
    "labelIds": ["INBOX"], # 付与されているラベル
    "snippet": "地域スポーツセンター体育室貸し出し抽選...",
    "payload": {
        "mimeType": "multipart/alternative", # MIMEタイプ
        # メールヘッダー
        "headers": [
            {"name": "From", "value": "city-xxxx-xxxx@apply.e-tumo.jp"},
            {"name": "Subject", "value": "【電子申請サービス】連絡先アドレス確認メール (【電子申請サービス】連絡先アドレス確認メール)"}
        ],
        # HTMLメールの場合
        "parts": [
            {
                "mimeType": "text/plain",
                "body": {"data": "VGhpcyBpcy...", "size": 120}
            },
            {
                "mimeType": "text/html",
                "body": {"data": "PGh0bWw+...", "size": 350}
            }
        ]
    },
    "sizeEstimate": 1024,
    "internalDate": "1730332800000"
}
メール本文についてはbodyまたはpartsとなります。
# テキストメールの場合
"body": {
    "size": 500,
    "data": "VGhpcyBpcy...base64エンコードされた本文..."
}

# HTMLメールの場合(parts内)
"parts": [
    {
        "mimeType": "text/html",
        "body": {"data": "PGh0bWw+...base64..."}
    }
]
取得したメールの詳細情報から、メール本文を取得するため、def process_label_emails -> def extract_links_from_email -> def get_email_bodyの順で関数に飛んでいきます。
            # ①
            # メールの内容からリンクを抽出関数へ
            # 取得したメール一覧のヘッダー情報から「件名」と「リンク」を取得する関数へ
            links = extract_links_from_email(message)
            if links:
                result[msg['id']] = {
                    'subject': get_header(message, 'Subject'),  # 件名を取得
                    'date': get_header(message, 'Date'), # 日付を取得
                    'links': links # メール本文のリンクを取得
message['payload']とすることでpayloadの情報を取得しに行きます。
payloadとは
Gmail APIでメッセージを取得する際のレスポンスにpayloadフィールドが含まれますが、簡単に言えばメールの本文やヘッダー、添付ファイルなどの情報が含まれる「中身」です
# ②
def extract_links_from_email(message):
    links = []

    # メール本文の取得
    body = get_email_body(message['payload'])


"""payloadの基本構造"""
{
    "mimeType": "multipart/alternative",  # メールのMIMEタイプ
    "headers": [ ... ],                   # メールヘッダー
    "body": { ... },                      # シンプルなメール本文(単一パートの場合)
    "parts": [ ... ]                      # マルチパートメールの構成要素
}

"""headerのメタデータ"""
"headers": [
    {"name": "From", "value": "sender@example.com"},
    {"name": "To", "value": "recipient@example.com"},
    {"name": "Subject", "value": "会議のご連絡"},
    {"name": "Date", "value": "Wed, 20 Jul 2024 15:30:45 +0900"},
    # その他のヘッダー...
]

"""bodyの本文"""
"body": {
    "size": 256,  # 本文サイズ(バイト)
    "data": "VGhpcyBpcyB...base64エンコードされた本文..."
}

"""parts(マルチパートメールの構造)"""
"parts": [
    {
        "mimeType": "text/plain",
        "body": {"data": "Base64テキスト本文..."}
    },
    {
        "mimeType": "text/html",
        "body": {"data": "PGh0bWw+Base64HTML本文..."}
    },
    {
        "mimeType": "image/jpeg",
        "filename": "photo.jpg",
        "body": {"attachmentId": "ANGjdJ..."}  # 添付ファイル
    }
]
get_email_body(message['payload'])側から渡されたpayloadからメール本文をデコードする処理を実行します。
def get_email_body(payload):
if 'parts' in payload:でマルチパートメールかどうかを判定しています。
Gmailには以下2種類が存在します
- シンプルなメール: 本文が payload['body'] に格納される
- マルチパートメール:本文、添付ファイルなどがpayload['parts']に配列で格納される
for part in payload['parts']:でpayload['parts']を回し、
マルチパートメール構造再掲
# マルチパートメール構造再掲

"""parts(マルチパートメールの構造)"""
"parts": [
    {
        "mimeType": "text/plain",
        "body": {"data": "Base64テキスト本文..."}
    },
    {
        "mimeType": "text/html",
        "body": {"data": "PGh0bWw+Base64HTML本文..."}
    },
    {
        "mimeType": "image/jpeg",
        "filename": "photo.jpg",
        "body": {"attachmentId": "ANGjdJ..."}  # 添付ファイル
    }
]
if part['mimeType'] in ['text/plain', 'text/html']:でpart['mineType']がtext/plainなのか`text/htmlなのかを判断しています。
base64.urlsafe_b64decode(part['body']['data']).decode('utf-8')
Gmail API では本文データがURL-safe Base64でエンコードされているため、以下の手順でデコードします:
-
part['body']['data']でBase64文字列を取得 -
urlsafe_b64decode()でバイナリデータに変換 -
decode('utf-8')でUTF-8文字列として読み取り可能にする
# ③
def get_email_body(payload):
    """メール本文をデコード"""
    if 'parts' in payload:
        for part in payload['parts']:
            if part['mimeType'] in ['text/plain', 'text/html']:
                return base64.urlsafe_b64decode(part['body']['data']).decode('utf-8')
    return base64.urlsafe_b64decode(payload['body']['data']).decode('utf-8')
Base64 とは
64進数を意味する言葉で、全てのデータをアルファベット(a~z, A~Z)と数字(0~9)、一部の記号(+, /)の64文字で表すエンコード方式です。
Base64エンコードでは、元のバイナリデータを3バイト(24ビット (1バイト = 8ビット×3 = 24ビット))ごとに分割し、それを4文字のBase64文字列に変換します。
その際、元データの長さが3バイトの倍数でない場合、末尾にパディング文字として=追加して、変換ごの文字列の長さを4の倍数に揃えます。
URL-safe Base64 とは
URLに使用できるBase64 エンコードのことを指します。
Base64の場合/, +, =も含まれますが、URLの場合、これらは特別な意味を持つためそのまま使用すると問題が発生します。
そのため、URL-safe Base64ではこれらの記号は以下のように置き換えます。
| Base64 | URL-safe Base64 |
|---|---|
/ |
_ |
+ |
- |
= |
%3D |
Pythonで実際にエンコード文字列をデコードしてみます。
以下のコードを実行すると"VGhpcyBpcyBhIHRlc3Qhfg=="をデコードし、This is a test!~と表示されます。
import base64

# URL-safe Base64 文字列(例: Gmail APIのメール本文)
encoded_data = "VGhpcyBpcyBhIHRlc3Qhfg=="

# デコード
decoded_bytes = base64.urlsafe_b64decode(encoded_data)
text = decoded_bytes.decode('utf-8')  # バイト列を文字列に変換

print(text)


# "This is a test!~"
def extract_links_from_email(message):
上記の処理でメール本文を取得できたので、取得した本文がHTMLメールかプレーンテキストメールどちらでも対応できるように、まずはHTMLメールかどうかの判断をするために、if '<html' in body.lower():としてメール本文に<html>タグの存在確認をしています。
HTMLメールだった場合には、BeautifulSoup(解析対象のHTML, '利用するパーサー')と指定し、HTMLを解析します。
解析後に、for a in soup.find_all('a', href=True):としてHTML内の全<a href>をfor文で回し、https://で始まるものだけを抽出しています。
その後、links.append(a['href'])でlinksに取得したリンクを配列として格納します。
def extract_links_from_email(message):
    links = []

    # メール本文の取得
    body = get_email_body(message['payload'])

    # HTMLメールの場合(BeautifulSoupで解析)
    if '<html' in body.lower():
        soup = BeautifulSoup(body, 'html.parser')
        for a in soup.find_all('a', href=True):
            if a['href'].startswith('https://'):
                links.append(a['href'])
linksイメージ
["https://example.com", "https://test.org"]
テキストメールだった場合は、こちらは正規表現を使用してURLを抽出しています。
re.findall(...): Pythonのreモジュール (正規表現)で条件に一致する全ての文字列をリストで返す関数です。
[^\s<>"\']+で正規表現を使用して抽出します。
-
https://: 文字列がhttps://で始まることを指定 -
^: 否定を意味します (この文字以外を含まる) -
\s: 空白 (スペース、タグ、改行など) -
<>"\': 記号 < > " ' -
+: 1文字以上の繰り返し
つまり、空白、<,>,",'以外の文字が続く部分をURLとして取り出す
->https://で始まり、空白や記号で区切られる文字列(URL)を全てリストにします。
links.extend(https_links): 取得したURLリンクリストをlinks配列に追加します。
    # テキストメールの場合(正規表現で抽出)
    https_links = re.findall(r'https://[^\s<>"\']+', body)
    links.extend(https_links)

    return list(set(links))  # 重複削除
以下コードで、result配列にGmail APIから取得したメールをIDで指定し、そのメールの件名、日付、リンクをresultに格納しています。
            # 取得したメール一覧のヘッダー情報から「件名」と「リンク」を取得する関数へ
            links = extract_links_from_email(message)
            if links:
                result[msg['id']] = {
                    'subject': get_header(message, 'Subject'),  # 件名を取得
                    'date': get_header(message, 'Date'), # 日付を取得
                    'links': links # メール本文のリンクを取得
                }
取得したresultをitems()メソッドを使用して取得すると、resultの中身をKey, Value形式で返します。
Key, Value形式で返ってきた値のKeyをemail_idに、Valueをemail_dataに格納するようにfor文を回します。
これで、欲しかったリンクの取得をすることが可能です。
    for email_id, email_data in result.items():  # 辞書からメールIDとリンクリストを取得
        print(f"\nメールID: {email_id}")
        print(f"件名: {email_data['subject']}")  # 件名も表示
        print(f"日付: {email_data['date']}")
        for link in email_data['links']:  # リンクリストを取得
            print(f" - リンク: {link}")

"""
resultのデータ構造
result = {
    dict_items([('1976xxxxxxxxx',
    	{'subject': '【スポーツセンター】9月分抽選結果のお知らせ',
    	'date': 'Thu, 12 Jun 2025 16:19:12 +0900 (JST)',
    	'links': ['https://apply.e-tumo.jp/xxxxxxx']}
    )])
}
"""
最後に
長々と解説してきましたが、現状またリンクを取得できたに過ぎないので、ここからこのリンクを開いて、その先のフォームに必要事項を入力するところまでできれば地域体育館の完全自動申請が可能となります。