MapLibre は、フリーでオープンソースな地図ライブラリのプロジェクトです。様々なライブラリがありますが、iOSやAndroidといったネイティブアプリ向けのライブラリもあります。
この記事では MapLibre Native for iOS のセットアップ方法を備忘録として残します。
パッケージのインストール
Swift Package Manager を使って Maplibre Native のパッケージをインストールします。
Xcodeから File -> Add Package Dependencies をクリック
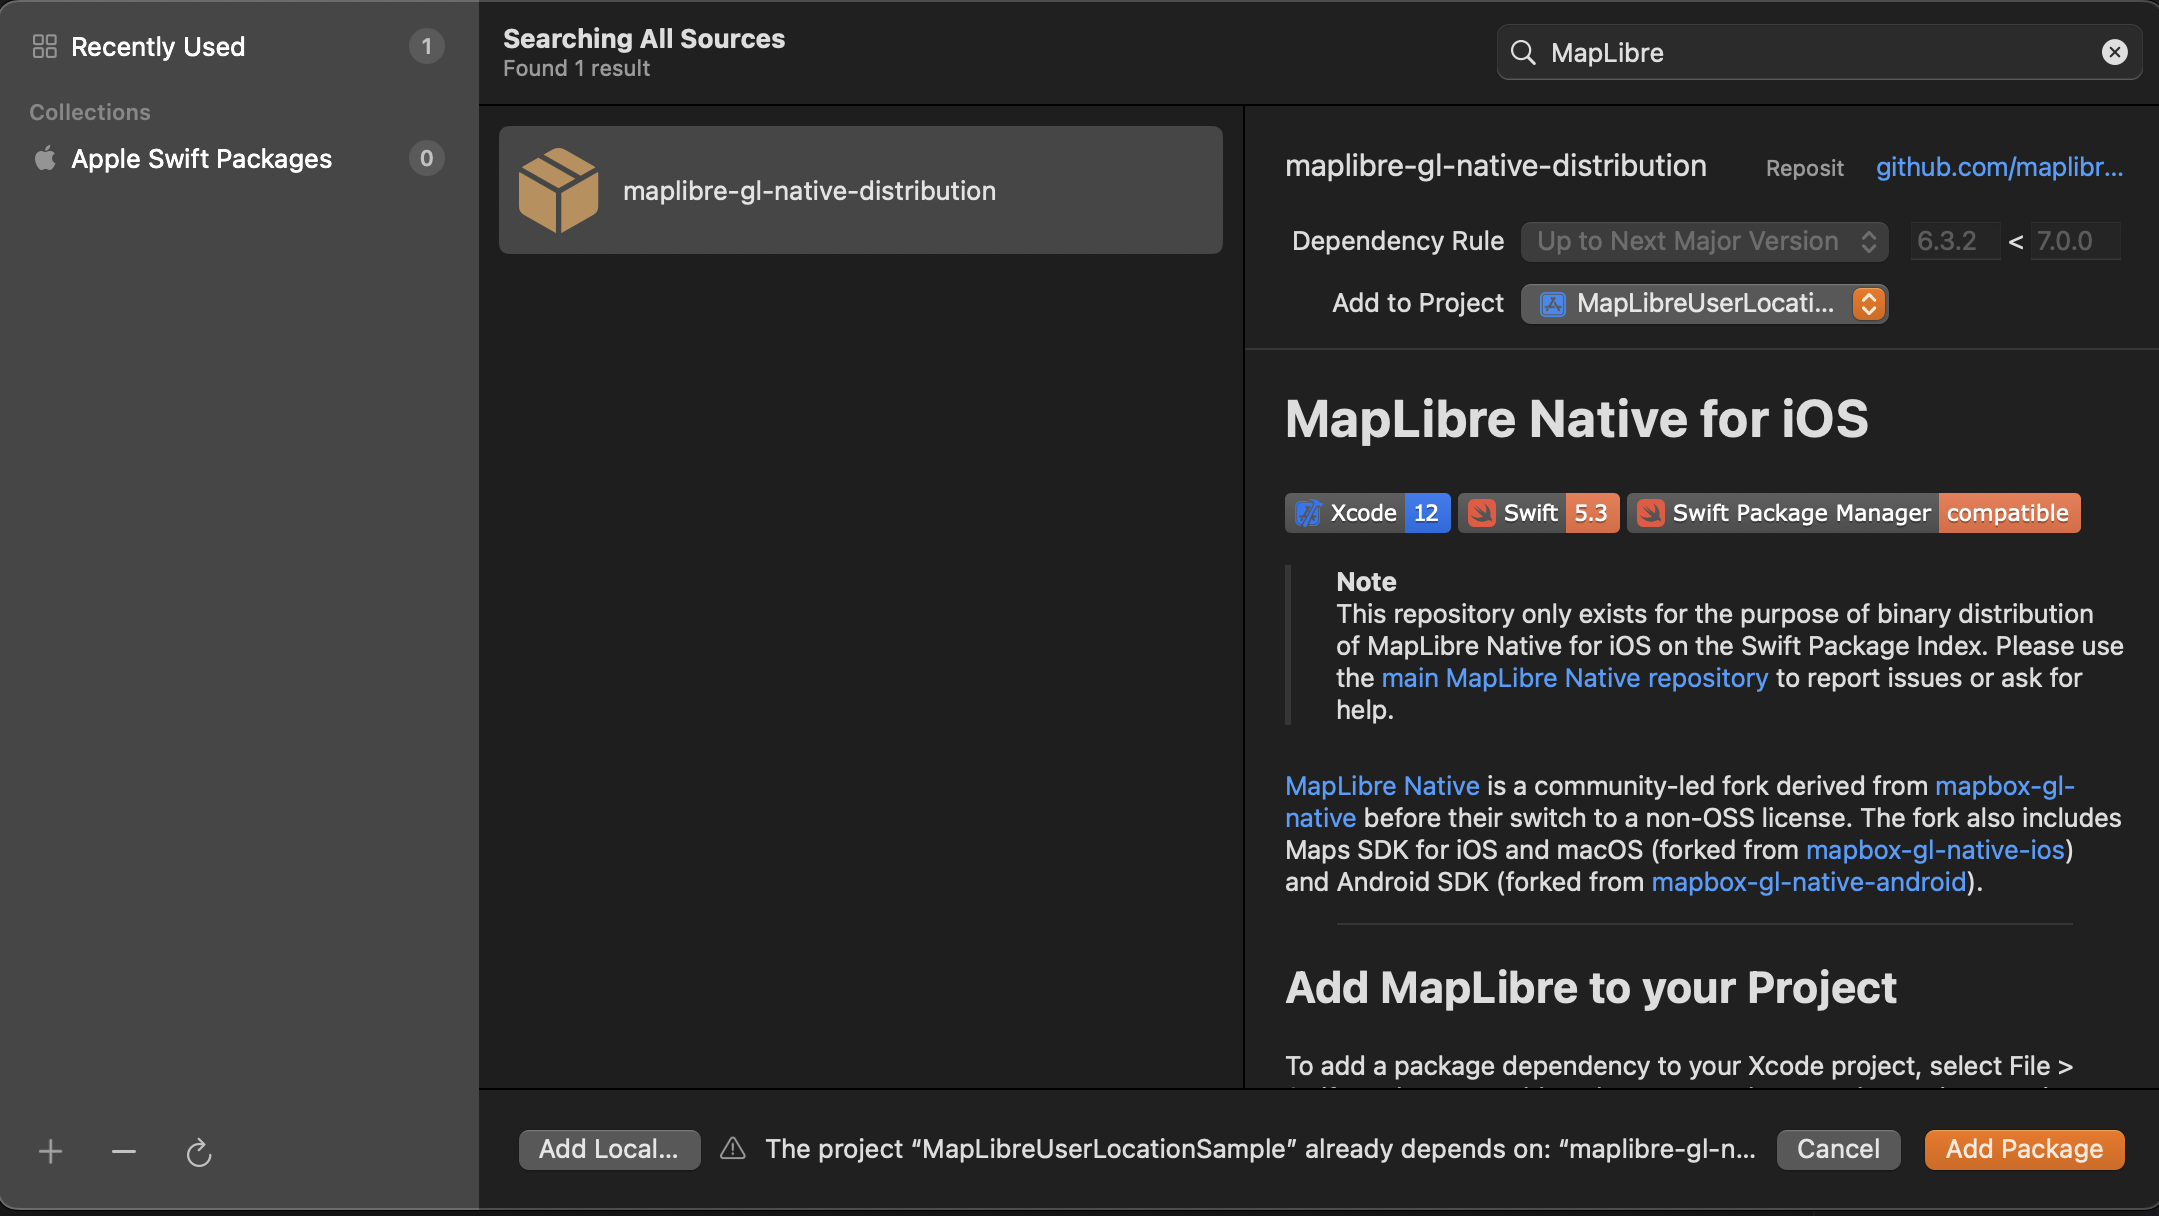
右上の検索欄に MapLibre あるいは https://github.com/maplibre/maplibre-gl-native-distribution と入力すると、下記の画像のように検索結果が表示される。
この状態で Add Package をクリック
右側の Add to Target で、Xcodeプロジェクトのターゲットを選択して Add Package をクリック
これで、導入は完了です。
MapView
MapLibre Native for iOSは、デフォルトでSwiftUIには対応していないため、新規に UIViewRepresentable を継承したソースファイルを作成する必要があります。
Xcodeのプロジェクトに MapView.swift を作成して、必要なライブラリをインポートしつつ MapView の struct を作成します。
import SwiftUI
import MapLibre
import MapKit

struct MapView: UIViewRepresentable {
    ...
}
MapTiler APIキー
MapTiler Cloud から配信されている地図を表示するので、MapTilerのAPIキーを取得する関数を書きます。
MapTilerのAPIキーを Info.plist に追記をして、以下のようにプログラム上で取得します。
/// MapTilerのキーを取得します
/// - Returns: MapTilerのAPIキー
func getMapTilerKey() -> String {
  let key = Bundle.main.object(forInfoDictionaryKey: "MapTilerKey") as? String

  guard let key = key else {
    preconditionFailure("Failed to read MapTiler Key")
  }

  return key
}
makeUIView
Viewが生成されたときに実行される makeUIView 関数を定義します。
func makeUIView(context: Context) -> some UIView {
  // MapTilerのキーを取得
  let mapTilerKey = getMapTilerKey()

  // スタイルのURLを定義
  let styleURL = URL(string: "https://api.maptiler.com/maps/streets-v2/style.json?key=\(mapTilerKey)")

  // Viewを定義
  let mapView = MLNMapView(frame: .zero, styleURL: styleURL)
  mapView.autoresizingMask = [.flexibleWidth, .flexibleHeight]
  mapView.logoView.isHidden = true
  mapView.setCenter(
    CLLocationCoordinate2D(latitude: 35.681111, longitude: 139.766667),
    zoomLevel: 15.0,
    animated: false
  )

  // DelegateはCoordinatorを指定します
  mapView.delegate = context.coordinator

  return mapView
}
updateUIView
Viewに更新があったときに実行される updateUIView を定義しますが、今回は特に何もしないので中身は空です。
func updateUIView(_ uiView: UIViewType, context: Context) {
  /// Viewがアップデートされたときの処理
  /// 現状は特に何も処理をします
}
Coordinator
マップが読み込まれた時などのイベント処理は、以下のように Coordinator を定義して、その中に記述します(この記事では、イベント関数を定義するのみに留めます)。
struct MapView: UIViewRepresentable {
  ...

  class Coordinator: NSObject, MLNMapViewDelegate {
    var control: MapView

    init(control: MapView) {
      self.control = control
    }

    func mapViewDidFinishLoadingMap(_ mapView: MLNMapView) {
      // マップのローディングが終わったときの処理
    }
  }

  ...

}
そして makeCoordinator 関数を定義して Coordinator を生成します。
func makeCoordinator() -> Coordinator {
  Coordinator(control: self)
}
全体像
MapView.swiftの全体像は、以下のようになります。
import SwiftUI
import MapLibre
import MapKit

struct MapView: UIViewRepresentable {

  func makeUIView(context: Context) -> some UIView {
    // MapTilerのキーを取得
    let mapTilerKey = getMapTilerKey()

    // スタイルのURLを定義
    let styleURL = URL(string: "https://api.maptiler.com/maps/streets-v2/style.json?key=\(mapTilerKey)")

    // Viewを定義
    let mapView = MLNMapView(frame: .zero, styleURL: styleURL)
    mapView.autoresizingMask = [.flexibleWidth, .flexibleHeight]
    mapView.logoView.isHidden = true
    mapView.setCenter(
      CLLocationCoordinate2D(latitude: 35.681111, longitude: 139.766667),
      zoomLevel: 15.0,
      animated: false
    )

    // DelegateはCoordinatorを指定します
    mapView.delegate = context.coordinator

    return mapView
  }

  func updateUIView(_ uiView: UIViewType, context: Context) {
    /// Viewがアップデートされたときの処理
    /// 現状は特に何も処理をします
  }

  func makeCoordinator() -> Coordinator {
    Coordinator(control: self)
  }

  class Coordinator: NSObject, MLNMapViewDelegate {
    var control: MapView

    init(control: MapView) {
      self.control = control
    }

    func mapViewDidFinishLoadingMap(_ mapView: MLNMapView) {
      // マップのローディングが終わったときの処理
    }
  }

  /// MapTilerのキーを取得します
  /// - Returns: MapTilerのAPIキー
  func getMapTilerKey() -> String {
    let key = Bundle.main.object(forInfoDictionaryKey: "MapTilerKey") as? String

    guard let key = key else {
      preconditionFailure("Failed to read MapTiler Key")
    }

    return key
  }

}
ContentView
アプリ起動後に表示される ContentView で、上記で作成した MapView を呼び出します。
import SwiftUI

struct ContentView: View {
  var body: some View {
    MapView()
      .ignoresSafeArea()
  }
}

#Preview {
  ContentView()
}
プレビュー
この状態でプレビューを確認すると、以下のように地図が表示されます。
追記情報
MapLibre Native for iOS では v6.0.0 で Mapbox としてインポートするのではなく MapLibre としてインポートするように変更されたようです。
また、地図表示に関連する関数名も Mapbox GL ベースから MapLibre Native ベースの名称に変更となりました。
さらに、このバージョンで地図描画が Metal レンダリングに対応しました。
詳しくは v6.0.0 のリリースノート を御覧ください。


