Java と Spring の開発環境も Docker で整えてしまうと楽です。今回の記事では、VSCode も Dockerに含めてみました。開発環境をまるごとDockerで管理できるので、管理がしやすいのでオススメです。
登場人物
Dockerとは
Linux上でコンテナーでアプリを動作させる環境です。アプリケーションとライブラリーを同一のコンテナーで固めて、使い回すことができます。
https://ja.wikipedia.org/wiki/Docker
VSCode
https://ja.wikipedia.org/wiki/Visual_Studio_Code
Microsoft製のEditorです。Dart Pluginを入れると、補間機能などが使えて便利です。
Code-Server
VSCodeをWebサービスとして動作させることができる凄いやつです。
https://github.com/cdr/code-server
環境を作ってみる
(1) dockerfile を書く
FROM openjdk:11

#
# GRADLE
RUN mkdir /works
WORKDIR /works

RUN apt-get update
RUN apt-get install -y curl wget gnupg less lsof net-tools git apt-utils -y
RUN apt-get install -y build-essential libssl-dev curl git-core
RUN apt-get install -y emacs

RUN wget https://downloads.gradle.org/distributions/gradle-5.4.1-bin.zip
RUN unzip gradle-5.4.1-bin.zip
ENV PATH="/works/gradle-5.4.1/bin:${PATH}"

#
# いらないかも、
# https://marketplace.visualstudio.com/items?itemName=vscjava.vscode-java-dependency 向け
# nodejs for vscode plugin
RUN curl -sL https://raw.githubusercontent.com/creationix/nvm/v0.33.11/install.sh -o install_nvm.sh
RUN sh install_nvm.sh
ENV NVM_DIR="/root/.nvm"

RUN chmod o+x /root/.nvm/nvm.sh
RUN /bin/bash -c "source /root/.nvm/nvm.sh && nvm install v12.0.0"
ENV PATH="/root/.nvm/versions/node/v12.0.0/bin/:${PATH}"

#
# code-server
RUN wget https://github.com/cdr/code-server/releases/download/1.939-vsc1.33.1/code-server1.939-vsc1.33.1-linux-x64.tar.gz
RUN tar xzf code-server1.939-vsc1.33.1-linux-x64.tar.gz -C ./ --strip-components 1
(1) docker image を走らせる
docker build -t java_spring_vscode .
docker run -p 8443:8443 -p 8080:8080 -it java_spring_vscode bash
(2) code-server を利用して、vscode を起動
mkdir /works/w
/works/code-server /works/w --allow-http --no-auth
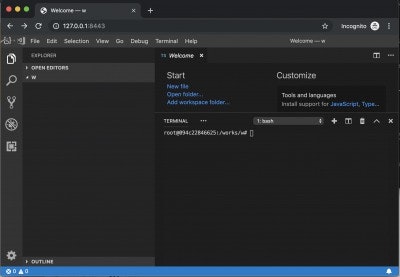
(3) and 'http://127.0.0.1:8443/' を ブラウザーで開く
Java Plugin をインストール
(1)
https://marketplace.visualstudio.com/items?itemName=redhat.java
(2) 不要かも
.vscode/settings.json
{
    "java.home": "/usr/lib/jvm/java-11-openjdk-amd64",
    "java.maven.downloadSources": true,
    "java.import.gradle.enabled": true,
    "java.errors.incompleteClasspath.severity": "warning",
    "java.configuration.updateBuildConfiguration": "automatic"
}
HelloWorld を書いてみる。
(1) Terminal -> New Terminal on VSCODE
(2) Terminal 上で
$ gradle init --type java-application
$ gradle build
(3) redhat java plugin 向けに build.gradle に eclipse を追加
※ 自動補間機能 とか 使いたいので
plugins {
    id 'java'
    id 'application'
    id 'eclipse'
}

repositories {
    jcenter()
}

dependencies {
    implementation 'com.google.guava:guava:27.0.1-jre'
   testImplementation 'junit:junit:4.12'
}

mainClassName = 'hello.App'
(4) Hello World!! を走らせてみる。
$ gradle eclipse
$ gradle build
$ gradle run
Spring Boot を動作させてみる。
(1) build.gradle を修正
buildscript {
    repositories {
        mavenCentral()
    }
    dependencies {
        classpath("org.springframework.boot:spring-boot-gradle-plugin:2.0.5.RELEASE")
    }
}

apply plugin: 'java'
apply plugin: 'eclipse'
apply plugin: 'idea'
apply plugin: 'org.springframework.boot'
apply plugin: 'io.spring.dependency-management'

bootJar {
    baseName = 'gs-rest-service'
    version =  '0.1.0'
}

repositories {
    mavenCentral()
}

sourceCompatibility = 11
targetCompatibility = 11

dependencies {
    compile("org.springframework.boot:spring-boot-starter-web")
    testCompile('org.springframework.boot:spring-boot-starter-test')
}
(2) package の ダウンロードとか
※ browser の再読み込みが必要かも
$ gradle build
$ gradle eclipse
(3) src/main/java/hello/App.java
package hello;

import org.springframework.boot.SpringApplication;
import org.springframework.boot.autoconfigure.SpringBootApplication;

@SpringBootApplication
public class App {

    public static void main(String[] args) {
        SpringApplication.run(App.class, args);
    }
}
(4) src/main/java/hello/Greeting.java
package hello;

public class Greeting {
    private final long id;
    private final String content;

    public Greeting(long id, String content) {
        this.id = id;
        this.content = content;
    }

    public long getId(){
        return this.id;
    }

    public String getContent() {
        return this.content;
    }
}
(5) src/main/java/hello/GreetingController.java
package hello;

import java.util.concurrent.atomic.AtomicLong;
import org.springframework.web.bind.annotation.RequestMapping;
import org.springframework.web.bind.annotation.RequestParam;
import org.springframework.web.bind.annotation.RestController;

@RestController
public class GreetingController {

    private static final String template = "Hello, %s!";
    private final AtomicLong counter = new AtomicLong();

    @RequestMapping("/greeting")
    public Greeting greeting(@RequestParam(value="name", defaultValue="World") String name) {
        return new Greeting(counter.incrementAndGet(),
                            String.format(template, name));
    }
}
(6) 起動してみる
$ SERVER_PORT=8080 SERVER_HOST=0.0.0.0 gradle tasks bootRun
(7) and, open 'http://127.0.0.1:8080/greeting' at your browser

以上です。
Code-Serverがとても便利でしたね。
https://github.com/cdr/code-server
終わり。
今回のコードは以下にまとめました。
https://github.com/kyorohiro/my-code-server/tree/master/java_spring
PS
[a] 再開したい場合
$ docker ps -a
check id and
$ docker start < id >
$ docker exec -it < id > bash
[b] 設定を変更したい場合
$ docker commit < id > java_spring_vscode_xxx
$ docker run -p 8443:8443 -p 8080:8080 -it java_spring_vscode_xxx bash
[c] マウント
$ docker run -p 8443:8443 -p 8080:8080 -v /Users/kyorohiro/w/xxx:/app/w -it java_spring_vscode bash