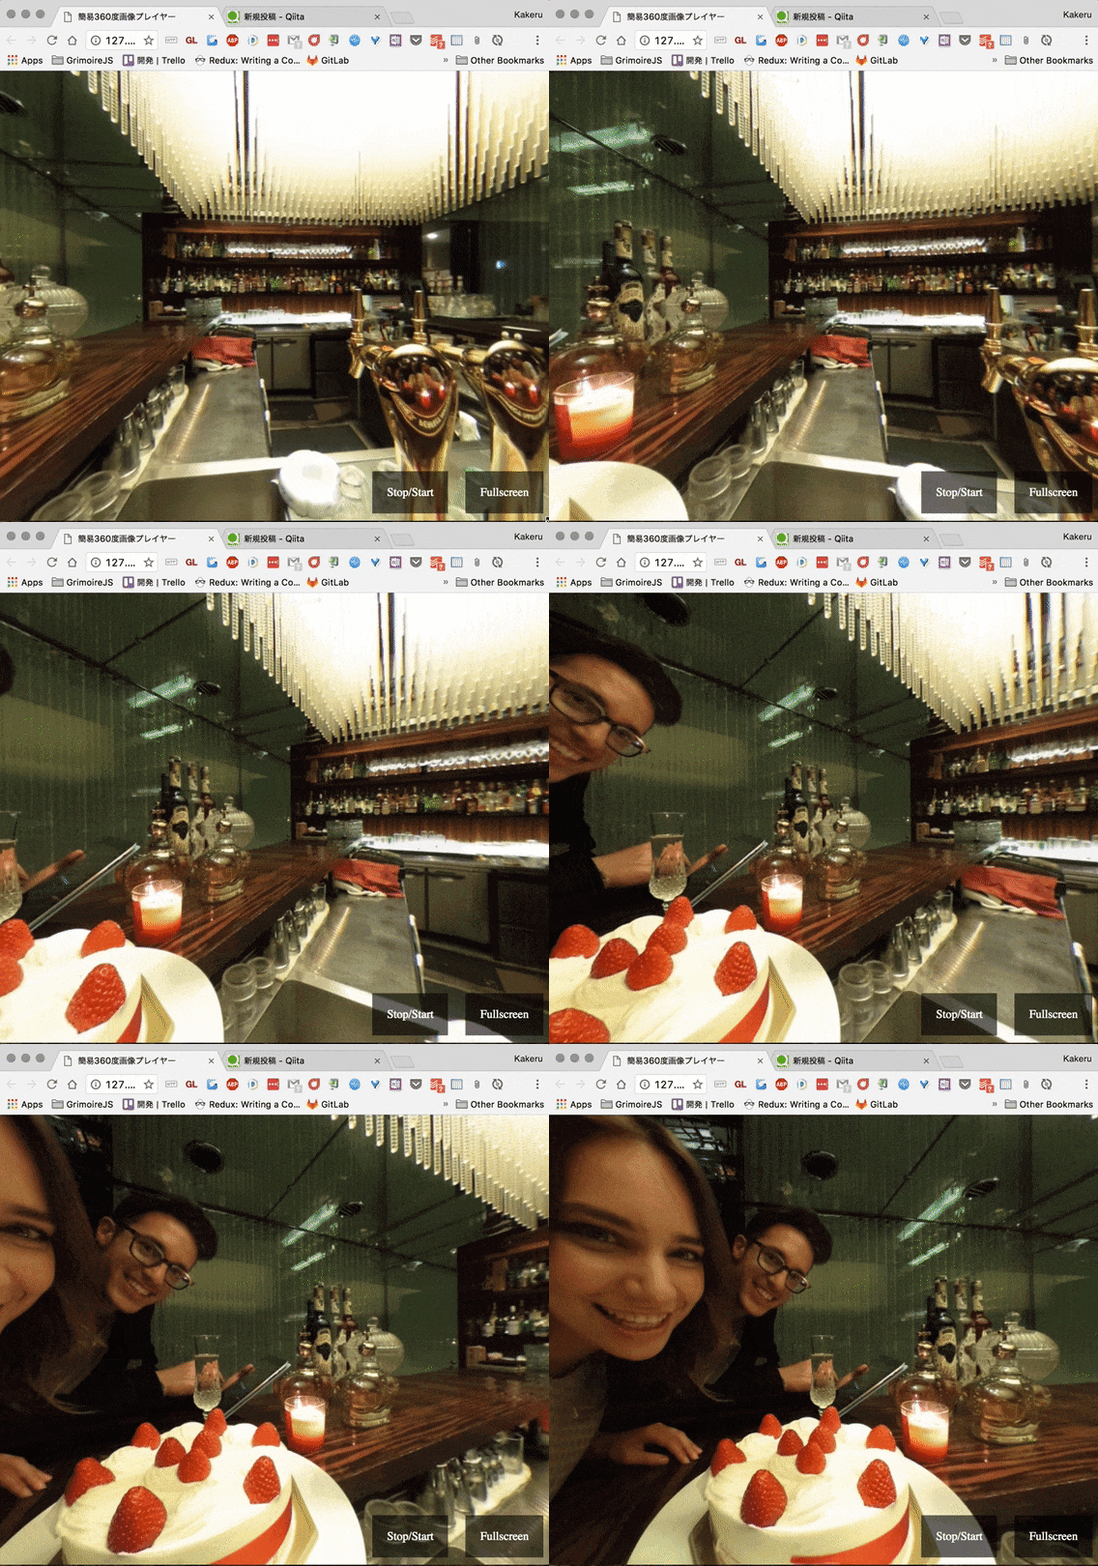
作ったもの
めっちゃシンプルな360度画像プレイヤーを作った。Grimoire.jsを使えば、本当に15分でできる!
実装した機能は以下のとおり。
- 360度画像を表示する
- 勝手に少しずつ回転する
- フルスクリーン機能
- 少しずつの回転を止められる/再開できる
- マウスホイールで回転できる
まずは実際に以下のアドレスでチェックできるので見て欲しい。
せっかくなのでステップバイステップで見ていく。
必要なファイルを用意する
まずは単純に以下のようなHTMLファイルを用意しよう。
<!DOCTYPE html>
<html>
<head>
	<title>簡易360度画像プレイヤー</title>
	<script src="https://code.jquery.com/jquery-3.1.1.min.js"></script>
	<script src="https://unpkg.com/grimoirejs-preset-basic/register/grimoire-preset-basic.js"></script>
	<script src="./index.js" charset="utf-8"></script>
	<link rel="stylesheet" href="index.css">
</head>
<body>
   <div class="canvas-container">
   </div>
</body>
</html>
jQueryとgrimoirejs-preset-basic(Grimoire.jsのプラグインがまとまっているもの)を読み込んでおく。
あとは、書き進めていくためのindex.cssとindex.jsを用意しよう。
あと、サンプルで表示したい360度画像を用意しよう。自分でTHETAで撮影しても良いし、ないならばGoogleで探してくると良い。
(注)360度画像の形式になっていないものがたまに検索結果に出るが、360度画像はたて:よこ=1:2の大きさになっているもので、左右の真ん中を中心に歪んでいる画像だ。正距円筒図法という。
CSSを少し書く
あらかじめhtmlとbodyとその中のdivのmargin,paddingを0pxに。heightを100%にしてページ全体を覆うようにしておく。
html, body, body > div {
    height: 100%;
    margin: 0px;
    padding: 0px;
}
GOMLを埋め込む
Grimoire.jsを使うときに使うキャンバスを操作するためのgomlファイルを埋め込む。
キャンバスを表示したい位置(ここではdiv.canvas-container内)に、<script type="text/goml">を指定して以下のように記述する。
<div class="canvas-container">
  <script type="text/goml" id="image-360">
    <goml height="fit">
      <scene>
        <camera position="0,0,0" fovy="90d"/>
	<mesh geometry="sphere" scale="-10,10,10" position="0,0,0" texture="./sample360.jpg" />
      </scene>
    </goml>
  </script>
</div>
とりあえず、これだけで360度画像が見えるようにはなる。
まず、カメラのfovy属性は視野角で、若干、デフォルト値だと狭いので普段よりも大きい90度を指定しておく。
また、カメラのみ、positionの初期値が0,0,10になっているので、0,0,0とすれば、メッシュの球の中にカメラが入るような状態となる。
さらに、このままだと球が裏面しか見えないため、透過されてしまうので、scaleでz軸だけ反転させて内側を表にするようにしている。
また、後々のため<script>にidを振っている。こちらも注意して欲しい。
回転させるようにする
勝手に回転させるためのスクリプトを書こう。
今回、作るSpinコンポーネントはspeedという数値の属性を受け取り、毎フレームごとにy軸中心にspeed度回転するようなものをつくる。
gr.registerComponent("Spin",{
  attributes:{
   speed:{
     default:1,
     converter:"Number"
   }
 },
 $awake:function(){
   this.phi = 0;
 },
 $update:function(){
   this.node.setAttribute("rotation","y(" + this.phi + ")");
   this.phi += this.getAttribute("speed");
 }
});
こうすると、GOMLの中で新しいコンポーネントSpinが使えるようになる。早速<camera>タグを以下のようにして適用する。
<camera position="0,0,0" fovy="90d">
  <camera.components>
    <Spin/>
  </camera.components>
</camera>
speedが1だと、早いと思うので、<Spin>を以下のようにして修正する。
<Spin speed="0.2"/>
UIを作る
UIのHTML/CSSを書く
canvasの上にHTMLで要素を作り簡易的にUIを作る。
以下のようにHTMLのbodyを修正する。
<body>
	<div class="canvas-container">
		<script type="text/goml" id="image-360">
			<goml height="fit">
				<scene>
					<camera position="0,0,0" fovy="90d">
						<camera.components>
							<Spin speed="0.2"/>
						</camera.components>
					</camera>
					<mesh geometry="sphere" scale="-10,10,10" position="0,0,0" texture="./sample360.jpg" />
				</scene>
			</goml>
		</script>
		<div class="canvas-controls">
			<a id="start-stop">Stop/Start</a>
			<a id="fullscreen">Fullscreen</a>
		</div>
	</div>
</body>
この状態で、以下のようなcssを書けば、ボタンが完成する。
.canvas-container {
    width: 100%;
}

.canvas-controls {
    position: absolute;
		bottom:30px;
		right: 0px;
}

.canvas-controls > a{
	background-color: rgba(0,0,0,0.6);
	color:white;
	padding: 20px;
	margin: 10px;
}

.canvas-controls > a:hover{
	background-color: rgba(0,0,0,0.8);
	cursor: pointer;
}
フルスクリーン表示を動くようにする
jQueryを用いて(もちろん用いなくても良い)、<a>要素を取ってきて、クリックイベントをまずとる。
<goml>要素にsetAttribute("fullscreen",true)とすればフルスクリーン表示になるので以下のように書く。
$(function(){
   var c = gr("#image-360"); // 操作したいGOMLへのインターフェースを取得する。(scriptへのクエリ)
   var isFullscreen = false;
   $("#fullscreen").on("click",function(){
     isFullscreen = !isFullscreen;
     c("goml").setAttribute("fullscreen",isFullscreen);
   });
});
これでボタンを押したらフルスクリーンになるようになった。
Start/Stopボタンを動くようにする
自作の<Spin>コンポーネントのspeedを0にするかある値にするか切り替えるようにすれば良い。
$(function(){...});の中で(フルスクリーンの奴の下に)、以下のように書けば良い。
	var speed = 0.2;
	$("#start-stop").on("click",function(){
		var spin = c("camera").single().getComponent("Spin");
		speed = speed > 0 ? 0 : 0.2;
		spin.setAttribute("speed",speed);
	});
c("camera").single()で、取得したノードのリストに対するインターフェースから具体的なノードを一つ取得できる。
ここから、Spinコンポーネントを取得してspeedをクリックのたびに0と規定値を繰り返すようにすれば良い。
これでこのボタンも動くようになった。
マウスのホイールで回転できるようにしてみる
<Spin>コンポーネントを改造して簡単にホイールの回転を取れるようにしてみる。
Spinコンポーネントの$awakeに以下のようなコードを差し込めば良い。
$(".canvas-container")[0].addEventListener("wheel",(function(e){
  this.phi += e.deltaY;
  e.preventDefault();
}).bind(this));
これで、ホイールの回転で回るようになった。
全体のコード
最終形のソースコードは以下のようになる。(Github : https://github.com/kyasbal-1994/advent-360-image-player)
<!DOCTYPE html>
<html>

<head>
	<meta charset="utf-8">
	<title>簡易360度画像プレイヤー</title>
	<script src="https://code.jquery.com/jquery-3.1.1.min.js"></script>
	<script src="https://unpkg.com/grimoirejs-preset-basic/register/grimoire-preset-basic.js"></script>
	<script src="./index.js" charset="utf-8"></script>
	<link rel="stylesheet" href="index.css">
</head>

<body>
	<div class="canvas-container">
		<script type="text/goml" id="image-360">
			<goml height="fit">
				<scene>
					<camera position="0,0,0" fovy="90d">
						<camera.components>
							<Spin speed="0.2"/>
						</camera.components>
					</camera>
					<mesh geometry="sphere" scale="-10,10,10" position="0,0,0" texture="./sample360.jpg" />
				</scene>
			</goml>
		</script>
		<div class="canvas-controls">
			<a id="start-stop">Stop/Start</a>
			<a id="fullscreen">Fullscreen</a>
		</div>
	</div>
</body>

</html>
html, body, body>div {
    height: 100%;
    margin: 0px;
    padding: 0px;
}

.canvas-container {
    width: 100%;
}

.canvas-controls {
    position: absolute;
		bottom:30px;
		right: 0px;
}

.canvas-controls > a{
	background-color: rgba(0,0,0,0.6);
	color:white;
	padding: 20px;
	margin: 10px;
}

.canvas-controls > a:hover{
	background-color: rgba(0,0,0,0.8);
	cursor: pointer;
}
gr.registerComponent("Spin",{
	attributes:{
		speed:{
			default:1.0,
			converter:"Number"
		}
	},
	$awake:function(){
		this.phi = 0;
		$(".canvas-container")[0].addEventListener("wheel",(function(e){
			this.phi += e.deltaY;
			e.preventDefault();
		}).bind(this));
	},
	$update:function(){
		this.node.setAttribute("rotation", "y(" + this.phi + ")");
		this.phi+= this.getAttribute("speed");
	}
});

$(function(){
	var c = gr("#image-360"); // キャンバス操作用のインターフェース
	var fullscreen = false;
	$("#fullscreen").on("click",function(){
		fullscreen = !fullscreen;
		c("goml").setAttribute("fullscreen",fullscreen);
	});
	var speed = 0.2;
	$("#start-stop").on("click",function(){
		var spin = c("camera").single().getComponent("Spin");
		speed = speed > 0 ? 0 : 0.2;
		spin.setAttribute("speed",speed);
	});
});
まとめ
こんなにも簡単に360度プレイヤーを作れた。より深く触れればエフェクトをかけたり、合成したり、360度画像上にお絵描きできるようにしたりすることもできるようになるだろう。
さらに、HTMLの要素などと簡易的に連携できるのがわかっただろうか。今回は質素なUIだが、より発展的なUIでも同じように簡易的に連携できるだろう。もちろん、jQueryだけでなく、最近のモダンなWebフレームワークの中での利用も可能だ。
Grimoire.jsはまだまだ開発途上ではあるが、日々新しい機能が増えている。是非とも興味を持った方がいたら、他にもチュートリアルなどを見ていただけると嬉しい。
