English translation follows Japanese paragraph
SmartOSをVMware Playerで動かすで簡単に紹介していますように、SmartOSは、ZFS + DTrace + Zones そして、なんと Solaris系にもかかわらずKVMやDockerが使えるオープンソースOSです。Sun Microsystems(現在のOracle)がオープンソース化していた Open Solarisから派生したillumosのカーネルを使ったOSです(SmartOSで遊んじゃう?で簡単にSmartOSを紹介しています)。
SmartOS is an Open Source virtualizaton platform and operating system in which you can use its native container, Linux container, KVM virtual machine and Docker(with open source SmartDatacenter).SmartOS is a distribution of illumos OS which is derived from Open Solaris Sun Microsystems(now Oracle) had open-sourced.ZFS is used as a storage infrastructure underneath SmartOS's virtualization functions and you can use DTrace to investigate kernel and your application's performance and other problems.
SmartOSは仮想化テクノロジとして以下の機能を持っています。
- SmartOSによるOS仮想化(コンテナ):
- SmartOSのZone(SmartMachine)
- LinuxのZone(LX Branded Zone)
- SmartOS組み込みのハイパーバイザベースの仮想化
- KVM
SmartOS supports the following virtualization technologies.
- OS Virtualizaion aka Container
- SmartOS's native Zone(aka SmartMachine)
- Linux Zone(LX Branded Zone)
- Hardware virtualization based on Hypervior
- KVM
ここでは、SmartOSのKVM上でCentOS7(7.1.1503)を動かしてみます。
In this article we will explore KVM virtual machine on SmartOS and you can see how you can deploy CentOS7(7.1.1503) on SmartOS as a KVM virtual machine.
SmartOSのKVMは、zfsのsnapshot(clone)機能を利用してtemplateとなるVM imageから高速に新しいVMを生成することができます。以下の例では実際にCentOSのVMを作るコマンド(vmadm create)の実行時間は、数秒でした。使い捨てのVM環境を頻繁に作成する場合には、vagrant以上に強力な解かもしれません。VPSのようなサービスにも向いていそうです。
KVM VM on SmartOS can be created by vmadm create command.This command will create a zfs snapshot of an existing VM image and then create a zfs clone from this snapshot.ZFS snapshot and clone are just metadata operation until you change data of new VM.So this command will complete less than 10 seconds typically.
SmartOSのGlobal Zone(大域ゾーン)を用意する(Prepare SmartOS Global Zone)
SmartOSをVMware Playerで動かすの手順でVMware Player上にGlobal Zoneを用意します。もちろん、ベアメタル上でもOKです(SmartOS用に専用で使えるハードディスクが余っていれば、むしろベアメタルの方が簡単です)。ただし、Hyper-VやVirtualBoxのような Nested Virtualizationに対応していないハイパーバイザ上では、KVMは使用できません。Linux KVMは、Nested Virtualizationに対応しているようですので大丈夫そうですが試していません(VMwareは、Virtualized VMという形でソフトウェア的にNested Virtualizationに対応しています。Intel Haswell CPUは、VMCS shadowingというNested Virtualizationをハードウェアで支援する機能を持っていますので、各ハイパーバイザーが早く対応してくれると嬉しいのですが。。。対応しているものはあるのでしょうか?)。
Before deploying KVM VM,you need to prepare SmartOS itself aka Global Zone on your physical machine or virtual machine.If you have extra disk drives it is easy to setup your SmartOS.If you don't have extra drive you can use VMware Player or workstation or Fusion since VMware supports nested virtualization by software.In my last article(Japanese),I used VMware Player.If you are a Mac user you can find step by step guide in the official document "SmartOS as a VMware Guest:VMware Fusion".
It seems like that KVM also support nested virtualization,so you may be able to use KVM.Virtual Box does not support netsted virtualization and AFAIK there is no plan to support it,so you can not use Virtual Box for KVM on SmartOS.Though Intel Haswell introduced VMCS shadowing which assists netsted virtualization by hardware,AFAIK there is no hypervisor which exploits this new technology yet.Though Virtual Box cannot be used for KVM VM on SmartOS setup,you can use it for OS virtualization like SmartOS Zone and Linux container(LX Braded Zone) since these technology doesn't need hardware assistance like VT-x(Oracle Solaris's new zone type "kernel zone" needs hardware assistance,so Oracle's VBox also cannot be used to test Oracle Solaris's kernel zone.Though "kernel zone" can be considered as hardware virtulization becasuse each zone have its own kernel, it supports solaris only.You can use Oracle Solaris's native zone on VBox).
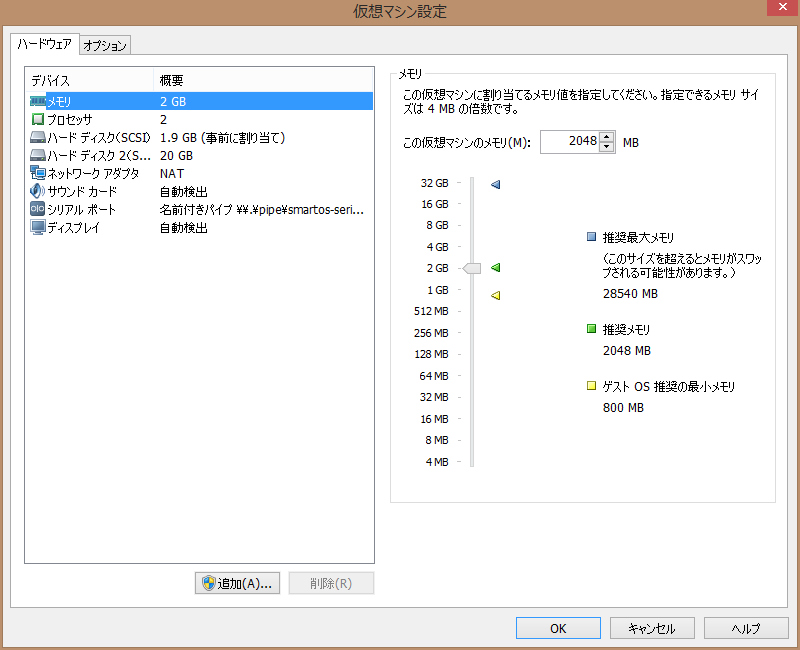
なお、SmartOSをVMware Playerで動かすの手順では、SmartOSには、1GBのメモリと1つのプロセッサコアを割り当てています。このままですとKVM VMの作成中に SmartOS自体がハングします。メモリを2GB以上、プロセッサを2個以上に変更しておきます。
In my last article(Japanese) I assigned only 1GB memory and 1 processor to VM(SmartOS).When you try to create KVM VM with this configuration,SmartOS might be hang.So before deploying KVM VM you may want to increase memory and processor assignment for your SmartOS setup.
CentOS7のKVM VM imageを import する(Import CentOS KVM image)
Global Zoneにログイン(Login Global Zone)
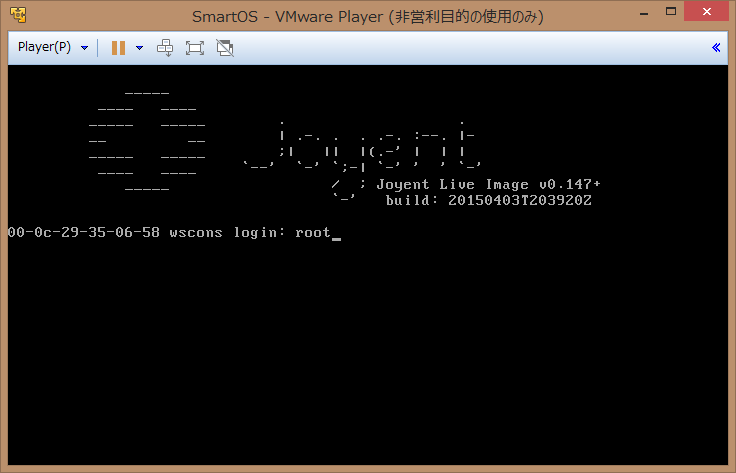
VMware Playerのコンソールビューで、SmartOS(のGlobal Zone)へrootでログインします。sshで入りたい場合は、コンソールビューでifconfig -a して ip address を確認しておきます。
Login to the global zone from VMware Player's console view.In order that you can use ssh,you can check IP address by ifconfig -a.
利用可能なKVM VM imageを確認する(Obtain a list of available KVM VMs)
SmartOSを開発・メンテナンスしている Joyent が提供している KVM VM image と zone template image を imgadm availコマンドで確認することができます(もしくは、Joyent Cloud Imagesで見つけることができます)。
You can get a list of available VM images provided by Joyent by using imgadm avail command in Global Zone.You can also refer to Joyent Cloud Images.
# imgadm avail | egrep -i "name|centos"
UUID                                  NAME                    VERSION     OS       PUBLISHED
e4cd7b9e-4330-11e1-81cf-3bb50a972bda  centos-6                1.0.1       linux    2012-04-04T02:51:46Z
8700b668-0da4-11e2-bde4-17221283a2f4  centos-6                1.3.0       linux    2012-10-03T22:14:08Z
2539f6de-0b5a-11e2-b647-fb08c3503fb2  centos-5.7              1.3.0       linux    2012-11-21T00:14:48Z
87c556ac-ab9d-11e2-914d-07682fcab47d  centos-6                2.4.1       linux    2013-04-24T15:48:05Z
30e9e4c8-bbf2-11e2-ac3b-3b598ee13393  centos-6                2.4.2       linux    2013-05-13T19:42:33Z
325dbc5e-2b90-11e3-8a3e-bfdcb1582a8d  centos-6                2.5.0       linux    2013-10-02T18:26:47Z
df81f45e-8f9f-11e3-a819-93fab527c81e  centos-6                2.6.0       linux    2014-02-07T02:30:56Z
19daa264-c4c4-11e3-bec3-c30e2c0d4ec0  centos-6                2.6.1       linux    2014-04-15T17:33:47Z
61a3035a-0864-11e4-b55b-9f87d4149e90  centos-6                20140710    linux    2014-07-10T18:59:55Z
5e164fac-286d-11e4-9cf7-b3f73eefcd01  centos-7                20140820    linux    2014-08-20T13:24:52Z
bf67d2fc-2ed1-11e4-a6ef-a7df3cdba7e9  centos-6                20140828    linux    2014-08-28T16:38:32Z
26f85622-497a-11e4-ba93-3fe7b89aea1a  centos-6                20141001    linux    2014-10-01T14:49:31Z
553da8ba-499e-11e4-8bee-5f8dadc234ce  centos-7                20141001    linux    2014-10-01T19:08:31Z
f37b10cc-6a9f-11e4-9181-e3d137d947bf  centos-6                20141112    linux    2014-11-12T19:13:14Z
1f061f26-6aa9-11e4-941b-ff1a9c437feb  centos-7                20141112    linux    2014-11-12T20:18:53Z
b1df4936-7a5c-11e4-98ed-dfe1fa3a813a  centos-7                20141202    linux    2014-12-02T19:52:06Z
b94d11d6-7a65-11e4-add0-93f38d3f5c5c  centos-6                20141202    linux    2014-12-02T20:56:44Z
02dbab66-a70a-11e4-819b-b3dc41b361d6  centos-7                20150128    linux    2015-01-28T16:23:36Z
5becfd74-a70d-11e4-93a6-470507be237c  centos-6                20150128    linux    2015-01-28T16:47:34Z
f7c19252-c998-11e4-be95-3315493f3741  lx-centos-6             20150313    other    2015-03-13T15:52:35Z
eb4128ec-cf12-11e4-960d-8780cec6463f  lx-centos-6             20150320    other    2015-03-20T15:08:09Z
7a50b1da-d22c-11e4-8ffe-071989ea571f  centos-6                20150324    linux    2015-03-24T13:48:40Z
3269b9fa-d22e-11e4-afcc-2b4d49a11805  centos-7                20150324    linux    2015-03-24T14:00:58Z
c41bf236-dc75-11e4-88e5-038814c07c11  centos-7                20150406    linux    2015-04-06T15:58:28Z
CentOS7のKVM VM imageを import する(Import CentOS7 VM image)
上の imgadm avai の出力中で最新のもの(UUID:c41bf236-dc75-11e4-88e5-038814c07c11)を import することにします。
import するコマンドは、 imgadm import UUIDです。
このコマンドを発行すると image がダウンロードされてインストールされます。
You can import KVM VM image by using imgadm import UUID command.This command will download VM image specified by UUID and import it into your SmartOS.
# imgadm import c41bf236-dc75-11e4-88e5-038814c07c11
Importing c41bf236-dc75-11e4-88e5-038814c07c11 (centos-7@20150406) from "https://images.joyent.com"
Gather image c41bf236-dc75-11e4-88e5-038814c07c11 ancestry
Must download and install 1 image (490.5 MiB)
Download 1 image     [=======================>] 100% 490.51MB 149.52KB/s 55m59s
Downloaded image c41bf236-dc75-11e4-88e5-038814c07c11 (490.5 MiB)
...88e5-038814c07c11 [=======================>] 100% 490.51MB   1.52MB/s  5m23s
Imported image c41bf236-dc75-11e4-88e5-038814c07c11 (centos-7@20150406)
import されている image は、imgadm listで確認できます。
You can check a KVM VM image you imported by imgadm list command.
# imgadm list
UUID                                  NAME      VERSION   OS     PUBLISHED
c41bf236-dc75-11e4-88e5-038814c07c11  centos-7  20150406  linux  2015-04-06T15:58:28Z
CentOSのKVM VMをProvisionする(Provision CentOS KVM VM as a guest in SmartOS)
KVM VMをprovisionするには、vmadm createコマンドを使います。vmadm createには、入力としてJSON形式で記述されたVMの属性情報を与える必要があります。標準入力からのリダイレクト、もしくは、-fパラメータによりファイルで与えることができます。ここでは、ファイルを用意することとします。
You can create KVM VM by using vmadm create command. This command requires VM's attribute(spec) information which described by JSON format.You can provide this information from standard input or prepared file following with -f parameter.
{
  "brand": "kvm",
  "ram": "512",
  "vcpus": "1",
  "nics": [
    {
      "nic_tag": "admin",
      "ip": "dhcp",
      "model": "virtio",
      "primary": true
    }
  ],
  "disks": [
    {
      "image_uuid": "c41bf236-dc75-11e4-88e5-038814c07c11",
      "boot": true,
      "model": "virtio"
    }
  ]
}
"nic_tag"は、作成するVMの仮想ネットワークインターフェースをアタッチするホスト側ネットワークインターフェースです。nictagadm もしくは sysinfoで確認できます。
You can check nic_tag by using nictagadm command or sysinfo command.
# nictagadm list
NAME           MACADDRESS         LINK           TYPE
admin          00:0c:29:35:06:58  e1000g0        normal
# sysinfo | json "Network Interfaces"
{
  "e1000g0": {
    "MAC Address": "00:0c:29:35:06:58",
    "ip4addr": "192.168.231.128",
    "Link Status": "up",
    "NIC Names": [
      "admin"
    ]
  }
}
"ip"は、これから作成するVMのIP addressです。DHCPを使う場合は、"dhcp"とします。
固定IPを使用する場合は、他にもDNSの resolver、default gateway,netmaskの指定が必要です。詳しくは、公式ドキュメントHow to create a KVM VM ( Hypervisor virtualized machine ) in SmartOSをご参照ください。なお、デフォルトゲートウェイですが VMware PlayerのNATの場合、ホスト側ネットワークインターフェースのIP addressではありませんので、SmartOSのGlobal Zone等の既にVMware Playerで動作している環境で、netstat -r等して確認します。
"ip" means VM's IP address.If you want to use DHCP,you can specify "ip": "dhcp".
# netstat -r

Routing Table: IPv4
  Destination           Gateway           Flags  Ref     Use     Interface
-------------------- -------------------- ----- ----- ---------- ---------
default              192.168.231.2        UG        1          0 e1000g0
localhost            localhost            UH        2        102 lo0
192.168.231.0        00-0c-29-35-06-58    U         5       1362 e1000g0
"image_uuid"は、imgadm importで import した KVM VM imageのUUIDを指定します。
なお、jsonファイルを作成するディレクトリはどこでもかまいませんが、"/","/root","/tmp"等は ramdisk です(df -hで確認できます)ので reboot すると消えてしまいます。一方で/varは、SmartOS作成時に作られた zfs 上にありますので reboot 後も消えることはありません。
Almost all file systems like "/","/root","/tmp" are not persistent.You may want to save json file in persistent file system. You can use /var and /opt since they are persistent.
# zpool list
NAME    SIZE  ALLOC   FREE  EXPANDSZ   FRAG    CAP  DEDUP  HEALTH  ALTROOT
zones  19.9G  2.27G  17.6G         -     8%    11%  1.00x  ONLINE  -
# df -h | grep zones
zones                   19G   597K        16G     1%    /zones
zones/archive           19G    19K        16G     1%    /zones/archive
zones/cores             10G    19K        10G     1%    /zones/global/cores
zones/var               19G   3.2M        16G     1%    /var
zones/config            19G    35K        16G     1%    /etc/zones
zones/opt               19G    19K        16G     1%    /opt
zones/usbkey            19G   115K        16G     1%    /usbkey
今回はここに置きます。
# vmadm create -f /var/tmp/centos7-spec.json
Successfully created VM a2764418-eee4-4dcc-8596-90dc9c16c536
vmadm createは通常数秒で完了します。(This command will complete in about 10 seconds.)
vmadm listでKVM VMが作成されたことを確認します。(Confirm if KVM VM is successfully created.)
# vmadm list
UUID                                  TYPE  RAM      STATE             ALIAS
a2764418-eee4-4dcc-8596-90dc9c16c536  KVM   512      running           -
新しいVM(CentOS)用の zfs ファイルシステムが作成されていることを確認します。
Check if a zfs file system for newly created VM guest is successfully created.
# df -h | grep zones
zones                   19G   599K       6.1G     1%    /zones
zones/archive           19G    19K       6.1G     1%    /zones/archive
zones/cores             10G    19K       6.1G     1%    /zones/global/cores
zones/var               19G   3.4M       6.1G     1%    /var
zones/config            19G    39K       6.1G     1%    /etc/zones
zones/opt               19G    19K       6.1G     1%    /opt
zones/usbkey            19G   115K       6.1G     1%    /usbkey
zones/a2764418-eee4-4dcc-8596-90dc9c16c536    10G    37K       6.1G     1%    /zones/a2764418-eee4-4dcc-8596-90dc9c16c536
zones/cores/a2764418-eee4-4dcc-8596-90dc9c16c536    10G    19K       6.1G     1%    /zones/a2764418-eee4-4dcc-8596-90dc9c16c536/cores
割り当てたメモリが少ない等でハングしてしまった場合には、SmartOSをPoweroffして再起動しますが、その場合、ゴミが残ってしまうことがあります。
SmartOS might hang when you assigned small memory to it.In such cases you should poweroff SmartOS VMware VM and reboot it.After reboot you may find garbage like the following.
# vmadm list
UUID                                  TYPE  RAM      STATE             ALIAS
7e9086da-364b-4ce4-bba4-6ee501099579  KVM   512      failed            -
# df -h | grep 7e9086da-364b-4ce4-bba4-6ee501099579
zones/7e9086da-364b-4ce4-bba4-6ee501099579    10G    37K       6.1G     1%    /zones/7e9086da-364b-4ce4-bba4-6ee501099579
zones/cores/7e9086da-364b-4ce4-bba4-6ee501099579    10G    19K       6.1G     1%    /zones/7e9086da-364b-4ce4-bba4-6ee501099579/cores
このような場合には、一旦作りかけのKVM VMを削除して、VMware Playerのメモリ割り当て、プロセッサコア割り当てを見直してやりなおします。
In such case you can delete the failed KVM VM and increase memory and then you can retry.
# vmadm delete 7e9086da-364b-4ce4-bba4-6ee501099579
Successfully deleted VM 7e9086da-364b-4ce4-bba4-6ee501099579
# vmadm list
UUID                                  TYPE  RAM      STATE             ALIAS
# df -h | grep zones
zones                   19G   597K        16G     1%    /zones
zones/archive           19G    19K        16G     1%    /zones/archive
zones/cores             10G    19K        10G     1%    /zones/global/cores
zones/var               19G   3.2M        16G     1%    /var
zones/config            19G    35K        16G     1%    /etc/zones
zones/opt               19G    19K        16G     1%    /opt
zones/usbkey            19G   115K        16G     1%    /usbkey
CentOS VMにコンソール接続する-CLIコンソール編(Connect to CentOS VM's console - CLI console)
コンソールには、vmadm console コマンドで接続します。引数として、接続先VMのUUIDが必要です。
You can connect VM console by using vmadm console command.This command takes UUID of your new VM.
UUIDを確認する(Check UUID of your VM)
# vmadm list
UUID                                  TYPE  RAM      STATE             ALIAS
a2764418-eee4-4dcc-8596-90dc9c16c536  KVM   512      running           -
vmadm consoleでコンソールへ接続する(Connect to VM's console)
# vmadm console a2764418-eee4-4dcc-8596-90dc9c16c536

   __        .                   .
 _|  |_      | .-. .  . .-. :--. |-
|_    _|     ;|   ||  |(.-' |  | |
  |__|   `--'  `-' `;-| `-' '  ' `-'
                   /  ;  Instance (CentOS 7.1 (1503) 20150406)
                   `-'   https://docs.joyent.com/images/linux/centos

centos-7 login:
vmadm console UUID 「Enter」としてもすぐに何も表示されない場合は、もう一度「Enter」を押します。
root でログインします(Login as root)
今回使用したVM imageでは root のパスワードは設定されていませんでした。
centos-7 login: root
   __        .                   .
 _|  |_      | .-. .  . .-. :--. |-
|_    _|     ;|   ||  |(.-' |  | |
  |__|   `--'  `-' `;-| `-' '  ' `-'
                   /  ;  Instance (CentOS 7.1 (1503) 20150406)
                   `-'   https://docs.joyent.com/images/linux/centos

[root@centos-7 ~]#
CentOSのVMであることを確認する(Check if new VM is CentOS or not)
本当にCentOSか確かめてみます。
# cat /etc/redhat-release
CentOS Linux release 7.1.1503 (Core)
確かに、CentOS 7 (7.1.1503)つまりRedHat Enterprise Linux 7.1相当であることが確認できました。
IP アドレスを確認する(Get IP address)
今後のログインのためにIPアドレスを確認しておきます。
# ip a s
1: lo: <LOOPBACK,UP,LOWER_UP> mtu 65536 qdisc noqueue state UNKNOWN
    link/loopback 00:00:00:00:00:00 brd 00:00:00:00:00:00
    inet 127.0.0.1/8 scope host lo
       valid_lft forever preferred_lft forever
    inet6 ::1/128 scope host
       valid_lft forever preferred_lft forever
2: eth0: <BROADCAST,MULTICAST,UP,LOWER_UP> mtu 1500 qdisc pfifo_fast state UP qlen 1000
    link/ether 32:13:a5:1e:5c:d8 brd ff:ff:ff:ff:ff:ff
    inet 192.168.231.129/24 brd 192.168.231.255 scope global dynamic eth0
       valid_lft 1336sec preferred_lft 1336sec
    inet6 fe80::3013:a5ff:fe1e:5cd8/64 scope link
       valid_lft forever preferred_lft forever
VMにALIASを付ける(Add alias)
vmadm listで見るとALIASが"-"になっています。UUIDだけだと複数のVMを作成するとわかりにくくなりますので、ALIASを付けておきます。
# vmadm update a2764418-eee4-4dcc-8596-90dc9c16c536 alias="CentOS7.1"
Successfully updated VM a2764418-eee4-4dcc-8596-90dc9c16c536
# vmadm list
UUID                                  TYPE  RAM      STATE             ALIAS
a2764418-eee4-4dcc-8596-90dc9c16c536  KVM   512      running           CentOS7.1
コンソールから抜ける(Exit console)
"Ctrl-]"でコンソールセッションを抜けることができます。
CentOS VMにコンソール接続する - ビデオコンソール編(Connect to CentOS VM console - Video console)
vmadm info <UUID> vncで、VNCによるビデオコンソールへの接続情報を取得できます。まず、UUIDを確認します。
You can get needed information to connect VNC which is provided by QEMU/KVM by using vmadm info <UUID> vnc.
# vmadm list | grep CentOS7.1
a2764418-eee4-4dcc-8596-90dc9c16c536  KVM   512      running           CentOS7.1
確認したUUIDを元にVNCの接続情報を取得します。
# vmadm info a2764418-eee4-4dcc-8596-90dc9c16c536 vnc
{
  "vnc": {
    "host": "192.168.231.128",
    "port": 58542,
    "display": 52642
  }
}
PC側でVNCビューワを起動して、接続情報を入力します。
下記の例では、UltraVNCを使用しています。
(私の環境では、display番号での接続ができませんでした。ポート番号で接続しています。)
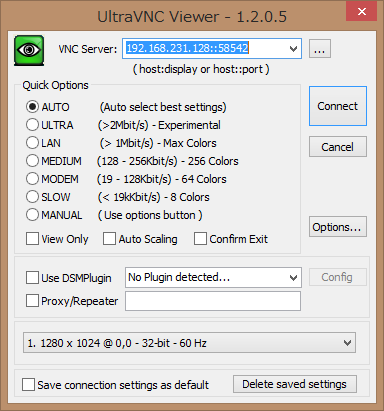
「Connect」をクリックするとビデオコンソールへ接続します。
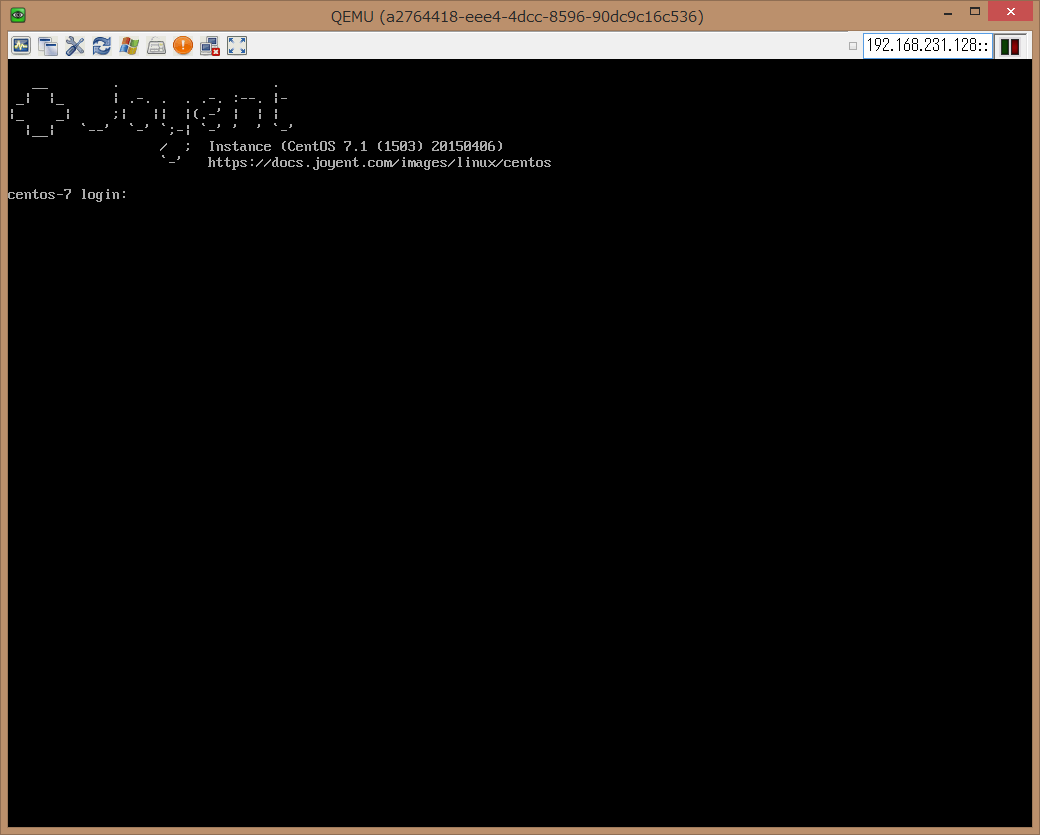
キーボードマップの設定(Change keyboard map if necessary)
このままですとVNCではキーボードのキーマップがおかしく英語でも日本語でもない状態でした(日本語キーボードで";"を押しても":"を押しても";"になる等)。日本語キーボードを使うために以下の3点の設定を行いました(なお、Ultra VNCは、Japanese Keyboardに設定します。また、Tiger VNCも試しましたが、こちらはTigaer VNC側でのキーボードの設定は必要ないようです)。
QEMU_KVMのキーマップの変更(Change QEMU KVM keymap)
以下のいずれかの方法で設定します。
You can change QEMU KVM keymap by using the following method-1 or method-2.
vmadm update による方法(Method-1)
SmartOSでは、vmadm update <UUID> qemu_extra_opts="-k ja"によって、qemu_kvm に"-k ja"という引数を渡せます。
vmadm create 時に渡す json ファイルに"qemu_extra_opts": "-k ja"を設定する方法(Method-2)
You can provide keymap name by json file when you create VM.
# cat centos7-spec.json
{
  "brand": "kvm",
  "ram": "512",
  "vcpus": "1",
  "alias": "CentOS 7.1(1503) KVM",
  "hostname": "centos7-01",
  "nics": [
    {
      "nic_tag": "admin",
      "ip": "dhcp",
      "model": "virtio",
      "primary": true
    }
  ],
  "disks": [
    {
      "image_uuid": "c41bf236-dc75-11e4-88e5-038814c07c11",
      "boot": true,
      "model": "virtio"
    }
  ],
  "qemu_extra_opts": "-k ja -usbdevice tablet"
}
CentOS7 上で、コンソールキーマップを変更(Change console keymap in CentOS Guest VM)
# localectl set-keymap jp106
# localectl status
   System Locale: LANG=en_US.UTF-8
       VC Keymap: jp106
      X11 Layout: jp
       X11 Model: jp106
     X11 Options: terminate:ctrl_alt_bksp
# cat /etc/vconsole.conf
KEYMAP=jp106
FONT=latarcyrheb-sun16
CentOS7上の GRUB の設定でブートパラメータを変更(Change boot parameter in GRUB setting on CentOS Guest VM)
/etc/default/grubのGRUB_CMDLINE_LINUXのvconsole.keymap=usをjp106に変更後、grub.cfgを更新
# cp /boot/grub2/grub.cfg /boot/grub2/grub.cfg.org
# grub2-mkconfig -o /boot/grub2/grub.cfg
Generating grub configuration file ...
Found linux image: /boot/vmlinuz-3.10.0-229.el7.x86_64
Found initrd image: /boot/initramfs-3.10.0-229.el7.x86_64.img
Found linux image: /boot/vmlinuz-3.10.0-229.1.2.el7.x86_64
Found initrd image: /boot/initramfs-3.10.0-229.1.2.el7.x86_64.img
Found linux image: /boot/vmlinuz-0-rescue-2b71577b5d2043428953ae1f2a63f3cc
Found initrd image: /boot/initramfs-0-rescue-2b71577b5d2043428953ae1f2a63f3cc.img
done
そして、poweroffして、vmadm startして再起動
CentOS7 KVM VMの起動時間を短縮(おまけ)(Reduce boot time)
ここまでの手順のままでは、CentOSの起動にかなり時間がかかります。
systemd-analyzeしてみると
# systemd-analyze
Startup finished in 4.109s (kernel) + 20.986s (initrd) + 2min 33.714s (userspace) = 2min 58.811s

# systemd-analyze blame
         59.051s rc-local.service
         44.259s postfix.service
         40.752s network.service
         18.748s firewalld.service
         12.622s tuned.service
          8.111s boot.mount
          6.131s ntpdate.service
          5.636s systemd-udev-trigger.service
          5.131s rhel-dmesg.service
          4.487s systemd-logind.service
          4.115s rsyslog.service
          4.019s systemd-fsck-root.service
          3.274s kmod-static-nodes.service
          3.209s acpid.service
          3.068s systemd-vconsole-setup.service
          2.372s systemd-fsck@dev-disk-by\x2duuid-01cf7647\x2d0b01\x2d4105\x2d97
          2.302s polkit.service
          2.285s NetworkManager.service
          2.206s systemd-tmpfiles-setup-dev.service
          1.955s dev-disk-by\x2duuid-81fd73a2\x2db584\x2d4958\x2daecf\x2dd8b147f
          1.852s rhel-import-state.service
          1.617s rhel-readonly.service
          1.558s sys-kernel-debug.mount
lines 1-23
rc-local と postfix に時間がかかっています。
/etc/rc.local をみてみると Joyentの SmartDataCenter(SDC)に関する処理をしているようですので、とりあえず止めてしまいます。
# chmod 666 /etc/rc.local
# ls -l /etc/rc.local
lrwxrwxrwx. 1 root root 13 Apr  6 15:51 /etc/rc.local -> rc.d/rc.local
# ls -l /etc/rc.d/rc.local
lrwxrwxrwx. 1 root root 28 Apr  6 15:51 /etc/rc.d/rc.local -> /lib/smartdc/joyent_rc.local
# ls -l /lib/smartdc/joyent_rc.local
-rw-rw-rw-. 1 root root 3009 Apr  6 15:51 /lib/smartdc/joyent_rc.local
さらに、postfix も止めてしまいます。
# systemctl stop postfix.service
# systemctl disable postfix.service
rm '/etc/systemd/system/multi-user.target.wants/postfix.service'
network.serviceも時間がかかり過ぎなようですが、これは追及すると時間がかかりそうですので、ここまでで。
さて、poweroff して vmadm start <UUID>してみると、体感ではかなり速くなっているようです。
# systemd-analyze
Startup finished in 4.203s (kernel) + 21.121s (initrd) + 1min 36.252s (userspace) = 2min 1.577s
# systemd-analyze blame
         40.593s network.service
         19.895s firewalld.service
         14.002s tuned.service
          5.799s ntpdate.service
          5.763s systemd-udev-trigger.service
          5.527s rhel-dmesg.service
          5.219s systemd-logind.service
          4.758s rsyslog.service
          4.020s systemd-fsck-root.service
          3.340s acpid.service
          3.135s systemd-vconsole-setup.service
          3.133s kmod-static-nodes.service
          3.001s NetworkManager.service
          2.868s plymouth-quit.service
          2.818s systemd-fsck@dev-disk-by\x2duuid-01cf7647\x2d0b01\x2d4105\x2d97
          2.346s polkit.service
          2.334s systemd-tmpfiles-setup-dev.service
          1.960s rhel-import-state.service
          1.897s plymouth-quit-wait.service
          1.777s rhel-readonly.service
          1.766s dev-disk-by\x2duuid-81fd73a2\x2db584\x2d4958\x2daecf\x2dd8b147f
          1.616s auditd.service
          1.584s sys-kernel-debug.mount
lines 1-23
確かにrc-localとpostfixがなくなって速くなっています。強引ですが少し遊ぶにはこれで。
補足
Global Zone(SmarOSそのもの)は、/usbkeyファイルシステム以外には不揮発性のストレージを持たず、再起動すると変更が失われてしまいます。そのため、キーボードの設定やssh公開鍵の登録などは、LinuxやSolarisとは異なる手順が必要です。一方で、今回作成した KVM VM や SmartOSのzones(コンテナ)は、ディスク上(zones pool)に保存されています。CentOS KVM VMは通常のCentOSと全く同じように運用することができるはずです。
また、KVMのVMではなく、LX Branded Zone(Linuxコンテナ)としてUbuntu 14.04を動かしてみるには、SmartOSのLX Branded Zone(Linuxコンテナ)を動かすをみてみてください。
未解決な問題
rebootコマンドでハング(回避策は、poweroffコマンド)
CentOSを再起動する際に reboot コマンドを使うとVMがハングしてしまう(もしくは、停止に異常に時間がかかている)。reboot発行後、Global Zoneで、vmadm listでみてみると"STATE"が"running"のままとなり、vmadm console <UUID>でもVNCコンソールでも接続できない状態となります。この場合、vmadm stop <UUID>で停止する必要がありますが、数分かかります。
なお、rebootコマンドを使わず、poweroffコマンドでシャットダウンして、vmadm start <UUID>とすると問題なく再起動できます。