0.はじめに
python (pysaml2) から cybozu.com の SAML 認証を確認してみます。
1.Amazon Linux の EC2 インスタンスを作成する
- E2 コンソールページから、Amazon Linux の AMI を選択し、ポチポチと EC2 インスタンスを作成する。
- AMI ID :
- amzn-ami-hvm-2017.03.0.20170417-x86_64-gp2 (ami-923d12f5)
- Instance Type :
- t2.micro
- Security Groups :
- SSH
- HTTPS
- AMI ID :
- その後、Elastic IP を割り当てます。
2.初期設定やセキュリティ設定を設定する
- 一般的な初期設定やセキュリティ設定などを行います。
- root ユーザのパスワードの設定
- ホスト名の変更
- /etc/sysconfig/network
- /etc/hosts
hostname
- 日本語設定
- /etc/sysconfig/i18n
- タイムゾーンの設定
- /etc/cloud/cloud.cfg
- /etc/sysconfig/clock
- /etc/localtime
- SSH の設定
- iptables の設定
- SSH
- HTTPS
3.pysaml2 をインストールする
-
以下のリンクから zip ファイルをダウンロードします。
wget https://github.com/rohe/pysaml2/archive/master.zip
1. ダウンロードした zip ファイルを解凍し、解凍されたディレクトリに移動します。
```bash
unzip master.zip
cd ./pysaml2-master
```
1. pysaml2 をインストールします。
```bash
sudo pip install --upgrade pip
sudo pip install repoze.who
sudo yum install libffi libffi-devel
sudo yum install gcc
sudo python setup.py install
```
4.サンプルプログラムを起動する
-
サンプルプログラムディレクトリに移動します。
cd ./pysaml2-master/example
1. 必要なライブラリをインストールします。
```bash
sudo pip install mako
sudo pip install "cherrypy==7.1.0"
sudo yum install xmlsec1 xmlsec1-openssl
sudo pip install pycryptodomex
```
1. サンプルプログラムを実行します。
```bash
./all.sh start
```

以下のメッセージが表示されたら、多分OK

```bash
$ SP listening on localhost:8087
$ IDP listening on localhost:8088
```

サンプルプログラムを終了します。

```bash
./all.sh stop
```
5.外部接続用の設定をする
-
iptables に以下の設定を追加します。
-A INPUT -p tcp -m tcp --dport 8087 -j ACCEPT
-A INPUT -p tcp -m tcp --dport 8088 -j ACCEPT
sudo service iptables restart
1. セキュリティグループ に以下の設定を追加します。 * TCP 8087 0.0.0.0/0 * TCP 8088 0.0.0.0/0
1. HTTPS 接続用に、適当な場所にサーバー証明書ファイル(公開鍵、秘密鍵)を格納します。 * サーバー証明書の公開鍵 : *.cert * サーバー証明書の秘密鍵 : *.key
1. 認証用の証明書を新たに作成します。
```bash
./create_key.sh

Generating a new test key and certificate.  To change the defaults offered
by openssl, edit your openssl.cnf, such as /etc/ssl/openssl.cnf

Generating RSA private key, 1024 bit long modulus
..................++++++
...........++++++
e is 65537 (0x10001)
You are about to be asked to enter information that will be incorporated into your certificate request.
What you are about to enter is what is called a Distinguished Name or a DN.
There are quite a few fields but you can leave some blank
For some fields there will be a default value,
If you enter '.', the field will be left blank.
-----
Country Name (2 letter code) [XX]:JP
State or Province Name (full name) []:[都道府県]
Locality Name (eg, city) [Default City]:[市区町村]
Organization Name (eg, company) [Default Company Ltd]:[企業名称]
Organizational Unit Name (eg, section) []:
Common Name (eg, your name or your server s hostname) []:[FQDN]
Email Address []:[メールアドレス]

Please enter the following 'extra' attributes
to be sent with your certificate request
A challenge password []:[パスワード]
An optional company name []:[企業名称]
Signature ok
subject=/C=JP/ST=[都道府県]/L=[市区町村]/O=[企業名称]/CN=[FQDN]/emailAddress=[メールアドレス]
Getting Private key

Now to enable these new keys, do:

    cp server.key idp2/pki/mykey.pem
    cp server.crt idp2/pki/mycert.pem

    cp server.key sp-wsgi/pki/mykey.pem
    cp server.crt sp-wsgi/pki/mycert.pem
```

作成した証明書をコピーします。

```bash
cp server.key idp2/pki/mykey.pem
cp server.crt idp2/pki/mycert.pem

cp server.key sp-wsgi/pki/mykey.pem
cp server.crt sp-wsgi/pki/mycert.pem
```
1. サンプルプログラムを修正します。
* ./pysaml2-master/example/idp2/idp_conf.py
```bash
29c29
< HOST = 'localhost'
---
> HOST = '0.0.0.0'
35c35
<     BASE = "https://%s:%s" % (HOST, PORT)
---
>     BASE = "https://%s:%s" % ("[FQDN]", PORT)
37c37
<     BASE = "http://%s:%s" % (HOST, PORT)
---
>     BASE = "http://%s:%s" % ("[FQDN]", PORT)
40,41c40,41
< SERVER_CERT = "pki/mycert.pem"
< SERVER_KEY = "pki/mykey.pem"
---
> SERVER_CERT = "[サーバー証明書の公開鍵の相対パス]"
> SERVER_KEY = "[サーバー証明書の秘密鍵の相対パス]"
```
* ./pysaml2-master/example/sp-wsgi/service_conf.py

```bash
4c4
< HOST = 'localhost'
---
> HOST = '0.0.0.0'
20,21c20,21
< SERVER_CERT = "pki/mycert.pem"
< SERVER_KEY = "pki/mykey.pem"
---
> SERVER_CERT = "[サーバー証明書の公開鍵の相対パス]"
> SERVER_KEY = "[サーバー証明書の秘密鍵の相対パス]"
```
* ./pysaml2-master/example/sp-wsgi/sp_conf.py

```bash
18c18
< BASE = "http://localhost:8087"
---
> BASE = "http://[FQDN]:8087"
21c21
<     "entityid": "%s/%ssp.xml" % (BASE, ""),
---
>     "entityid": "%s/%sp.xml" % (BASE, ""),
```
1. サンプルプログラムを実行します。
```bash
./all.sh start
```
1. 以下のサイトへアクセスし、ログインします。
* http://[FQDN]:8087/ * ログイン情報は、`./pysaml2-master/example/idp2/idp.py` (528行目) に記載。 * `daev0001` は、エラーになるので使わないこと!!


サンプルプログラムを終了します。
```bash
./all.sh stop
```
6.pysaml2 側に連携用アカウントを設定する
- サンプルプログラムを修正します。
* ./pysaml2-master/example/idp2/idp.py
```bash
528a538
>     "[メールアドレス]": "[パスワード]",
```
* ./pysaml2-master/example/idp2/idp_conf.py

```bash
37a38,60
>     "[メールアドレス]": {
>         "sn": "Testsson",
>         "givenName": "Test",
>         "eduPersonAffiliation": "student",
>         "eduPersonScopedAffiliation": "student@example.com",
>         "eduPersonPrincipalName": "test@example.com",
>         "uid": "[メールアドレス]",
>         "eduPersonTargetedID": "one!for!all",
>         "c": "SE",
>         "o": "Example Co.",
>         "ou": "IT",
>         "initials": "P",
>         "co": "co",
>         "mail": "mail",
>         "noreduorgacronym": "noreduorgacronym",
>         "schacHomeOrganization": "example.com",
>         "email": "[メールアドレス]",
>         "displayName": "Test Testsson",
>         "labeledURL": "http://www.example.com/test My homepage",
>         "norEduPersonNIN": "SE199012315555",
>         "postaladdress": "postaladdress",
>         "cn": "cn"
>     },
```
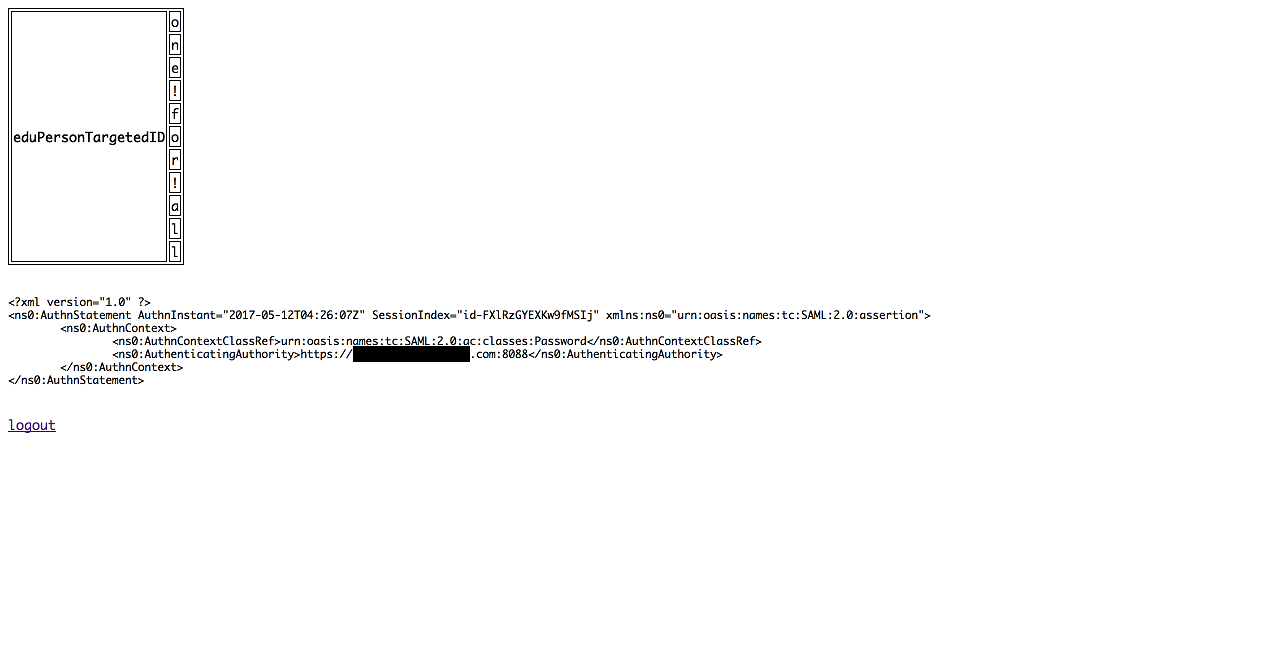
1. サンプルプログラムを実行し、サイトへのログインを確認します。
7.cybozu.com 側の設定をする
cybozu.com 側の設定は、以前の記事に同様の記載があるので、それを参考に行います。
- cybozu.com に SP の設定をする
- SAML 認証を有効にする : ☑︎
- Identity ProviderのSSOエンドポイントURL(HTTP-Redirect) :
https://[FQDN]:8088/sso/redirect - cybozu.comからのログアウト後に遷移するURL :
http://[FQDN]:8087/logout?goto=http://[FQDN]:8087/ - Identity Providerが署名に使用する公開鍵の証明書 :
作成した証明書(server.crt)をアップロードします。 - Service Providerメタデータのダウンロード
- pysaml2 の SP の設定に必要なので、リンクをクリックしファイルをダウンロードしておきます。 (spmetadata.xml)
- pysaml2 の SP の設定に必要なので、リンクをクリックしファイルをダウンロードしておきます。 (spmetadata.xml)
- cybozu.com に連携ユーザーを追加する
- ※手順通り
8.pysaml2 側に cybozu.com の SP の設定をする
- ダウンロードした cybozu.com の Service Provider のメタデータ (spmetadata.xml) を適当な場所に格納します。
- サンプルプログラムを修正します。
* ./pysaml2-master/example/idp2/idp.py
```bash
48a49,50
> from saml2.saml import NameID
> from saml2.saml import NAMEID_FORMAT_TRANSIENT
341a344,345
>                 nameid = NameID(
>                     format=NAMEID_FORMAT_TRANSIENT, text=identity["uid"])
344a349,350
>                     name_id=nameid,
>                     sign_response=True,
```
* ./pysaml2-master/example/idp2/idp_conf.py

```bash
117c117,124
<         "local": [full_path("../sp-wsgi/sp.xml")],
---
>         "local": [full_path("../sp-wsgi/sp.xml"), full_path("[cybozu.com の Service Provider のメタデータの相対パス]")],
>         #"inline":
>         #"remote": [
>         #    {"url": "",
>         #     "cert": ""}],
>         #"mdfile":
>         #"loader":
>         #"mdq":
```
1. サンプルプログラムを実行し、cybozu.com のサイトへアクセスし、ログインを確認します。
pysaml2 のログイン画面からログインした後、 cybozu.com の画面が表示されたら、OK!!
99.ハマりポイント
-
まず pysaml2 のインストールですが、
sudo python setup.py installを実行して、エラーが出たらログを確認しつつ、必要なライブラリを一つずつインストールしていく感じです。
-
サンプルプログラムの実行でも同様です。
./all.sh startを実行しては、必要なライブラリのインストールをしていきました。- cherrypy は、7.1.0 じゃないとダメっぽいので、お気を付けを。
- pycryptodomex は、pycryptodome じゃ無くて、pycryptodomex ですので、そこもお気を付けを。
-
で、やはりもっともハマったというか、よくわからなかったのが、「7.pysaml2 側に cybozu.com の SP の設定をする」のところでした。
-
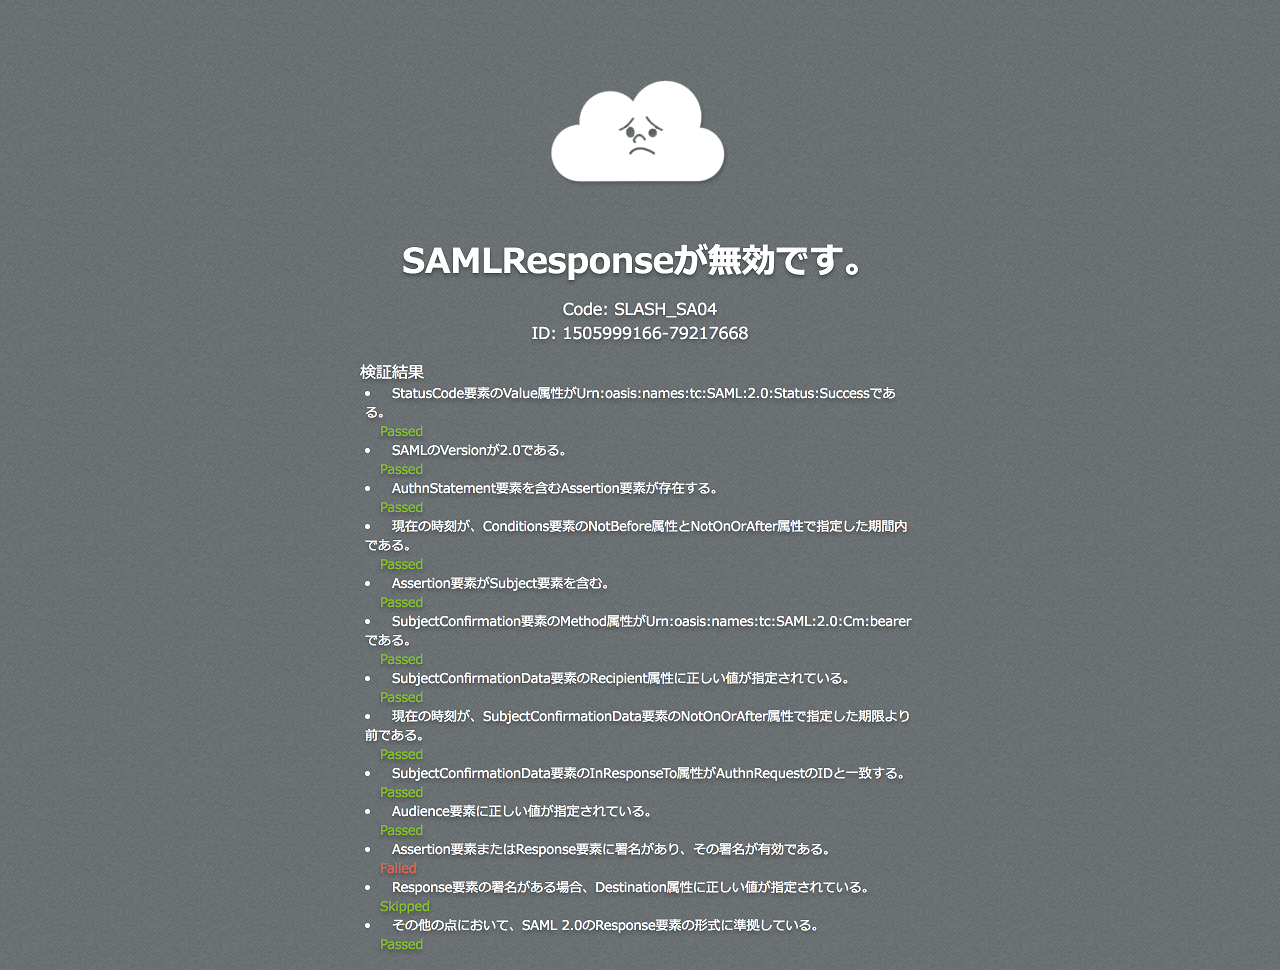
./pysaml2-master/example/idp2/idp.pyがそのままだと、以下のエラーが表示され、create_authn_responseの引数にsign_response=True,を追加して対処したら… -
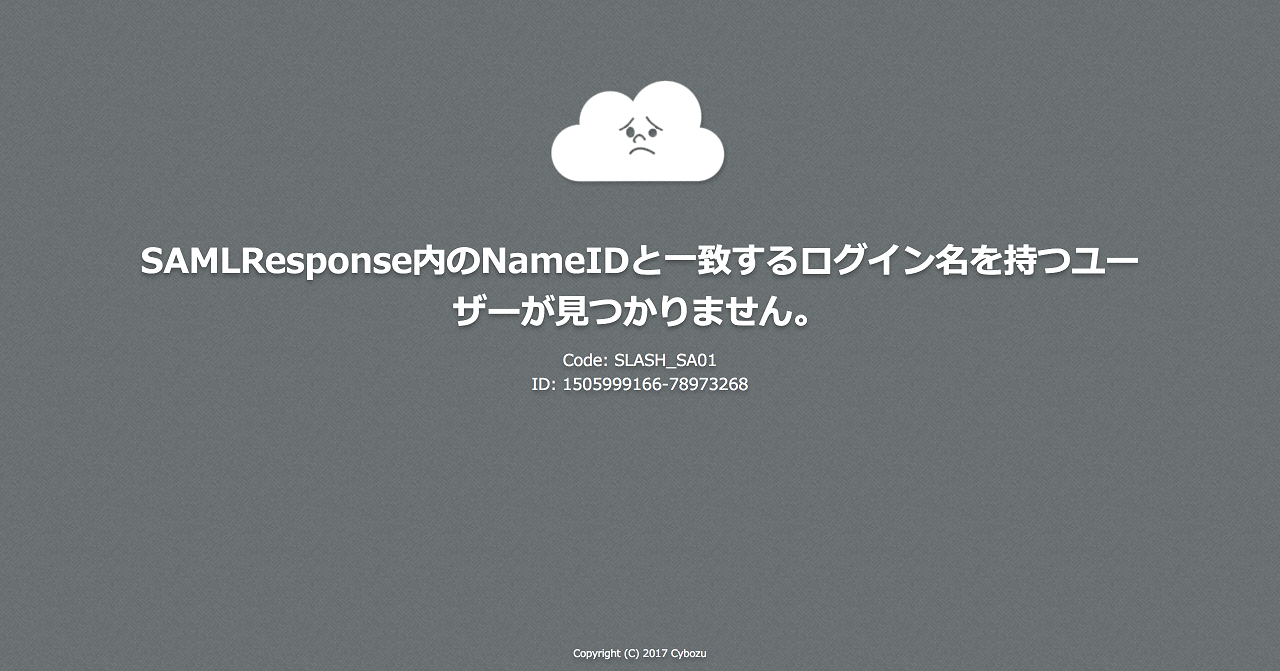
次に以下のエラーが表示され、
name_id=nameid,を追加して連携できた!!って感じででした。 -
どちらのエラーの時も、まずはログを見て、その後、
./pysaml2-master/tests/配下のテストプログラムを確認したりしながら、修正していきました。SAML の仕様を理解しながらの対応だったので、時間が掛かりました。終わってみれば数行の追加でしたが…。 -
こちらのサイトも参考にさせて頂きました。
XX.まとめ
とりあえず、確認できて良かったです。
もう少し、SAML の仕様について理解を深める様、勉強しないといけないのかも…。

