OpenCVのDNNモジュール
OpenCV 4.1.2ではDNNモジュールにCUDAオプションが付きました。このDNNモジュールには様々なフレームワークで生成した学習済みモデルを読み込んで実行できます。
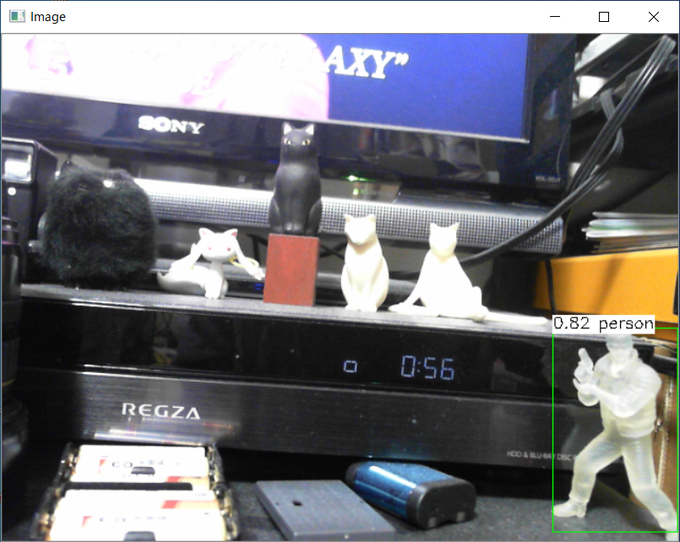
一般物体認識の高速なモデルとしてYOLOv3がありますが、これもreadNetFromDarknet関数で読み込んで推論を行うことができます。
main.cpp
# include <opencv2/core.hpp>
# include <opencv2/dnn.hpp>
# include <opencv2/highgui.hpp>
# include <opencv2/imgproc.hpp>
# include <opencv2/videoio.hpp>

using namespace cv;
using namespace dnn;

/// Darknetのモデル
static const char* cfg = "yolov3.cfg";
static const char* weights = "yolov3.weights";

/// 推論結果のヒートマップを解析して表示
void postprocess(Mat& frame, const std::vector<Mat>& outs, Net& net);

static float confThreshold = 0.5f;
static float nmsThreshold = 0.4f;
std::vector<std::string> classes;

int main(int argc, char *argv[])
{
	VideoCapture camera;
	if (camera.open(0))
	{
		/// YOLOv3のモデルを読み込む
		Net	net = readNetFromDarknet(cfg, weights);
		// OpenCV 4.1.2をソースからCUDAを有効にしてビルドした場合、このようにCUDAを指定できます
		net.setPreferableBackend(DNN_BACKEND_CUDA);
		net.setPreferableTarget(DNN_TARGET_CUDA);

		Mat image, blob;
		std::vector<Mat> outs;
		std::vector<String> outNames = net.getUnconnectedOutLayersNames();
		for (bool loop = true; loop;)
		{
			camera >> image;

			/// 画像をBLOBに変換して推論
			blob = blobFromImage(image, 1.0f / 255);
			net.setInput(blob);
			net.forward(outs, outNames);

			/// 推論結果をimageに描画
			postprocess(image, outs, net);

			imshow("Image", image);
			switch (waitKey(10))
			{
			case 'q':
			case 'Q':
				loop = false;
			}
		}
		camera.release();
	}
}
推論結果はヒートマップなので、ここから必要な情報を抽出します。この部分はモデルによって異なりますが、YOLOv3では領域のデータの後にカテゴリーを示すヒートマップが続いており、カテゴリの信頼度をpostprocess関数で抽出して描画します。
void postprocess(Mat& frame, const std::vector<Mat>& outs, Net& net)
{
	static std::vector<int> outLayers = net.getUnconnectedOutLayers();
	static std::string outLayerType = net.getLayer(outLayers[0])->type;

	if (outLayerType == "Region")
	{
		for (Mat out : outs)
		{
			float* data = (float*)out.data;

			// 検出したオブジェクトごとに
			for (int i = 0; i < out.rows; i++, data += out.cols)
			{
				// 領域情報
				int centerX = (int)(data[0] * frame.cols);
				int centerY = (int)(data[1] * frame.rows);
				int width = (int)(data[2] * frame.cols);
				int height = (int)(data[3] * frame.rows);

				// そのあとに一次元のヒートマップが続く
				Mat scores = out.row(i).colRange(5, out.cols);
				Point classIdPoint;
				double confidence;

				// 信頼度とクラスを抽出
				minMaxLoc(scores, 0, &confidence, 0, &classIdPoint);

				// 信頼度が閾値超えたオブジェクトを描画する
				if (confThreshold < confidence)
				{
					int left = centerX - width / 2;
					int top = centerY - height / 2;
					// 領域を表示
					rectangle(frame, Rect(left, top, width, height), Scalar(0, 255, 0));

					// ラベルとしてクラス番号と信頼度を表示
					std::string label = format("%2d %.2f", classIdPoint.x, confidence);
					int baseLine;
					Size labelSize = getTextSize(label, FONT_HERSHEY_SIMPLEX, 0.5, 1, &baseLine);

					top = max(top, labelSize.height);
					rectangle(frame, Point(left, top - labelSize.height),
						Point(left + labelSize.width, top + baseLine), Scalar::all(255), FILLED);
					putText(frame, label, Point(left, top), FONT_HERSHEY_SIMPLEX, 0.5, Scalar());
				}
			}
		}
	}
}
カテゴリ名を表示する部分はこの記事では些末な部分なので省きましたが、coco.namesから読み込んでカテゴリ番号と置き換えればよいでしょう。
